Tamiya German Tiger I Mid Production Tank Build Part – 2 of a Series
In this Sunward Hobbies tutorial, I’ll be continuing with the Tamiya Tiger Tank Mid Production build with Part 2. This is a 1/35 scale plastic model kit and the mid-production model of (Kit No 35194)
You’ll get to see some basic weathering and effects which you can choose to build on or leave as is. The effects can be removed or enhanced later.
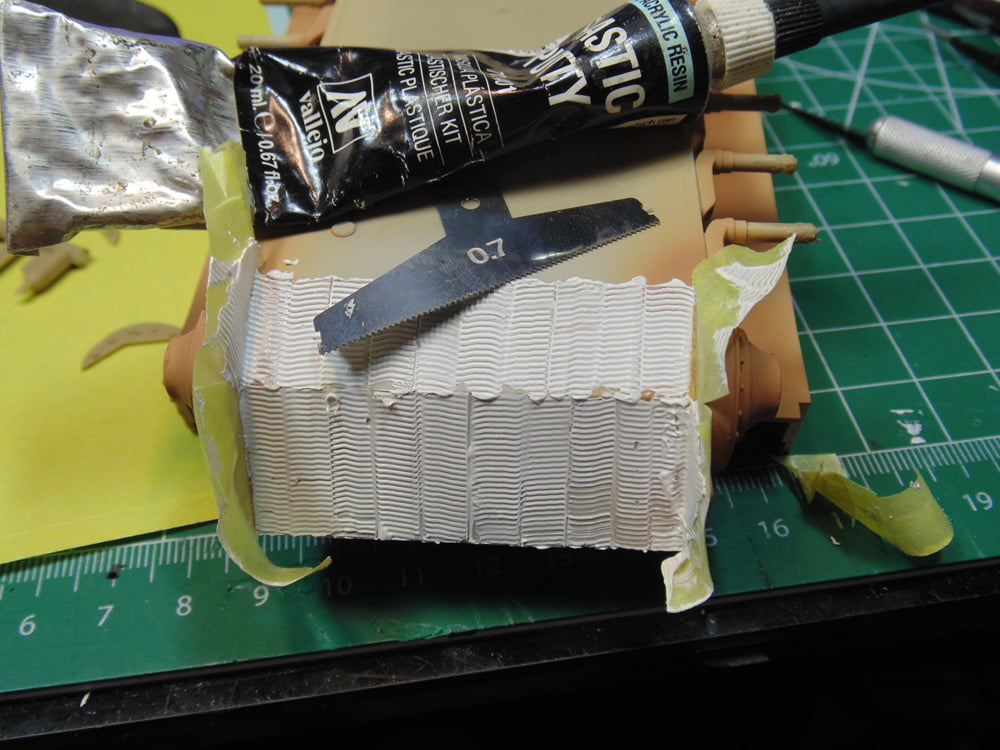
Here, I’ve added the Zimmerit coating to the front. I’ve said this before, Vallejo Plastic putty works well here, yet dries quickly because of being made of the ground down marble. There’s no smell and you can dilute it with water.
Now let’s finish the tracks. Sure, there’s some sanding to do, but it’s very relaxing. To remove the “fuzz” consider placing a little dab of Tamiya Extra Thin Cement on the sanded part, that’s what I always do.

You can save yourself a huge amount of time if you angle your sanding stick and scuff up the molding imprints. Even after weathering the tracks, or not, your eyes will be strained to see these marks.

I used Mr. Cement Black for the long lengths of the tracks because it has a duller finish than Tamiya’s extra thin. This will help with the track weathering later. Just a personal choice really due to the less odour.
Sunward Hobbies has a full tutorial on building tracks.
Keep your parts rough. Use a metal “straight-edge” to align the parts and you won’t have an issue.
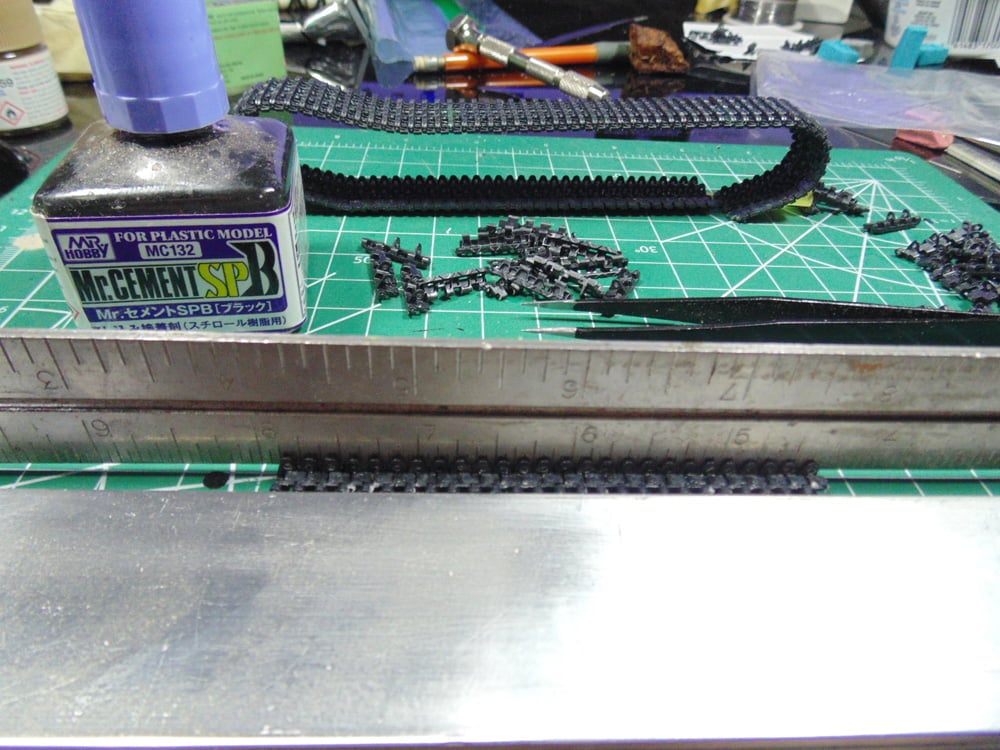
You can use some foam bits as a form to keep the tracks in place whilst they dry.


When the cement is setting up you can clean up the flash on the parts needed for Steps 6, 7 and 8.

Many parts can be sub-assembled to save time.

After priming all the parts I wanted to add some texture to the exhausts. Here, I’ve roughed up some coarse packaging foam. It’s a super simple way to get the base look of raised or chipped metal.
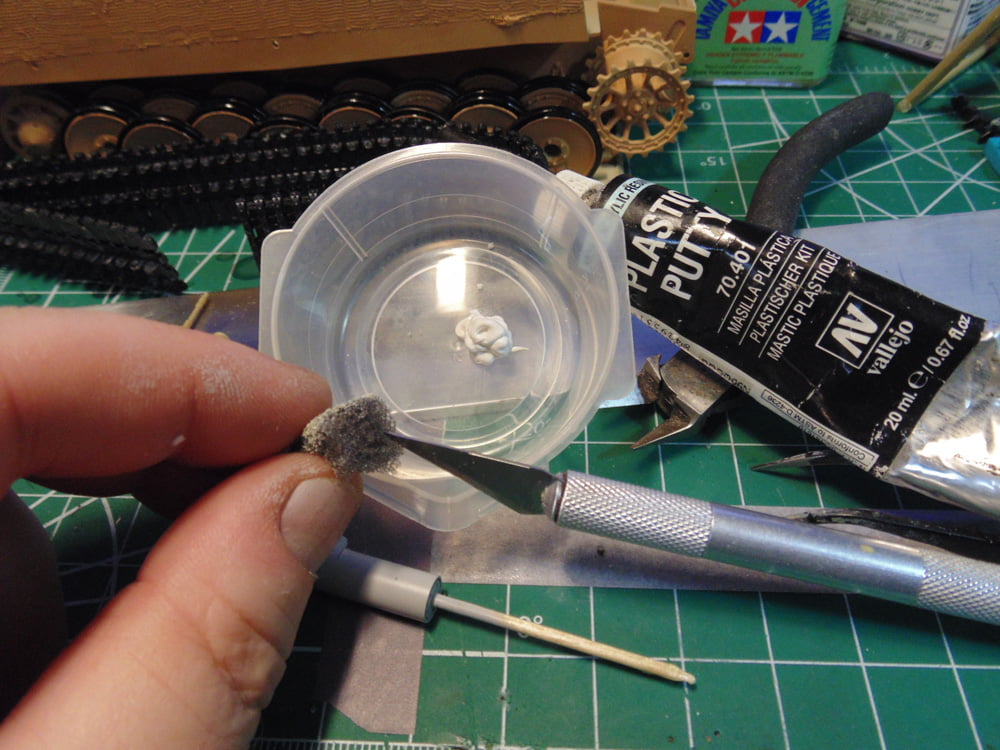
You can make this effect as slight or strong as you want. Also, the great part about this product is that you can remove it with little to no harm of the parts.

Experiment and play around with the look you want and relax knowing this all cleans up in seconds, but when it’s painted and clear-coated it’s very durable to be handled.
As previously mentioned, the putty needs a few hours to properly dry. Now we can move forward and mask off the areas for the Zimmerit coating on the front glaciate. Yes, it looks messy yet is easily cleaned up with a fine tool.

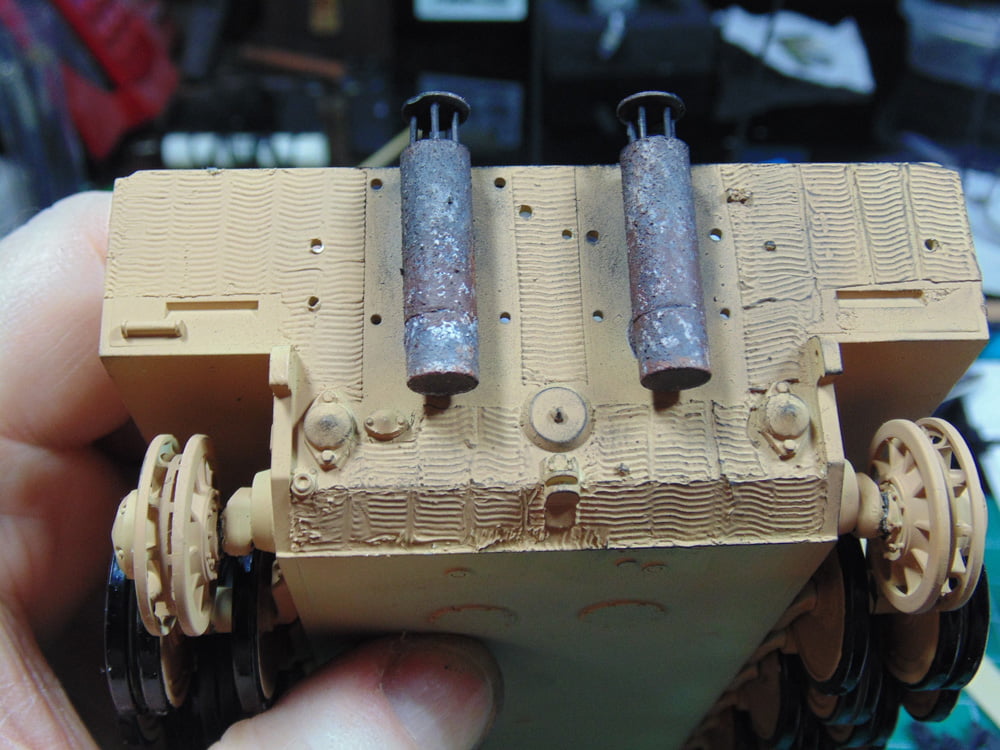
The exhaust tubes are an important part of the look on this vehicle. Obviously, they were primer coated and sprayed with a Tamiya dark grey. I decided to add some more of a textured look by dabbing a little XF-2 white.

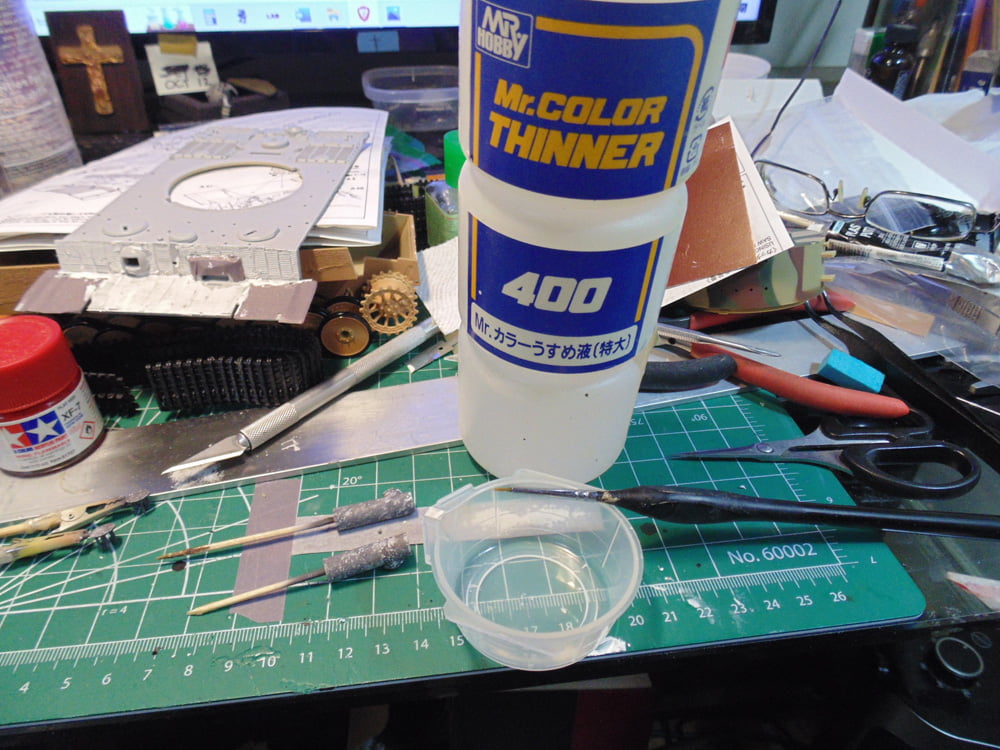
Here’s a tip, use an old brush and some Mr Color. Thinner 400 (not the Self leveling ) thinner to fade out any overly strong edges of the white paint.
You can easily spend days on a few parts. Choose the look you want to discover how much time will be invested. I’m going to give this replica a six-month in-service unit. Adding a rusted effect requires your base grey, the white and now the red brown. If you want a much more worn look, simply stipple more color on. Keep in mind, I’ll be adding more effects later.
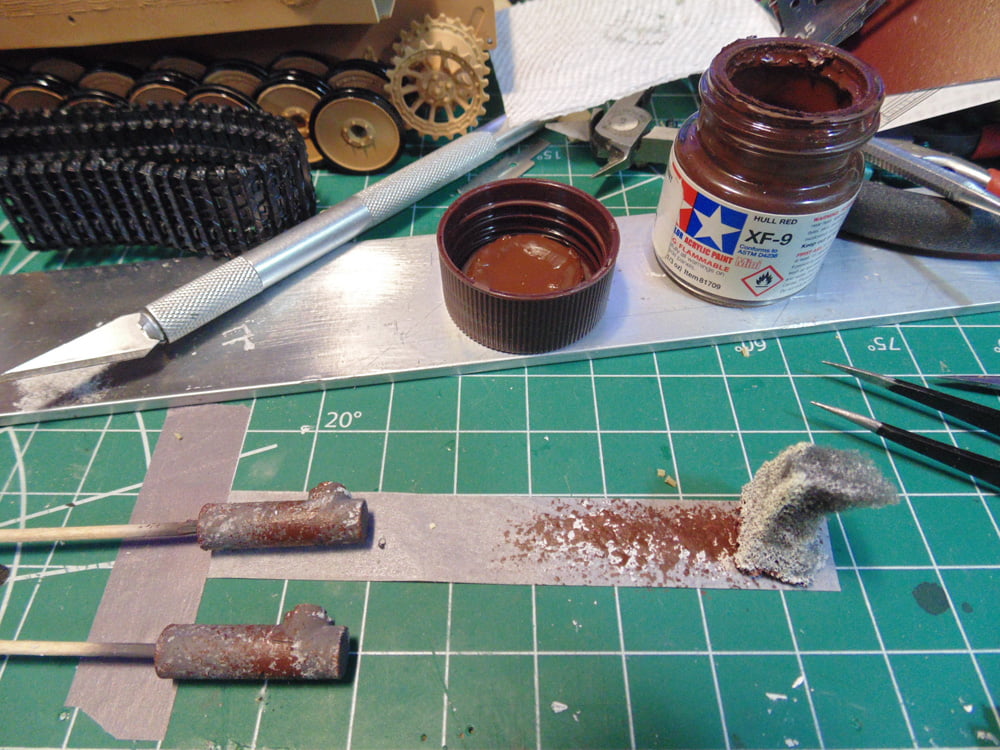
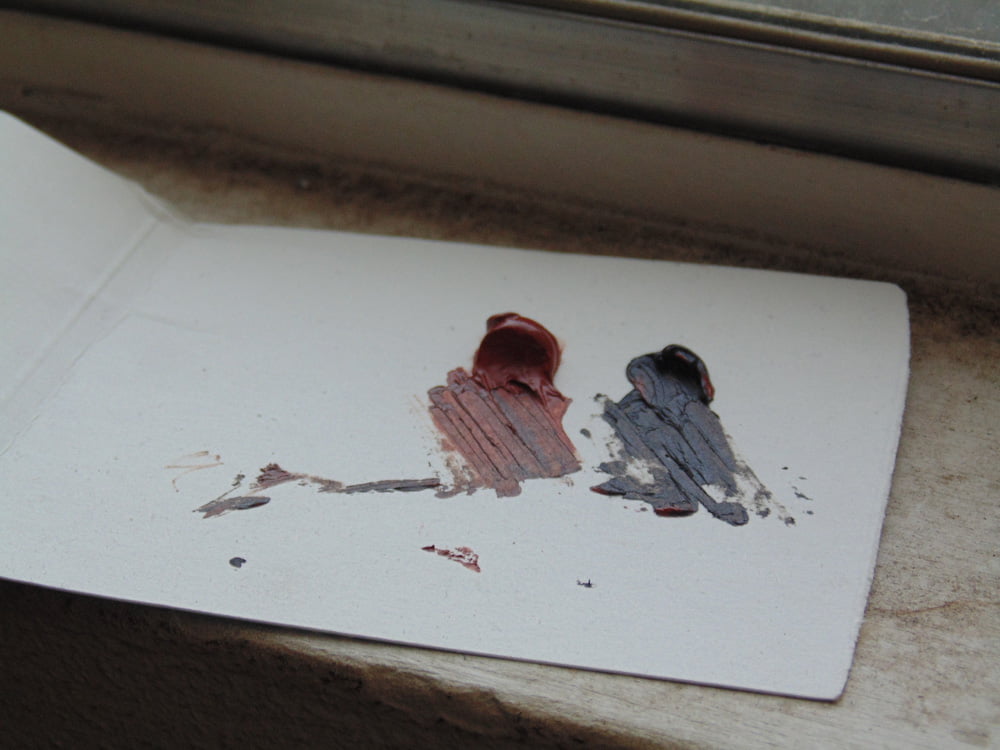
Now I’ll be adding some more rust effects. When using any oil pigments make certain to place you dabs on a non-coated paper surface to draw out the oil. This makes reducing and feathering out a lot easier.
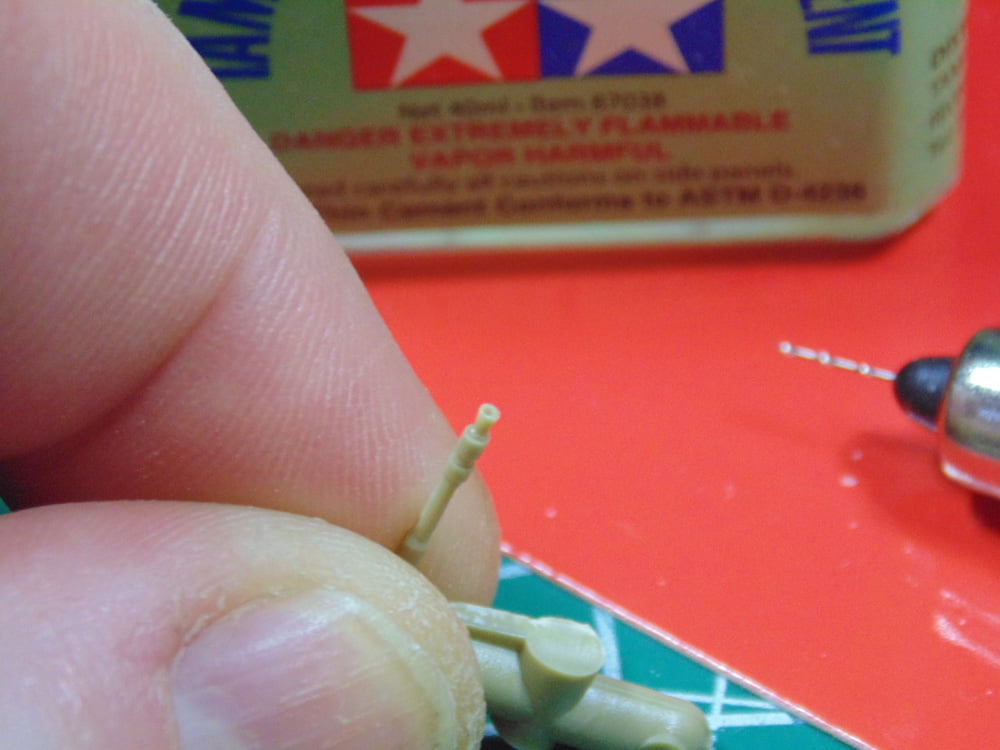
While the oil from the pigment is seeping out I jumped ahead to core-out the end of the machine gun barrel. Sunward Hobbies have all the drill bits you’ll need for this. Here I’ve done the work then added a minute touch of extra thin cement to erase any minor plastic burring. Use this technique for many other parts in your projects.
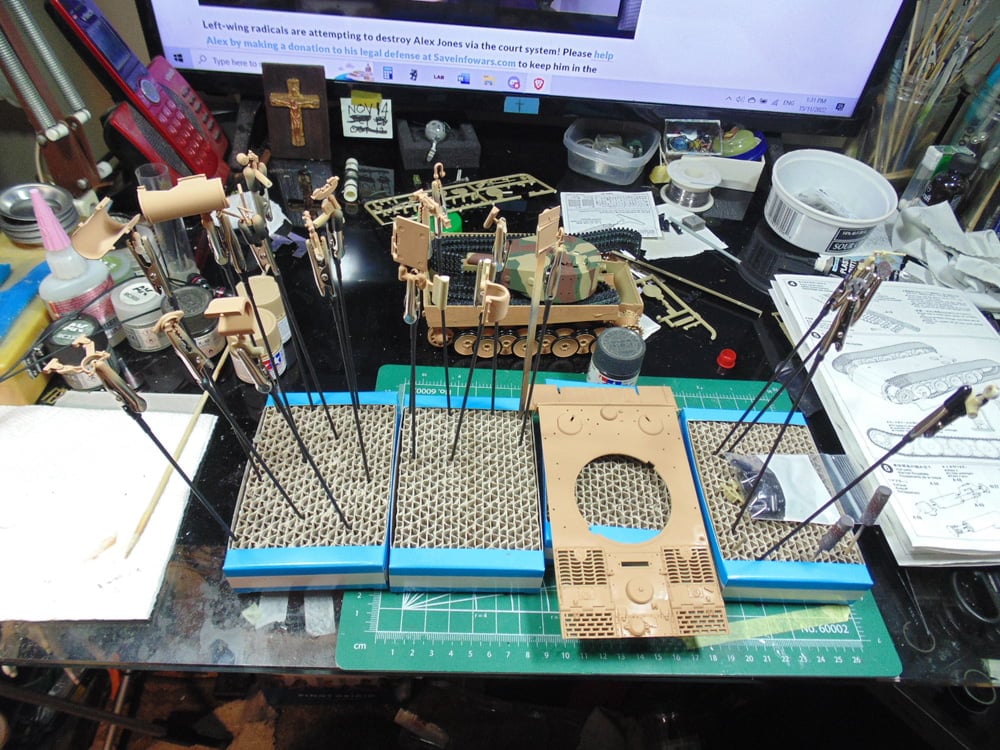
Priming your parts is essential for the color coat to adhere properly. Spend a few bucks and get some parts holders and the parts base. AK Interactif and Mr. Hobby offer these products which will save you an enormous amount of time figuring out where to put your painted parts safely.

Here’s a tip, place your parts in one base prior to painting and next splay them out on several other bases once you’re done with each. This way they won’t touch and needing to be primed or painted again later. Also, inspect the alligator clips and wash if needed.
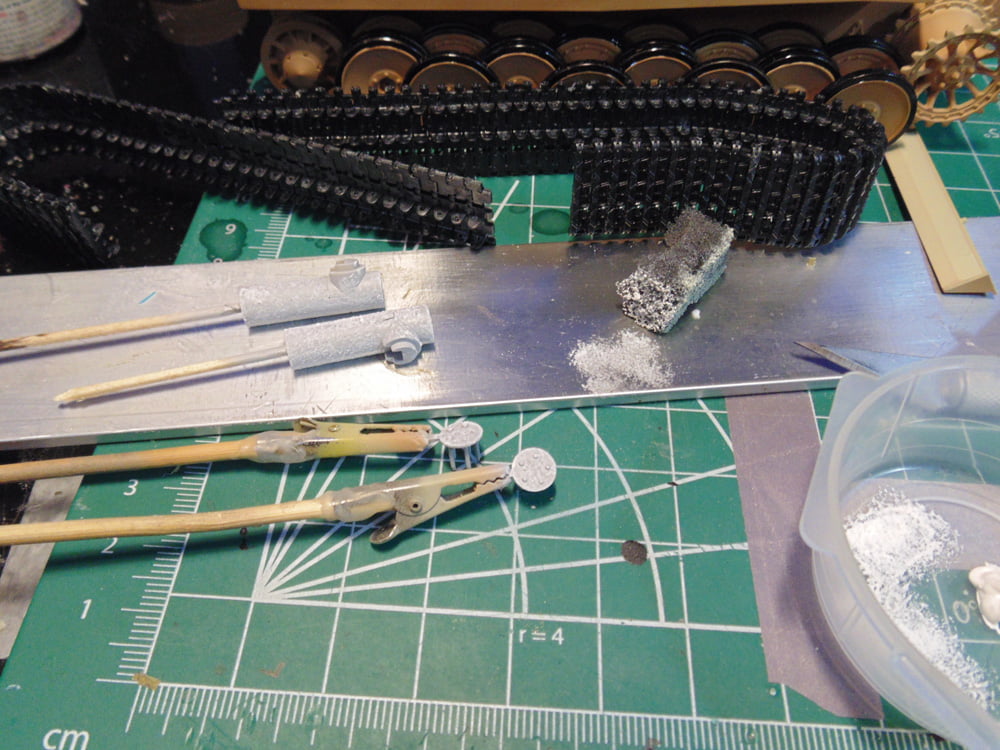
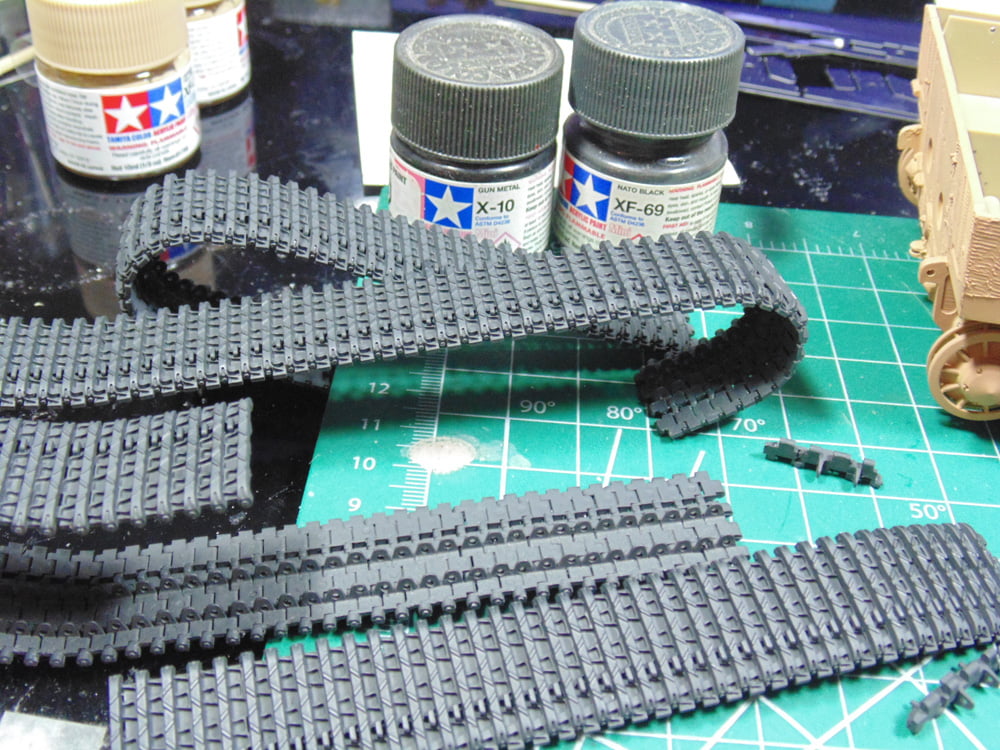
Now let’s get back on track (pun intended) with Step 6. Because these parts were scraped and sanded I didn’t feel the need to prime them. However, they still need a base coat. Tamiya’s X-10 gun metal and X-69 NATO black work super when mixed as an under coat. In this picture you can see how flat the parts are. This texture will make it much easier to add pigments and effects later, should you choose to go that route.
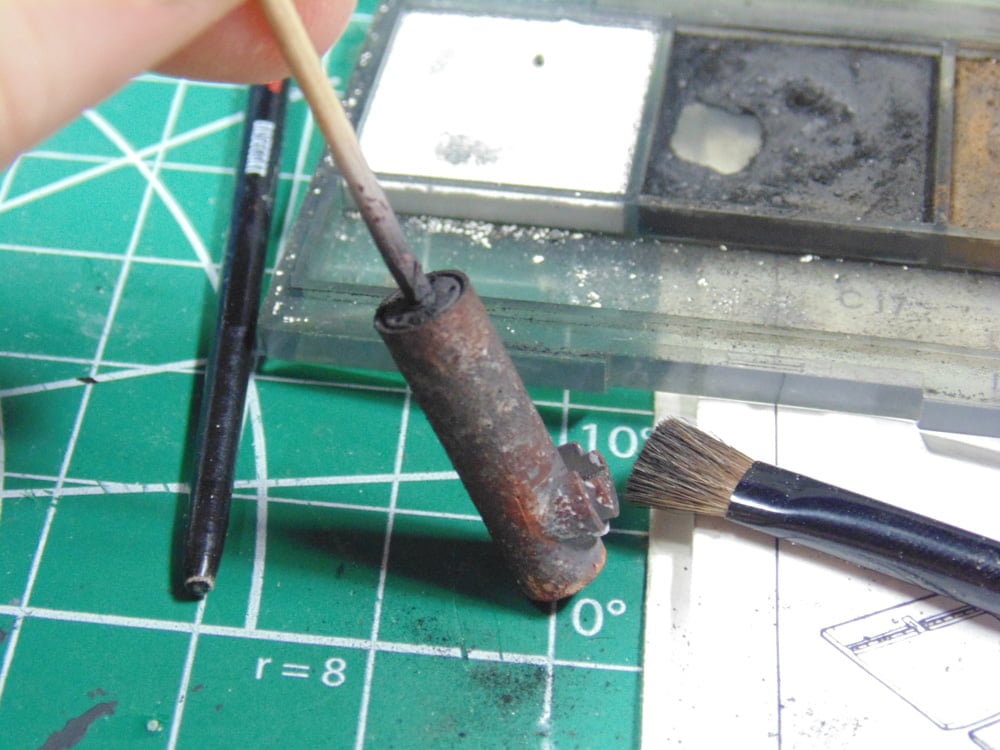
With this done I moved on to add more color to the exhausts. Pick-up some metal mixing cups from Sunward Hobbies, you’ll use them for so many tasks. Here I’m putting a few spots of light rust to the surface. Add 6 drops of enamel thinner in the cup then blend your pigment as you desire.

Consider using a clamp to hold firm your cardstock with the pigment on it to the bench. Might sound like a small thing, but trust me it will make your life easier. Dab on, as wanted, the reduced rust color but don’t forget the tops because they’ll be the parts noticed.

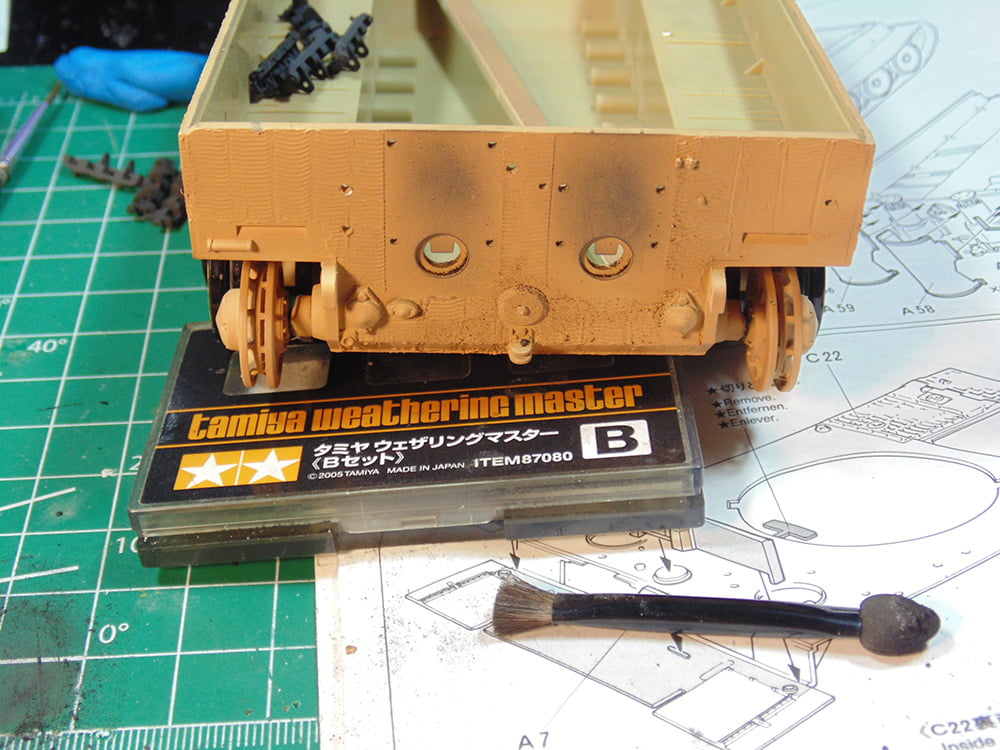
Tamiya’s Weathering Master B is a quick and very lifelike solution to adding vast amounts of realism to any project. Here I’ve dusted and dry brushed the outlet ports. Keep in mind you’ll have to use several strokes to get an effect. Once you’ve got the hang of it though you will smile.
Make sure to add some color behind the tubes for a more realistic effect. Use the spongy part of the applicator to blend the black/brown pigment.
Here you can see the dry brushing on the Zimmerit. Use a non-metalizing pigment for the Zimm because it was not metal. I used AK soot for the Zimm and a metallizer for the steel parts. Please wait until your parts have adhered to the surfaces before dry brushing anything else.
Now we get into a modeller’s choice decision. The exhaust covers hide some really nice detail away from these parts. You make the call if those bits should be hidden or not. Regardless, I’m prepping them for view. Mr. Metal Color 214 is terrific for the task. Shake the jar well then use the remainder in the cap to soak the brush. Then swirl the bristles on some paper towel until there’s almost no sign of the dark color (this applies to most dry brushing technique.) then let the brush relax for a minute. Make light sweeps on the details and edges and once you’re comfortable with the effect then use a bigger pressure to deepen the effect.

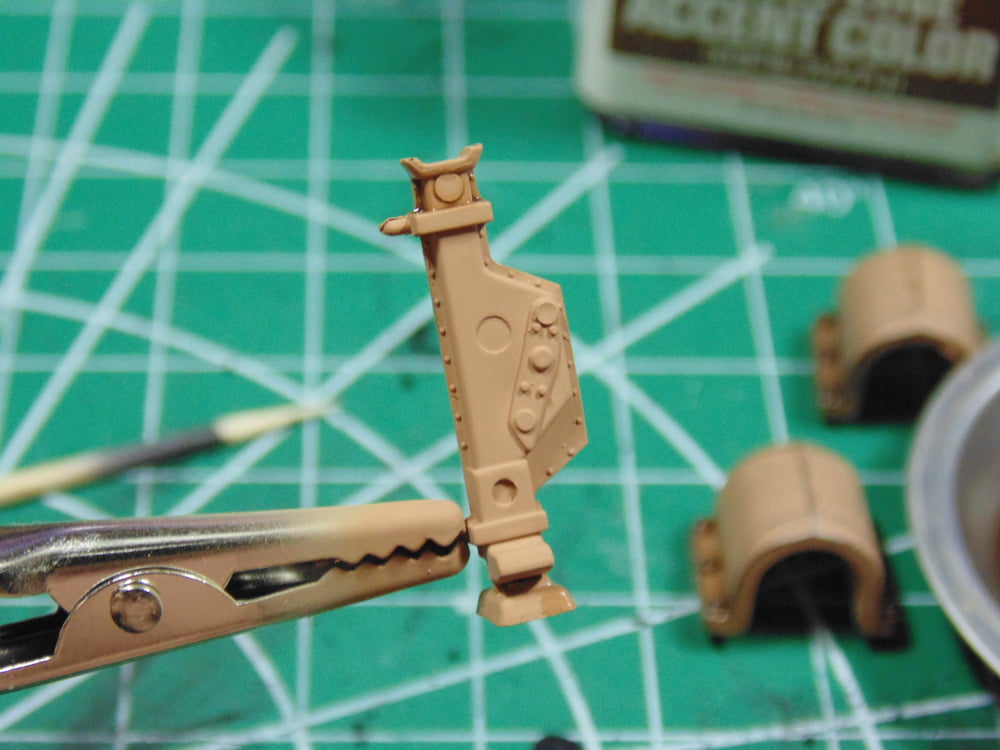
For places where the dry brushing won’t get to I use Tamiya panel line accent color for many tasks. When blended they offer a wonderful tone variation for jobs like a military subject. Being enamel, over an acrylic or lacquer, it runs into the cracks highlighting the details.

You can see the detail being drowned out at the top of this jack lift. Although some of you might not want such a stark contrast. No problem, simply dampen an old fine brush in enamel thinner and rub the area while wiping the brush tip on some paper towel, then repeat the process until you’re happy. After this dries in a few hours I’ll dry brush it with metallizer.

In this photo you can see how things are progressing. There’s still plenty to do if that’s the way you want to go, but consider adding a few details. Mixing a drop of paint retarder in a metal cup with some of the model’s base coat will look great on tiny spots of the exhaust tops and tubes. It takes minutes and yet adds another layer of detail.

Use your mixture of panel line accent to darken the edges of the bolts and lines around the wheels and sprockets. It will look a bit messy at first but you’re going to feather this away with some thinner and a fine brush. Note the heavier filth on one side versus the other. That’s on purpose because this example will be slightly two faced. The owner will be able to spin it around and have a different look. Go easy with the pressure of the paint brush, work the thinner in slowly until you get the hang of it.

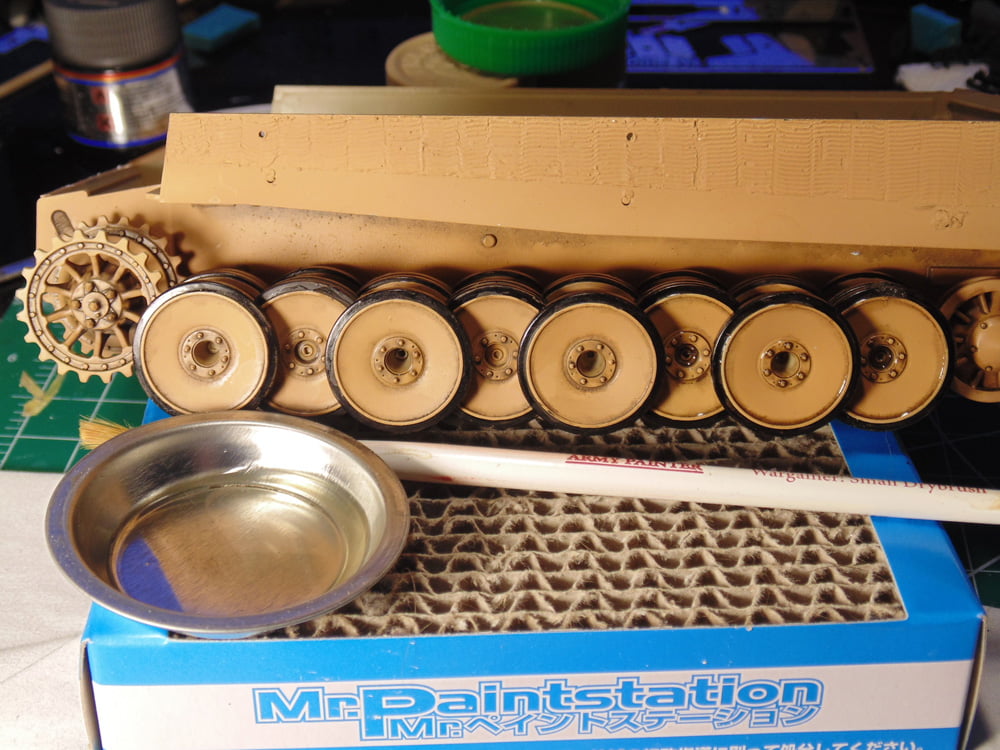
Naturally the tracks have to be completed before moving on with assembly. Here you can see more weathering effects. The Tamiya paints will allow the metallizer to cling nicely. Do this dry brushing now before you add dust effects.

Now I’m mixing up some AK Interactive pigments. I only want a slight earthy dust effect, but of course use your own artistic licence here. AK pigments are super easy to work with and easily mixed for the look you’re after. Spend a good amount of time mixing any pigments, regardless of the brand. Be mindful though with all pigments they are very fine and can be inhaled. Consider wearing a dust mask or applying them in an extraction booth. Sunward Hobbies have all the gear you need to help with this.
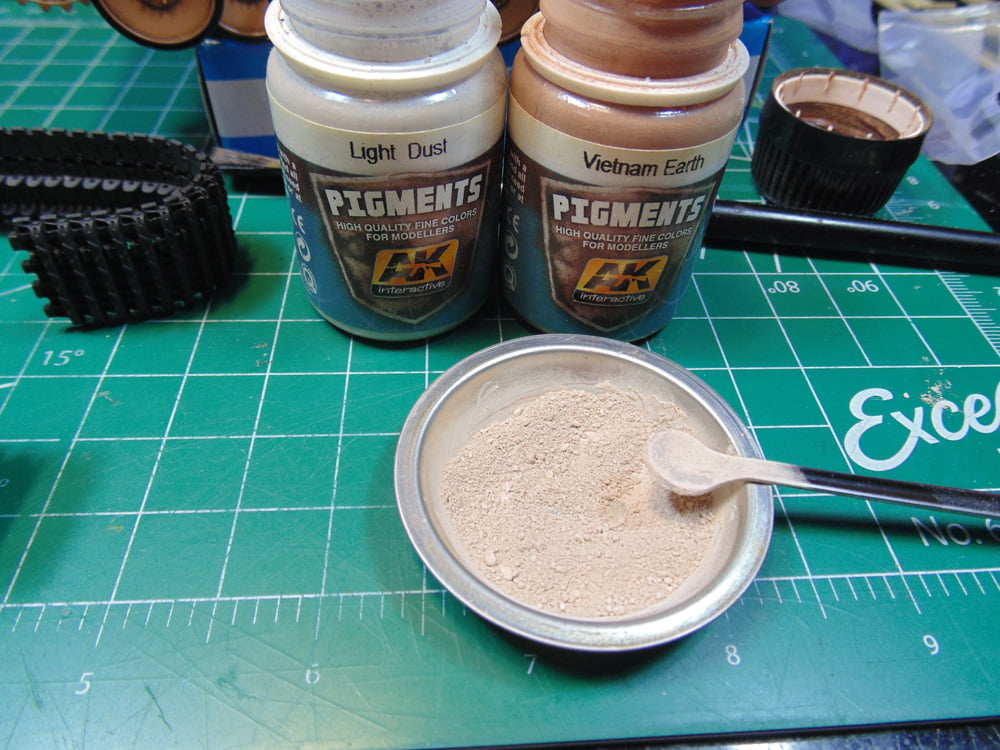
Always use two different brushes. One will apply or dust the pigment on the parts and area while the other is for dipping in the enamel pigment fixer. I firmly suggest using an AK or other brand name pigment fixer because the quality is less smelly, it goes a long way plus the intensity can be adjusted later by adding more color later on. Make sure you clean the work station with enamel then wash it up with warm soapy water, otherwise it’s a nightmare to clean later and will get on your fingertips leaving a mess where you touch.

Just as with the Tamiya panel line accents, the AK pigment fixer needs 6 hours to dry in order to add more or remove some color. Yes, there’s extra mixed pigments in the metal, but don’t throw them away just yet. You’ll need them later for minor dusting here and there. I never discard anything until the project is completed and out the door. Consider adding pigments as random and organic looking as possible and bear in mind the look can always be changed.

In this photograph I’ve done most of the highlighting and weathering of both sides of the replica. Adding some dull coat will further blend the look. TESTORS produce an excellent product for reducing the shine on an area. It can be reduced with lacquer thinner or hand-painted. Use whichever dull-coat you want, yet remember when spraying the product of choice keep your airbrush away from the model about 8 inches to get the desired muted effect. Note how the messiness has mostly gone away.
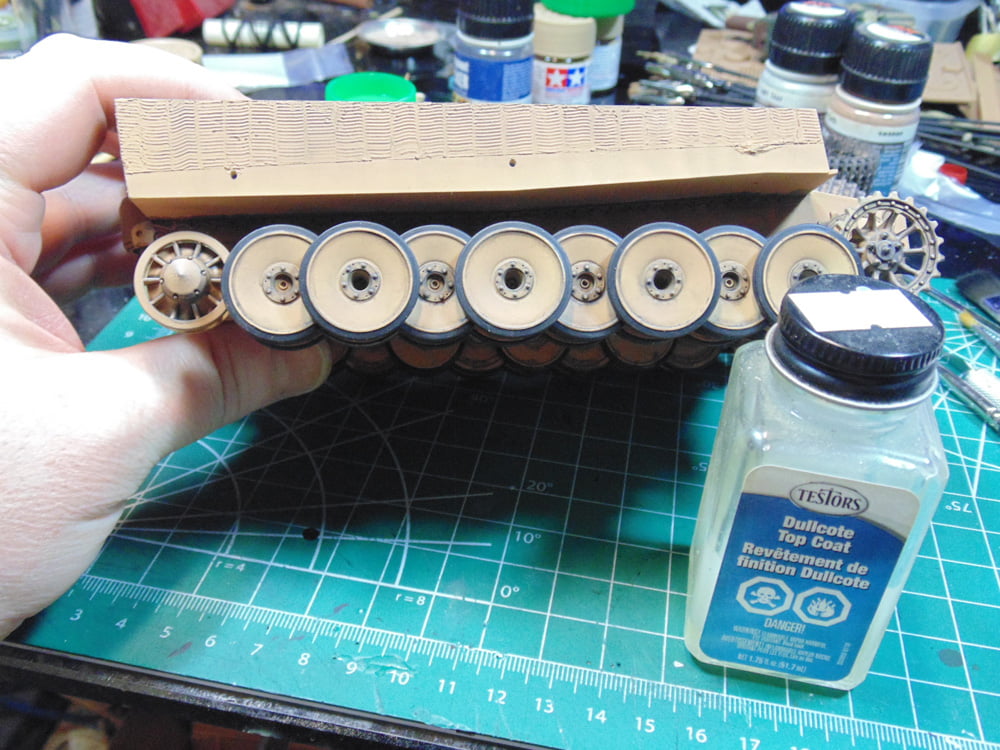
To finish this article up, I’ll dry brush some more metallizer on the tracks to bring out further life and realism. Don’t get me wrong, you make the decision as to how far you want to batter up your model or not. At the very least you have some tips and tools to work with.

If you have any questions about the products or methods used in this article, please feel free to ask the staff when you pick up or place your next order from Sunward Hobbies.
H.G. Barnes is a former voice-over artist and retired sales and marketing professional. He’s the author of two large volume science fiction adventure romance novels with many more in the works. For well over 40 years he’s been building scale model replicas and now does commission work for clients in Canada and the USA, plus completes projects for companies in Asia and Europe.
Currently H.G. is involved as an Associate Editor with KitMaker Network’s Online Magazine Channels