Tamiya German Tiger I Mid Production Tank Build Part – 1 of a Series
In this Sunward Hobbies tutorial, I’ll be starting the Tamiya Tiger Tank build with Part 1. This is a 1/35 scale plastic model kit and the mid-production model (Kit No 35194)
In Part 1, you’ll get plenty of tips to help speed things along and hopefully make the build more enjoyable. Also, I’ll cover a basic weathering foundation, Zimmerit application and how to prep and install parts.
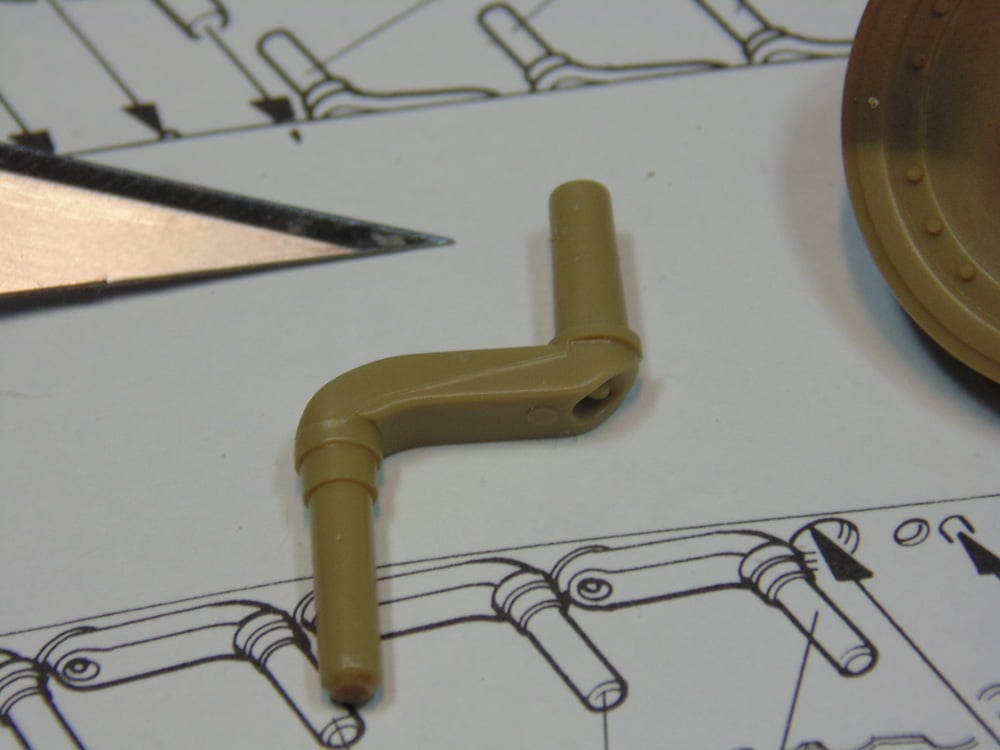
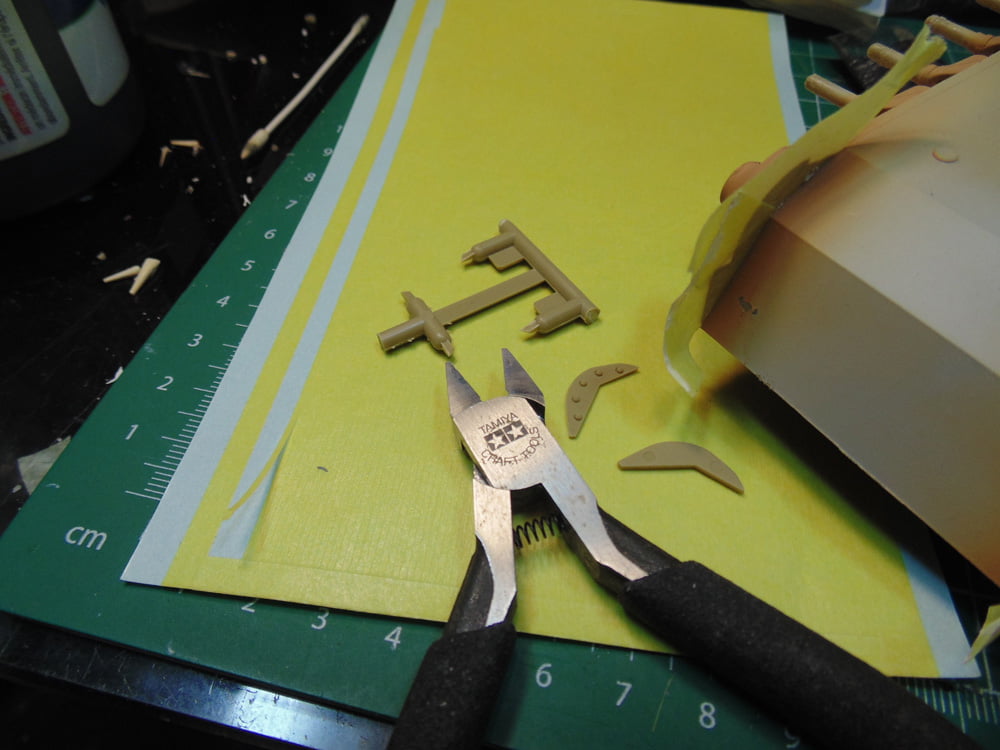
First, you’ll need to address the modelling basics, removing flash lines. In steps 1, 2 and 3 there are roughly 80 parts which need clean-up. You can use either the sharp or blunt edge of your hobby blade or use a Tamiya panel line scriber. This is a great tool because it gives you excellent grip and better control over how much material is being removed. Basically, so you don’t overdo it.
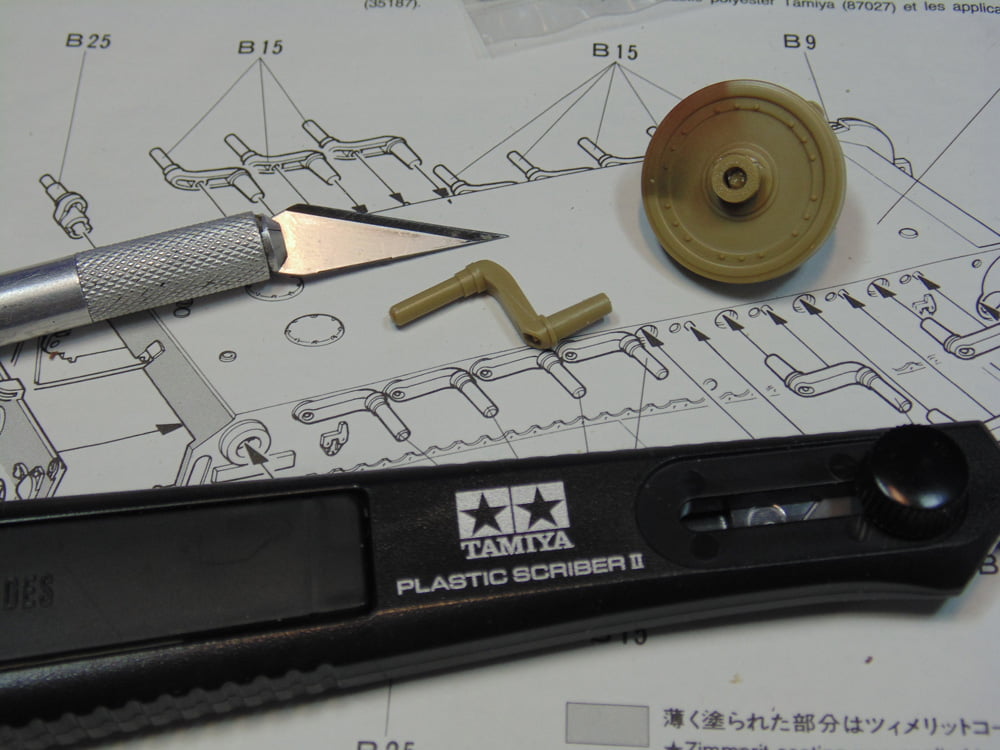
To move things along quicker you can decide not to bother with removing flash from some parts that will never be seen. Many times, I don’t sand away these seam lines to get more detail, but it all depends on the part. Ultimately, it’s your choice and mine was to save time.
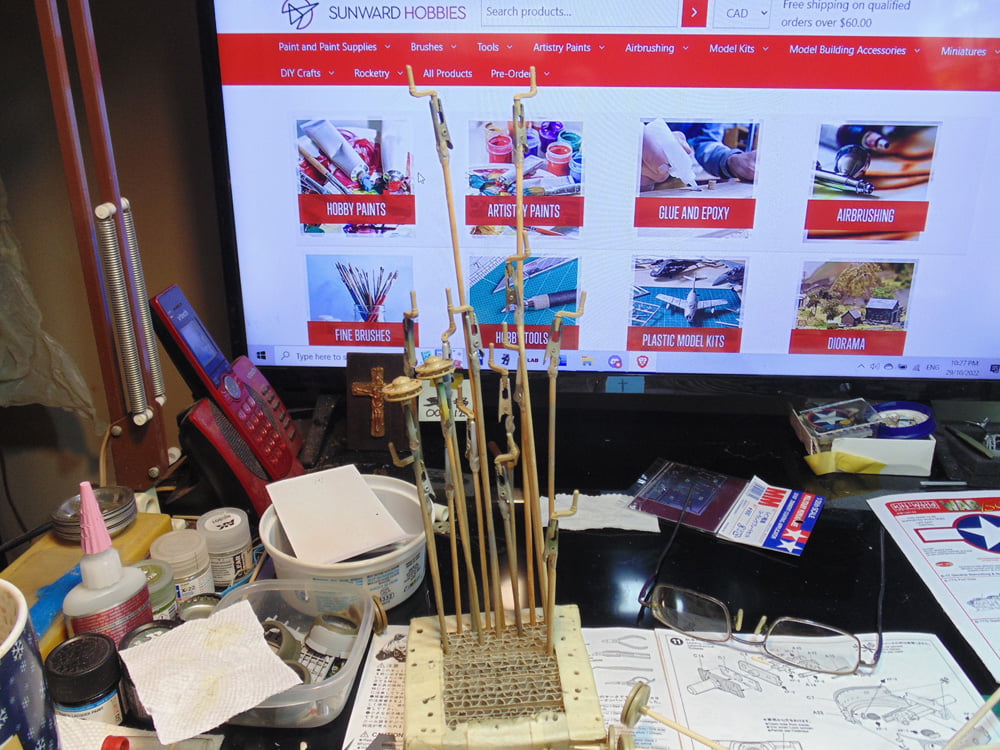
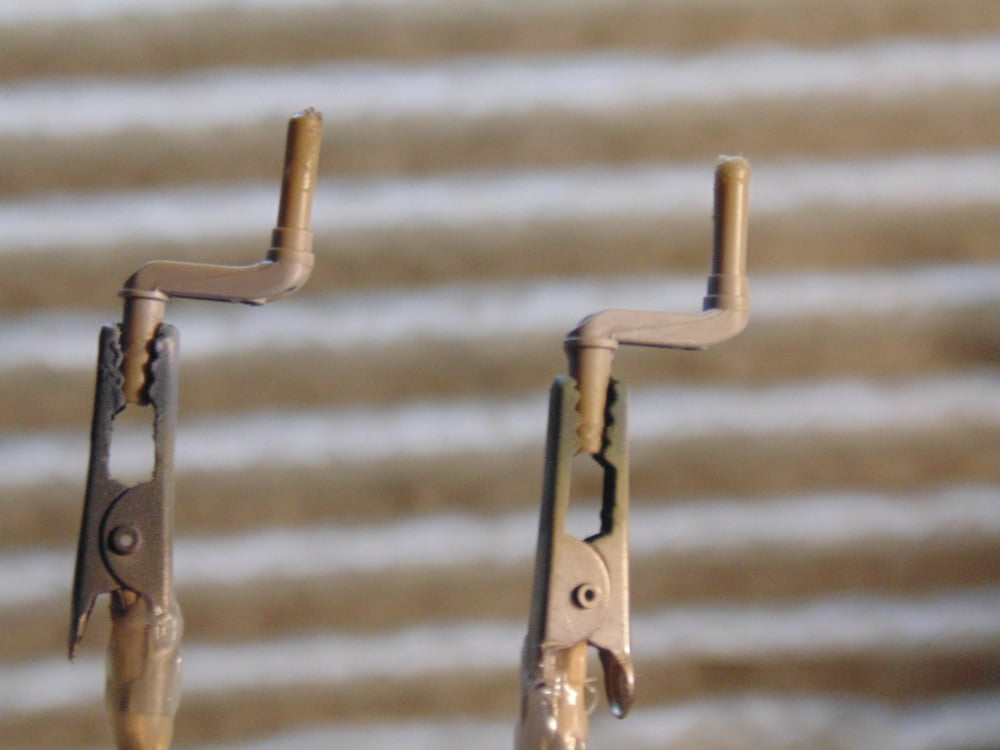
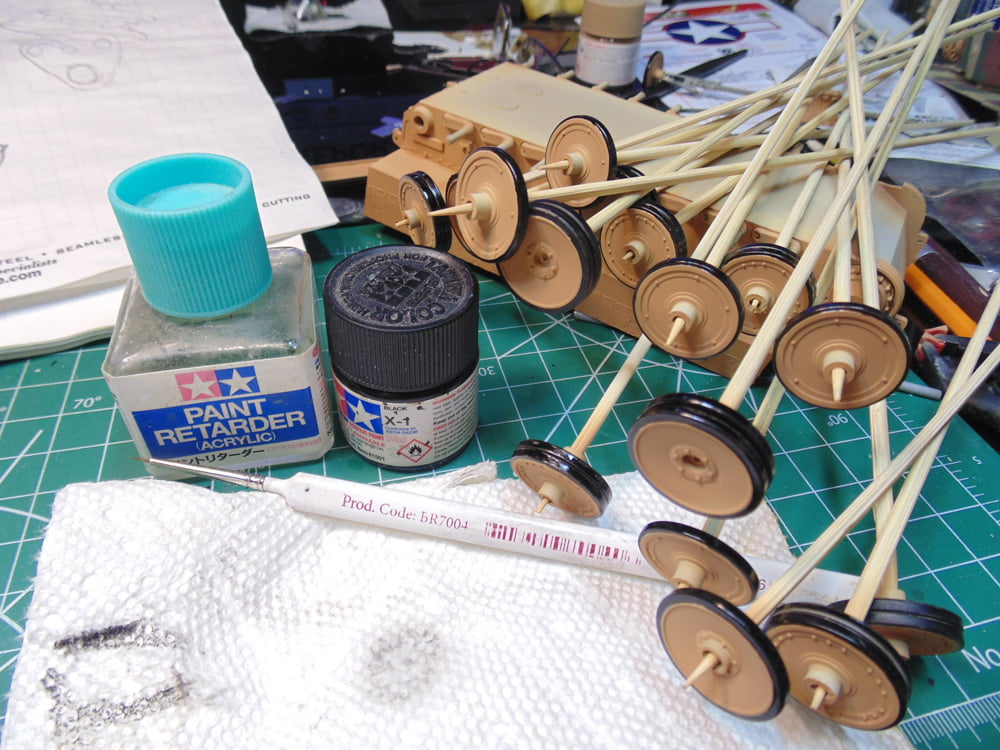
This shot is a little out of focus, yet you can clearly see I’m using AK Interactive alligator clips and sticks epoxied to wood skewers. At the time when I needed a holder they were not in-stock. To improvise, you can cut up some Mr Hobby cardboard strips and tape or use a Woodland Scenics glue gun to keep them together. You’ll need about 30 clips.
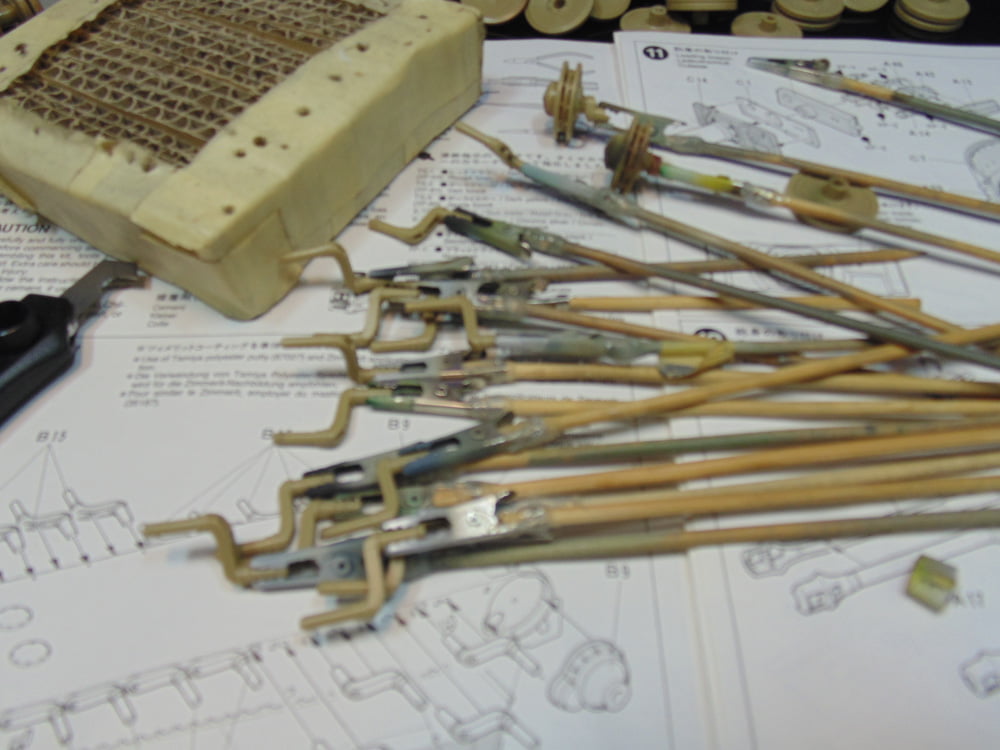
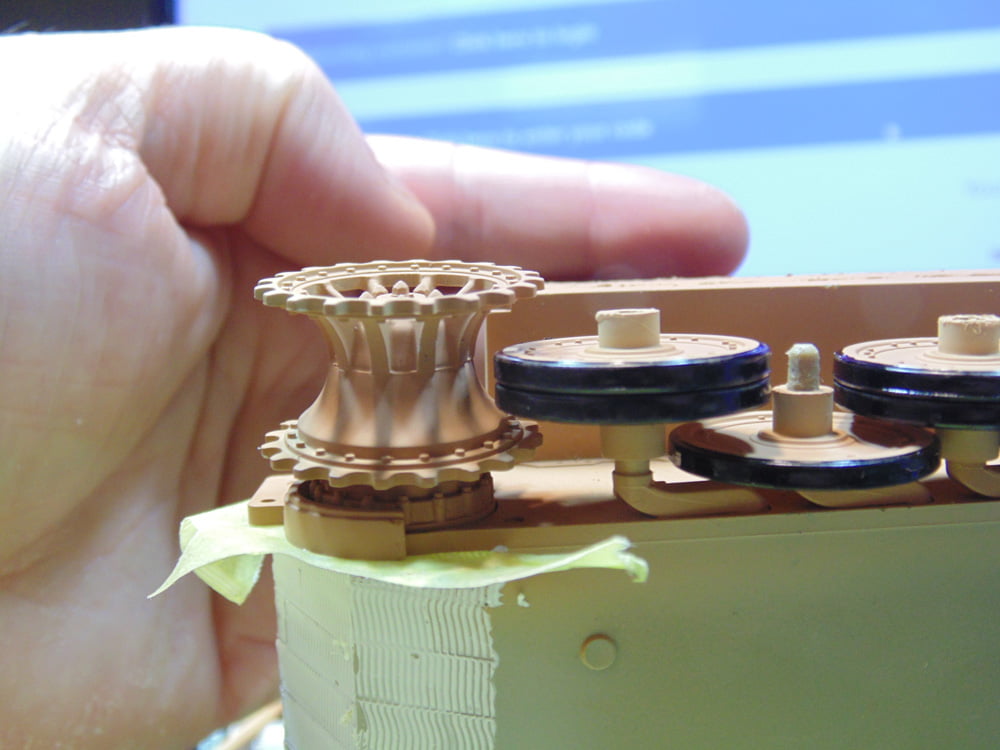
Some road wheels have only one open end. Snip the pointed tip off until you have a solid pressure fit with the plastic and wood skewer. A little twist will help them bond.
Many of the road wheels will let you slip the skewer/rod all the way through, but it’s important to remember that you’ll be doing a lot of painting stages, thus, make certain the parts aren’t spinning around.
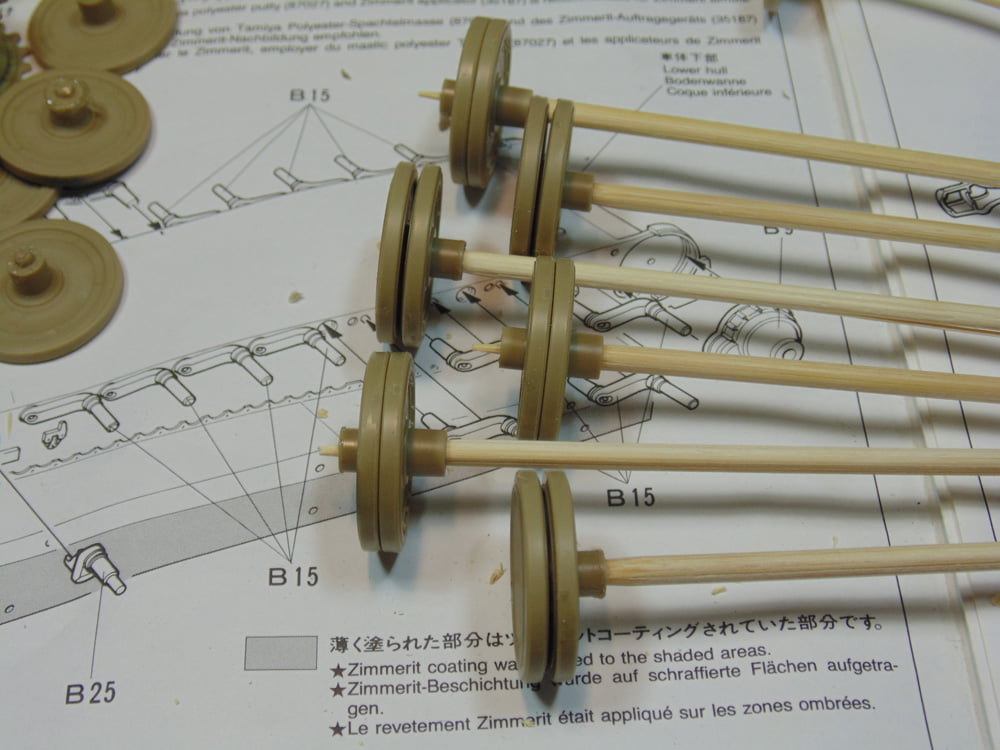
There are 58 parts in the sprocket, idler and road wheels assembly. My best advice is to put on some relaxing music and work as methodically as you can cleaning them up. You’ll be at this for dozens of hours, yet it can be quite therapeutic.
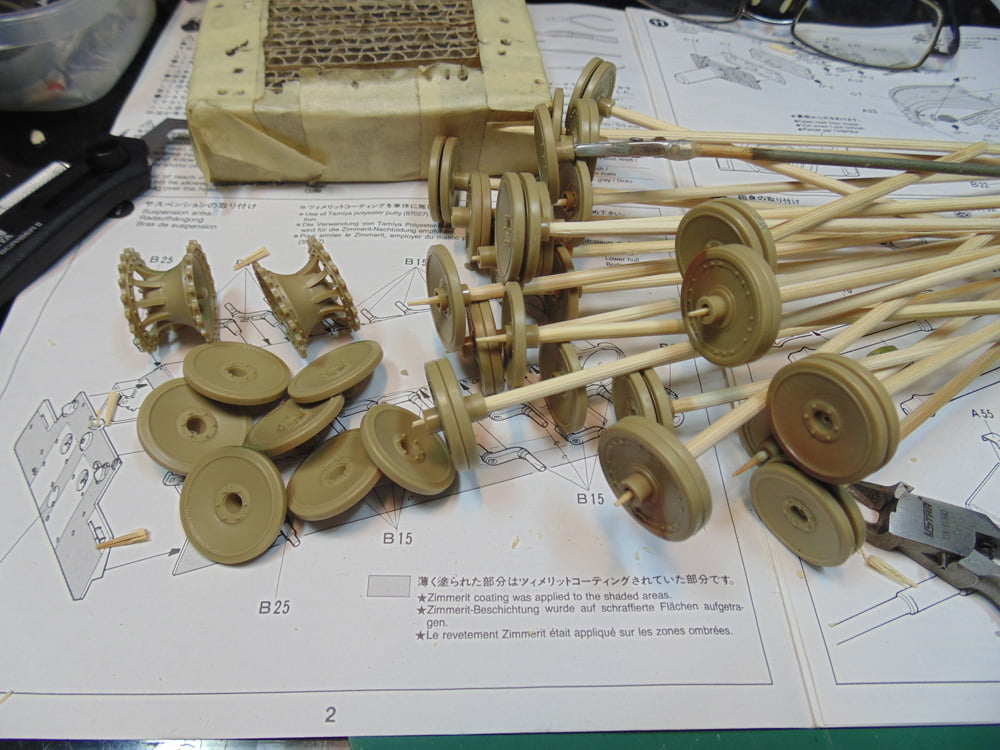
Get in the habit of placing your sticks back to front on the holder, so you can keep track of drying times. This way you can simply spin the holder around to begin the second primer or paint stages. Make sure you have spaced them enough to avoid wet contact.
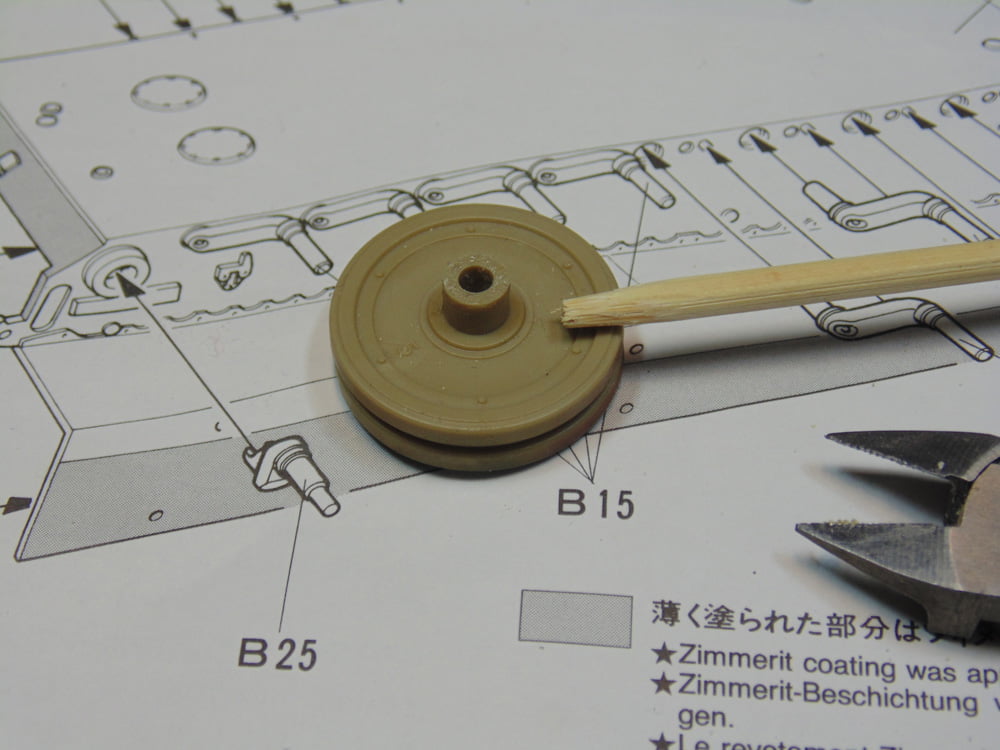
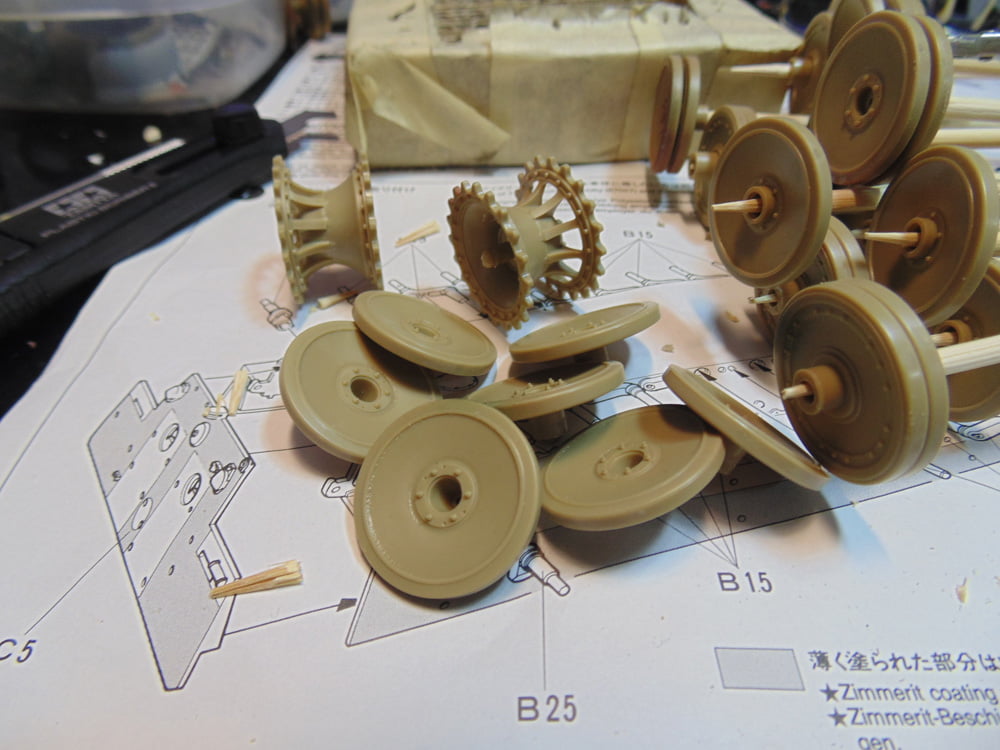
In step 2 you’ll be doing more wheel parts work. To speed things up a little, you can pre-assemble the idlers, sprockets and double wheels. For the double wheels with a slight gap for the guide horns, don’t bother painting the insides of them prior to assembling them. That effort will be completely hidden and is a waste of time and materials.
Mr. Surfacer Primer 1000 and Mr. Color Thinner 400, cut 50/50, are my favorite for priming parts. The coats are even and dig into the plastic nicely. The thinner is also very forgiving when you get too much on, as it levels and dries evenly.
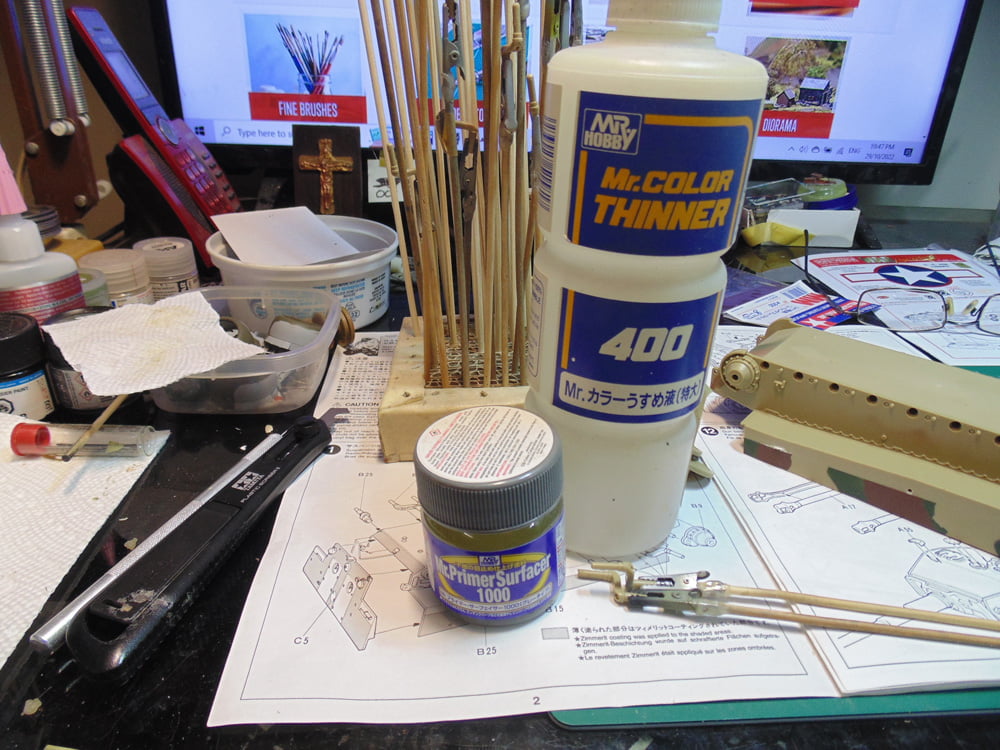
Make sure you’ve shaken the primer jar thoroughly for the best results. After a minute of agitating the jar, turn it sideways and watch for a line of bubbles to be all the way across. Naturally, if there are no bubbles you’ll need to shake it more.
Begin with a mist coat to allow the next layer to have something to bite on to. Also, there is no need to paint or spray the connecting shafts.
Now you can add the wet primer coat. While these parts are drying you can get your lower hull pre-assembled and primed.
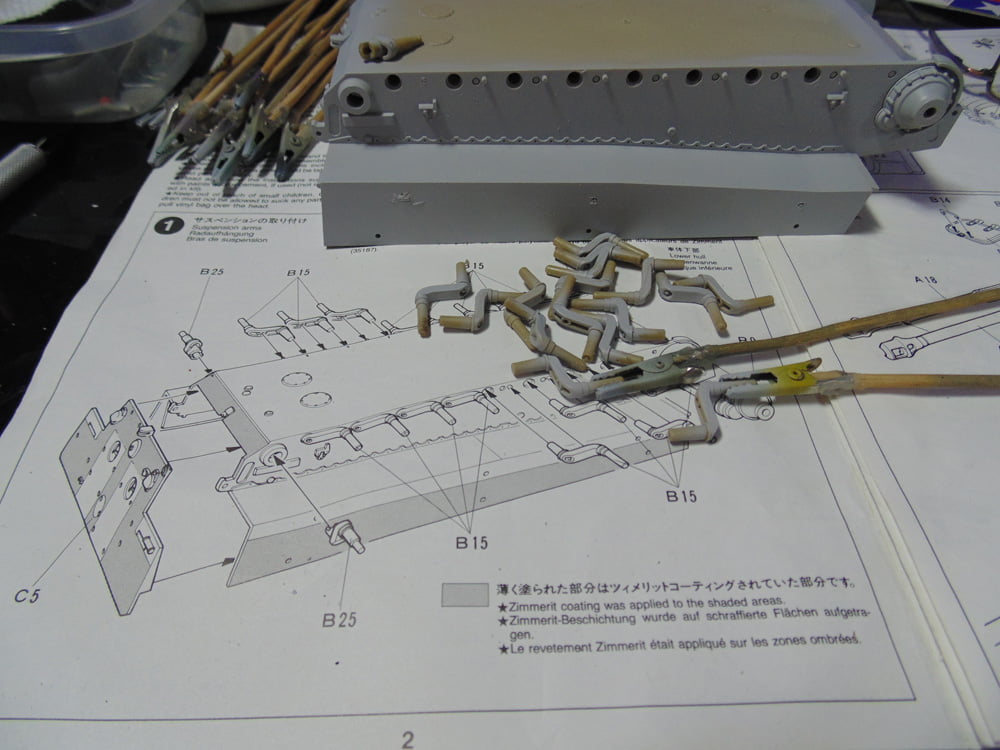
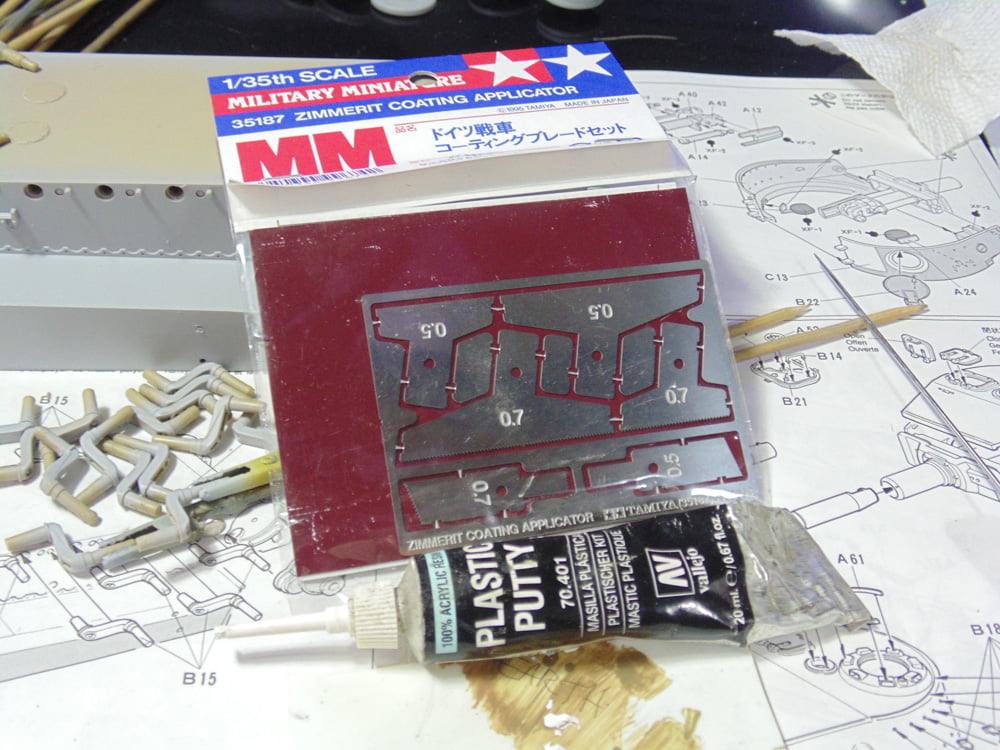
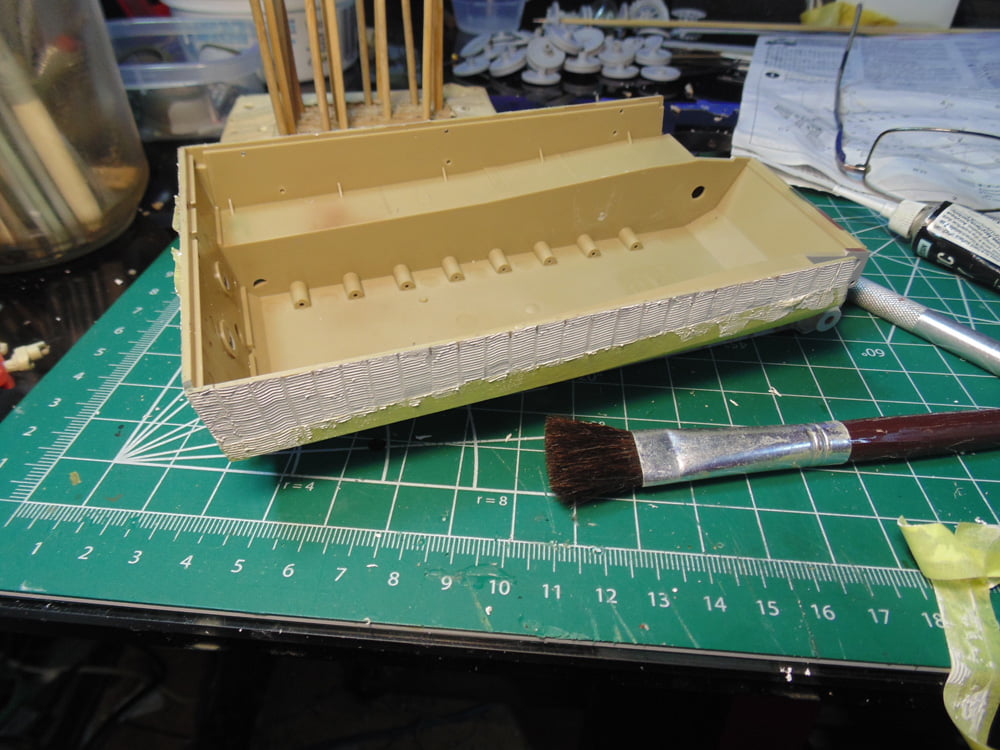
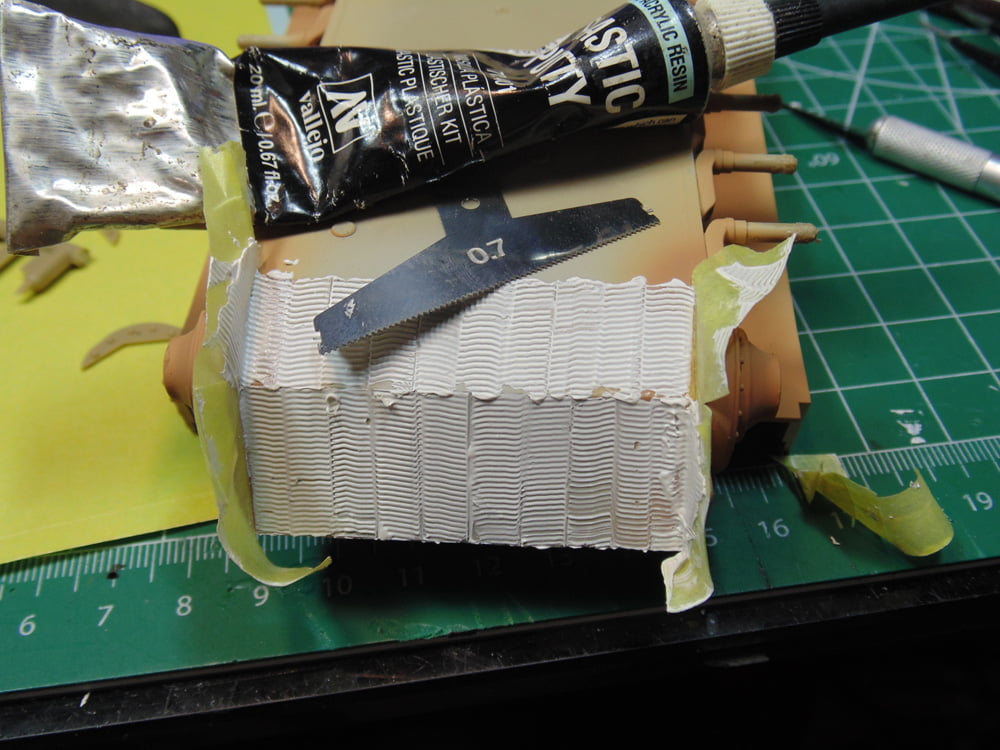
Now let’s prepare for the Zimmerit anti magnetic explosive coating. In the old days doing each line or square in putty was a major pain, but with Tamiya’s Zimmerit applicator tool the task is now a lot of fun. There are dozens of smooth wood fillers and plastic putty out there. Here I’m using Vallejo plastic putty.
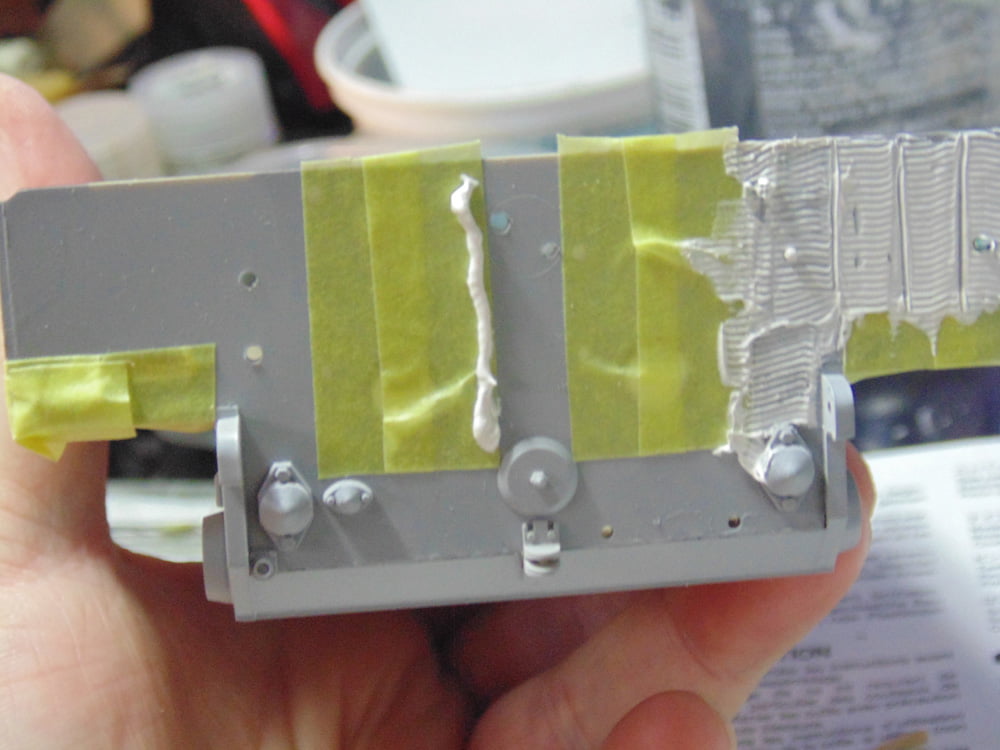
It’s always wise to mask off the uncoated areas. Now you can use the appropriate width of tool for that space to be coated. Make sure to de-tac the tape once to avoid any primer from lifting. Run the needed length on your forearm or palm and then pull it free at a 45-degree angle to keep the tape from curling up.
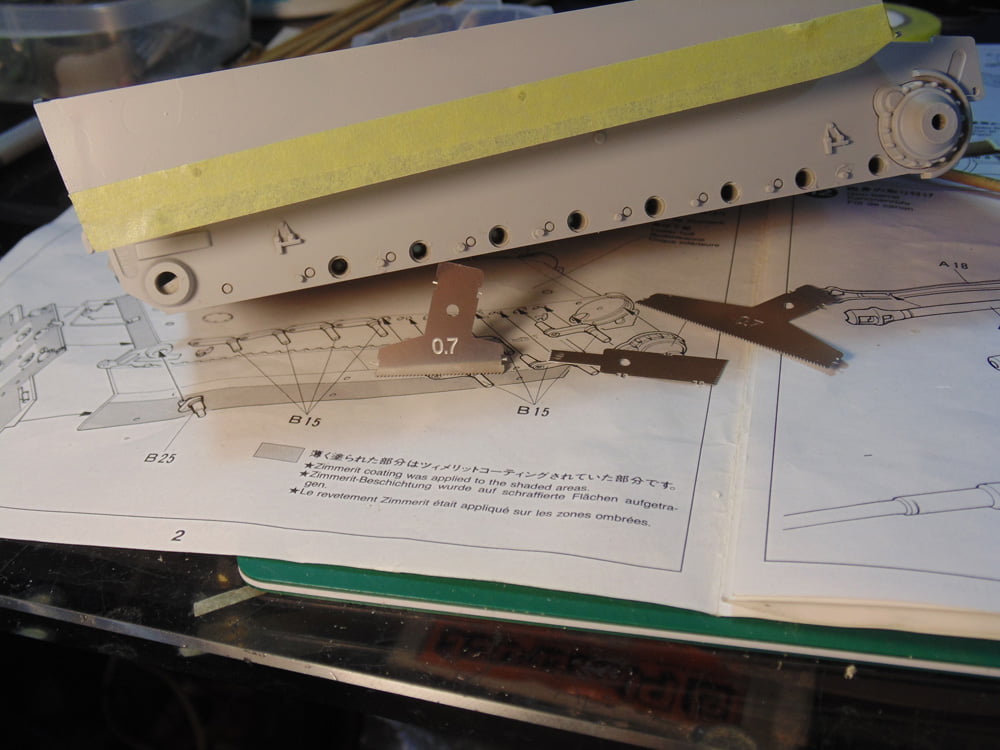
At the back plate there are indication lines to show where the parts are to be placed. Put your tape just a hair beyond those lines so the putty doesn’t interfere with their placement. This is true with other masked off areas as well.
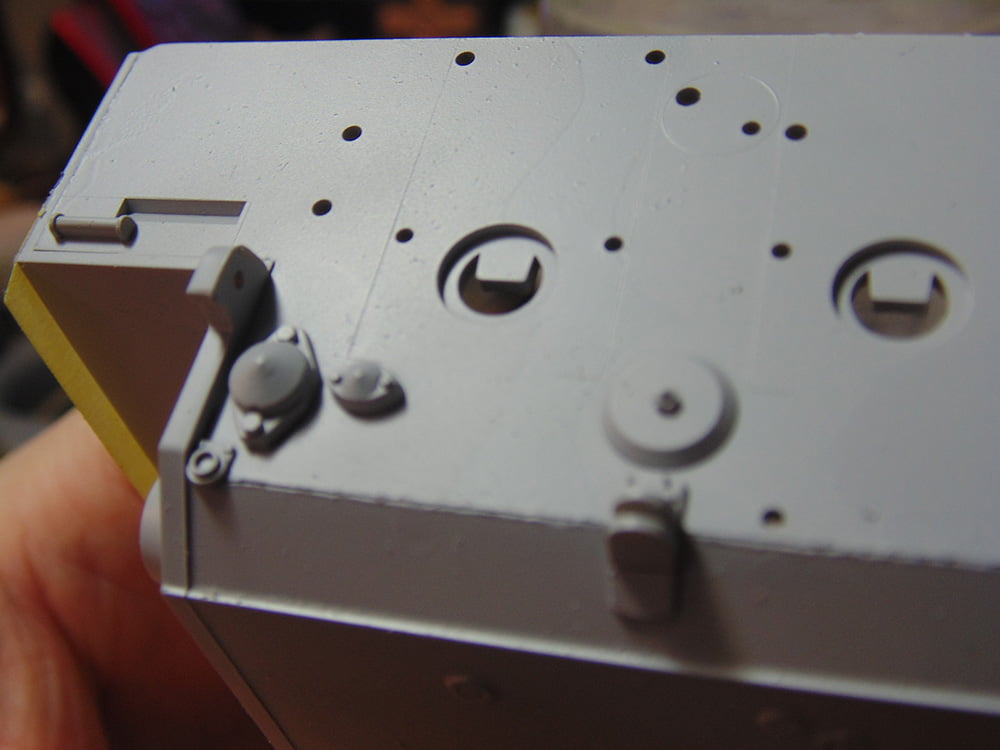
Have some water, paper towel and a soft big brush to clean the Zimmerit tool often. This filler’s skin dries in minutes and gums up the teeth in the tool, so wash it often. Also, note the toothpick tips in the holes. That’s for show, but later they will be poking out from the inside so I don’t lose track of these points where the parts go. Insert them while the putty is still wet.
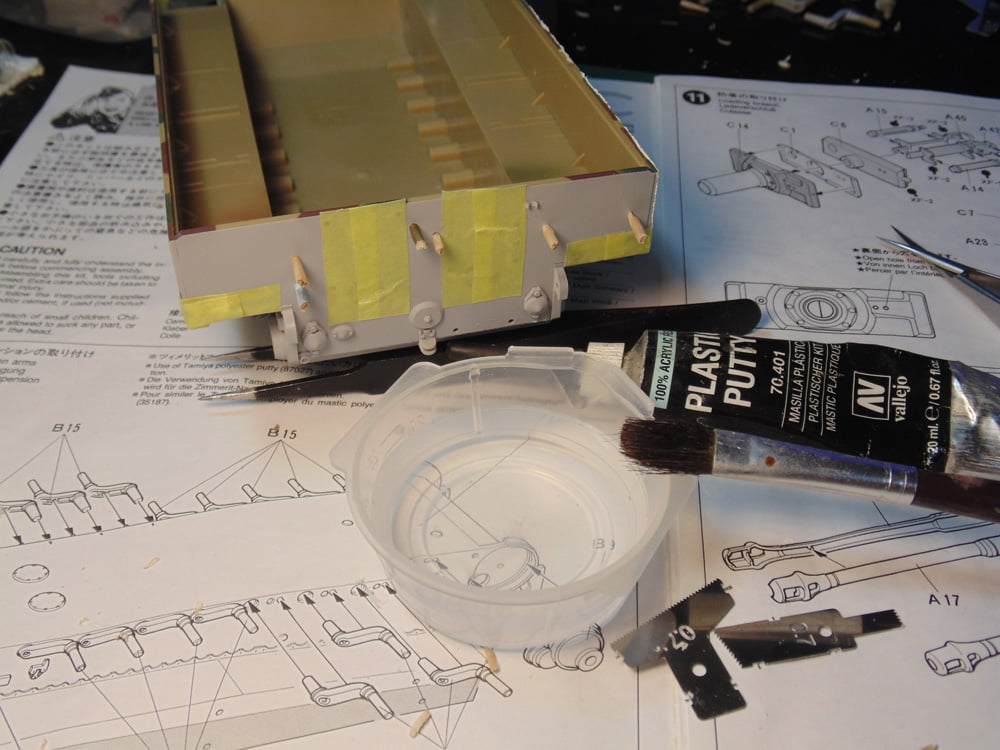
No matter which filler or putty you’re using, always lay down a bead before the location where the putty is needed to start. This way you’ll get a consistent layer in that spot and not have to go over it again to fill the gap.
Don’t worry about perfection. These coatings can be as organic looking as you wish. Later, you can use a fine tool to clean up the excess that’s gone on detailed parts. The putty dries to the touch quickly but takes several hours to fully cure, thus handle your parts with care.
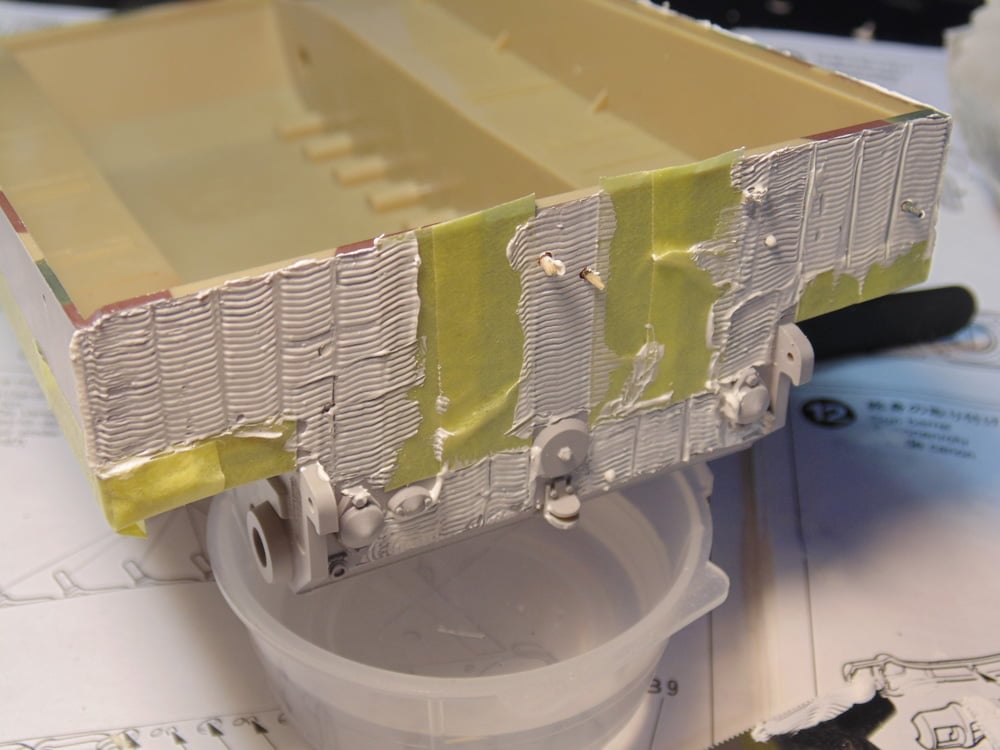
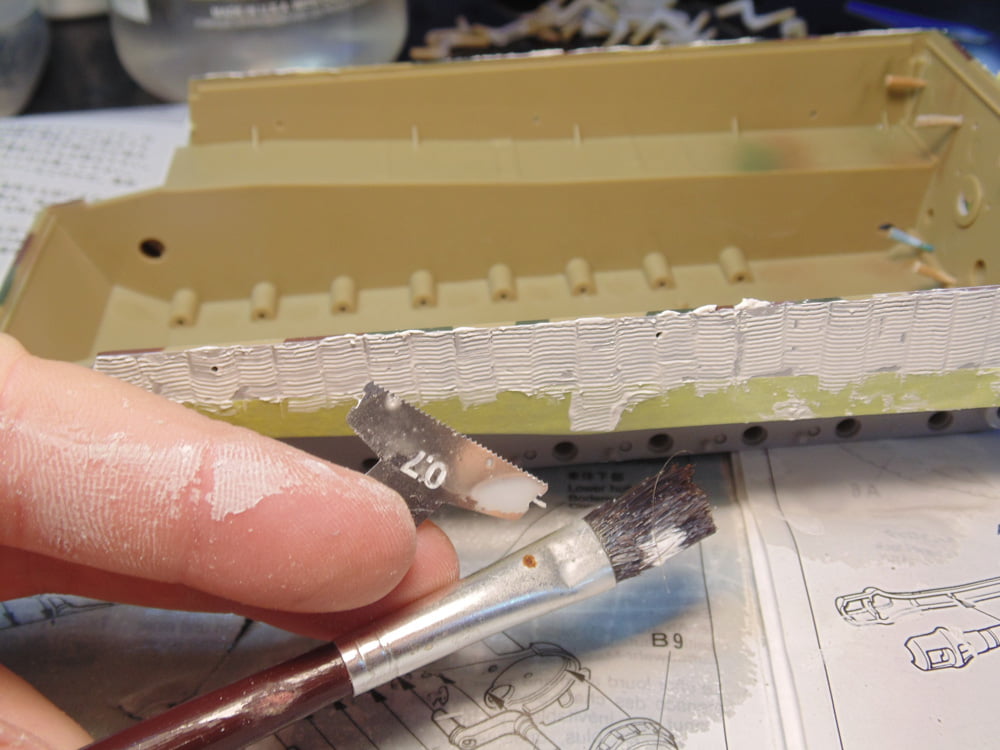
I neglected to mention earlier that there are two scales of Zimmerit tools in the Tamiya set. A 1/48 of 0.5mm and the 1/35 0.7mm. In this picture you can see on the left what happens when the tool gets gummed up with hardening filler. Thankfully, this is a water-based product and is easily removed to start again.
Once the filler is almost hardened, peal your tape off at a 45-degree angle away from the coating. Don’t fret if every line isn’t fully coated because later these spots can be refined as fallen off flacks. Use the box art as a guide if you want that look or simply redo it.
Before or after the tape is removed and the filler is completely dried, use a stiff wide brush to gently remove any excess. You can also use a blade to get rid of unsightly high points.
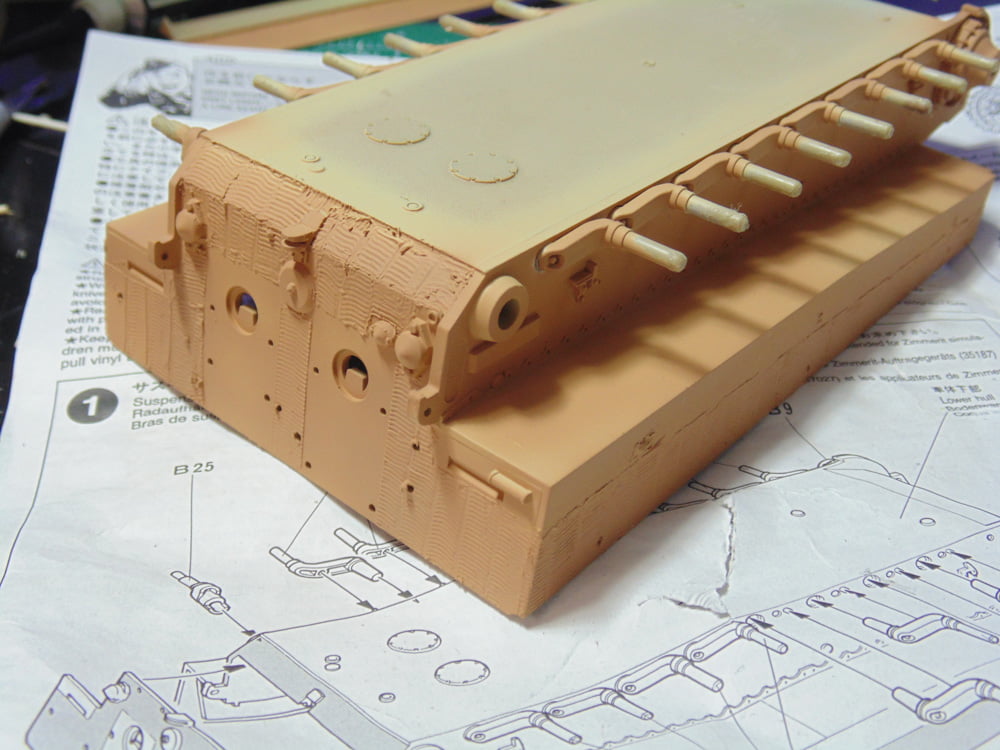
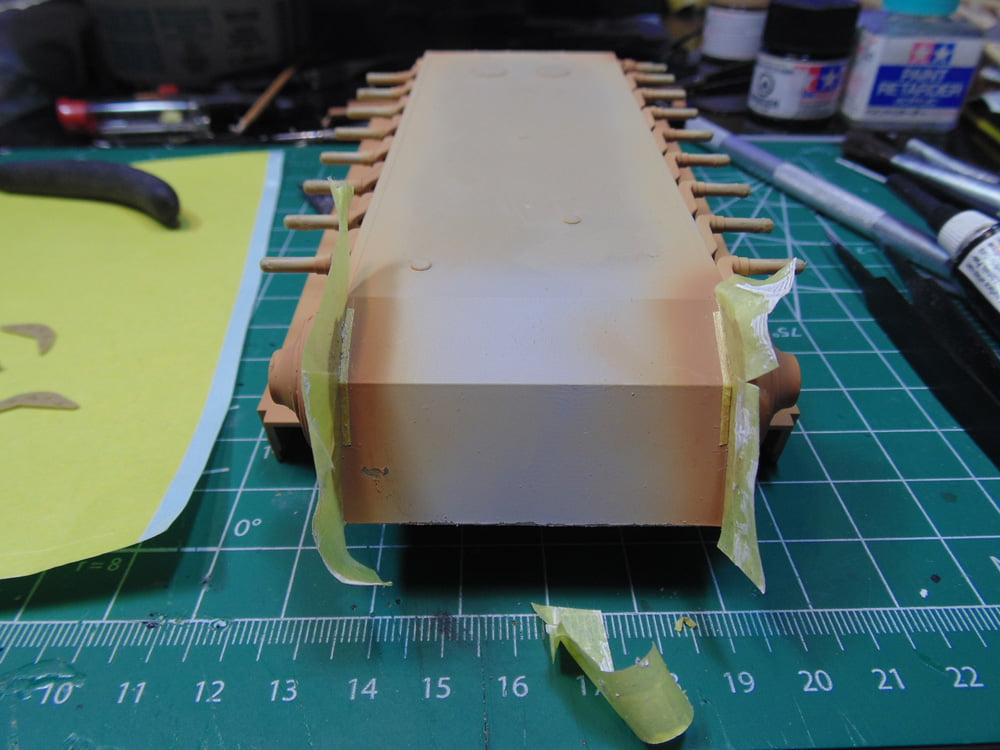
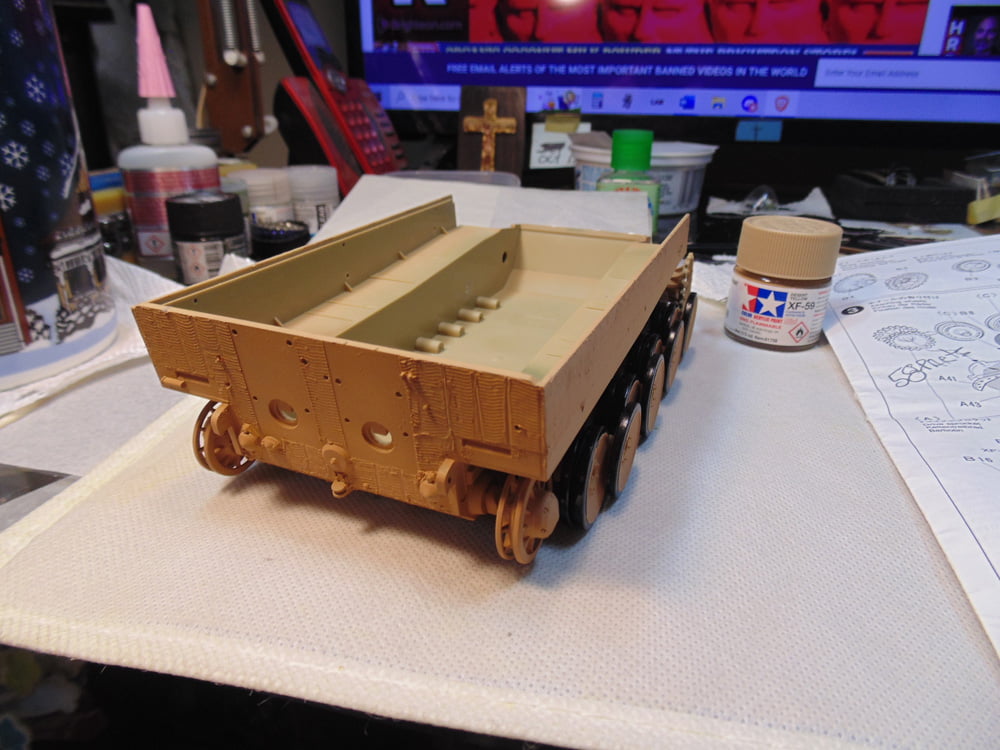
The next step is the sand color undercoat. Don’t paint or spray too thick of a layer since it’s just a color background to lighten the dessert yellow and add some depth as a pre-weathering method. Obviously, you can skip this color, but I promised to show some weathering and paint effects. More on this later.
You can see the subtle difference in the early production paint and the mid production darker yellow. While it’s tough to see, due to my novice photographic skills, but there are many spots where the darker color has not reached, causing the effect.
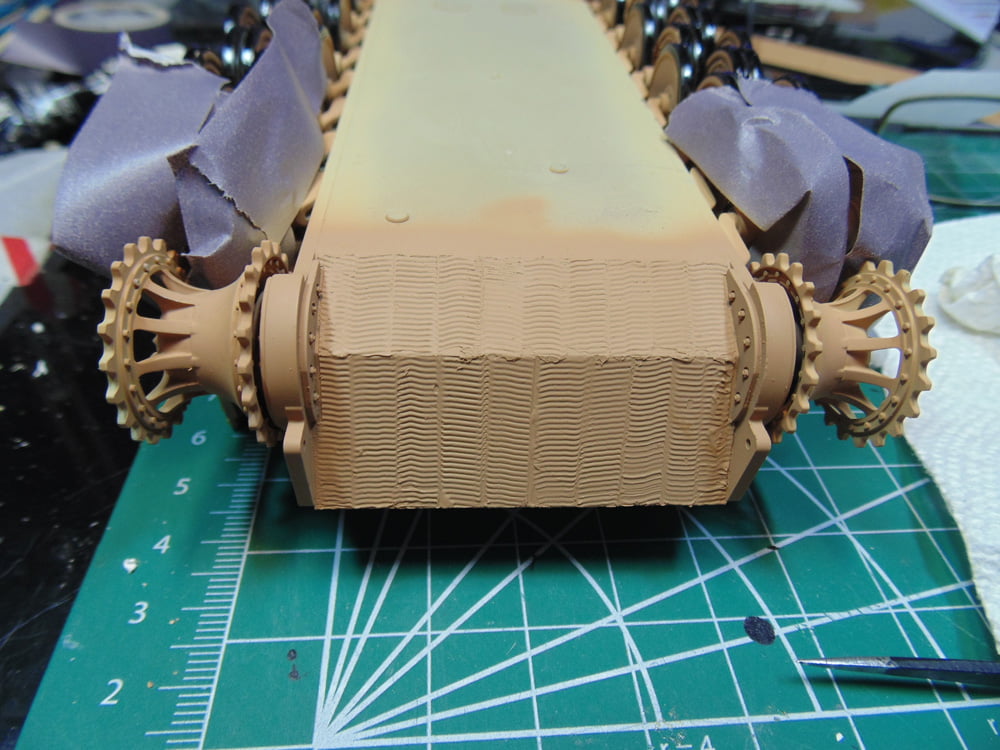
And here you can see the back plate with its final main base colors.
Now to paint the solid rubber of the road wheels. There are two ways to get this done. One of the quickest and simplest ways is to use a circle template. First you mask off, using a circle cutter, the inner steel wheel then spray the rubber color or flat black. Then remove the tape and fit the proper sized template hole over the wheel to protect the black paint from overspray. The other way is to simply paint them by hand. I chose this method because there will be panel line washes added later to cover up any of my flaws and more of the painted yellow steel wheel shows up. This, as well, will take many hours, but once you get into a rhythm the time flies by. Besides, you’ll have to do touch-ups regardless of which technique you select.
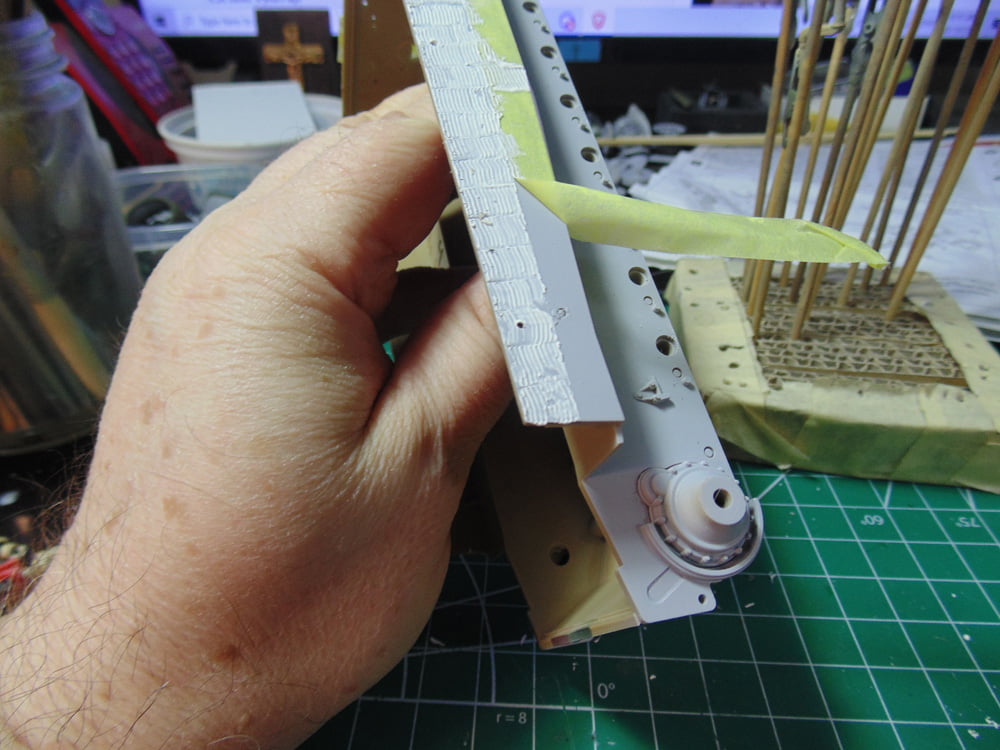
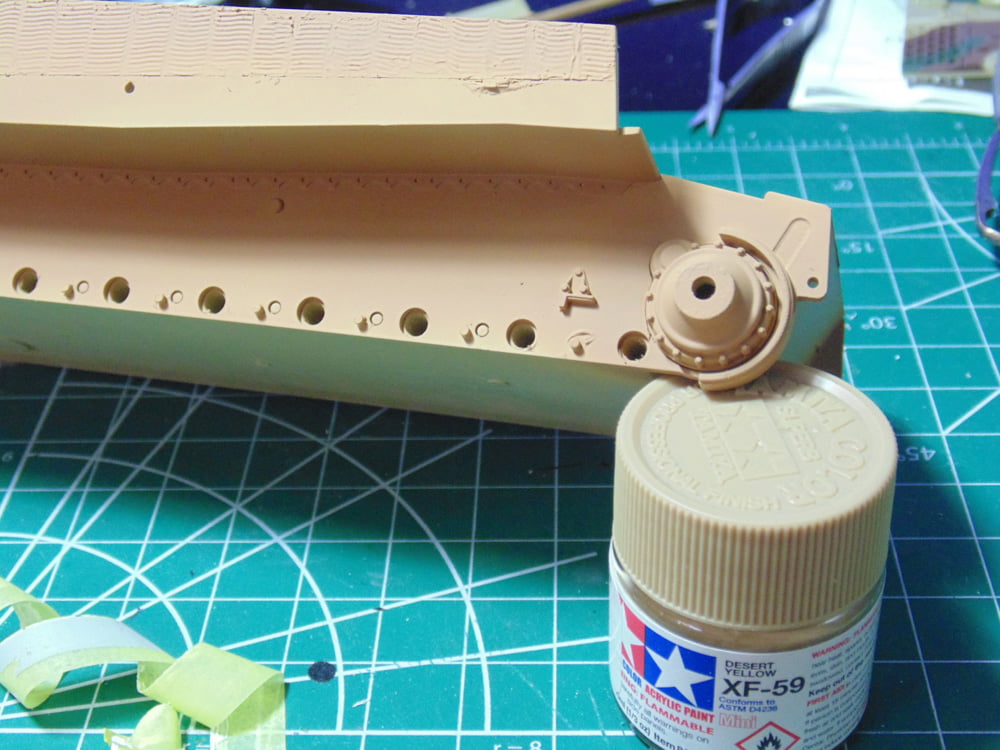
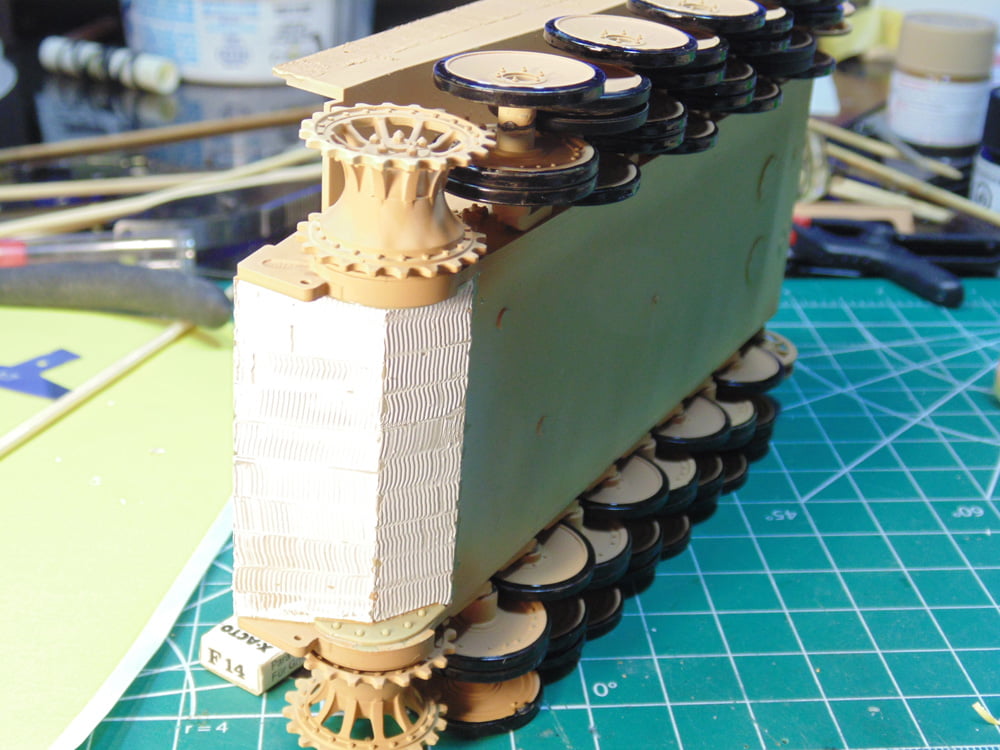
When adding Zimmerit to the front lower plates, be sure to mask them off as you did the back. Here, I’m using some Mr. Hobby 1mm strips to protect the space where the bolt parts are to be fitted along with the sprocket frames.
Here I’ve done the less than perfect front Zimmerit coating.
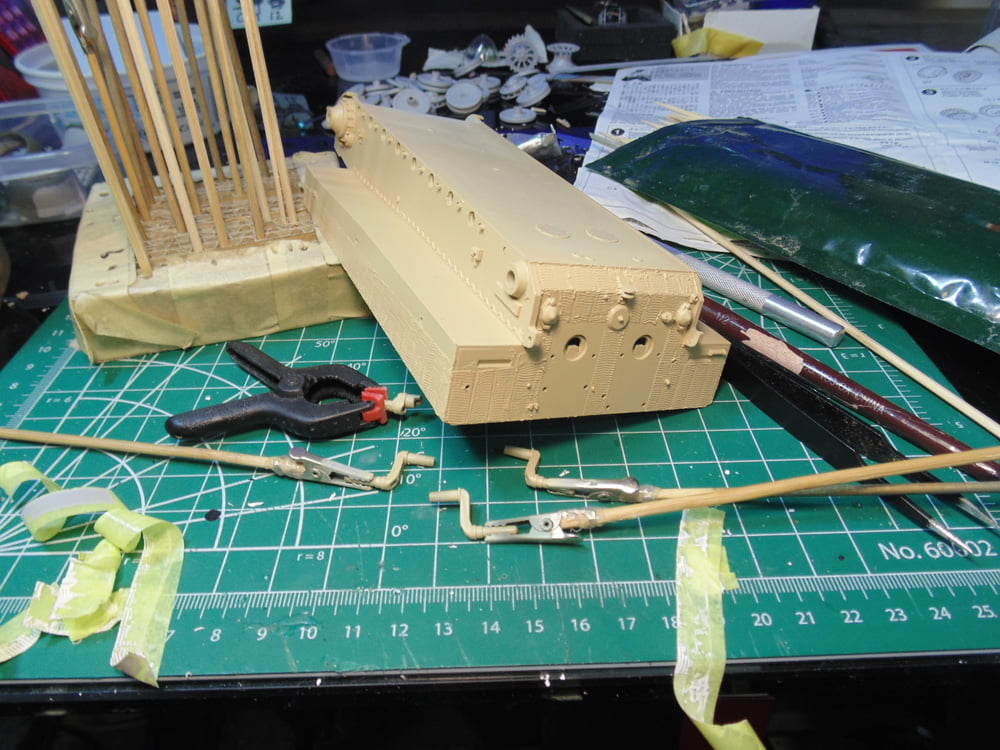
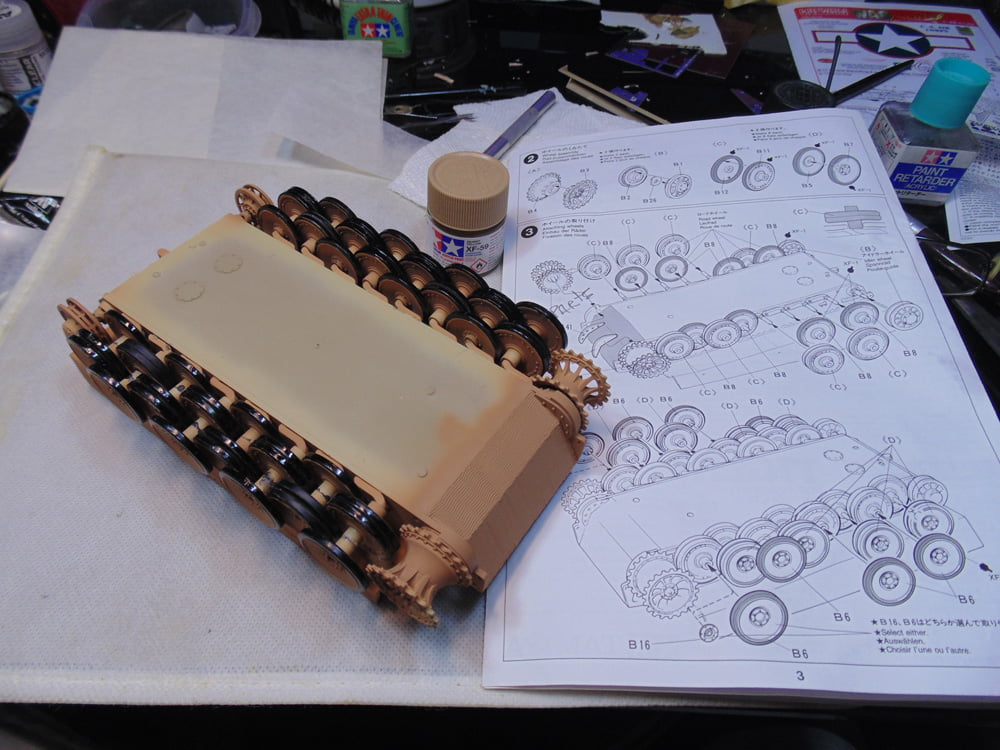
In step 3 you add the completed road wheels. I did this while the putty was drying to save some time in order to get this article completed on schedule. It illustrates that you can get other things done on your project while waiting for the previous task to have enough time to properly set up. Follow the instruction for the first four inner wheels on each side, but make sure you put the first double between the teeth of the sprocket and add them at the same time.
Always test fit everything to make adjustments before gluing the parts. This will allow the Zimmerit to completely hardened for the color coats. You can place the model on its side and flat to get the proper look and fit to later match your tracks. Add some sponge between the wheel and the floor of the side wall to gently coax any wheel that stands up too proud while the glue is setting up. Note the spacers under the side wall.
Mask off the rubber painted places of the road wheels and finish the final under and top coat of the lower hull assembly.
It’s your call to paint the belly or not. This model’s underside will rarely, if at all, see the light of day. Thus, it’s a total waste of time to paint it.
There’s no question that you’ll be spending days completing these 3 steps, but I have to hand it to Tamiya. Get the worst tasks out of the way and the rest of the build will glide a lot quicker.
If you have any questions about the products or methods used in this article, please feel free to ask the staff when you pick up or place your next order from Sunward Hobbies.
H.G. Barnes is a former voice-over artist and retired sales and marketing professional. He’s the author of two large volume science fiction adventure romance novels with many more in the works. For well over 40 years he’s been building scale model replicas and now does commission work for clients in Canada and the USA, plus completes projects for companies in Asia and Europe.
Currently H.G. is involved as an Associate Editor with KitMaker Network’s Online Magazine Channels