Artesania Latina Bluenose II Build – Part 13 of a Series
In this Sunward Hobbies tutorial, I’ll be continuing with Artesania Latina’s Bluenose II build with Part 13. Previous Part 12
In this Sunward Hobbies tutorial I’ll be completing steps 36, 37 and 38 of the Artesania Latina Bluenose II fishing schooner. In Part 12 I miss-labelled the step numbers which included 36, my apologies.
Part 13 includes tips on how to clean up and adjust parts so they fit and fit better. You’ll also get some easy tips on painting along with my builder’s techniques on how to more easily place parts in very small spaces.
One of the most important tools for this, or any build, is a set of reaming tools. All the metal parts in the Bluenose II kit have some degree of flash. Artesania Latina ask you to remove this, but each hole or pin of any part must have the flash eliminated as well.
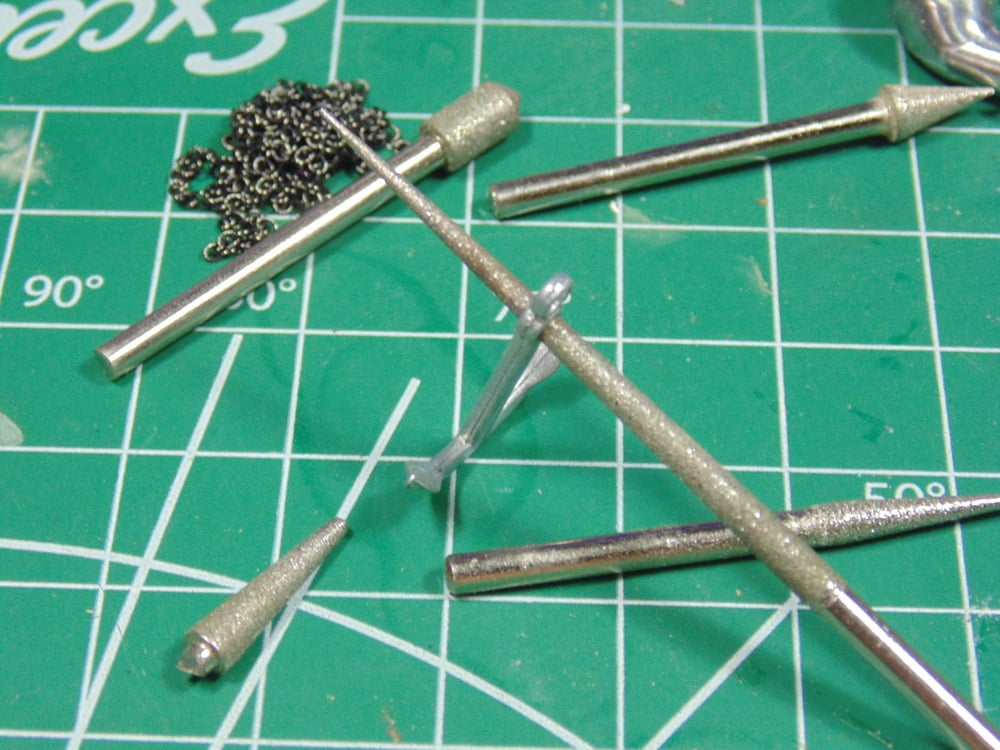
Wearing a pair of (nitryl or rubber) gloves will help a lot to grip these parts. (On a flat sheet not sponge backed) sandpaper you can run most of the edges to remove flash.
Another huge benefit of taking the time to do this is the bond of the part to the mating surface. Having the part scuffed up vastly increases the surface area for your paint to adhere to. I’m using BSI epoxy; thus, it will seep into all those micro scratches of the painted metal and to the wood.

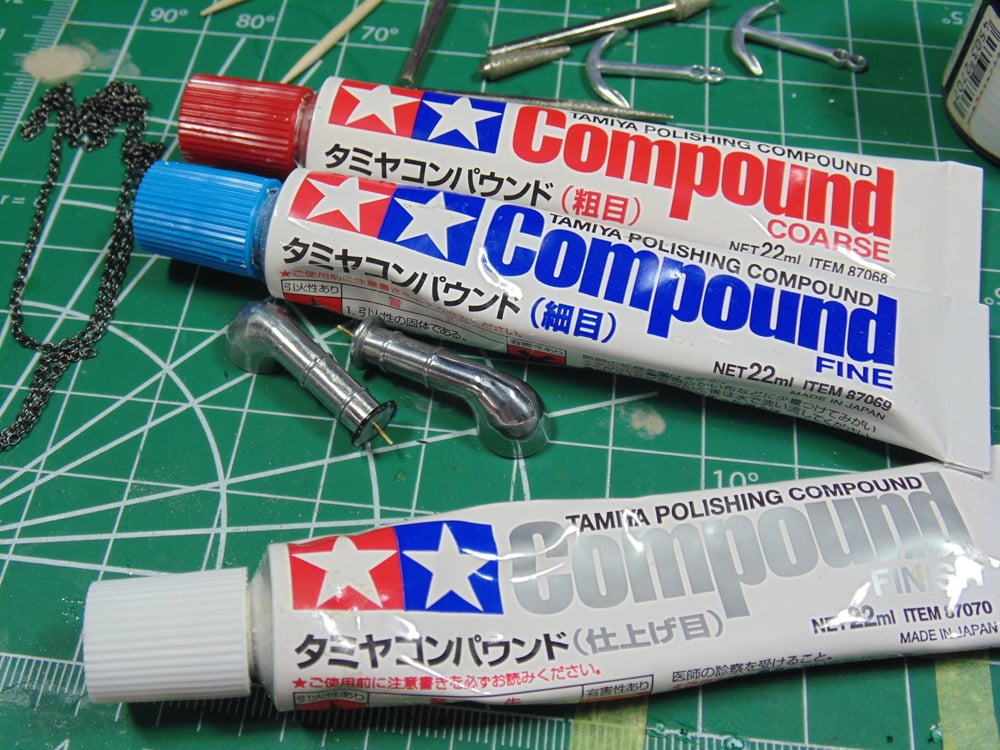
On this Bluenose II these stacks should have a bit of shine to them. This task is very satisfying because you see nice results quickly. My suggestion though is to apply your Tamiya Course Polishing Compound to all three. Fully remove this step then move to the next type after polishing the previous. This will make things go quicker, however, it’s your model and if you want to do one at a time have fun. Just make certain you use a different cloth for each grit of compound.
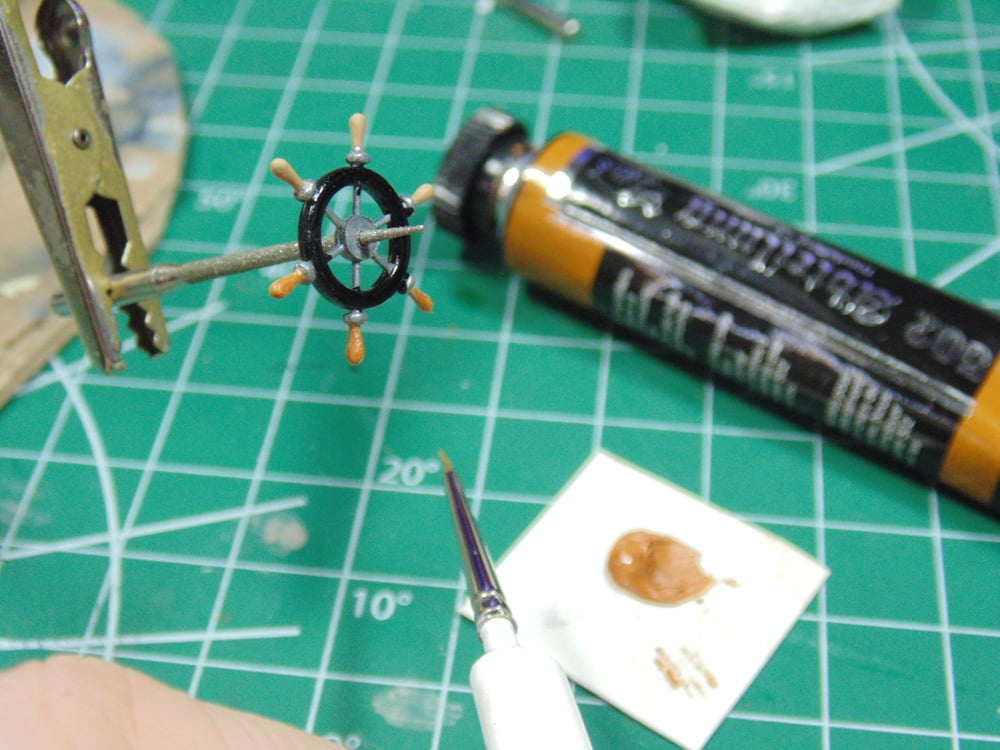
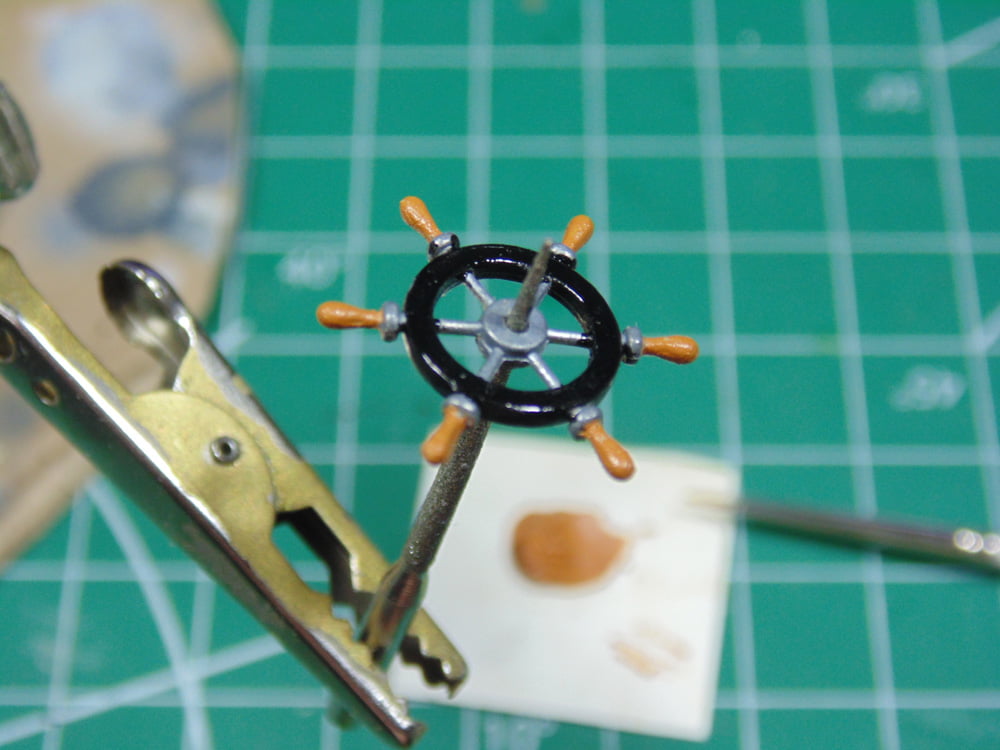
In Part 12 I had not painted the steering wheel handles. This is a very easy and quick job. Paint them first with any brand of Desert Yellow and let it fully dry. Next, paint a translucent layer of Ocher, Earth or even Light Rust modeling oils. In this case I’m using Abteilung 502 giving the handles a truly realistic color.
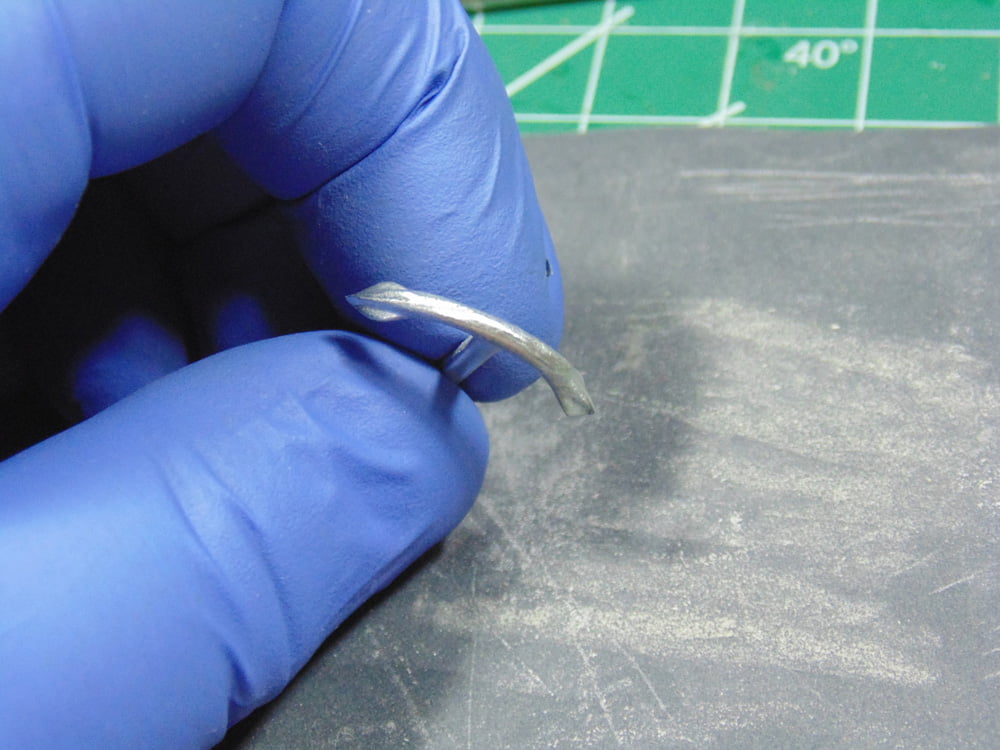
Your next challenge will be to get the tackle rods into the eye of the anchors. I tried reaming the hole, but no dice because the ball is way too large. Then tried sanding the ball, yet found it quicker to sever the ball and epoxy it back on.
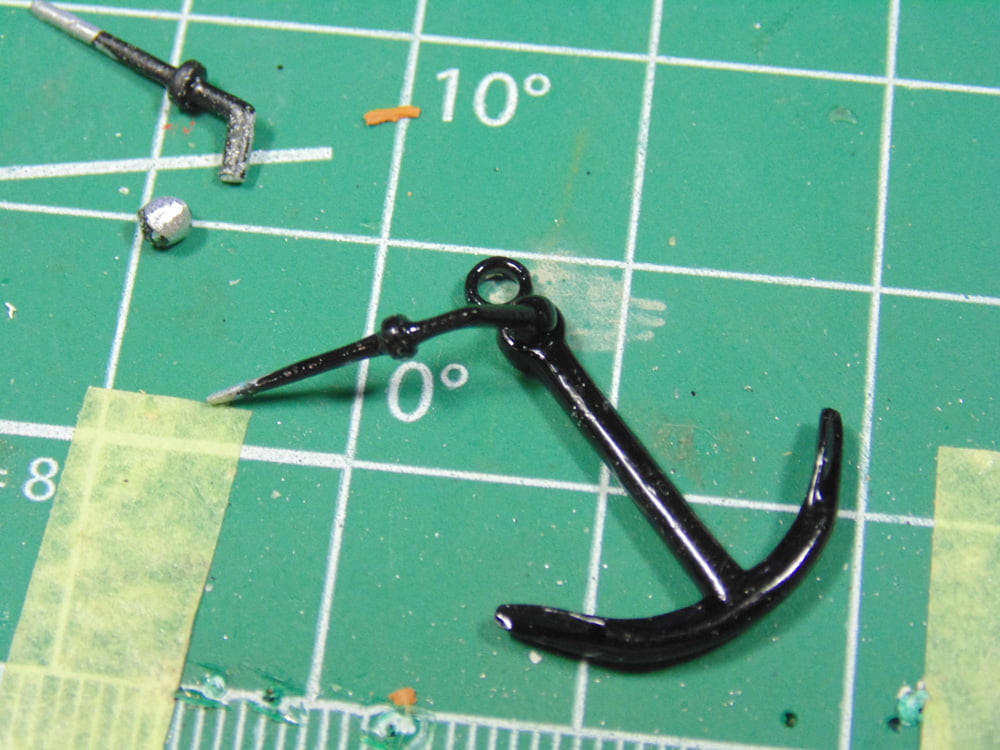
This epoxy needs a minute to begin stiffening so hold your part then clamp. It’s vital to let these rest for at least a few hours due to all the man handling that’s coming up.

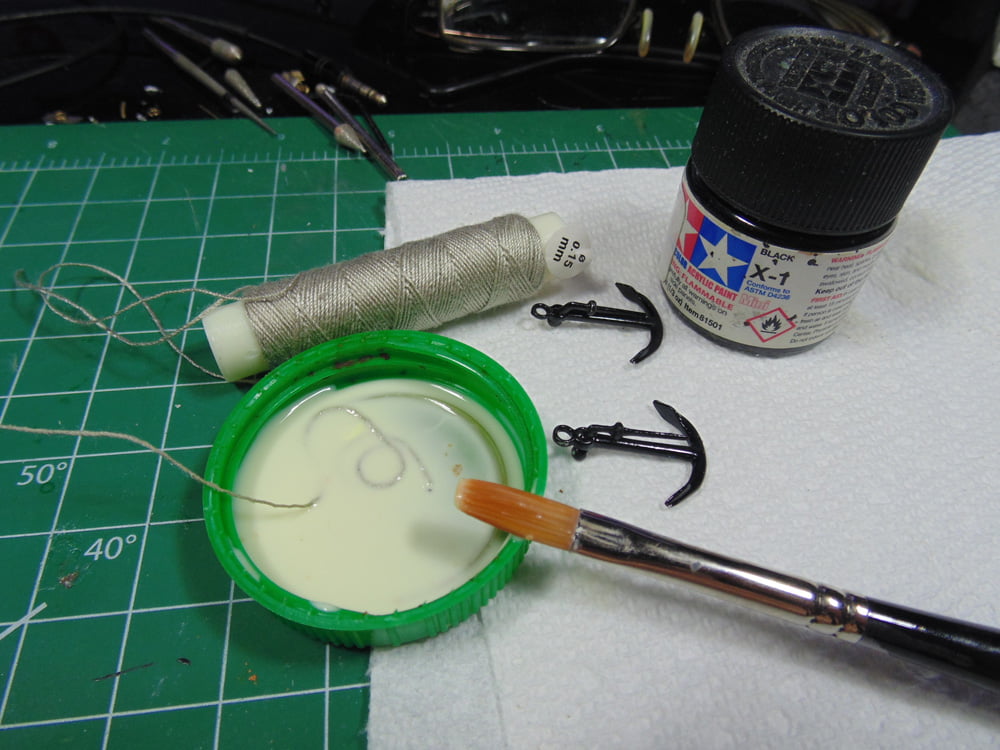
After testing the anchor lashing rope/string when it was dry it would not stay put. Dilute some AK Interactive PVA glue 50/50 and soak your rope/string. To help even more use a hobby brush and paint some glue on the area of the part and let that dry. When the damp string meets the dry PVA they attach much quicker. Now you can wind the string after it dries in that spot and use your moist hobby brush to help it move easier. This also cuts way back on the fuzz of the line.
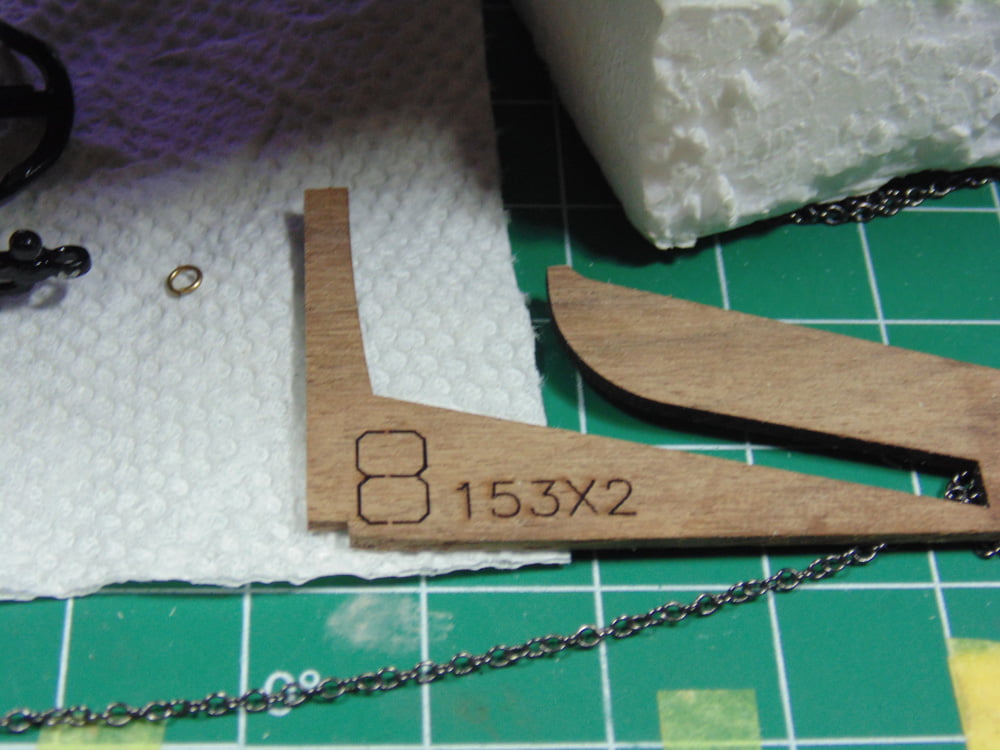
Here’s a Pro Tip. Be mindful of these parts. Yes, it looks like an 8 and being at the very corner can be easy to miss. This is why I mentioned in a beginning article that you should never throw out anything until the build is complete.
Here’s another tip, use a rounded Excel Hobby Blades File to form a gully in the part. The anchor will not only fit more snuggly and adhere better, but looks more realistic. These heavy anchors always dug trenches and often had to be replaced.
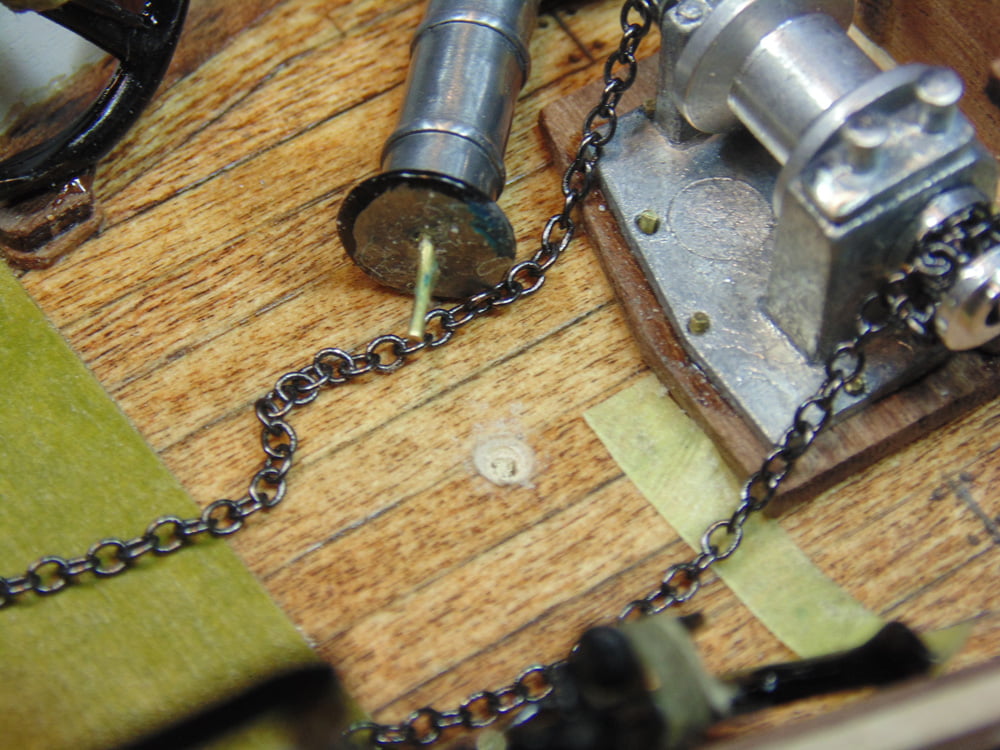
At the end of Part 12 I placed the anchor chain guide metal part. The part has holes for the deck bolts, yet no parts came in the kit. Here’s a tip, take your 1mm drill bit and core out these holes free of the cement. Next use a sharp blade and roll it over some of the 1mm brass rod which does come with the kit. You’ll only need half a dozen 2mm bits.
To make your life considerably easier use a slow curing BSI Cyanoacrylate CA glue INSTA-FLEX + is ideal for this super small and intricate job, giving you time to position the bolts upright and not at an angle. Here’s another tip, to steady yourself, hold your breath each time you make a correction… sure works for me.
This next step requires some careful tiny work as well. You need to open the supplied brass rings. The easiest way I’ve come up with is to run sharp Hobby Blades tweezers inside then use a second set to open the other one up. There must be a specialized jeweler’s tool for this, yet not in my inventory. After the anchor and chain are in the loop use the teeth of needle nose pliers to close the gap.
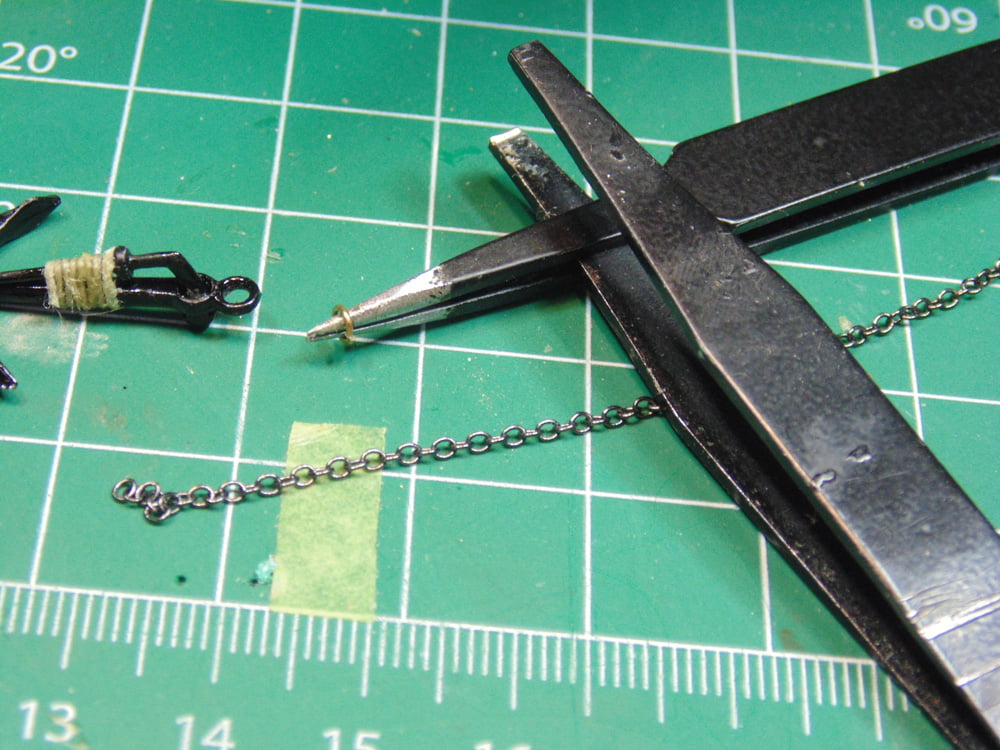
Again, you’ll have to ream out the holes for the swing arms. It’s a good idea to drill an indent into the wood below and glue these parts. Let them fully dry so they stay put and not moving all around when threading the chain.
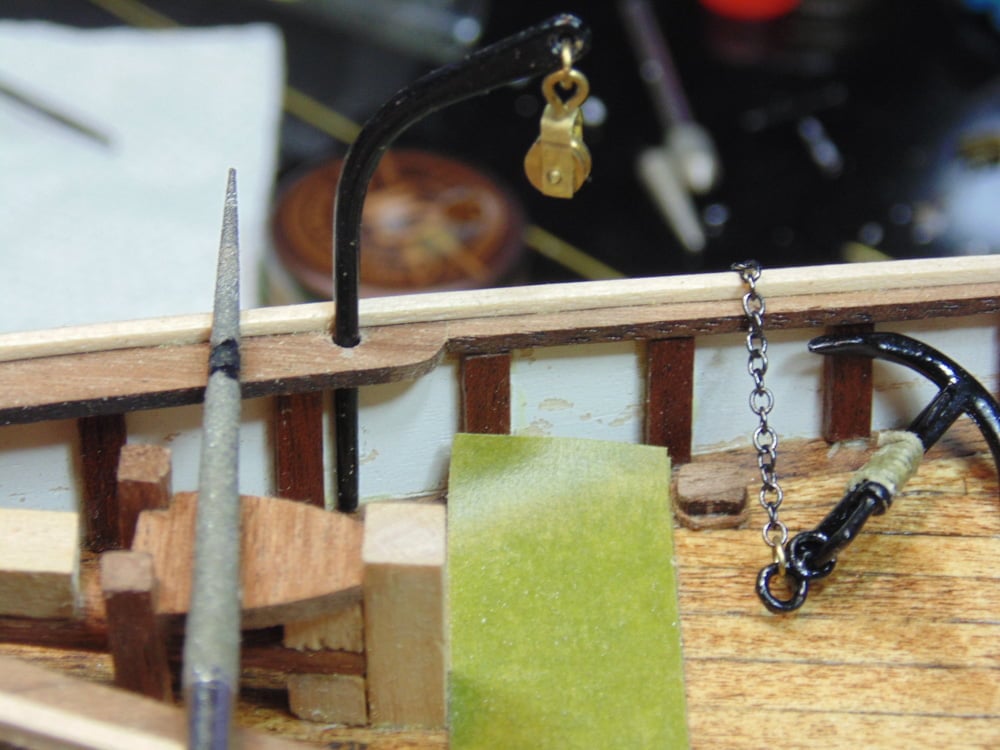
I cut the length of chain in half to make handling easier. After threading the pulley on the swing arm I took some thin wire and twisted on a guide line. Make yours long enough to catch with tweezers after it’s inserted into the sides of the ship.

The sag in the chain at the sides of the ship should go below the decorative adornment as to not obscure it. Take some time to work this look out and then place some tape on the deck to keep the chain that way while you’re doing the deck work.
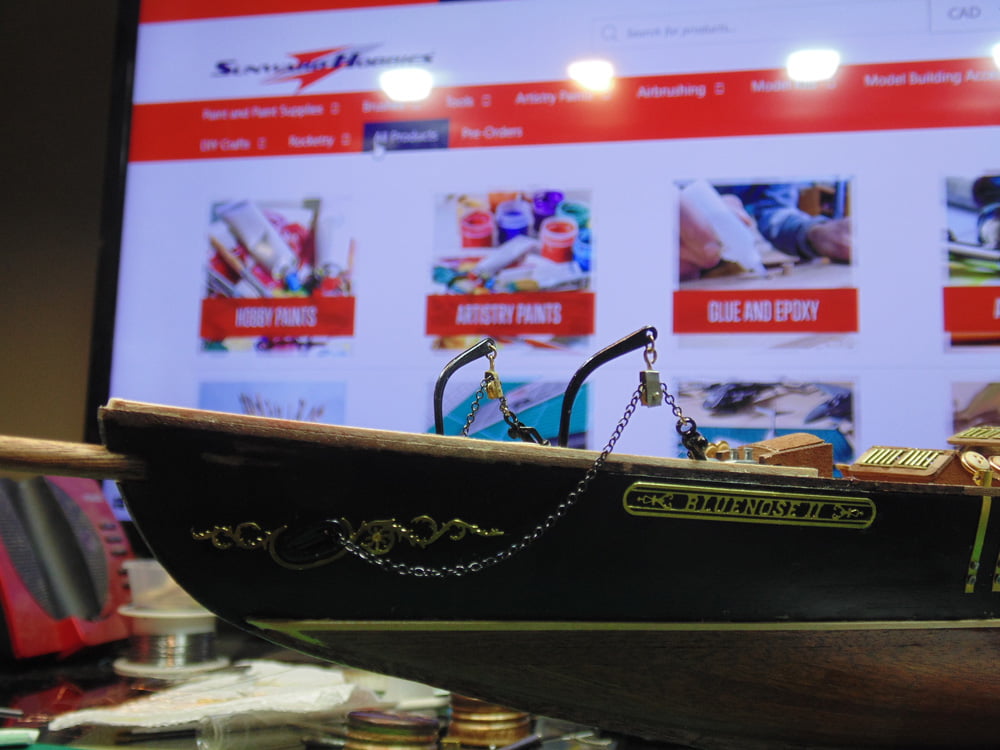
I decided to double wind this chain for a better look. After that you’ll need to carefully drill out the holes at the back of the machine to clean out any excess glue.
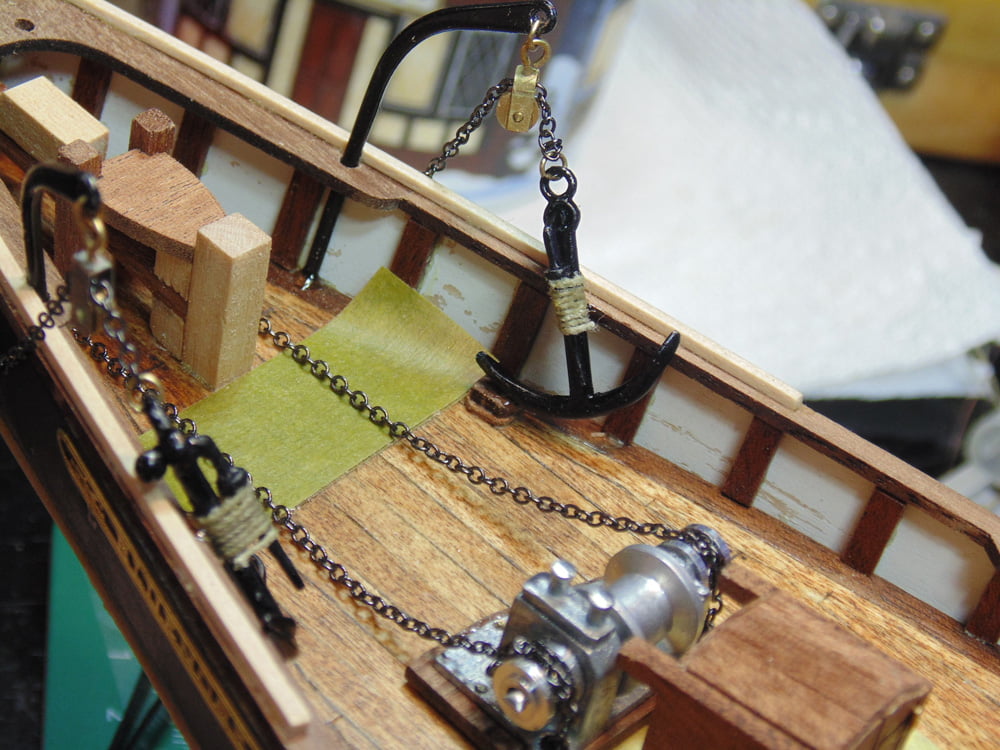
Then measure an extra bit of chain to fit down these holes. Bring the chain back up and snip it off then add a touch of glue to the ends and run them back down the holes.

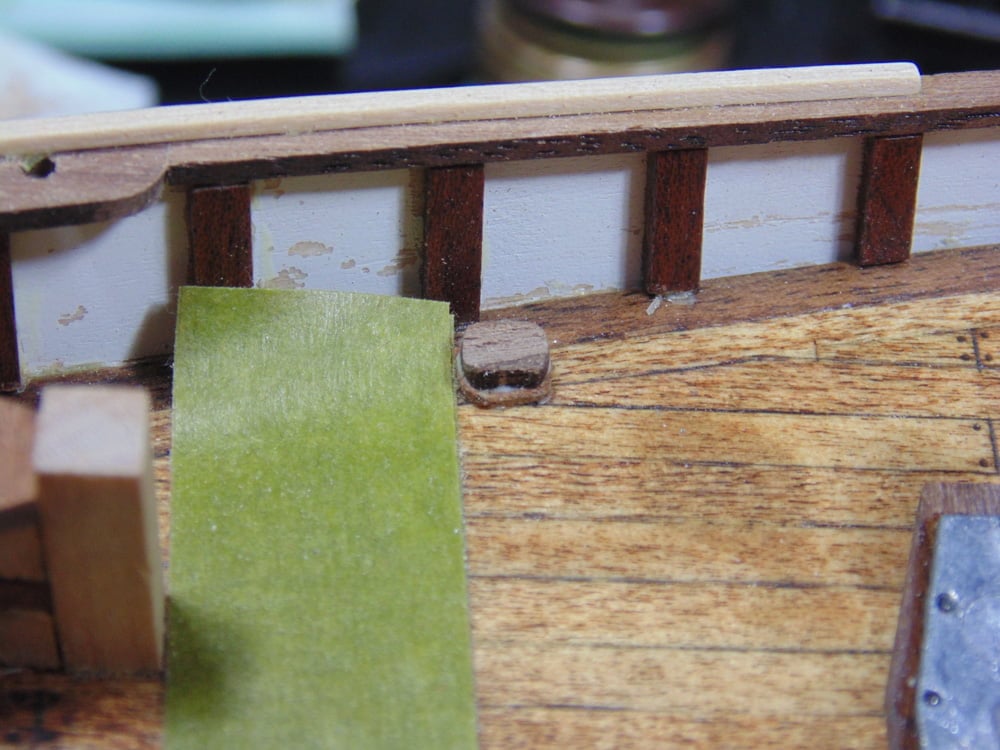
When adding the forward vent stack, it’s always best practices to pin the metal part. Also, you’ll want to make an indent so the glue has more unpainted clean wood to stick to. Use some measured tape as a distance marker for placement.
If I can get away with using extra glue, which might seep out, I’m all for it. If the glossy look, however, bothers you then paint on some flat clear coat to mask it. It’ll be rare if you ever notice it again.

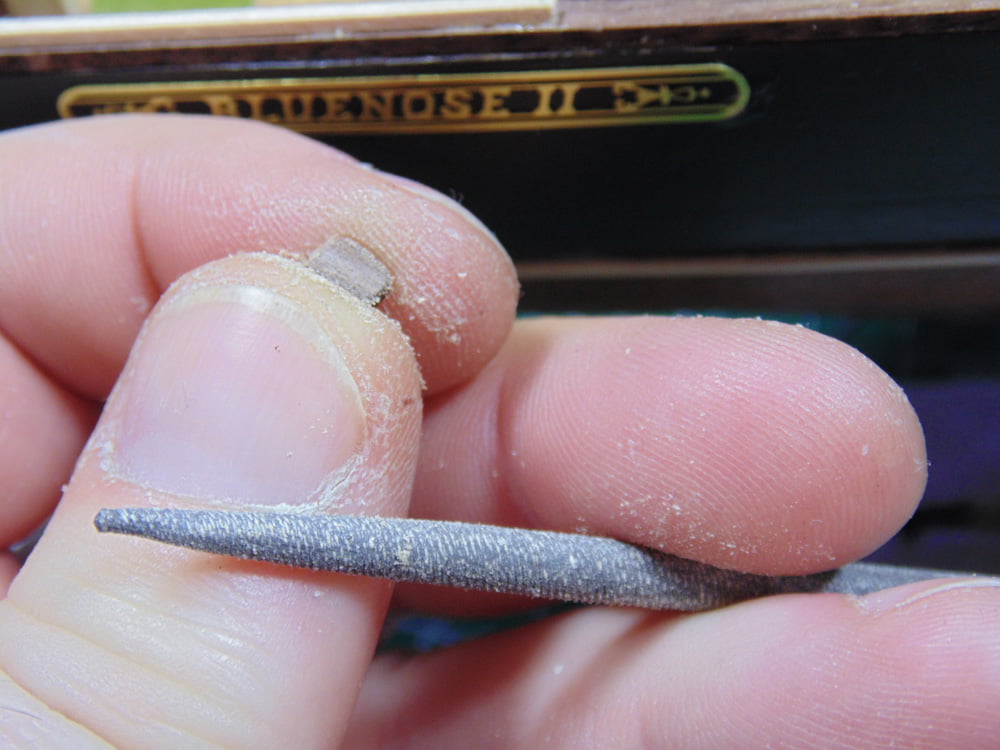
The posts for the aft guide rails need their eyelets drilled out. Here you can see the flash in the holes of the before version. At the very least you must do this or the cable will give endless trouble threading it. You may also opt to polish them if you decide to remove all the outside flash. Be prepared to spend many hours on this.

Another must thing to do is file down the pins of the posts. These are way too thick and will never fit in the suggested 1mm holes needed on the deck rail. Put them in a pin vise for easier handling and spin the pin on a flat file. Get them close to that 1mm then set the parts aside.

For the holes in the rails here’s some advice, get a set of head magnifiers or a stationary yet posse-able magnifying glass. These holes have to be dead center or the drill will pop out the outside or inside. Next, take a needle and make a guild hole, again dead center, and carefully roll the pin around. Then use a slightly thicker puncturing tool to make a slightly wider guide hole. This will make accurate drilling much much easier. It’s a very delicate procedure so take your time. Use measured lengths of tape to get the correct spacing for the pins. Now you can snip the pins to the suggested 2mm or 2.5mm length and fine tune their width for each hole.

After you make your loop in the braided wire, I strongly suggest adding a drop of super glue and clamping it tight with your tweezer. This allows winding the steel wire easier and tighter. You definitely want gloves on to grip this material.

By using a “second hands” tool at one end and a clamp at the other you can keep the tension on the cable. This will make winding the steel wire much easier. By cutting off six-inch lengths you won’t have to fight with the entire roll of wire constantly having to be untangled. Use two tweezers to pull the wire tight around the braided cable.
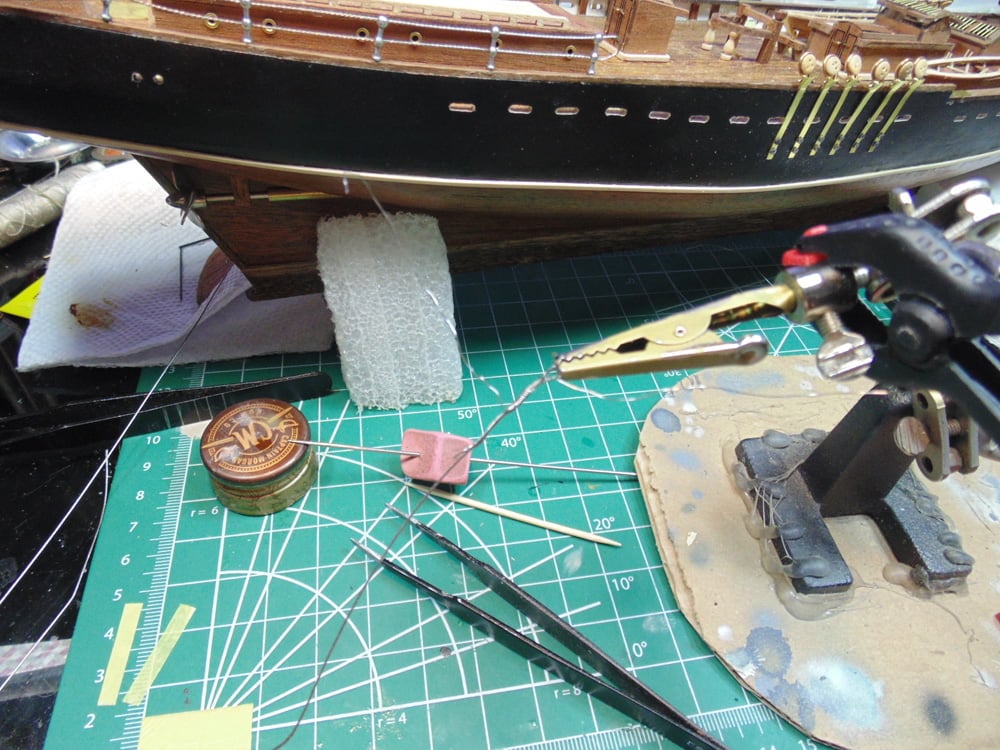
Lastly, you’ll have each end needing to be made into a loop after the cable is threaded into the posts and steel wire wrapped around the ends. Then you slip both ends in an open eye hook and push that into the aft drill hole.
The end result may be a bit wavy, pun intended, but it’s a replica. Both wire types come in a coil. Try stretching the coils out. In the future, after other parts are added in this area, I’ll be snipping the forward end turns off after adding drops of CA glue to each eyelet. For now, though, it’s in place and stable. There’s a great deal of work to be at the stern and I don’t want to risk that glue coming free.
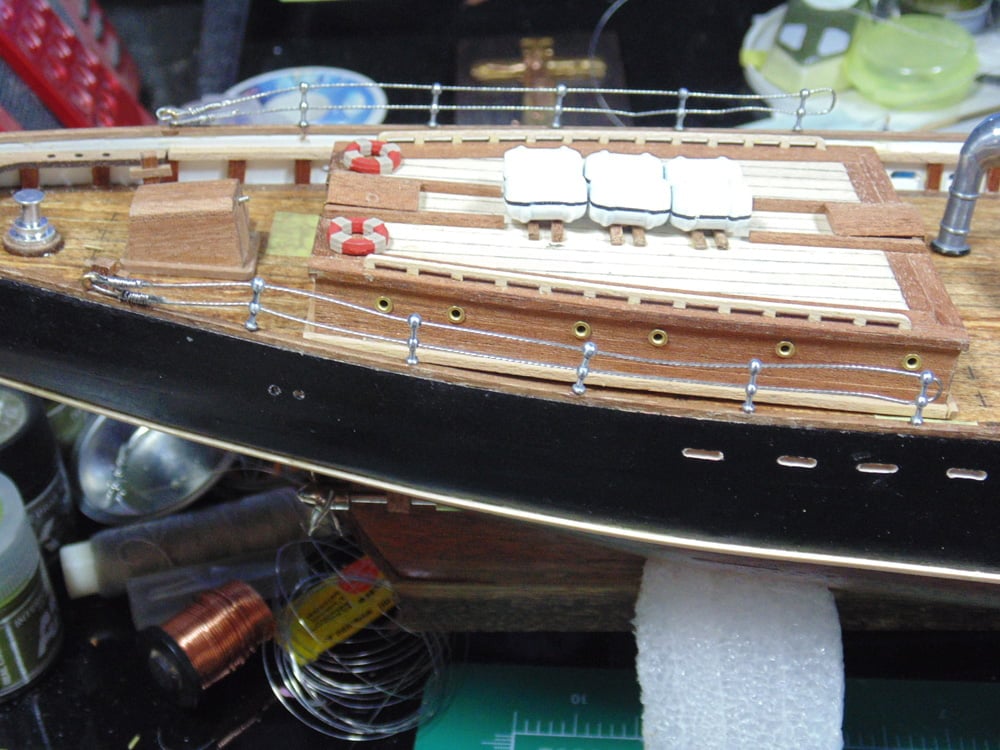
DSC03229 Aft hand rails in place
Thanks again for taking the time to follow the build. If you have any questions about Artesania Latina products, the techniques or tools used in this article, please feel free to ask the staff when you pick-up or place your next Sunward Hobbies order.
If you have any questions about the products used or the methods in this article, please feel free to ask the staff when you pick up or place your next order from Sunward Hobbies.
H.G. Barnes is a former voice-over artist and retired sales and marketing professional. He’s the author of two large volume science fiction adventure romance novels with many more in the works. For well over 40 years he’s been building scale model replicas and now does commission work for clients in Canada and the USA, plus completes projects for companies in Asia and Europe.
Currently H.G. is involved as an Associate Editor with KitMaker Network’s Online Magazine Channels