Artesania Latina Bluenose II Build – Part 11 of a Series
In this Sunward Hobbies tutorial, I’ll be continuing with Artesania Latina’s Bluenose II build with Part 11. Previous Part 10
In this Sunward Hobbies tutorial, you’ll get to see some very nice detail added to the 1/72 Artesania Latina “Bluenose II”. I’ll show you some time saving tips in sections 28 to 32.
The carpenters and tradesmen who lovingly restored the Bluenose were master craftsmen. Hopefully I can showcase this on the upper deck work.
When you begin the access ways on this model you’ll need to add batting on the bottom to align it up. Make certain the edges are sanded square.
Obviously, the tops have to be clad with Sapelly wood. Here’s a tip, lightly remove in a “V” shape the underside or upper side of the stripes with a Excel Hobby No.11 blade. They’ll conform much better and reduce the time spent sanding.

The instructions call out to add basswood stripes to the bottom. Here’s a huge tip, lightly sand each surface before or the different wood types will not conform properly.
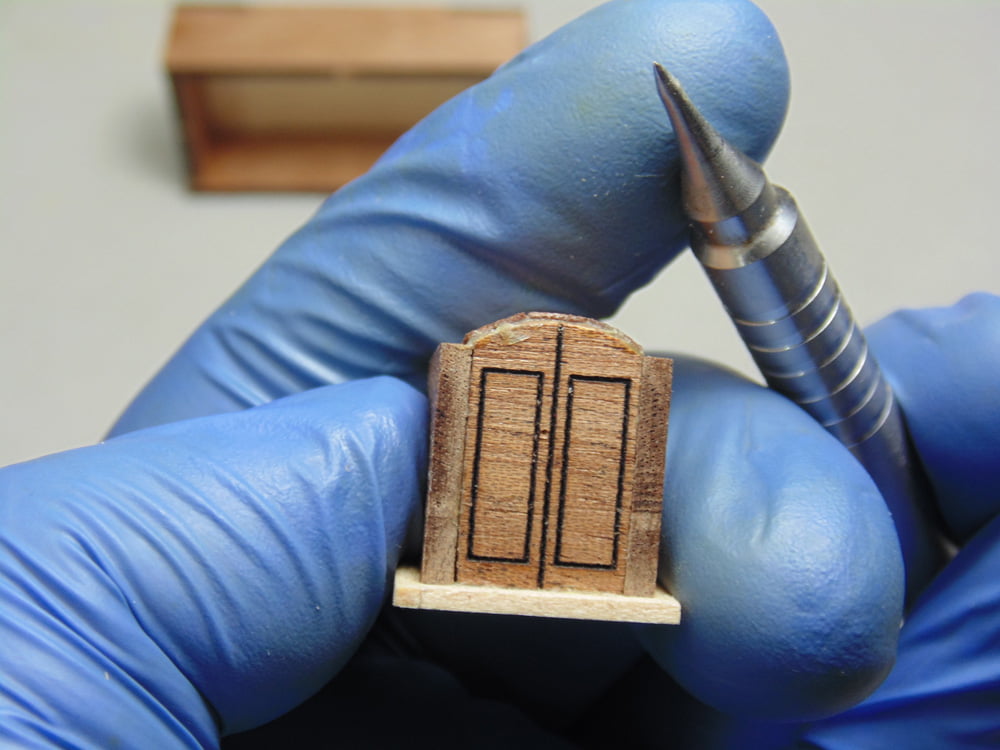
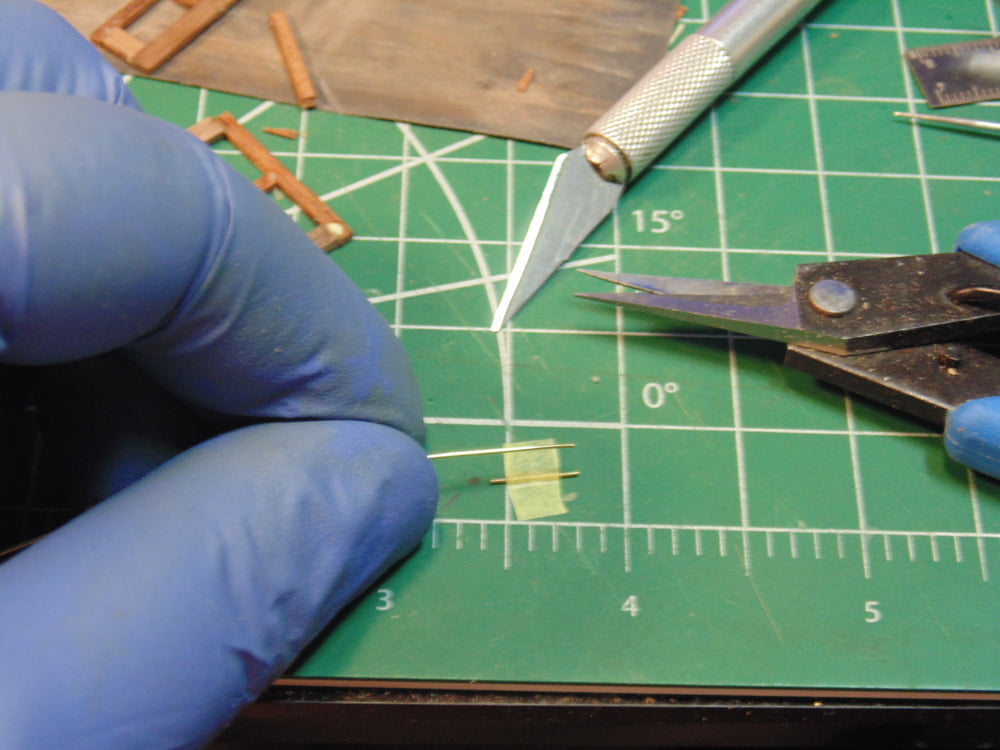
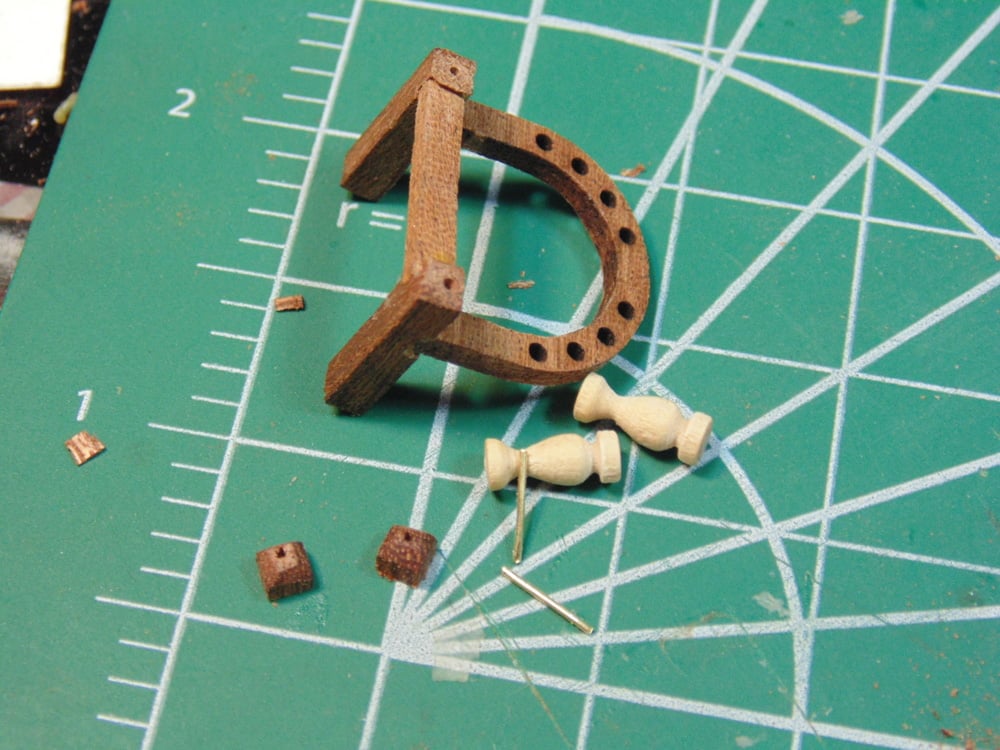
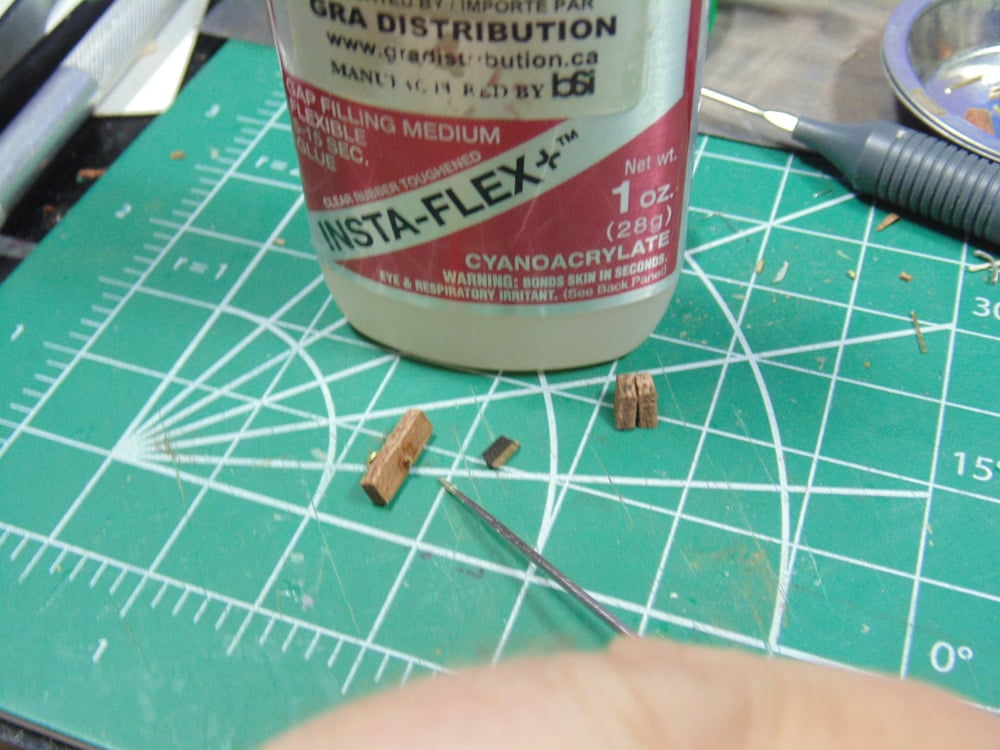
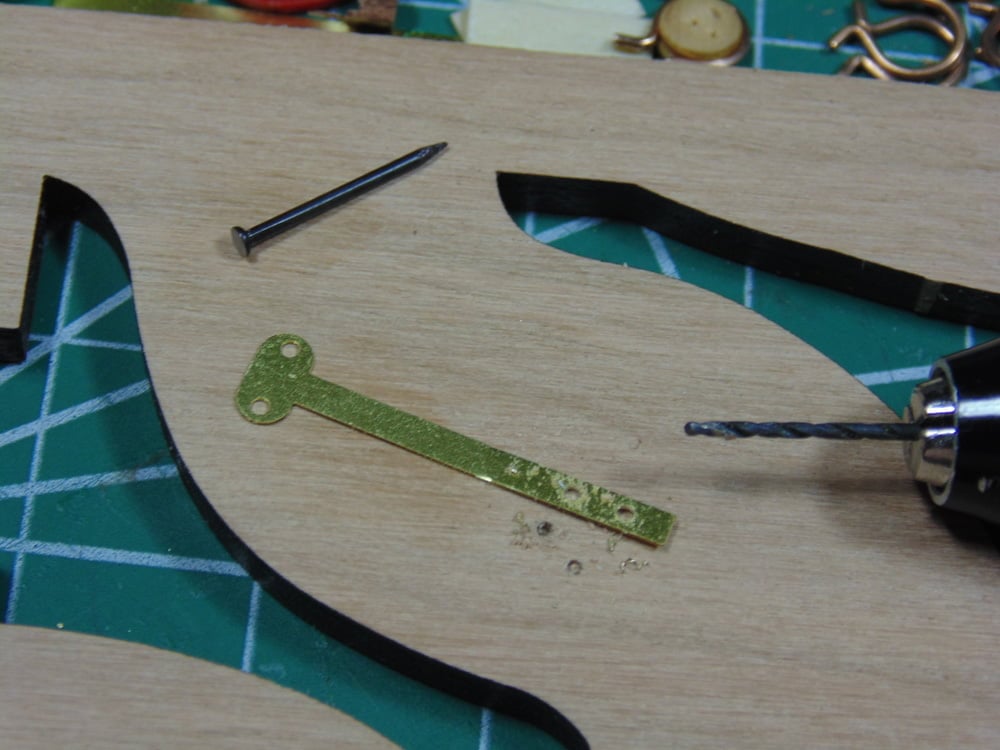
When adding the door handles it is wise to use a pointed edge tool. Pin-prick the hole and gauge the depth.
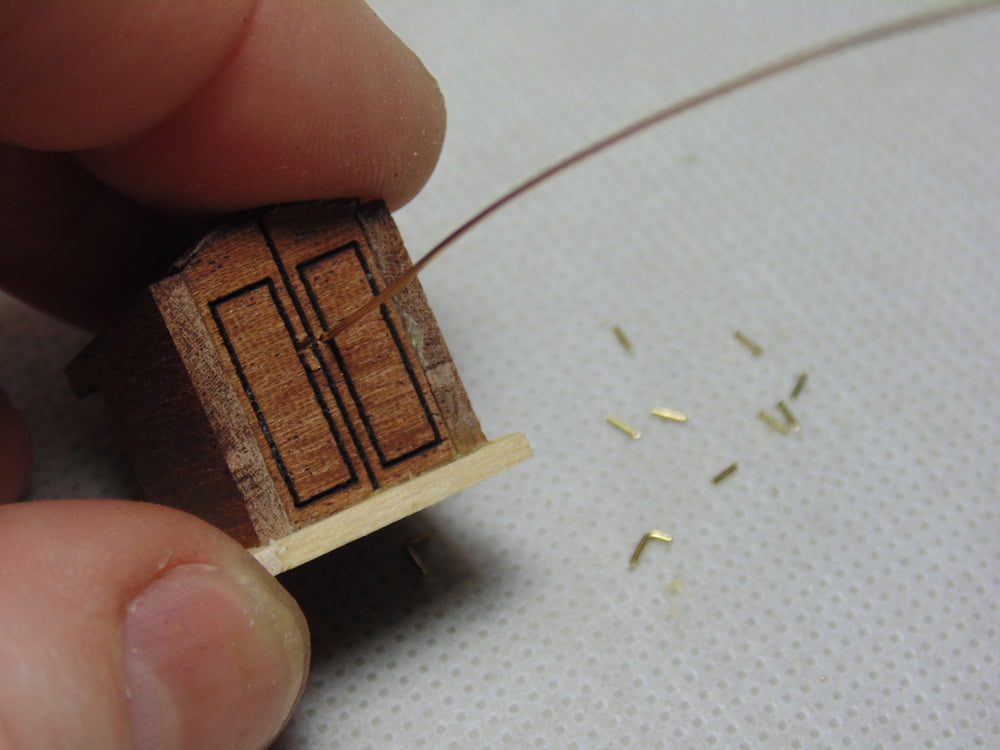
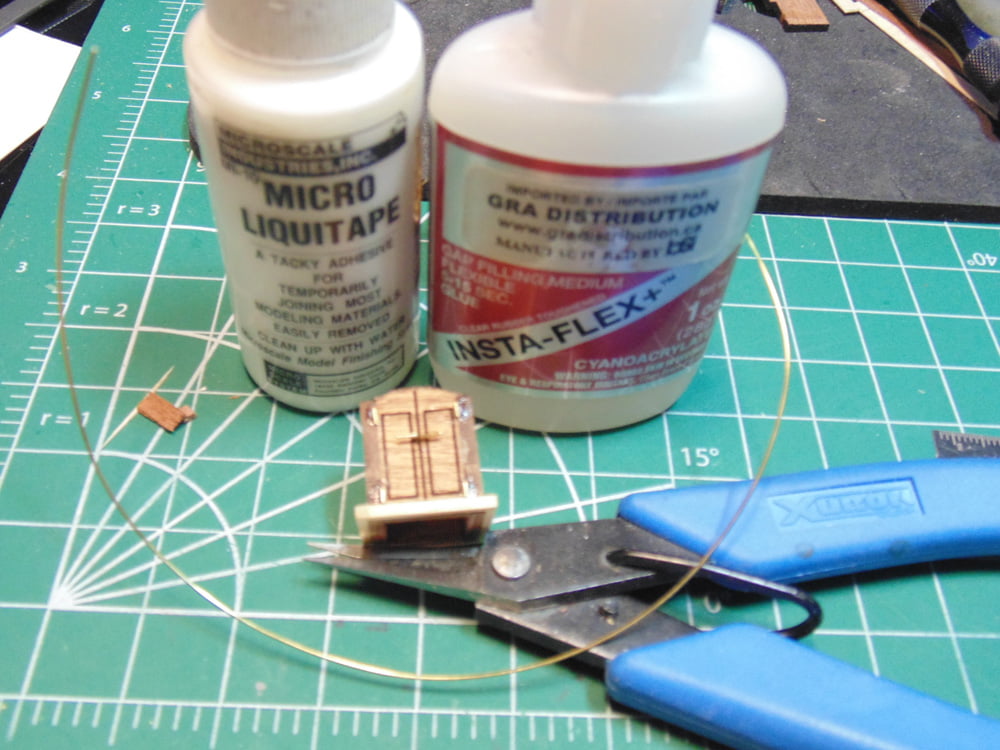
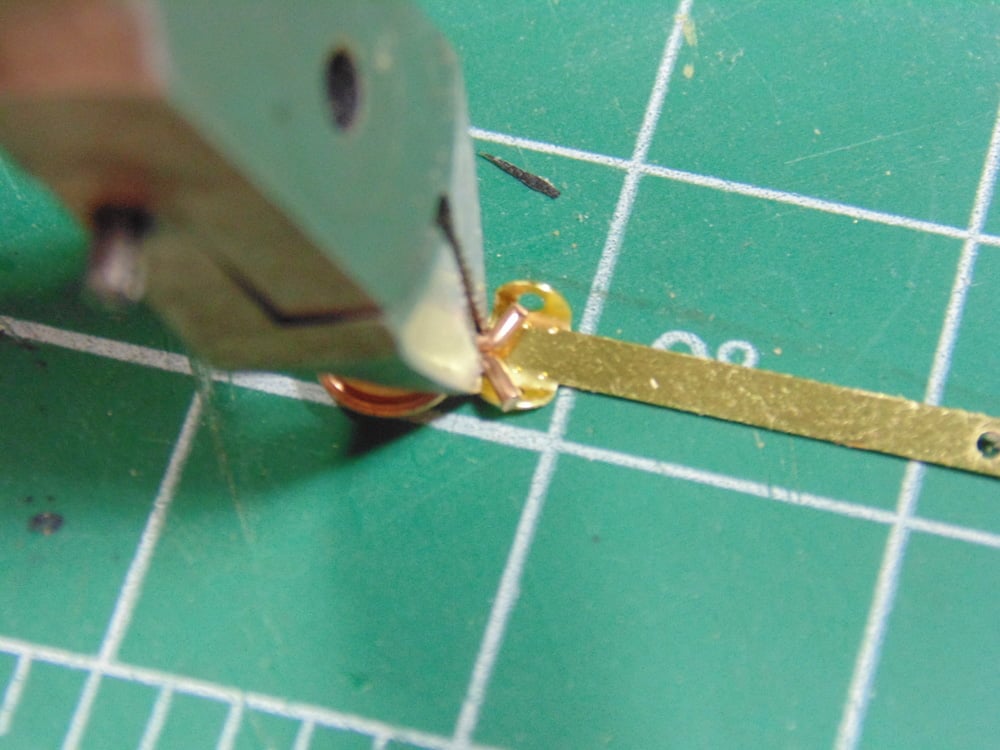
Brass or any metal on wood is a challenge to connect. Here’s another tip, Sunward Hobbies has a great selection of BSI Cyanacrolate CA and PVA glue. Use a tiny dab of Microscale Liquitape MI-10 to get the part in place and then follow up with CA. Use Xuron photo-etch shears to make a clean cut on the wire.
Here’s another tip, while these parts are laser cut its still wood and wood shrinks, thus changing shape. Test fit all the parts in each subsection and sand. Roughly put them together, like a puzzle, to see what needs correcting.
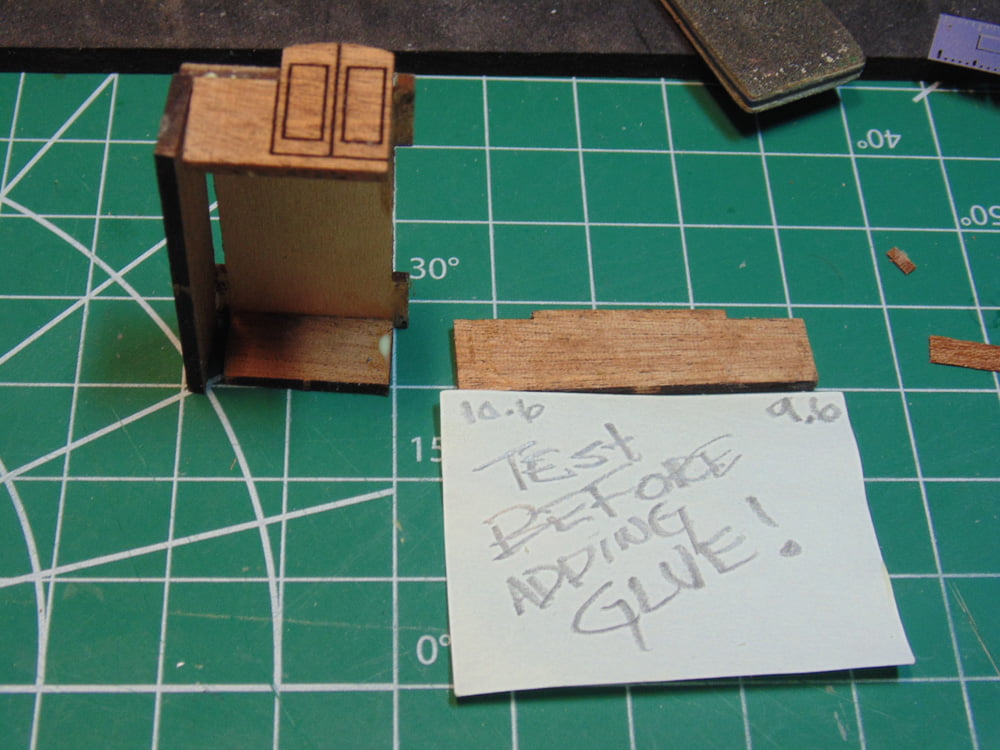
Unfortunately, most of these subsections had warped. That is not a fault of Artesania Latina it’s simply nature. Make sure you get some good quality clamps from the store.
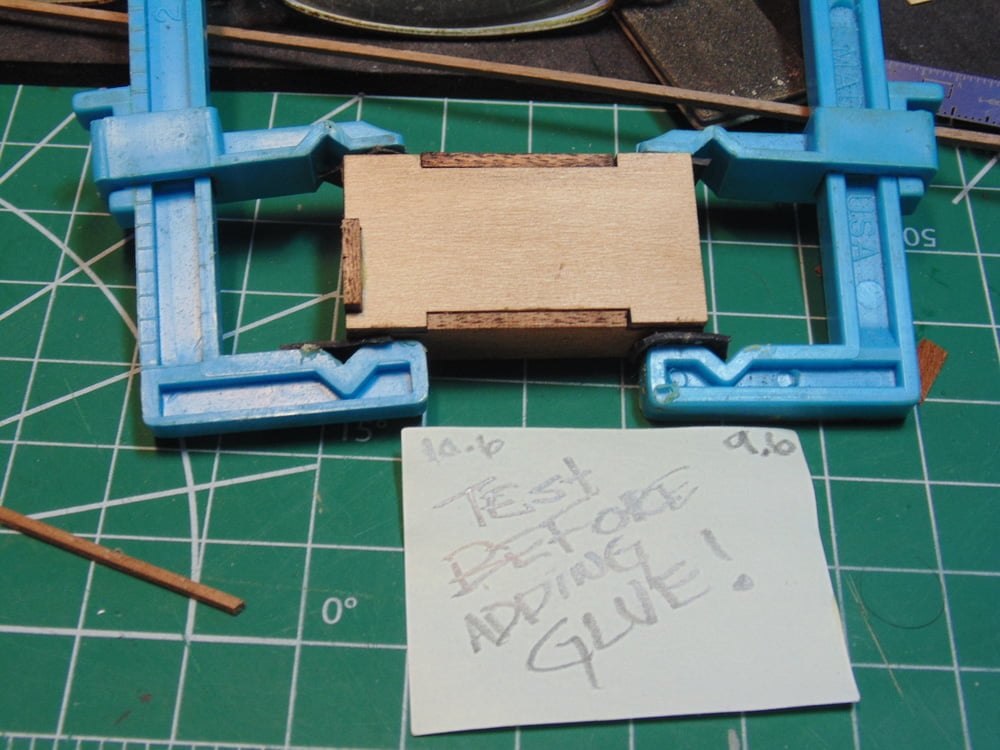
Consider adding some cushioning at the mouth of the clamps. You’ll get a better grip this way, plus there’s less damage to the parts. Here, I’ve added a two-sided tape then the rubber and foam. Just some modeler’s advice.
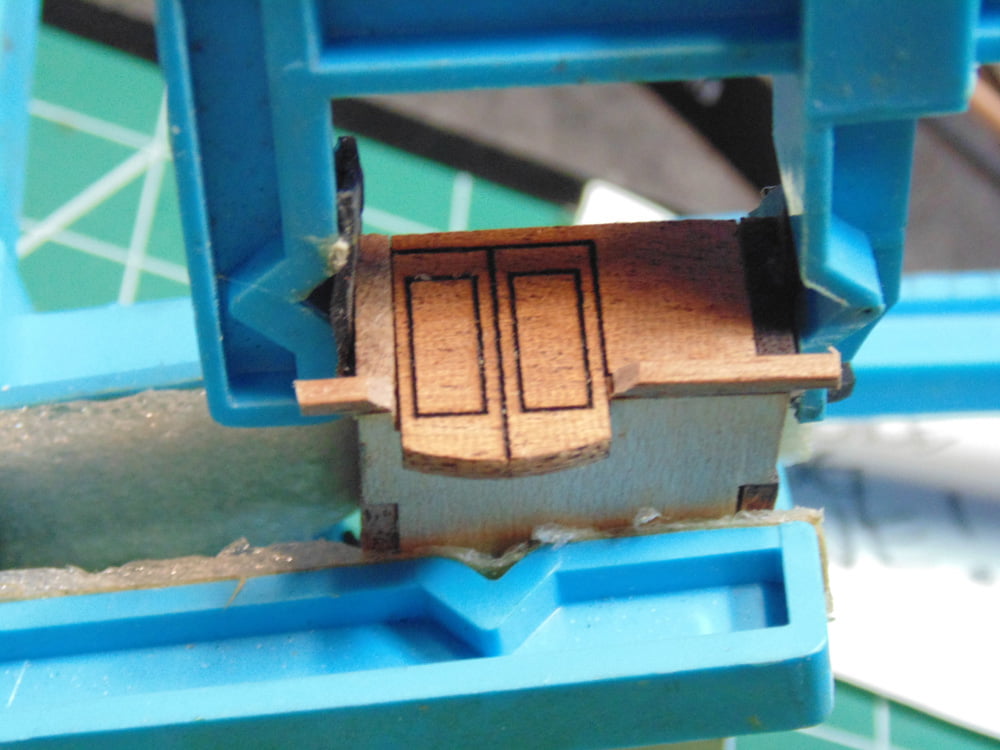
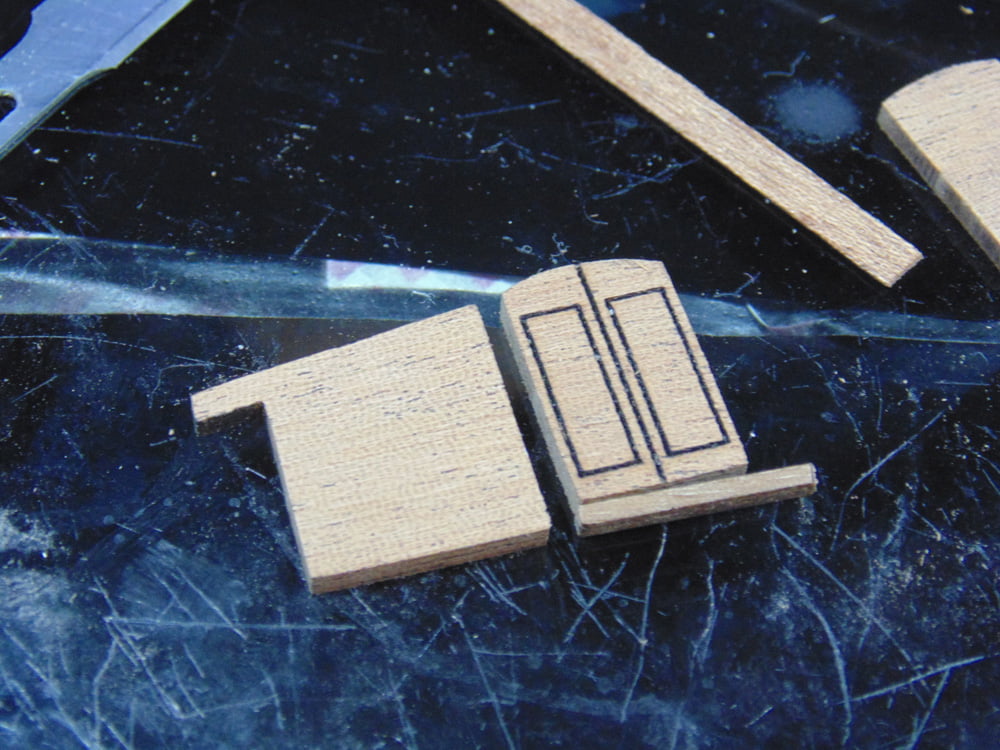
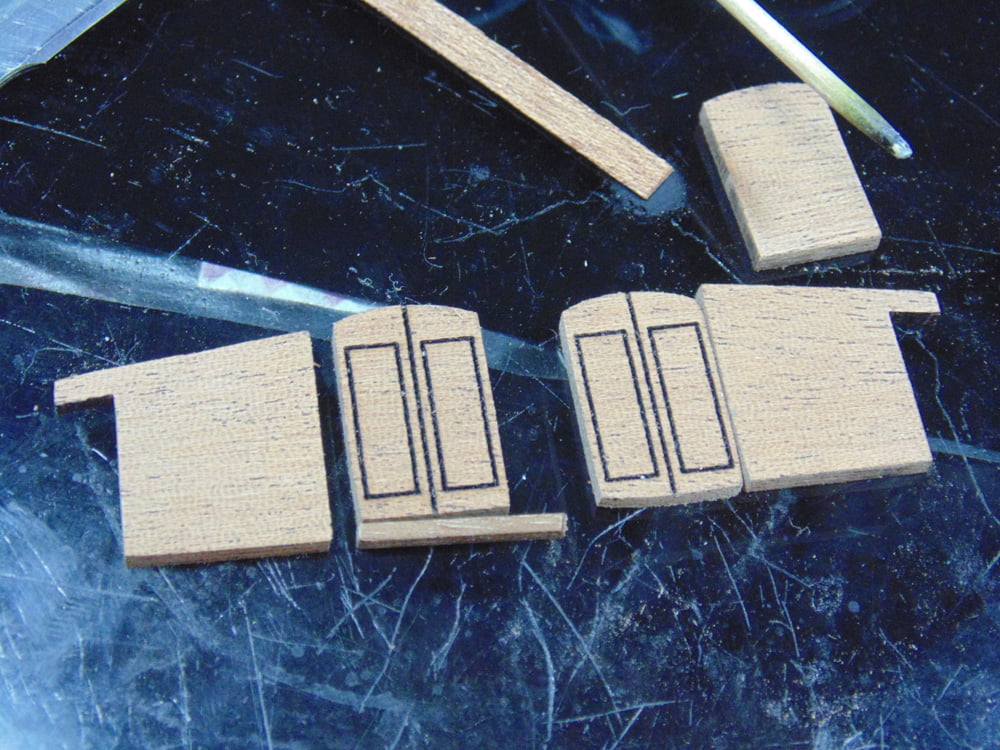
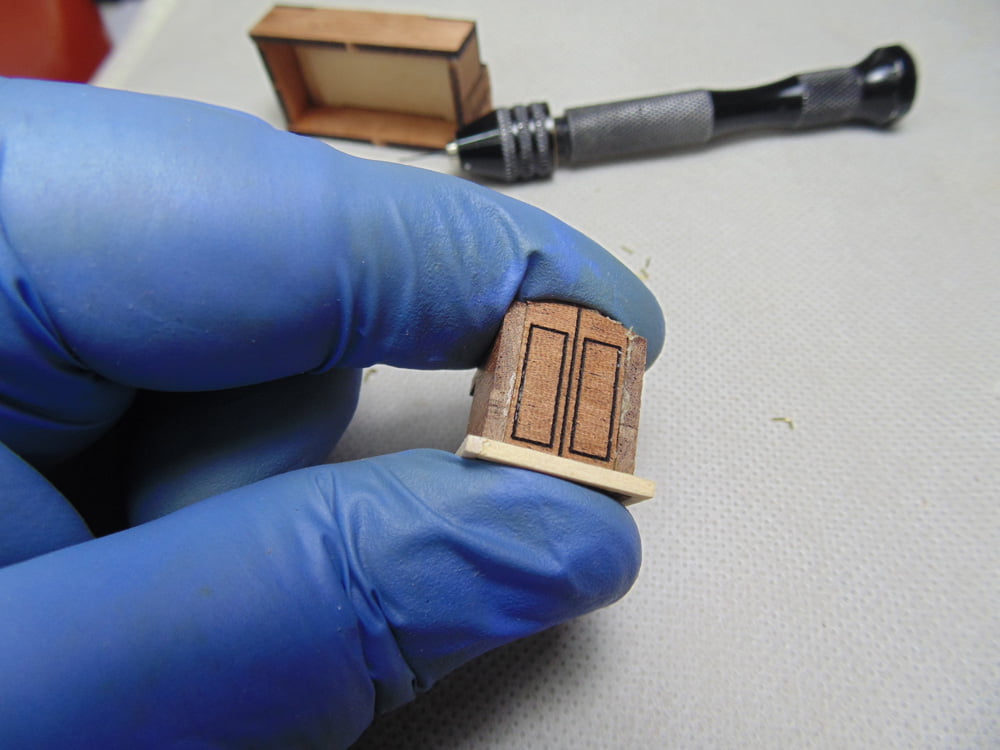
In section 29 the draft houses need to be constructed. The fit was not the best and needed adjusting. Don’t fret about this, just get it close enough to being true because you’ll have to adjust this again.

On the main housing work your edging in a clockwise fashion. This will save you a huge amount of time sanding edges. In this case I only had to fine sand one edge instead of several.

To make it look more linear add the planks from the out side inward then correct the difference.
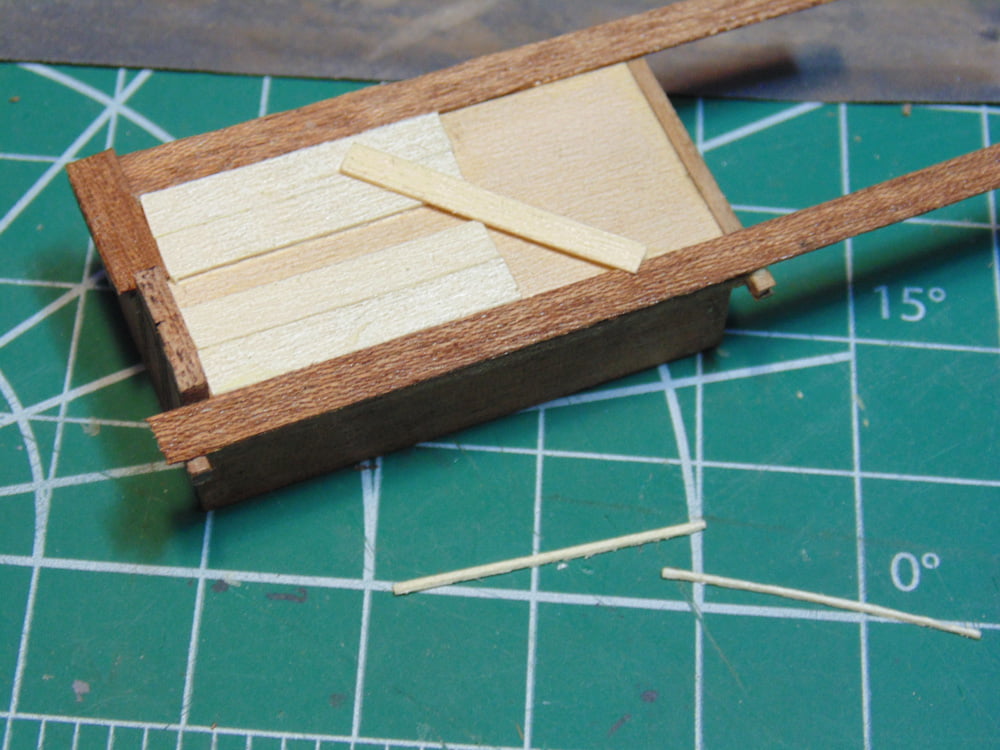
Please follow the previous suggestion about detailed parts and roofing. What you’ll end up with looks very nice.
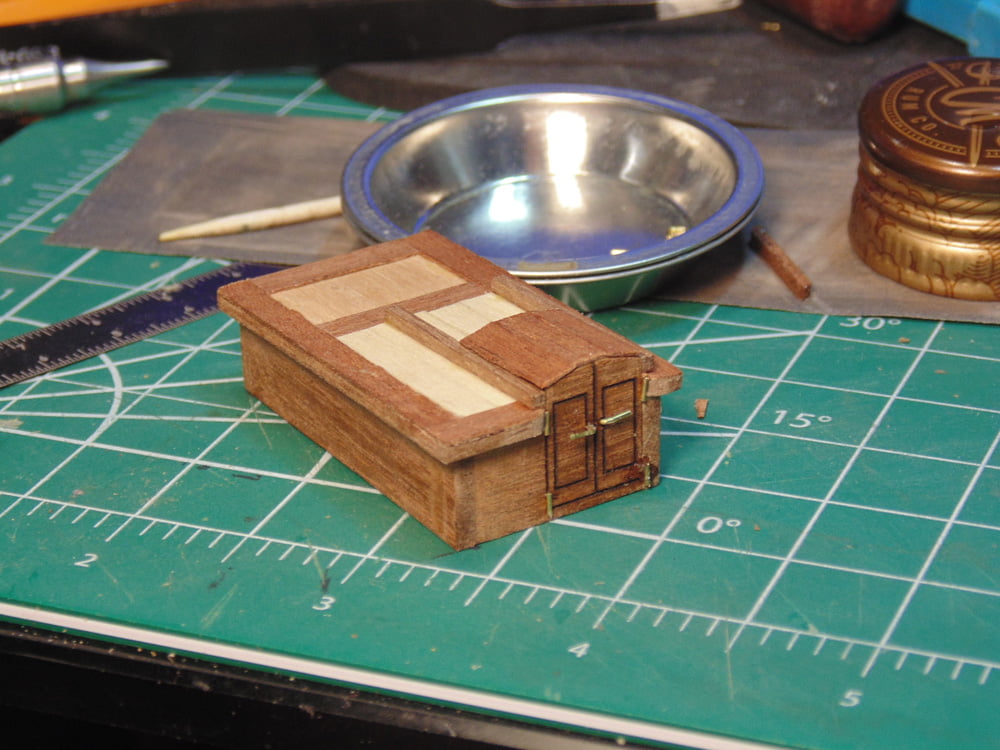
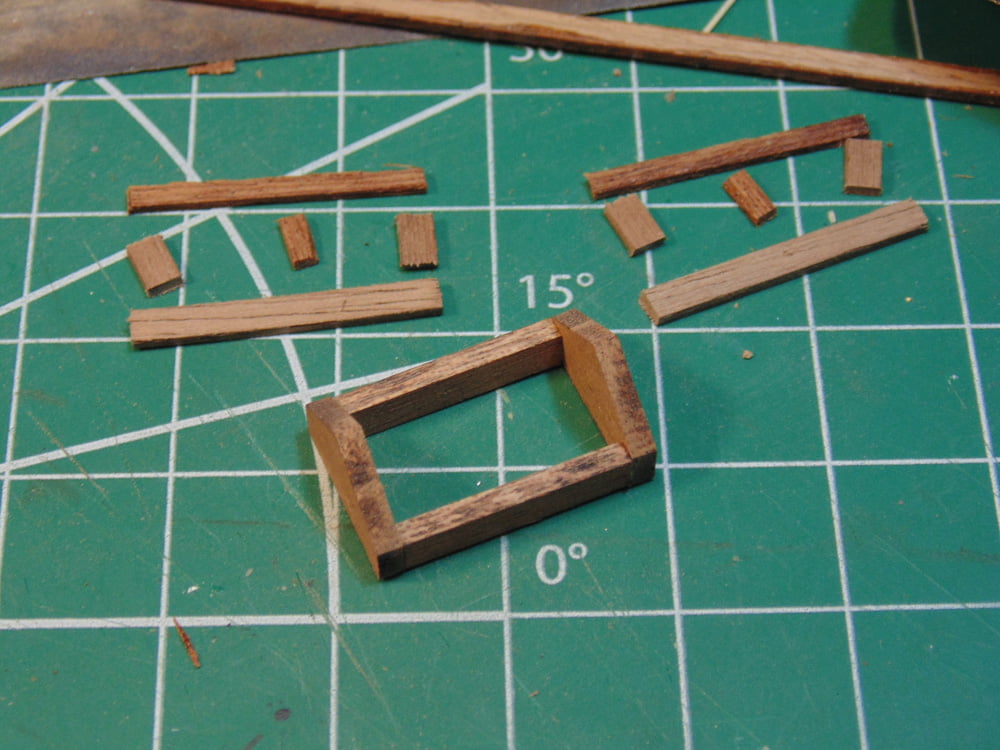
On the opening rooftops, spend some extra time getting the frames squared right. This way you’ll save yourself hours in the next step. Well maybe.
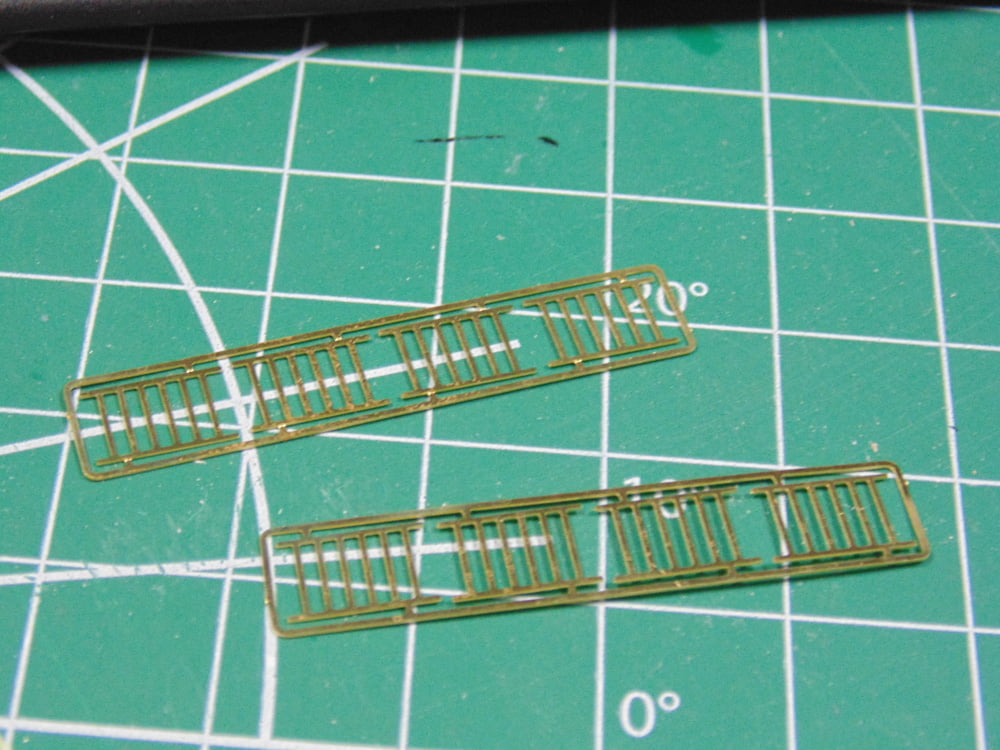
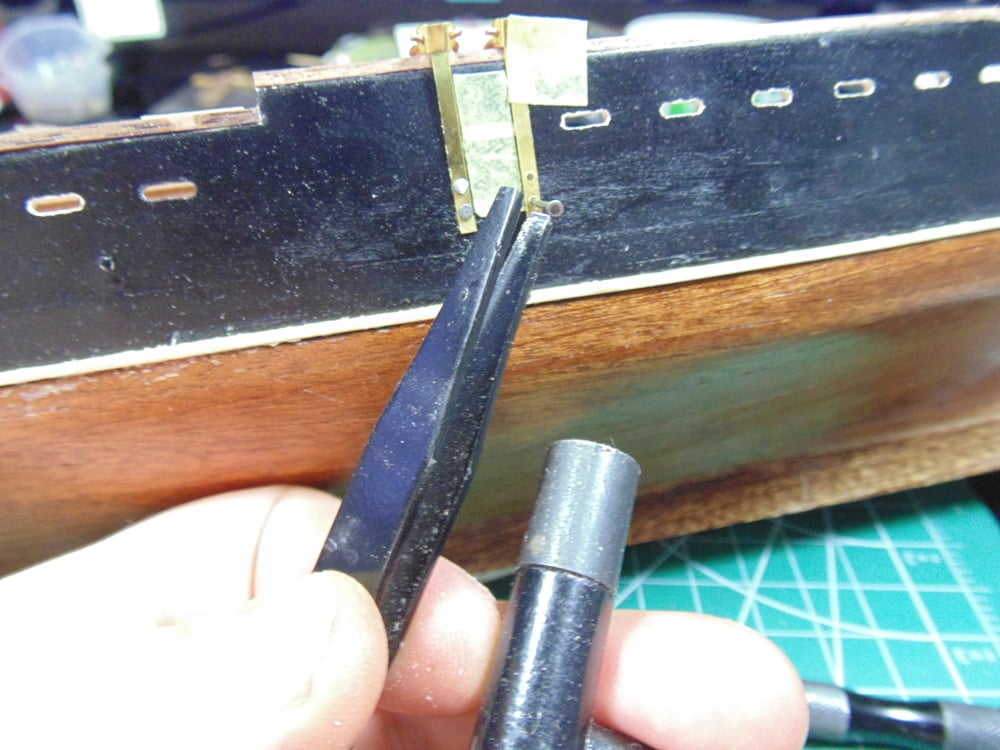
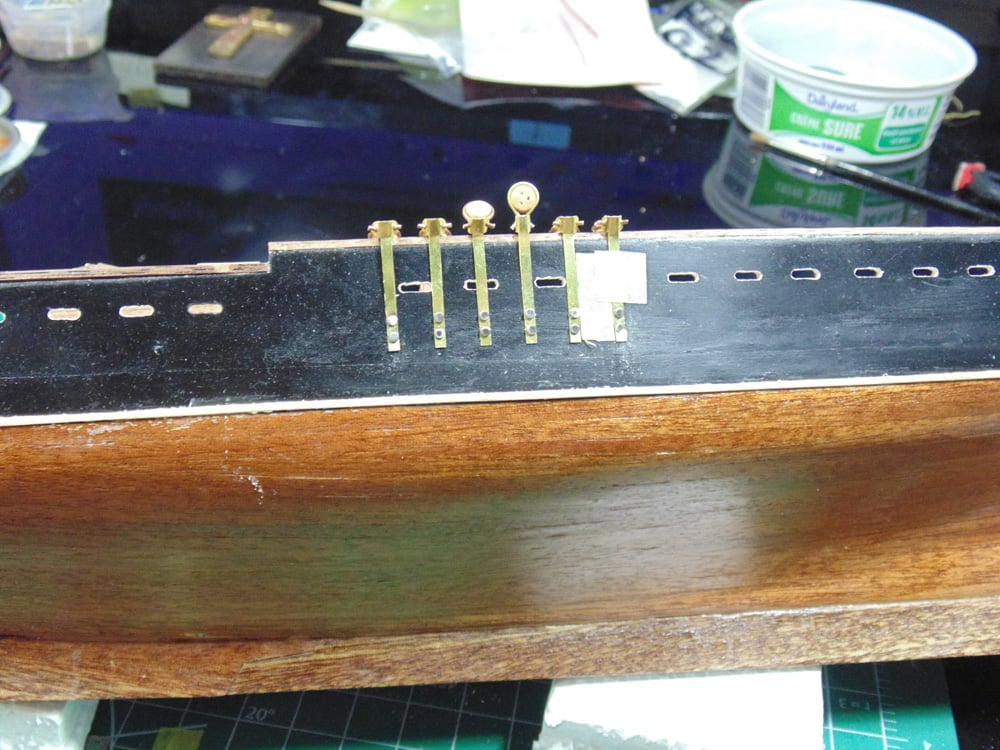
It literally took me an entire 24 hour day to cut, shape, sand and fit the metal parts for these grill tops. But wait! Artesania Latina do not mention in the instructions or the box that they’ve made some photo-etch parts. (Insert expletive here.)
The braided wire used for the roof openers was a challenge to even work with at six inches and frustrating at half an inch. Consider coating some string line with CA glue then shaping it.
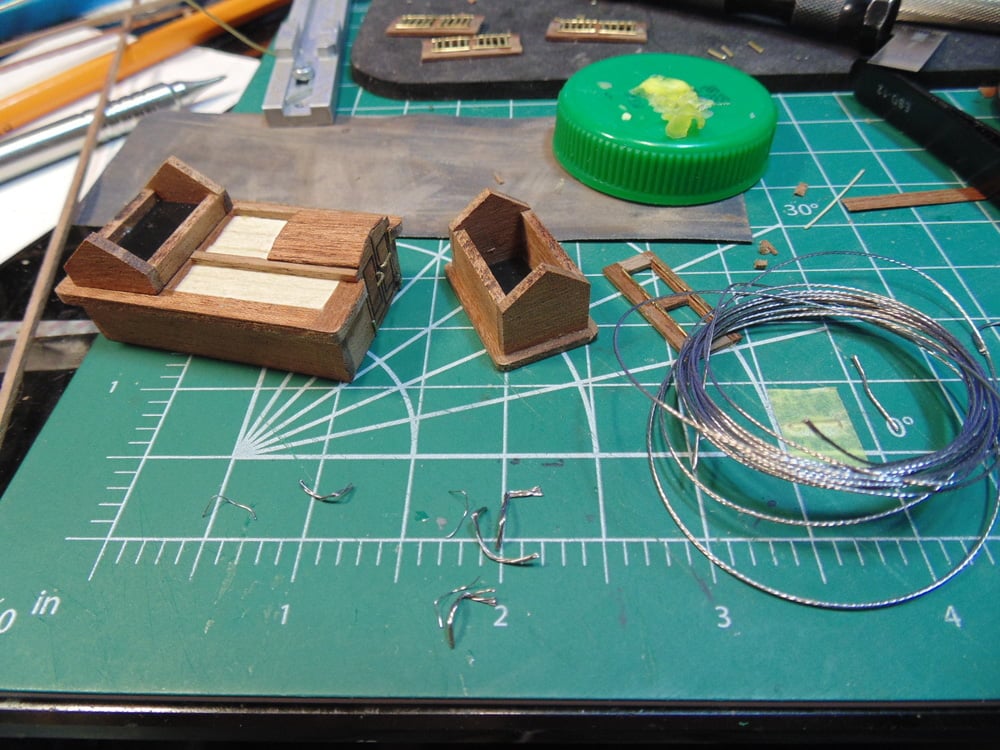

It’s passable and organic but not to my standards and thus will be changed later. You’ll discover why soon.
The parts fitment on the wheelhouse was warped. Use some strong clamps to manage that. My advice is to not over sand the edges since they will be clad later.
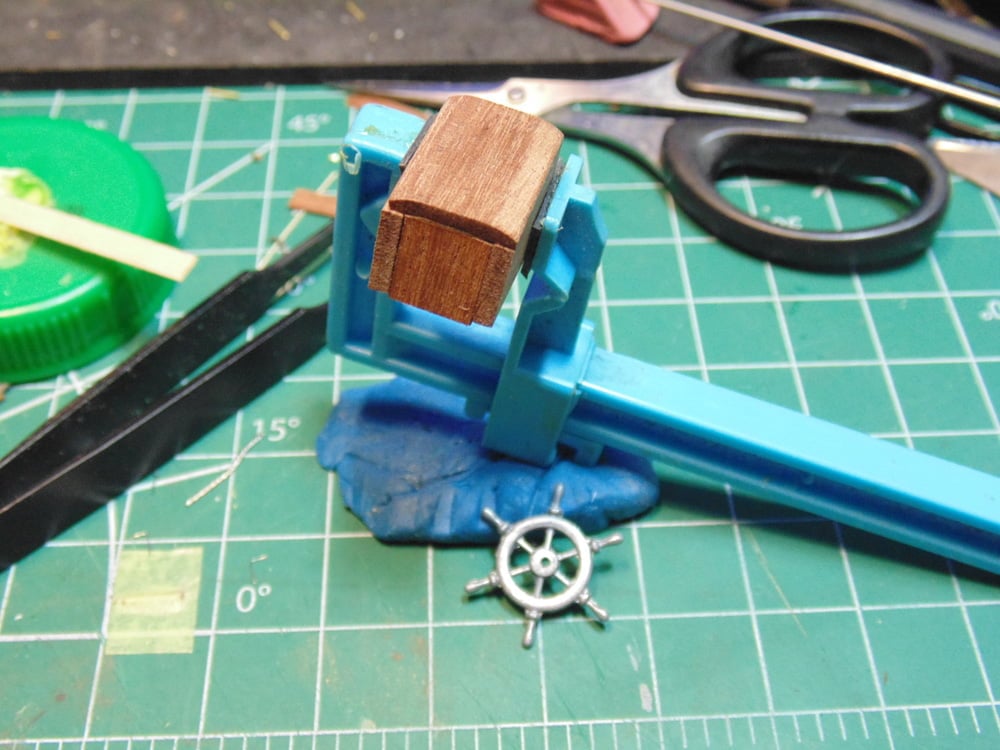
On this particular kit there was metal flash in the steering wheel connecting hole. Please consider buying a set of reaming tools. Sunward Hobbies have a great selection of tools to overcome issues like this in your build.
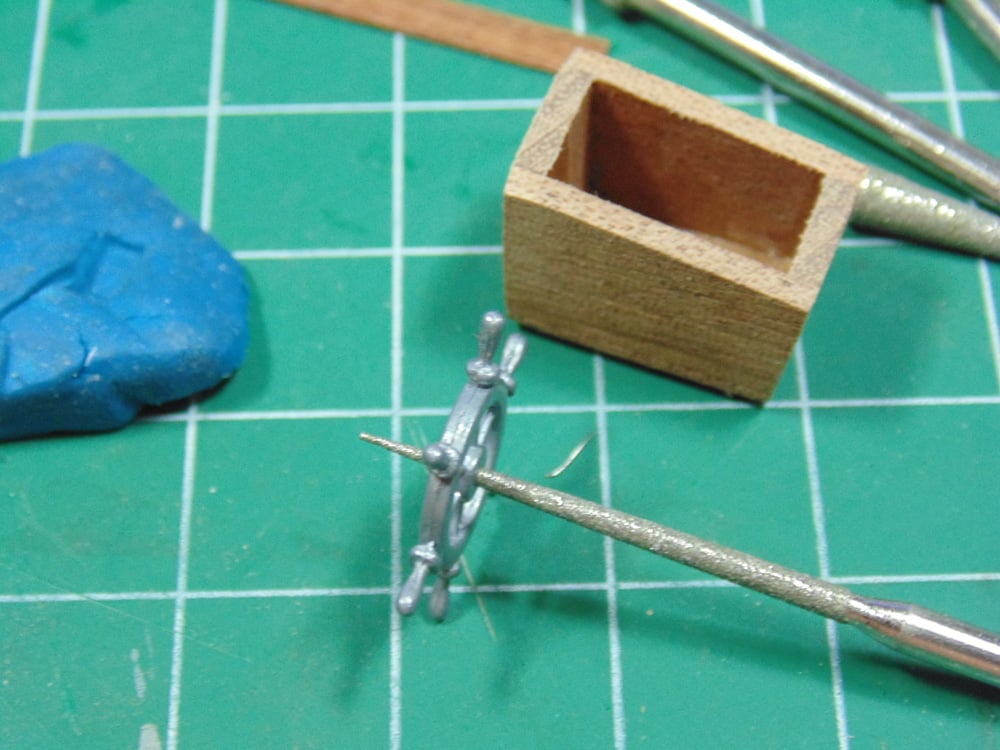
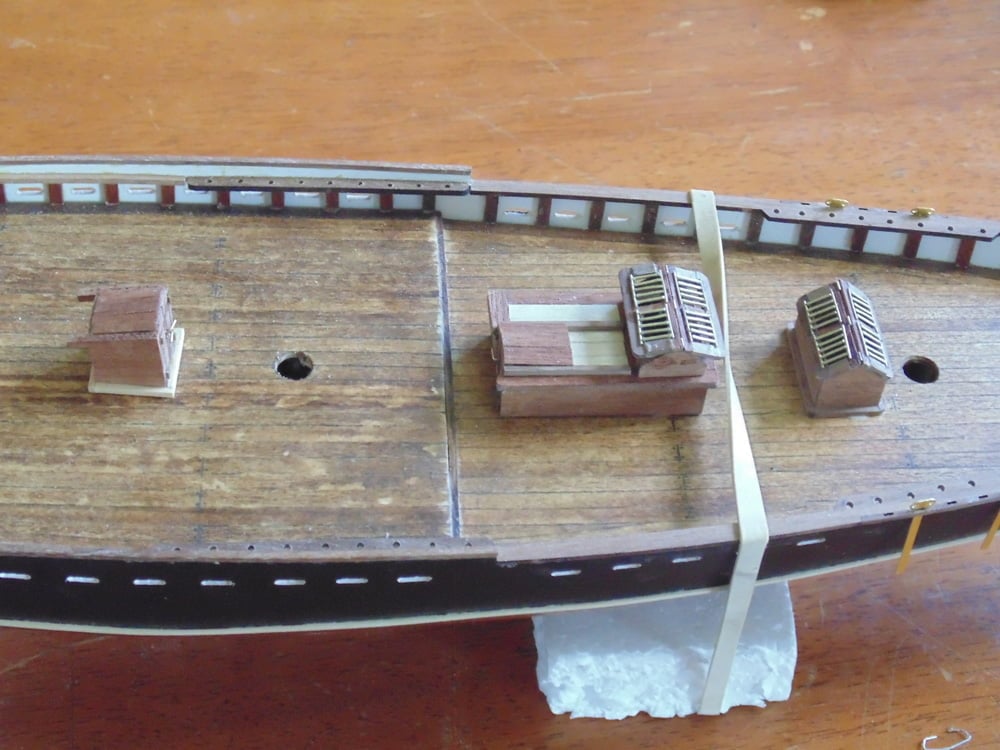
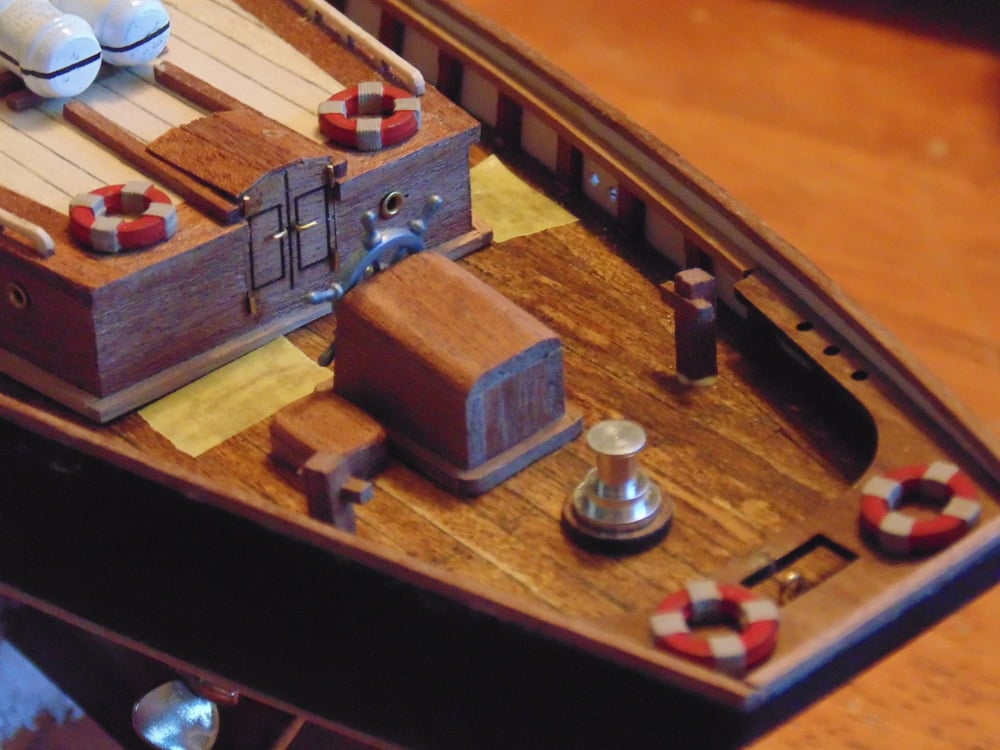
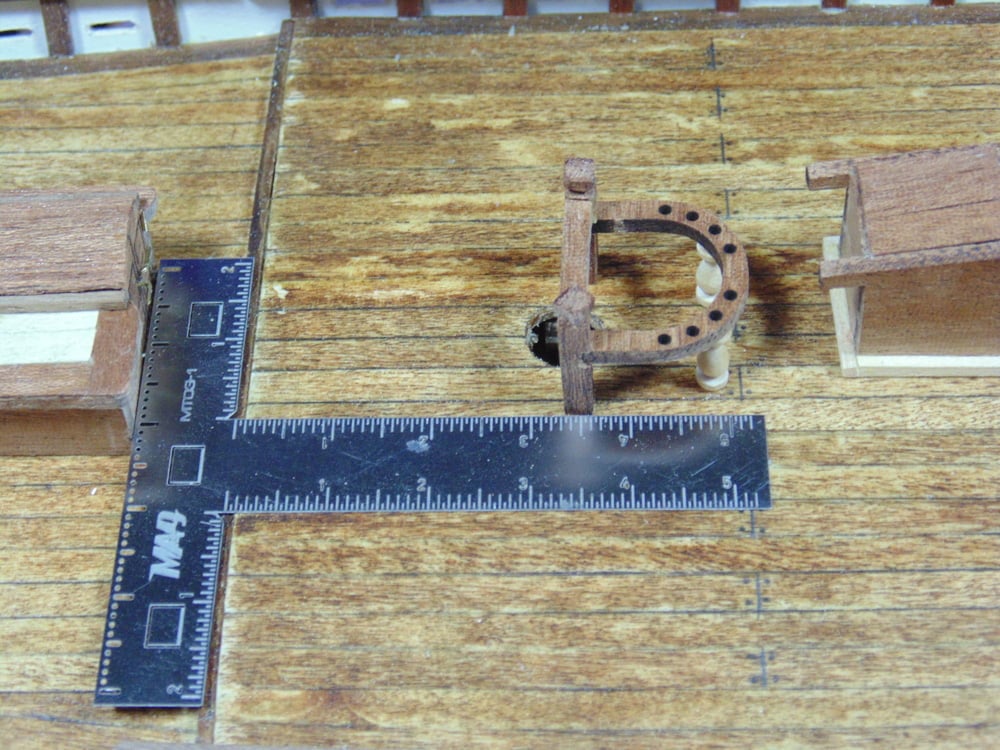
Due to the warp in the deck a few things were done here. The windlass and tie-downs were made and fitted. These are only marker points though, later they will be pinned with metal and cemented in place with BSI epoxy for strength. Next, the cabin’s base cornices will be removed and dropped. The tape is for marker points and, again, you’ll find out soon why.
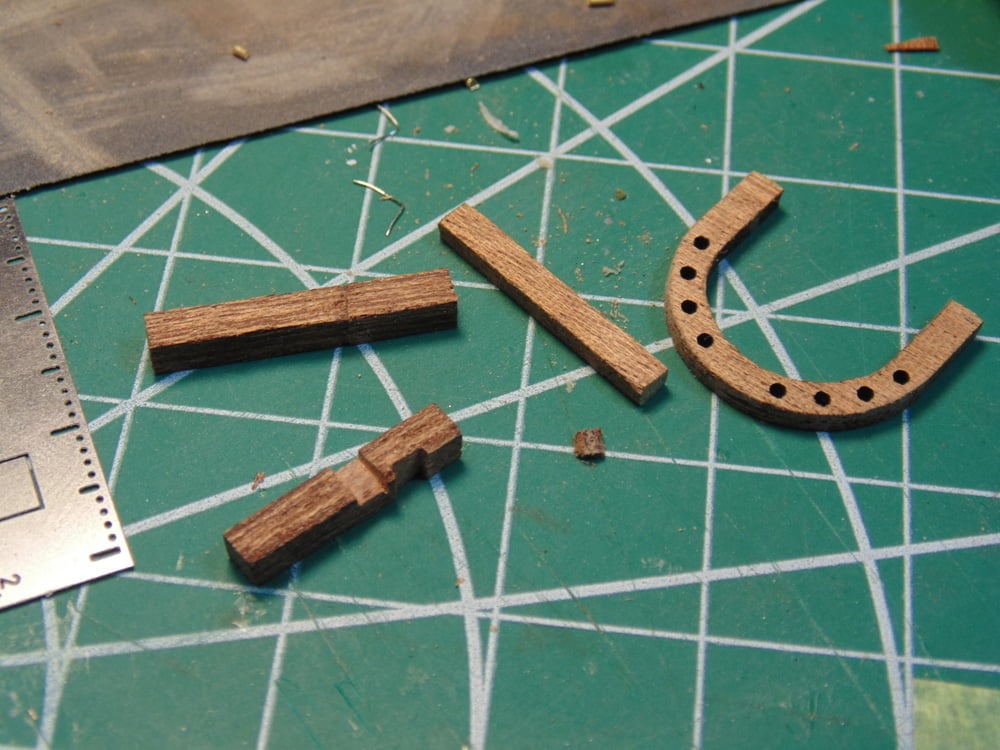
It’s your choice as to how to tackle etching straight edged notches in 3mm by 3mm wood. I’d recommend buying a set of mini-files from the store. Being a detailed minded fellow I used both the Tamiya and Vallejo brands of files in this build. Also, be mindful that this wood type is prone to snapping.
Any place that will have rope on it needs to be well secured. Please consider adding a half inch pin to the bottom of deck parts and use epoxy to secure them. For now, I’ll use a little CA glue on the underside of the “bench” in preparation for the rigging.
When placing the main mast tie-down rig do not follow the instructions. Use your eyes and center it over the hole. Remember, there’s a high likelihood this sub-assembly will need to be removed and reinforced to the deck.
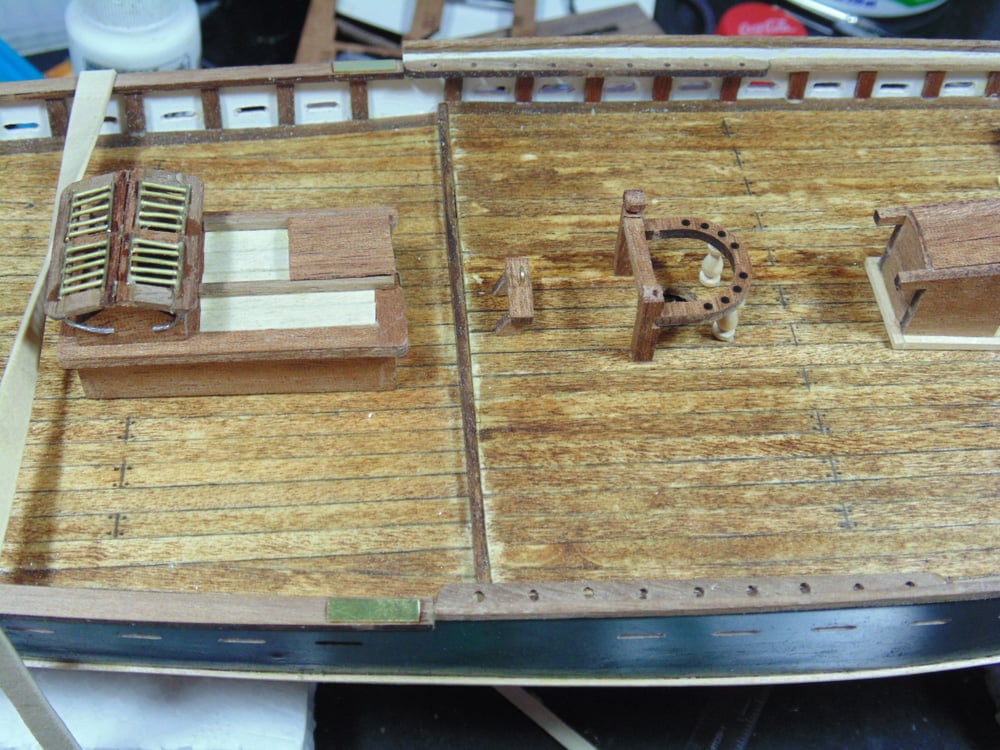
Here, I’ve roughly placed the subsections. As we move along you’ll see how they’ll be much better secured.
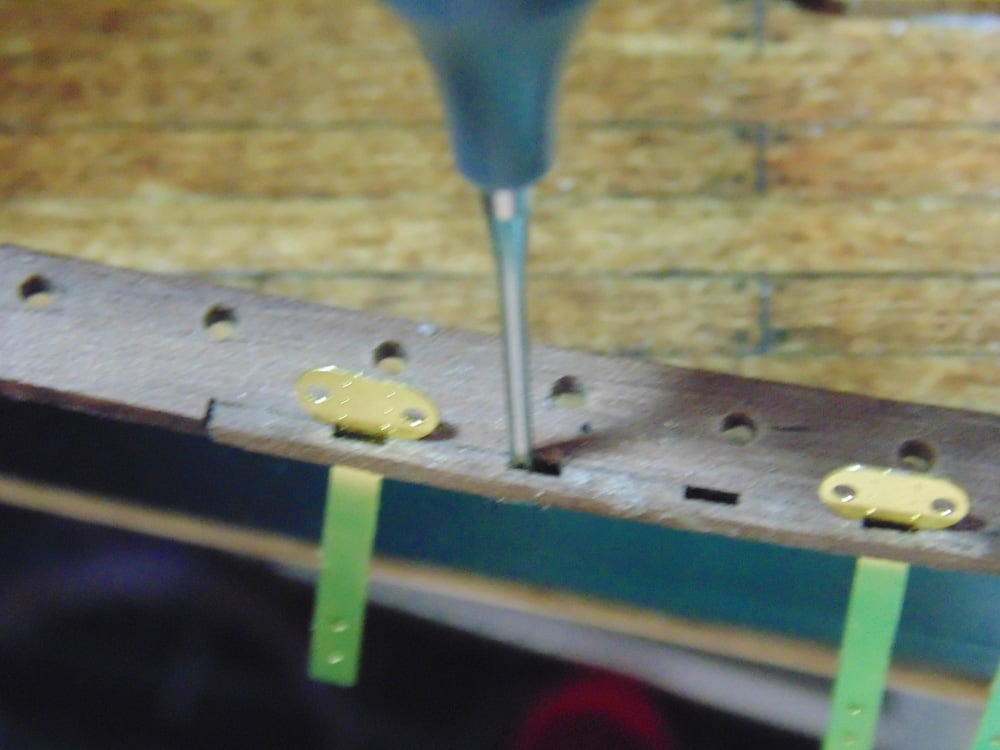
The gap needed to slide the lug straps in might be too small on your kit. Be mindful that the wood used is very delicate. A thin sharp tool will open up this area.
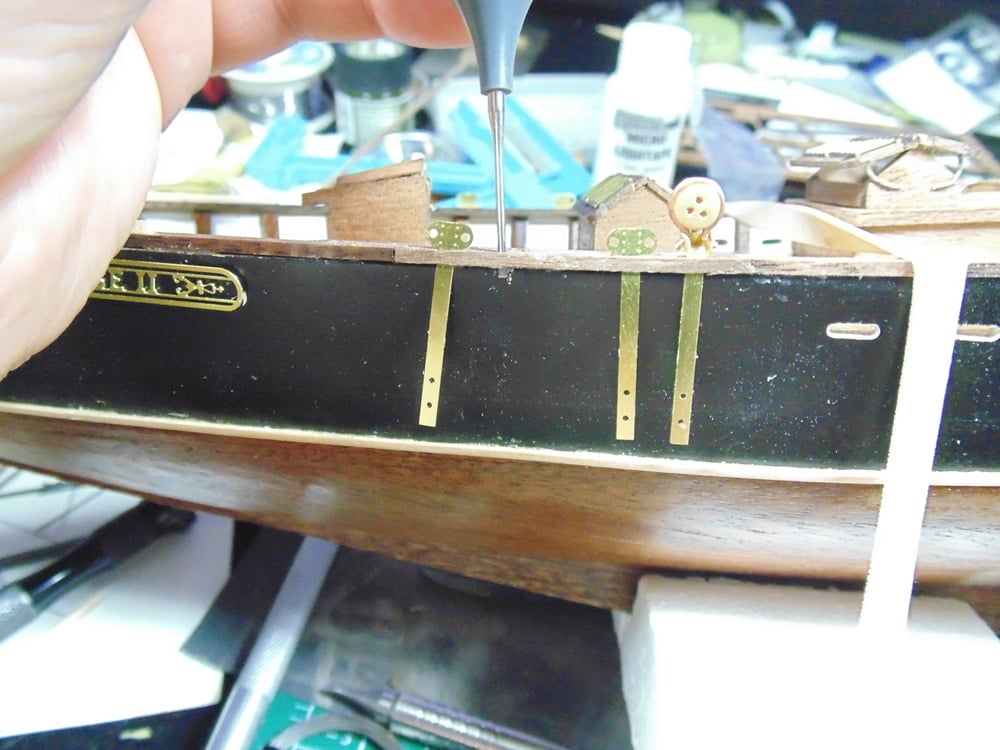
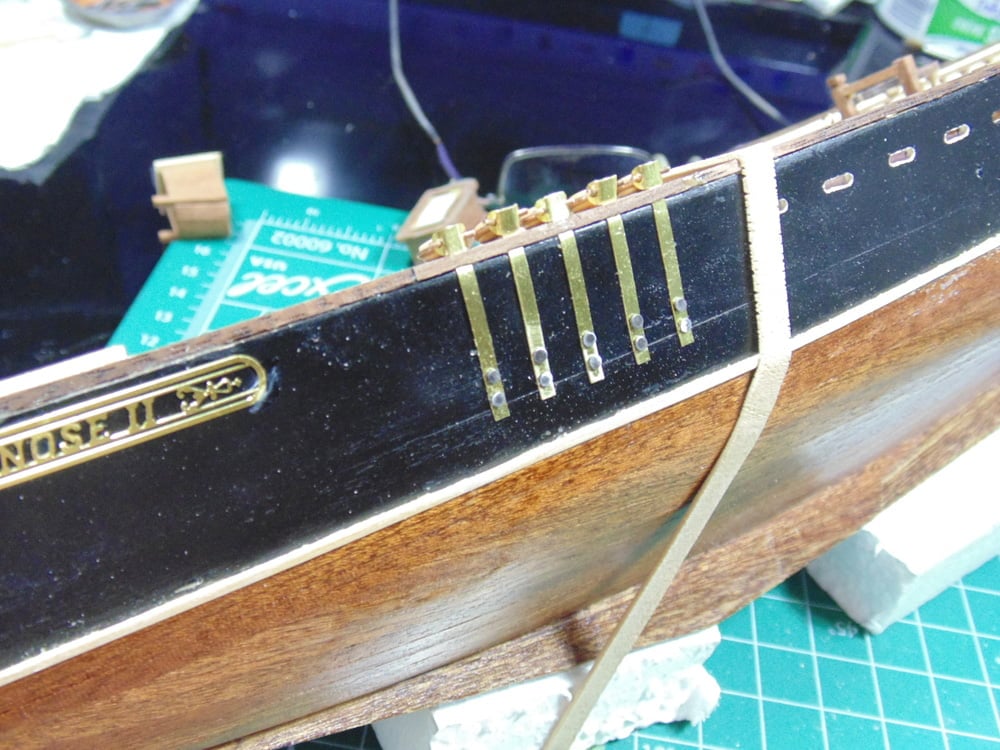
I’d recommend you sand smooth these brass parts. Wooden model replicas are a treat for the eye, yet the material used is notorious for snapping.
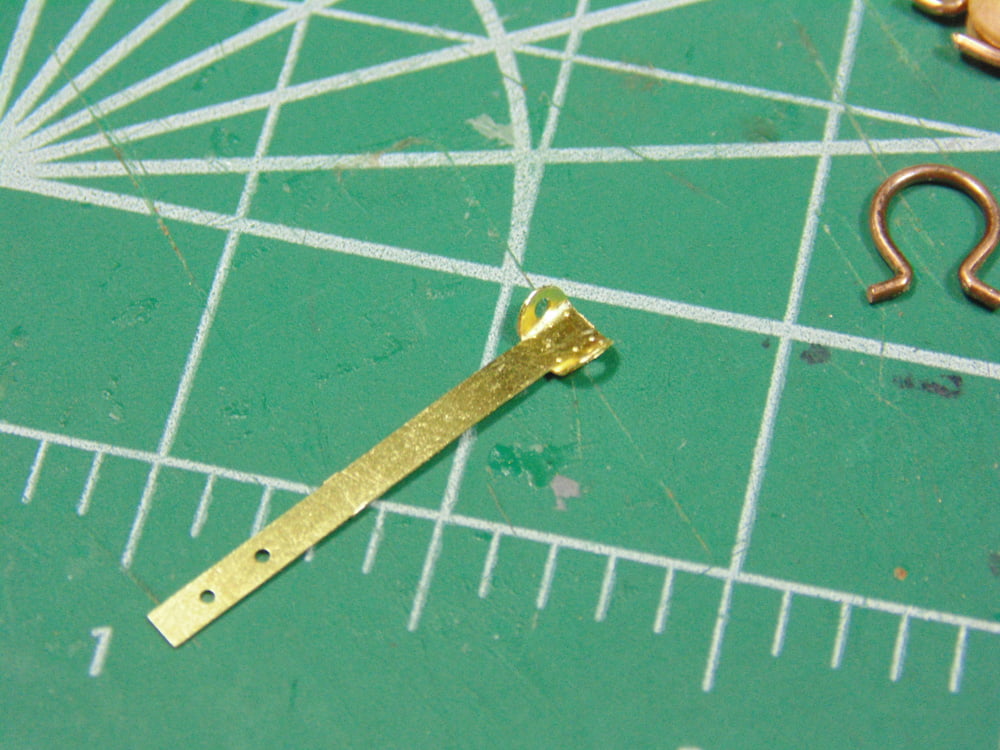
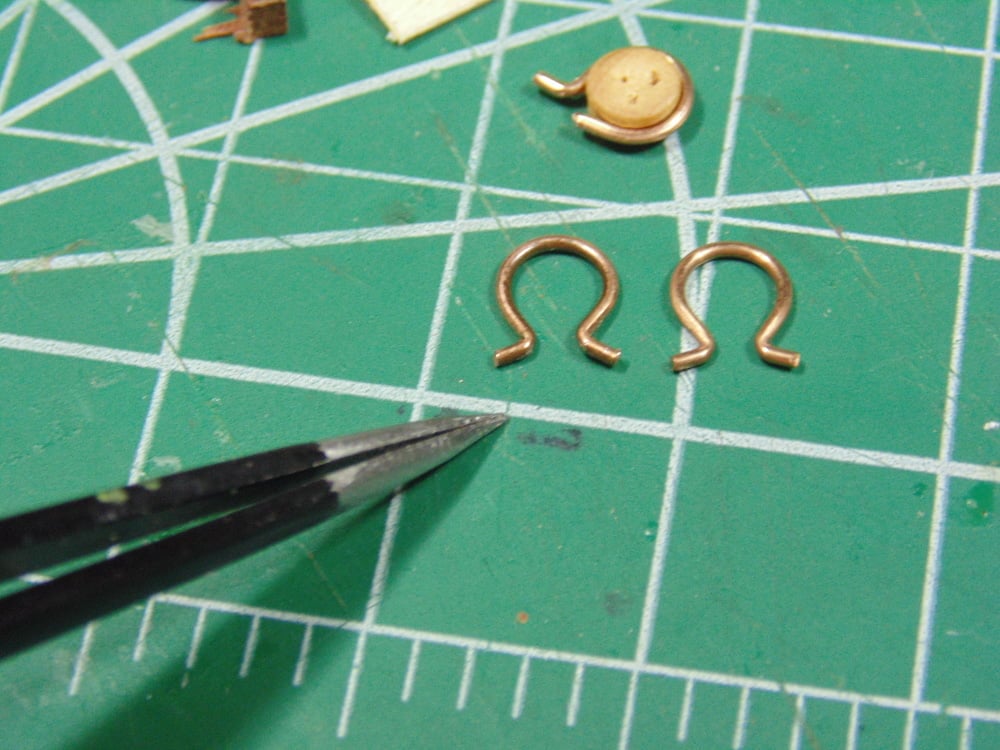
The “omega” shaped lanyards are very stiff and can easily be broken. Gently “pop” them over the lug. No tools required here.
As mentioned in a previous Sunward Hobbies article the small nails were out of stock. Here, I’m using model railway ties which have been polished on the heads. Tape the first tie down in place then make a puncture hole.

Regardless if the nails are in stock or not, opening up the holes is a must. Even the supplied brass nails will kink the straps. Use a micro larger drill bit and widen the holes.
Use an old or fine set of side cutters to squeeze lanyard and block into the lug. It’s tough to explain how difficult this was at first so I’ll put it like this. Imagine you’re opening your arms to hug someone. That’s how the brass lug should look when you begin. Then you can maneuver the tips of the lanyard into the holes of the lug. Later you can gently pinch them so the part looks correct.
Slice some tape at the suggested width and use that as a spacer. Next, use some more tape to hold in place the strap. Here I’ve fashioned an old set of tweezers to crimp round parts. Use whatever works for you to hold the nail and tap it into place.
I’m not concerned with the steel look of the nails on brass look of the straps for now, it can always be touched up later with AK paint. The key thing to take away from this is the spacing angle. Use tape as a hold down and more measured tape as a divider. Drill smaller guide holes into the model for the nails.
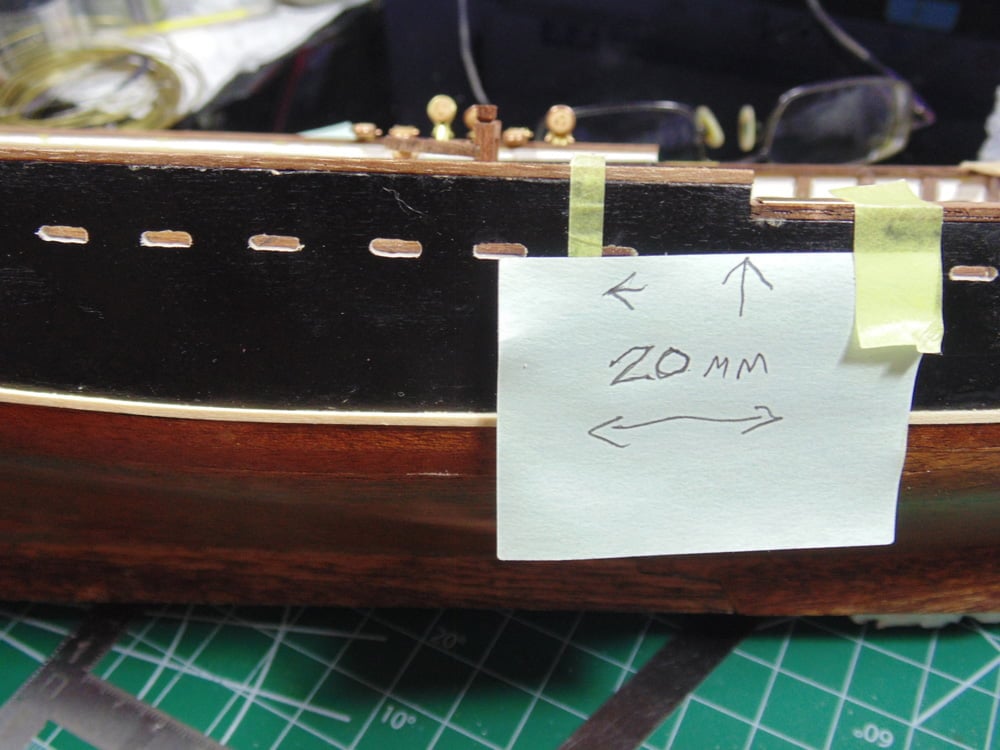
The directions illustrate only the port side, yet the model is different on the starboard side. This mid ship measurement of the straps is vital for the rat lines later.
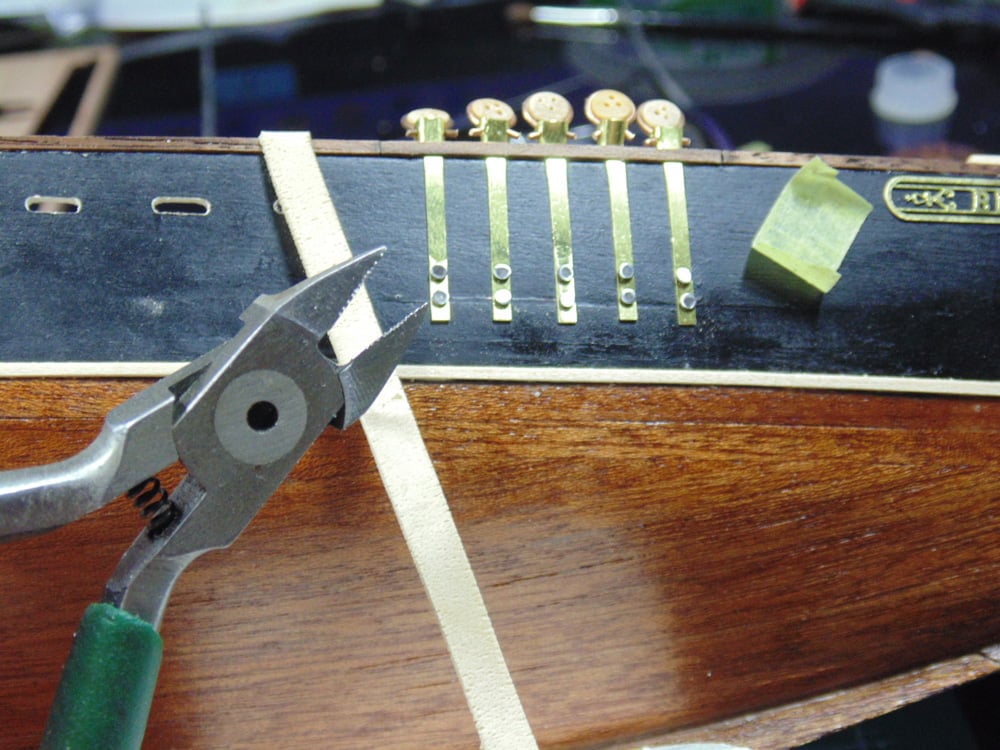
When all your lug assembles have been completed you can then walk around the model and crimp and fine tune the look. Use a set of fine Tamiya side cutters (or others) to squeeze the photo-etched brass arm lugs. This will force them to stand more erect.
I’m extremely careful with every client’s replica. That said, I knew this was going to happen by simply reading the instructions. The gentle striking from the hammer will knock parts off, even with beaning glued, so I didn’t.
Do not attach these subsections unless you are convinced they are metal pinned with a dab of epoxy and secure. More on that in the next Sunwards Hobby blog.
Thanks again for taking the time to follow the build. If you have any questions about Artesania Latina products or the techniques used please feel free to ask when you pick-up or place your next Sunward Hobbies order
If you have any questions about the products used or the methods in this article, please feel free to ask the staff when you pick up or place your next order from Sunward Hobbies.
H.G. Barnes is a former voice-over artist and retired sales and marketing professional. He’s the author of two large volume science fiction adventure romance novels with many more in the works. For well over 40 years he’s been building scale model replicas and now does commission work for clients in Canada and the USA, plus completes projects for companies in Asia and Europe.
Actuellement, HG est impliqué en tant que rédacteur associé avec les chaînes de magazines en ligne de KitMaker Network.