Airfix Avro Vulcan B.2 Black Buck
This is the twelveth part of the Airfix Avro Vulcan B.2 Black Buck 1/72 Scale A12013 build and review.
I’ve always loved putting on decals, even as a kid it was one of my favourite parts of modeling. I just found dipping the decal in water and sliding it onto the model incredibly satisfying. Later in life when I got into modeling on the internet I was surprised to learn that many modelers didn’t share my enthusiasm for decals. In fact,
I would also learn that many despised the process, or that it filled them with so much dread they’d put off applying them for as long as possible.
I understand their trepidation, and I can relate as I’ve had several occasions where the decals just went wrong, and sometimes for no reason whatsoever. There are even a few decal brands I avoid at all costs because the experiences I had using them were so awful.
In this post, I’m going to go through my process and show some of the tools and products I use when I’m applying decals. Hopefully, this might help overcome any worries or questions you might have with decals.

You might recall in Part 11 that the last thing I did to the model was add a gloss coat over the entire model (Mr. Hobby Aqueous H-30 Clear). This was applied to not only protect the paint but a glossy surface that is very smooth and this will help the decals adhere more securely.
Next, I’ll grab the various tools and products I need for the decal application.
- Excel Hobby knife with a new Excel #11 blade. This is needed to carefully cut out some of the smaller decals. Use a new blade with your hobby knife, this will make cutting into the paper a lot easier.
- Pointed Tweezers, are essential when I’m putting the decals in water and to hold onto the paper backing as I slide the decals onto the model.
- Decal Brush, this is a dedicated paintbrush that I only use for decal solvents. It’s from an Airfix starter set, and it’s excellent for adding solvents or more water if the decal is suddenly stuck in the wrong place.
- Cotton Swabs, are used to gently push out the remaining water from underneath the decals once they are in place. I can also use these to mop up excess or stray decal solvent.
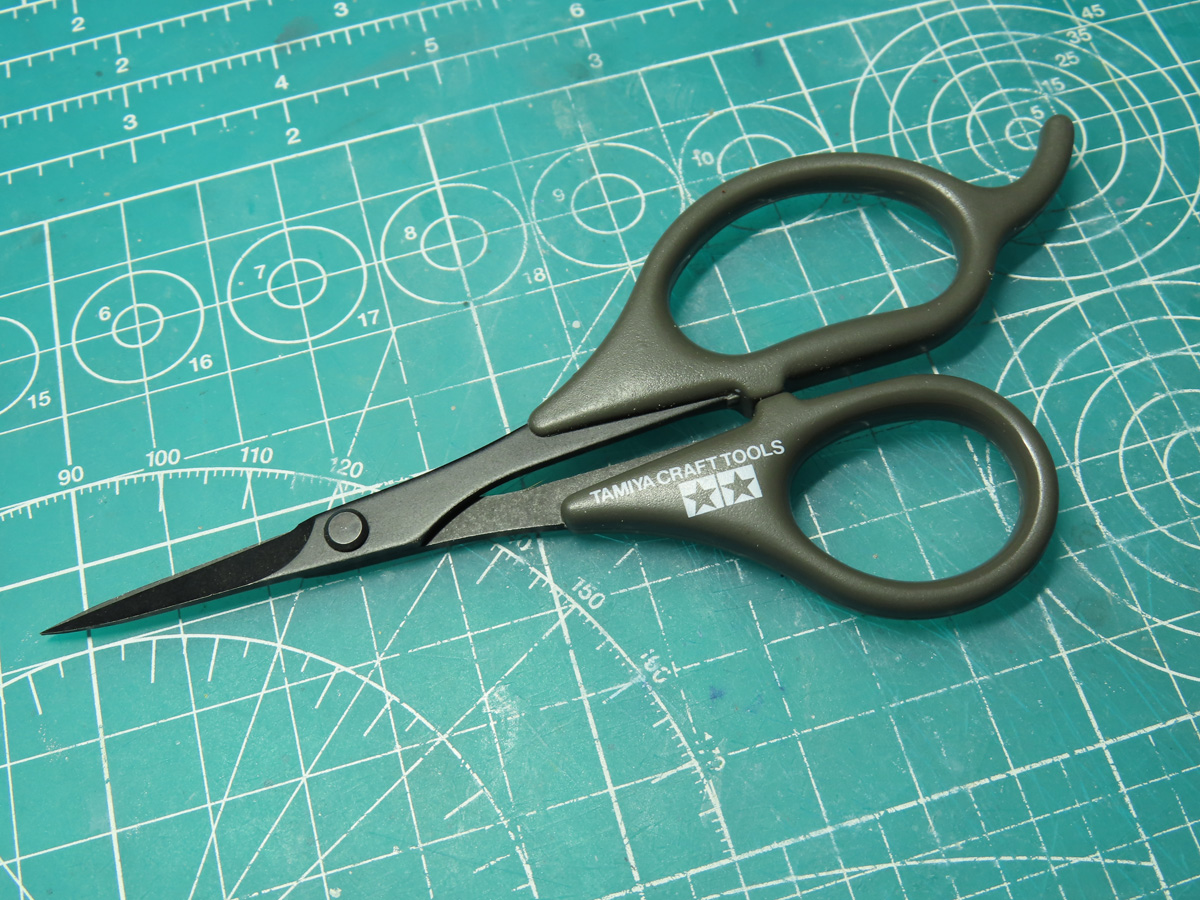
- Ciseaux à décalcomanies Tamiya 74031, are extremely useful and something I’d suggest adding to your cart immediately next time you are in the store or online. I use these scissors all of the time to carefully trim off the decal film, or cut out the larger decals from the sheet. I feel a lot more control and precision when I use these, and I only wish that I had purchased a set of them earlier as they would have made so many decal projects in the past much easier.
My decal process with aircraft typically goes like this. First I apply all of the tiny stencils, as they are the smallest and most tedious I find it’s better to get them out of the way first before I move on to the more fun decals. I begin with the tail and I gradually move towards the nose of the aircraft. Then I apply the decals to the underside, and once that is done I finish with the decals on the top.
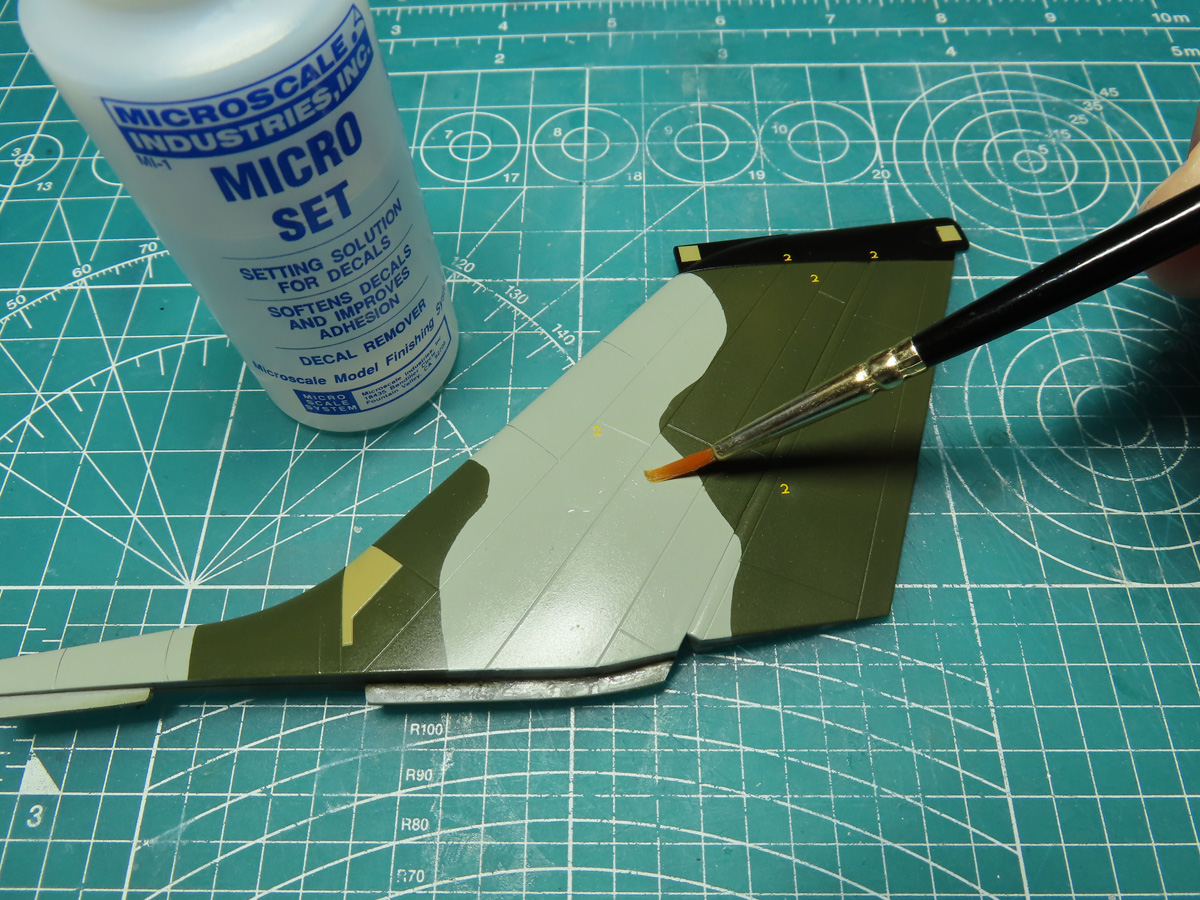
What is possibly the most well-known of all decal solvents comes from Micro-industries. Micro Set and Sol over the years have been go to products for many modelers as they aren’t too aggressive and typically boast excellent results with many different companies.
Here I’m applying the flag pennant to the tail. I’m brushing on a base coat of Micro Set in the place where the decal will rest. The Micro Set will help soften the decal so that it will be more snug to the surface and help achieve a more painted on effect.

Now that the decals are in place and I’ve carefully pushed out the excess water from underneath the decal (this was accomplished by slowly rolling the cotton bud over the decal) I’m ready to apply a liberal coating of Micro Sol. Micro Sol will melt down the decal, and this will be even more secure to the surface. It will also melt the decal into the panel lines for a more authentic look.
Once you apply the Micro Sol carefully place the parts away and give them time to dry. This solvent is usually done in an hour or two, but that will also depend on the brand of decals you are using.
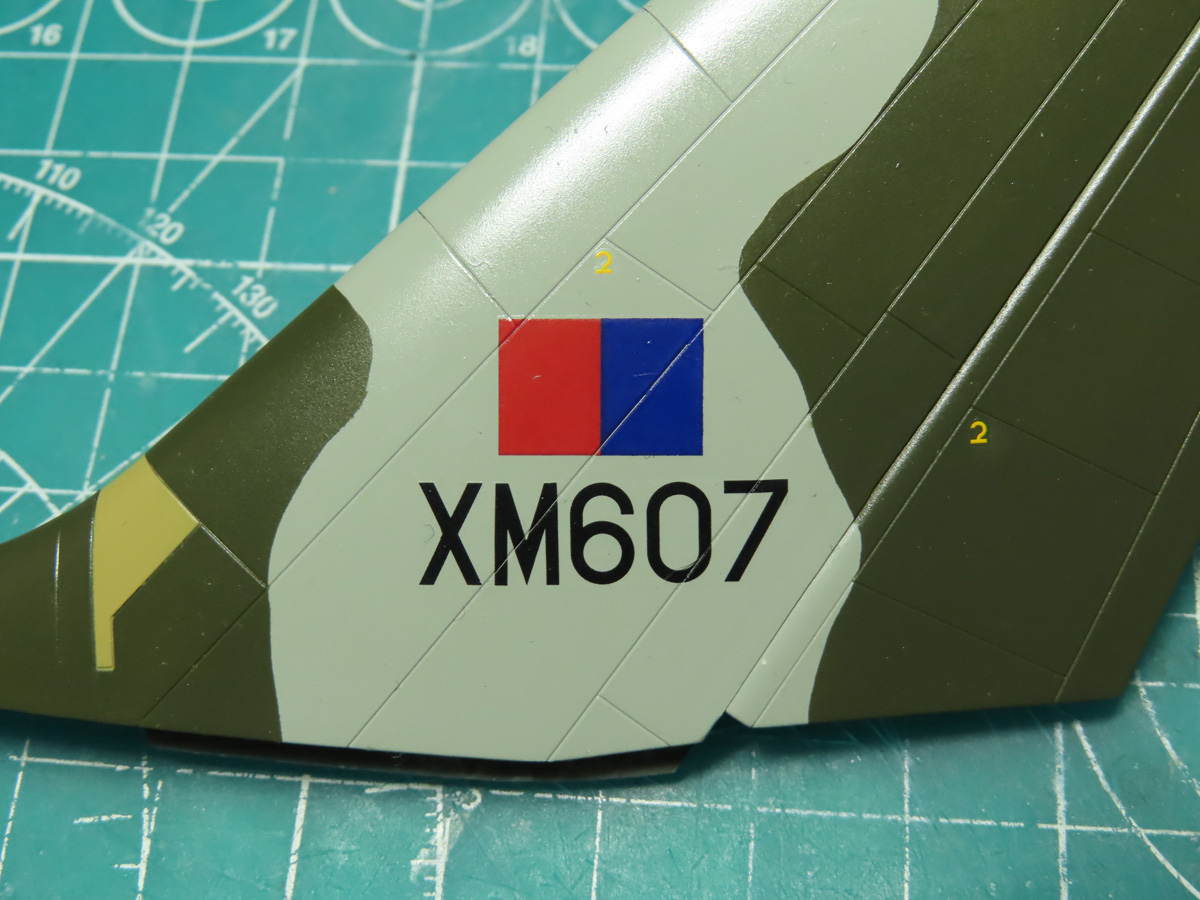
Here are the end results of the Micro Set and Micro Sol a few hours after the solvents have been applied. The decals with this Vulcan are very thin and this greatly assisted in the decals conforming to the surface. You can see how nicely the decals have fallen into the recessed panel lines.

Over the years I’ve looked for a one-size-fits-all decal solvent. As a result, I’ve tried out a few searching for the perfect solvent. But a lot of this comes down to the brand of decal, and even that’s not a guarantee. I’ve had decals from Airfix and Tamiya that looked similar and once I got them off of the paper they turned out to have very different properties.
A friend of mine even claimed that he’d only use Japanese decal solvents like Mr. Mark Fitter, and Mr. Mark Setter for Japanese brand decals. And Micro Set and Sol for everything else.
My preferred and go-to decal solvent is Tamiya Mark Fit “Super Strong” as it’s aggressive on tough thicker decals and it can be very gentle on thinner decals like the ones provided with this kit. Although it’s not as slow setting as Micro Set and Sol, as you can see from the picture this roundel has conformed really well to the surface.
And it’s so snug you can faintly see the outline of the green paint. This was something I tried to avoid beforehand by gently sanding it down. I honestly thought everything was levelled out, but this decal solvent has proven me wrong.
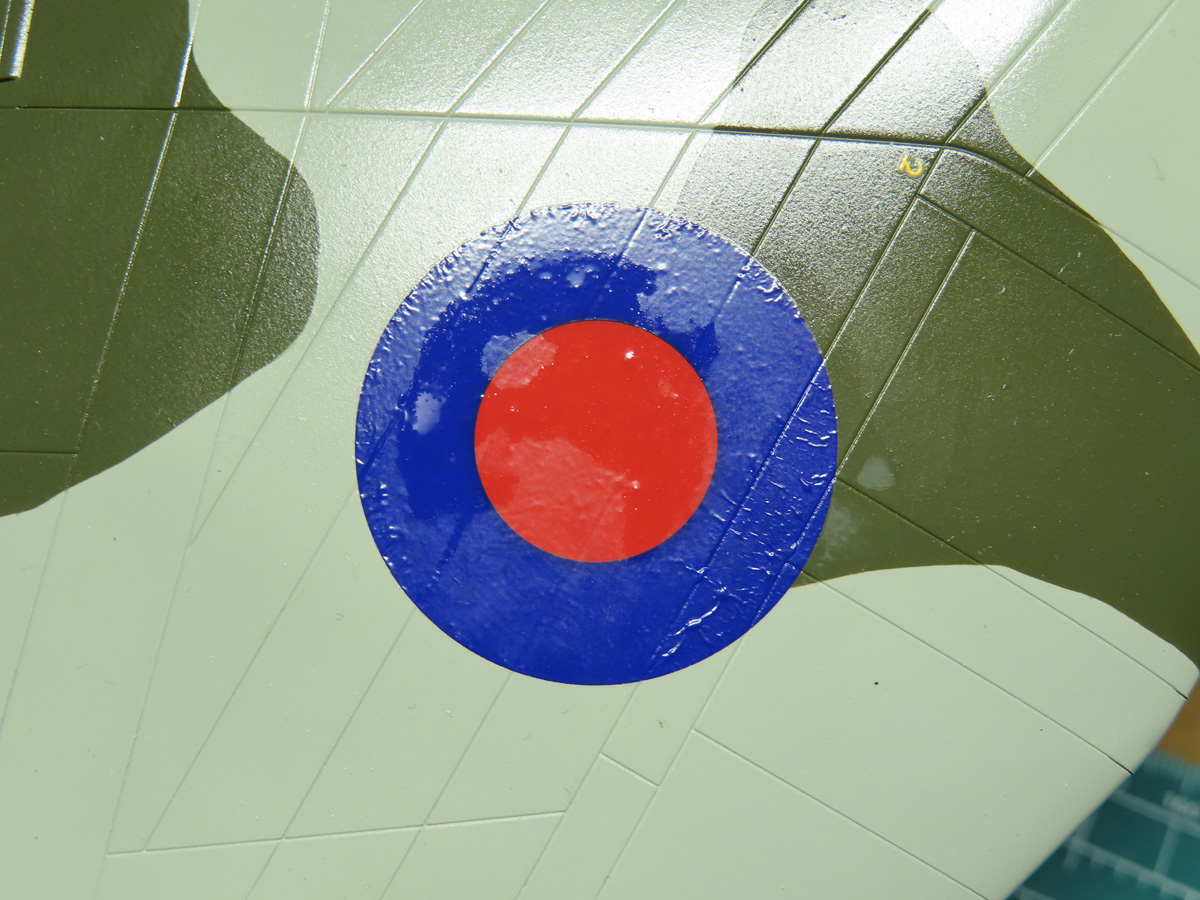
After I applied the Tamiya Mark Fit “Super Strong” the decal began to wrinkle up and it looked like a complete disaster! But don’t panic, this is a normal reaction for many solvents. This is just the solvent doing its job, and it will gradually level out and once again conform to the surface of the model.
Resist the urge to touch the decal, or worse add on more solvent. The decal at this stage is melting and it’s incredibly delicate, you can very easily ruin the decal beyond repair.
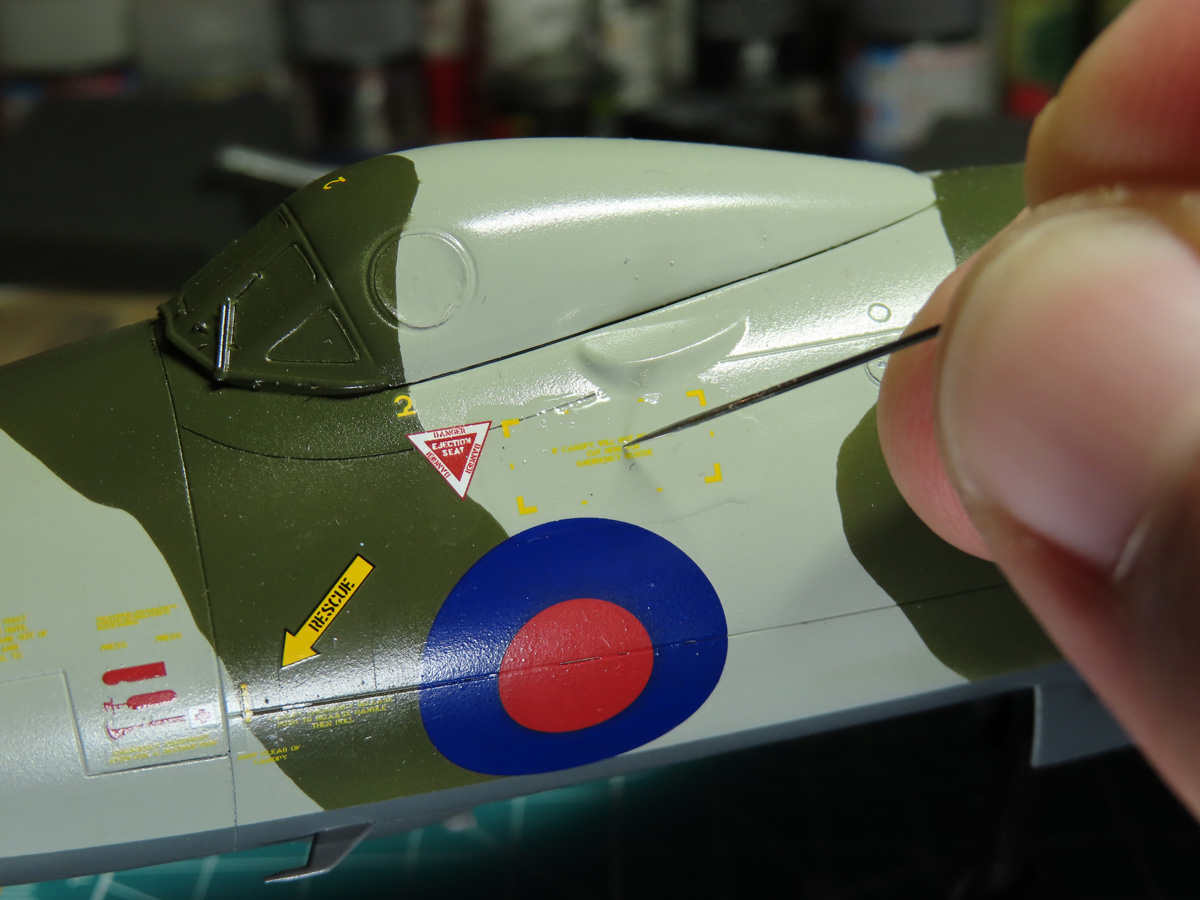
“But what about silvering”, or “What is silvering”?
Silvering happens when air is trapped behind the clear carrier film. A good gloss coat helps prevent silvering from happening, but even with a gloss coat, it can still happen.
And it did with this decal just below the canopy. The solution is to add more decal solvent Tamiya Mark Fit Super Strong all around the decal. I then took a sharp sewing needle and I carefully stabbed out all of the air bubbles. This allowed the air to be released and the decal solvent to flow in.

I’d like to talk for a moment about some of the other decaling products I use. Tamiya Decal Adhesive is basically a glue for decals. For those times when I might have left a wet decal for too long on the backing and most of the glue is now gone I can brush on Tamiya Decal Adhesive to the model and then lay down the decal.
It provides an excellent bond between the decal and the surface, and it can even help prevent silvering from happening.
This product has saved so many tiny stencils over the years that had quickly lost their backing. I think I can consider this product essential for modeling.

Tamiya Decal Adhesive -Softner Type- is a fairly new product. This is similar to the previous product, and you apply it in the same way, brush it onto the surface and then lay the decal on top. But the difference with this adhesive is that it also helps to soften/melt the decal before you apply the decal solvent on top.
I’ve personally had mixed results with this product, there are times when it seems to really kick in and then then there are times when little to no effect with other decals. So you might have better luck with this one than me, but I still think it’s very useful with thicker decals.

There are 3 levels of Tamiya decal solvent, and each one is easily identifiable on the front label. There is Mark Fit, which is a basic solvent for thinner decals.
Mark Fit Strong- which I’ve had varied success with. I’ve found that it works quite well on thinner decals, but it had a hard time with thick decals, and I ended up having to apply a lot of solvent to get the decals just right.
Mark Fit Super Strong- this as I mentioned earlier is my go-to solvent. It’s really aggressive on thick decals and gentle on the thinner ones. I would suggest caution when using this solvent and test it out on a few spares first to better understand and see how this solvent works and reacts.

If you are feeling adventurous you can go one step further with the decal. I took a new blade in my hobby knife and I carefully cut the decal following along the panel lines. I then applied more solvent to allow the newly cut decal to fall into the groves.
This is of course completely optional, but it will help the effect later on when I add a panel line wash to the model.

After the solvents have done their job and I’m satisfied with the decals, I’ll airbrush on some acrylic gloss coat. Here I’m again using Mr. Hobby Aqueous H-20 Clear, but I’ve also used Tamiya X-20 Clear in the past. I’m spraying on 2 thin coats over the decals and only on the decals, as I already sprayed a gloss coat on the model before the decals were applied.
I prefer to spray an acrylic coat onto the models as some lacquer paints can be too aggressive, and as I encountered once before as I had a decal melt and form many tiny bubbles that melted rock hard. I had to carefully sand down the bubbles and mask off the decal to spray paint recovering the project. This happened last year, but even since then, I’ll only apply acrylics over the decal.
But once the decals are sealed over I can apply a stronger lacquer finish.

I hope that this post has been helpful in better understanding how to apply and care for decals. With the right tools and solvents, the decalling process can be a lot easier. And I understand how it can also be overwhelming, so the next time you are in the shop ask an associate for their advice and see what experiences they’ve had with various products.
I’m just as excited as I was when I was a kid looking at all of these decals laid out on the model. It’s a great feeling of accomplishment seeing all of those tiny stencils splayed around the model. As frustrating as they are they really add a welcome detail to the model.
I’m going to let the clear coat around the decals harden just a bit more, but next, I’m going to be adding a panel wash and then some weathering. I’ve been looking forward to this part as the Vulcan could get really dirty, and with all of those bombing missions in the Falklands, they would be particularly grungy.
To be continued…
Jared Demes is a modeler from southern Alberta. He has been building models since he was 4 years old when his Dad first introduced him to the hobby. He has written for several magazines including, Fine Scale Modeler, Scale Aircraft Modeling, Phoenix Scale Models, and others. He has an interest in all modeling subjects, with a focus on WWII Japanese aircraft and Science Fiction.
Jared has won several IPMS awards for his modeling, and currently operates his YouTube channel rebelsatcloudnine, where he showcases model builds and product demonstrations.
Next Post: Part 13
Previous Post: Part 11
First Post: Part 1
