Airfix Avro Vulcan B.2 Black Buck
This is the eleventh part of the Airfix Avro Vulcan B.2 Black Buck 1/72 Scale A12013 build and review.
To my surprise, the build greatly slowed down these past weeks. After all of that work painting the camo I was ready to add on a gloss coat and then begin placing the decals and adding some weathering. As I evaluated the rest of my work I quickly realized I didn’t have that much left to build.
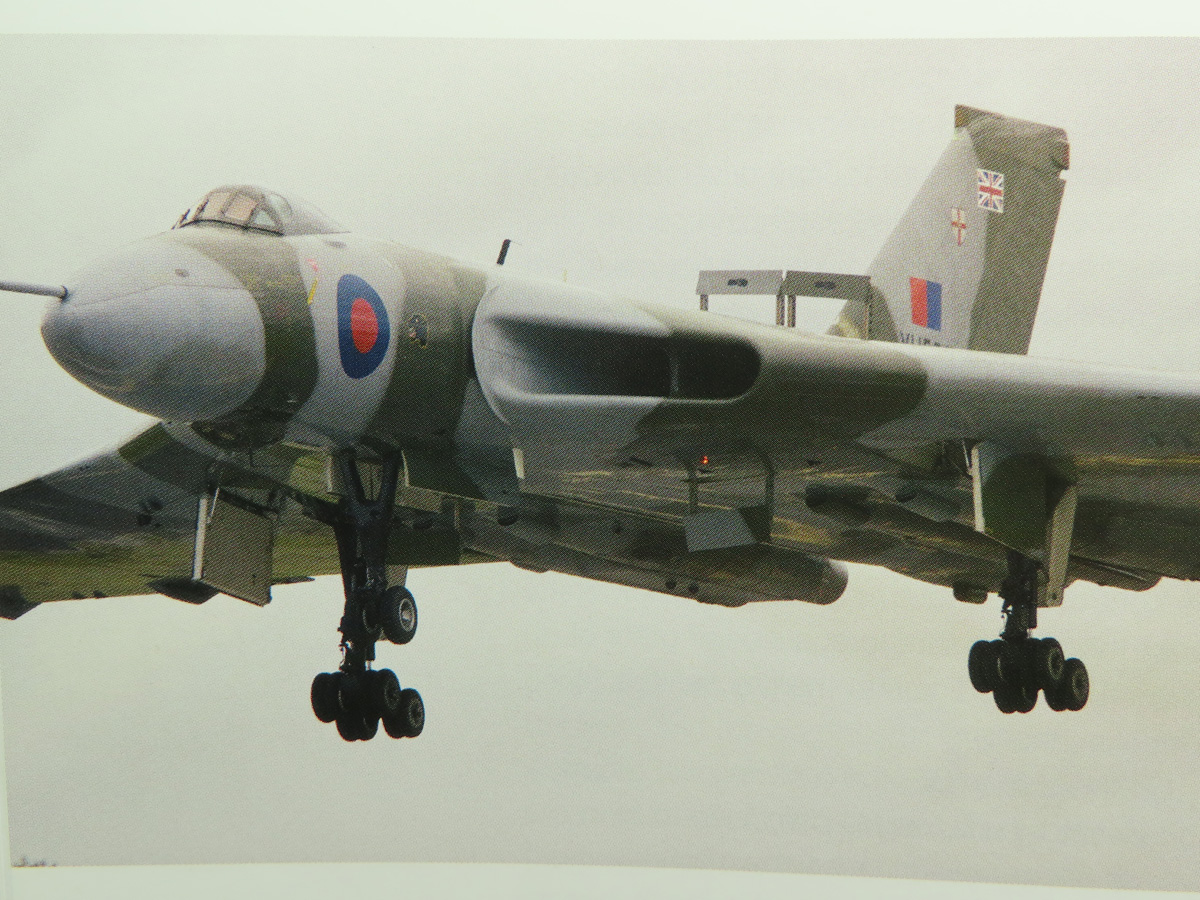
I decided that I would build the landing gear first, and get this Vulcan standing on its own. This would allow me to not worry anymore about scratching the new paint. And it would make things generally easier for the rest of the build.

I mentioned this earlier in the build, but I’m really glad that Airfix switched over to this newer dark grey styrene. It’s a lot tougher which is needed to support such a big model. There was quite a bit of cleaning to do on one of the landing gear struts, but they were easy to assemble.
Once I had them all painted I sprayed on a coat of Mr Hobby Aqueous H-12 Flat Black.
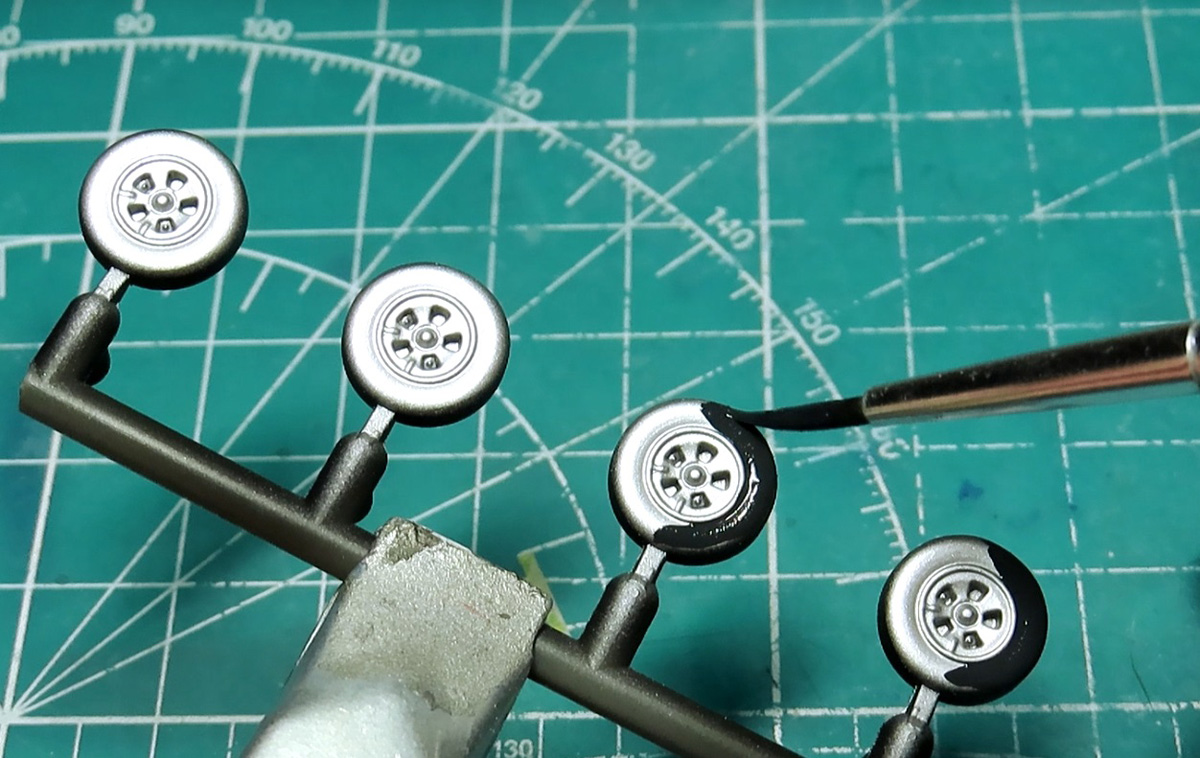
Next, I painted all 18 tires, and this was stressful, as the tires are very small, and the division between the hubs and the tires was difficult to paint around.
After the seam lines were cleaned off of each tire I sprayed on Mr Color 8 Silver. This paint is a slightly duller color and I think that it compliments the scale really well. For the tires, I hand brushed Vallejo Black Grey (70.862) This is my preferred color for tires as the grey tinting that the paint has replicates a nice used effect that tires have in real life.

Several places on the Vulcan are painted ochre, and most of these are included as decals. Some of these decals would be complicated to lay down to the surface so I decided I would paint these onto the model.
The 2 circles here are located on the underside of the model. Using a circle template I was able to cut out some masking tape to place onto the model.

Here is the end result with the masks removed. I had planned on using AK Interactif Ochre (RC016), but I felt that it was a bit too bold, especially when I compared it to real pictures. It’s a bit of a shame as I really wanted to test it out.
Instead, I painted the ochre sections with the fairly new Tamiya XF-88 Dark Yellow 2. I think that this color looks very accurate, and it isn’t distracting and blends in with the rest of the model.

I removed all of the paper towels and tissues that I used to cover up the bomb bay and the wheel wells. I’m very pleased to report that none of the Dark Grey bled through onto the white, and everything is neat and tidy.
I also painted a small section with XF-88 just behind the right-wheel bay. This was an optional decal which would have been very difficult to lay down flat and keep straight with that squared section in the middle.

Lastly, before I begin adding on the wheels, I wanted to show the tail with the sections I painted XF-88. Decals are supplied for the top squares on the black section. But the other parts will need to be painted as there are no decals for these areas.
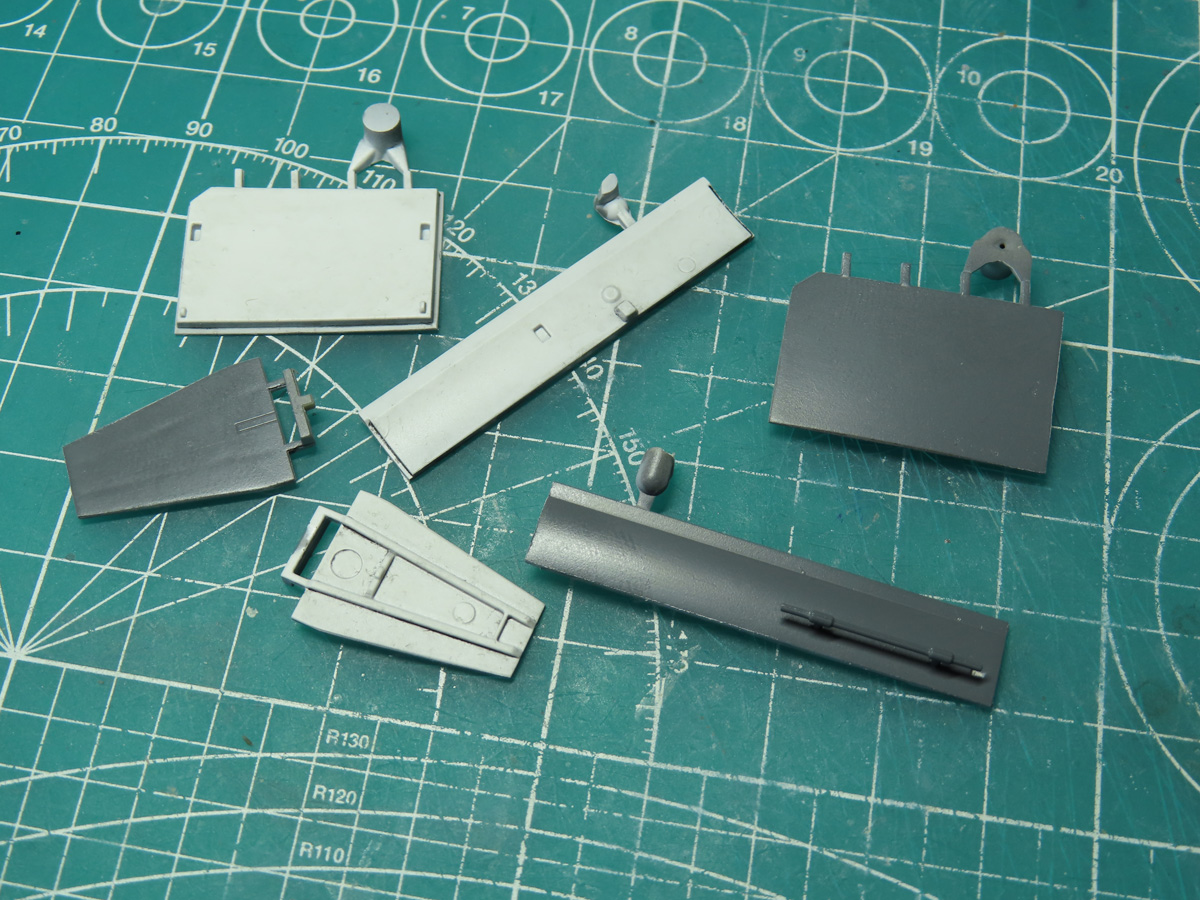
I painted the insides of the gear doors with Tamyia XF-2 Flat White and weathered the parts with Tamiya Panel Line Accent Color Black, just as I had done previously with the interior bays. These parts would be nearly impossible to paint once they are added to the model.
Now that they are all completed I cut off the sprue tabs as I no longer needed to hold them with my clamps for airbrushing.

I really love the design with adding the doors and landing gear. As you can see here I’ve first added the door to the wheel bay. I want to note that I sanded the bottom of the door down a bit more to allow the landing gear to fit in more easily.
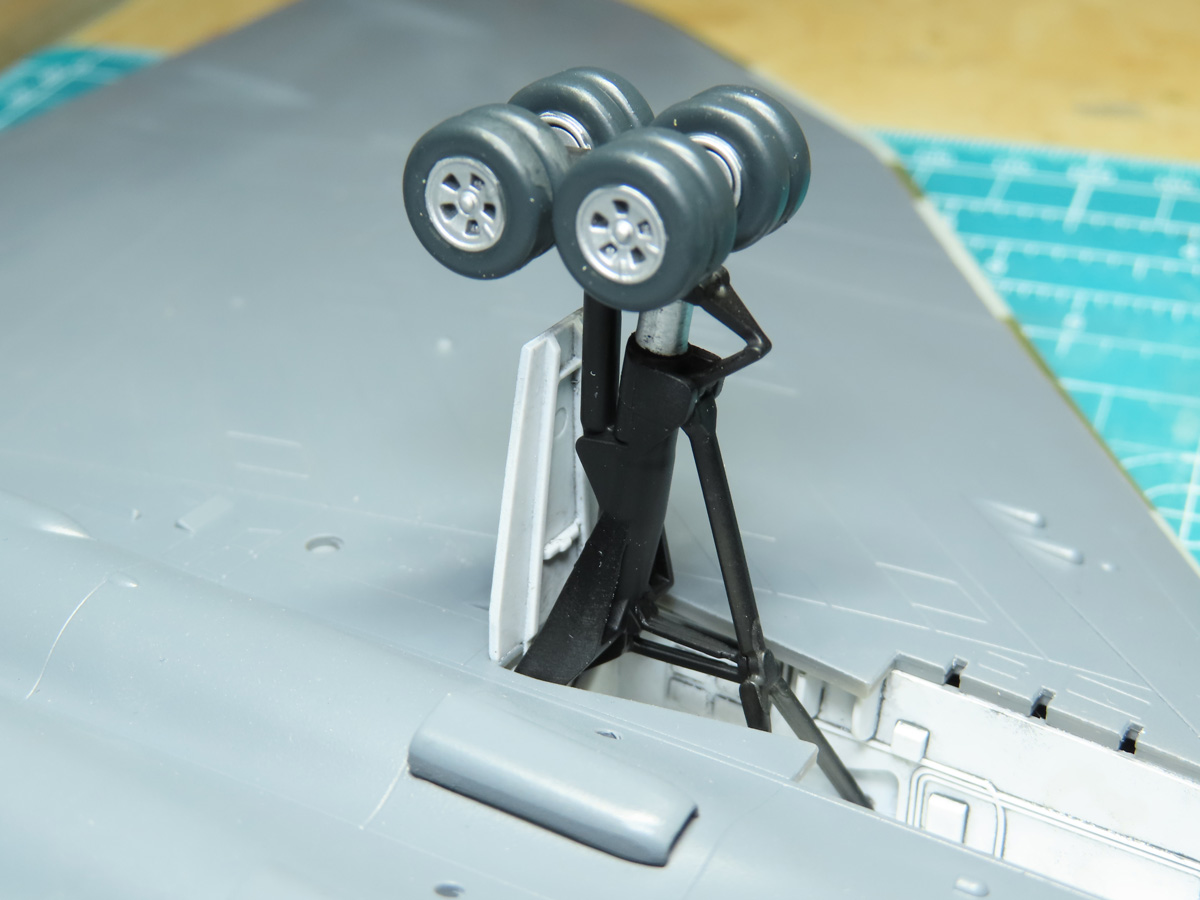
I was then able to slide the peg from the landing gear just below the door. Next, I glued in the forward bracer that would connect to the main section of the landing gear.
Everything fit in with ease as I was initially concerned there could be fit issues. I glued the parts with Mr. Cement SP, and this really secured the parts in place.

I’m pleased to report that the gear doors were just as easy to add on as the landing gear. The difficulty was getting the levers in place as they are tiny and in a cramped area, however, using Tamiya HG Straight Tweezers made adding these parts a lot easier.
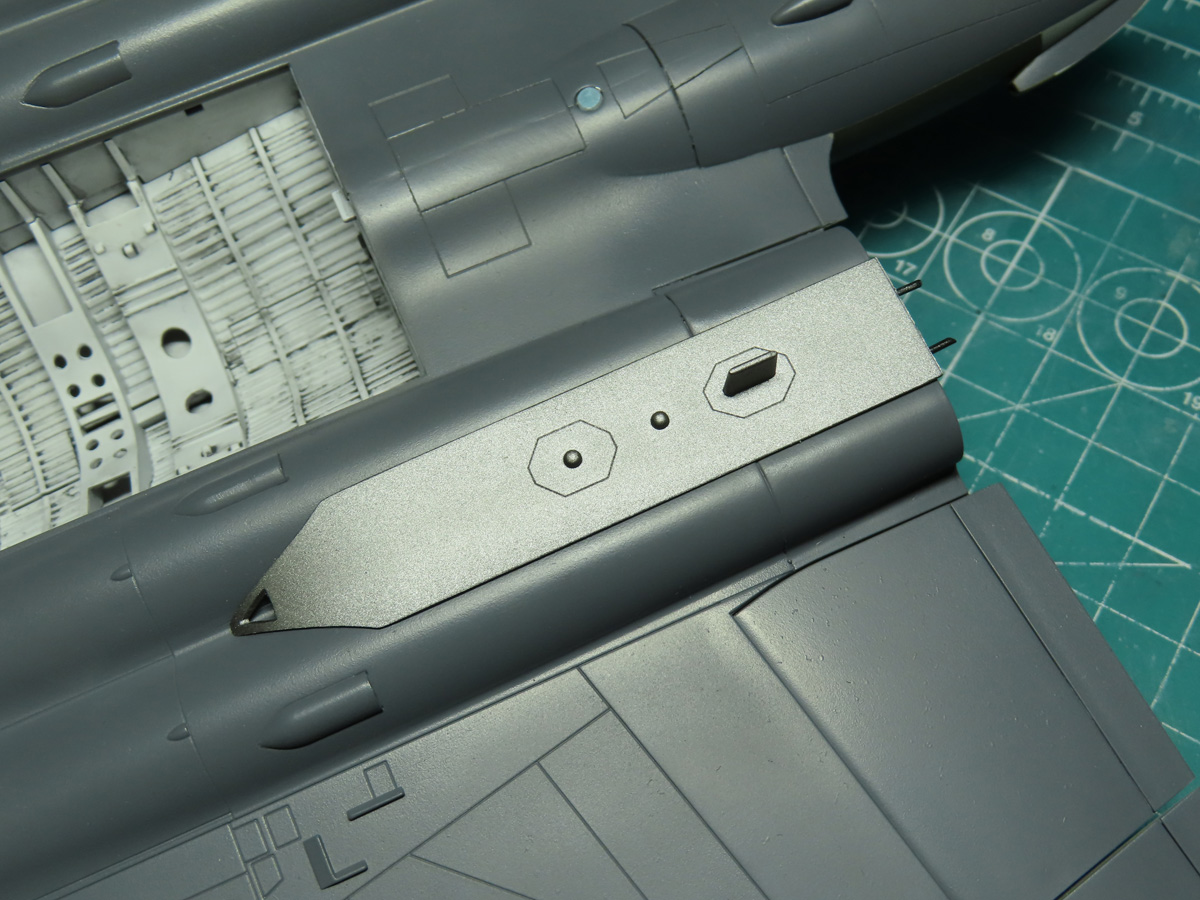
Before I flipped the Vulcan over to stand on its own I added on the “Red Shrimp” This odd looking plate was a noise jammer during Operation Black Buck. The part was painted with Tamiya XF-56 Metallic Grey, before being super glued to the underside.

Now that Black Buck 1 was standing on her own, I sprayed a gloss coat. I’ve run out of my preferred gloss Mr. Color 46, but by accident, I discovered a small box near my painting station with 3 new bottles of Mr Hobby Aqueous H-30 Clear. I thinned the gloss with Mr. Color Rapid Thinner. This thinner would help the gloss to dry a lot harder, and I’ll do a proper report on this product sometime soon as it’s changed my modeling greatly and for the better.
I’ll now leave the gloss alone for a while to harden up some more before I start handling it. The next step is to add the decals and I’m so excited for this stage in the build as it’s one of my favourite things in the modeling process.
Years ago I built the Tamiya 1:32 A6M2b Zero, and I built it in small stages. I would build, finish the section I was working on and place the parts to the side. I just kept in this rhythm, and before I realized it I had reached the end of the instructions book and to my great surprise I had nothing left to build and I needed to assemble the rest of the model.
I’m having a similar experience here with this Vulcan. As I look back at the huge box that the parts came in I’m surprised to see that there isn’t much left to assemble. It’s a bit of a mixed feeling as I’m having a lot of fun building, but also it’s exciting to know that I’m moving forward, nearly completing this model. Long term projects are funny that way.
To be continued…
Jared Demes is a modeler from southern Alberta. He has been building models since he was 4 years old when his Dad first introduced him to the hobby. He has written for several magazines including, Fine Scale Modeler, Scale Aircraft Modeling, Phoenix Scale Models, and others. He has an interest in all modeling subjects, with a focus on WWII Japanese aircraft and Science Fiction.
Jared has won several IPMS awards for his modeling, and currently operates his YouTube channel rebelsatcloudnine, where he showcases model builds and product demonstrations.
Next Post: Part 12
Previous Post: Part 10
First Post: Part 1