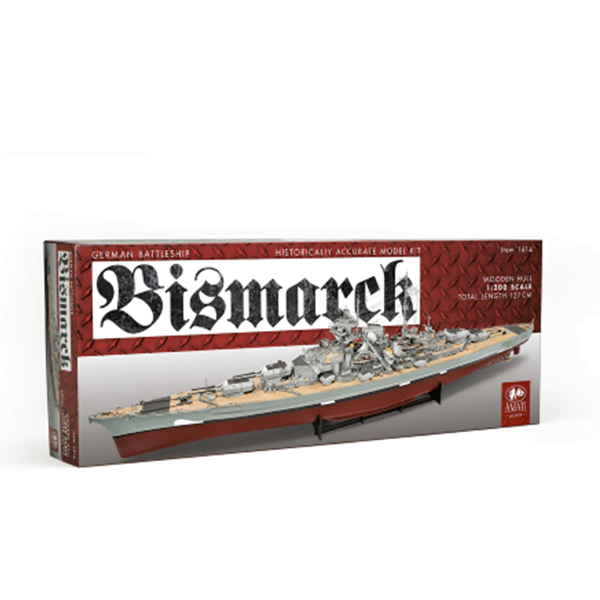
Amati German Battleship Bismarck Kriegsmarine 1941 1/200 Scale 1614 Special Order
$899.99
Special Order – 3 weeks for arrival.
Any other items with this order will not ship until the release date.
Buy this product and earn 1799.98 points.
La description
Dimensions:
- Scale: 1:200
- Length: 50 inch
- Height: 11.50 inch
- Width: 7.16 inch
Components
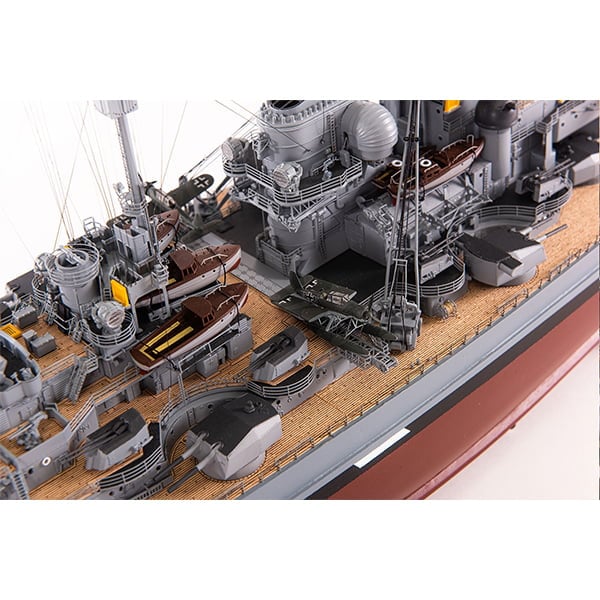
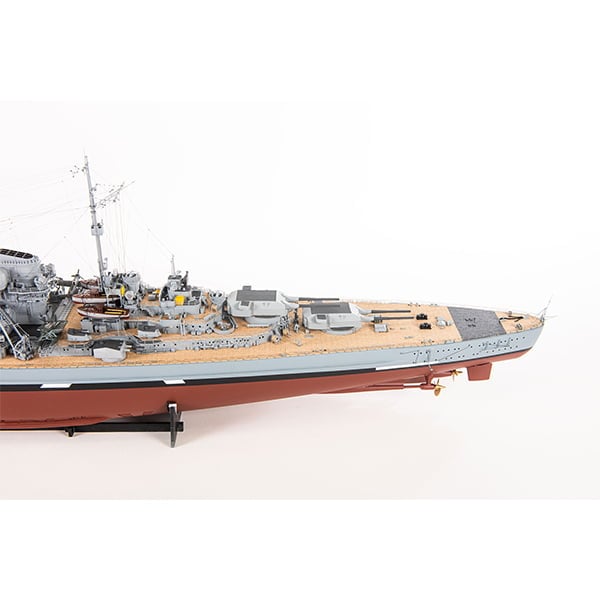
- Plank on frame
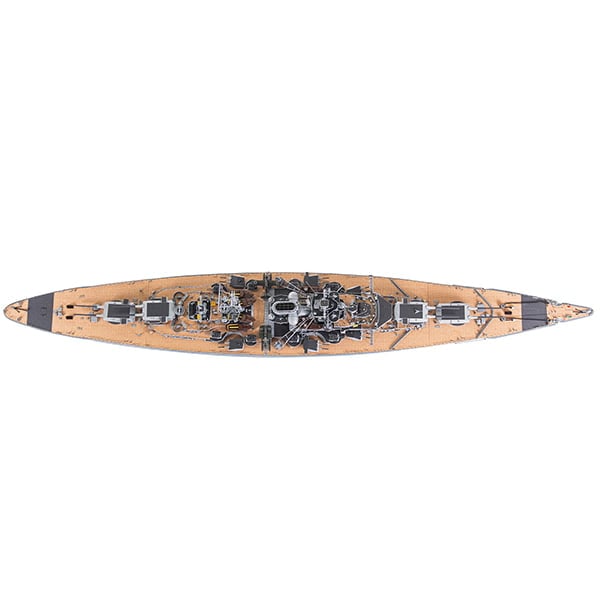
- Wooden decks
- 2266 photoetched parts included
- 16 playwood laser sheets
Documentation:
Building instructions in 2 colour volumes
Historical background:
Bismarck was the first of two Bismarck-class battleships built for Nazi Germany’s Kriegsmarine. Named after Chancellor Otto von Bismarck, the ship was laid down at the Blohm & Voss shipyard in Hamburg in July 1936 and launched in February 1939. Work was completed in August 1940, when she was commissioned into the German fleet. Bismarck and her sister ship Tirpitz were the largest battleships ever built by Germany, and two of the largest built by any European power.
Characteristics
The two Bismarck-class battleships were designed in the mid-1930s by the German Kriegsmarine as a counter to French naval expansion, specifically the two Richelieu-class battleships France had started in 1935. Laid down after the signing of the Anglo-German Naval Agreement of 1935, Bismarck and her sister Tirpitz were nominally within the 35,000-long-ton (36,000 t) limit imposed by the Washington regime that governed battleship construction in the interwar period. The ships secretly exceeded the figure by a wide margin, though before either vessel was completed, the international treaty system had fallen apart following Japan’s withdrawal in 1937, allowing signatories to invoke an “escalator clause” that permitted displacements as high as 45,000 long tons (46,000 t).
Bismarck displaced 41,700 t (41,000 long tons) as built and 50,300 t (49,500 long tons) fully loaded, with an overall length of 251 m (823 ft 6 in), a beam of 36 m (118 ft 1 in) and a maximum draft of 9.9 m (32 ft 6 in). The battleship was Germany’s largest warship, and displaced more than any other European battleship, with the exception of HMS Vanguard, commissioned after the end of the war. Bismarck was powered by three Blohm & Voss geared steam turbines and twelve oil-fired Wagner superheated boilers, which developed a total of 148,116 shp (110,450 kW) and yielded a maximum speed of 30.01 knots (55.58 km/h; 34.53 mph) on speed trials. The ship had a cruising range of 8,870 nautical miles (16,430 km; 10,210 mi) at 19 knots (35 km/h; 22 mph). Bismarck was equipped with three FuMO 23 search radar sets, mounted on the forward and stern rangefinders and foretop.
The standard crew numbered 103 officers and 1,962 enlisted men. The crew was divided into twelve divisions of between 180 and 220 men. The first six divisions were assigned to the ship’s armament, divisions one to four for the main and secondary batteries and five and six manning anti-aircraft guns. The seventh division consisted of specialists, including cooks and carpenters, and the eighth division consisted of ammunition handlers. The radio operators, signalmen, and quartermasters were assigned to the ninth division. The last three divisions were the engine room personnel. When Bismarck left port, fleet staff, prize crews, and war correspondents increased the crew complement to over 2,200 men. Roughly 200 of the engine room personnel came from the light cruiser Karlsruhe, which had been lost during Operation Weserübung, the German invasion of Norway. Bismarck’s crew published a ship’s newspaper titled Die Schiffsglocke (The Ship’s Bell); this paper was only published once, on 23 April 1941, by the commander of the engineering department, Gerhard Junack.
Bismarck was armed with eight 38 cm (15 in) SK C/34 guns arranged in four twin gun turrets: two super-firing turrets forward—”Anton” and “Bruno”—and two aft—”Caesar” and “Dora”. Secondary armament consisted of twelve 15 cm (5.9 in) L/55 guns, sixteen 10.5 cm (4.1 in) L/65 and sixteen 3.7 cm (1.5 in) L/83, and twelve 2 cm (0.79 in) anti-aircraft guns. Bismarck also carried four Arado Ar 196 reconnaissance floatplanes, with a single large hangar and a double-ended catapult. The ship’s main belt was 320 mm (12.6 in) thick and was covered by a pair of upper and main armoured decks that were 50 mm (2.0 in) and 100 to 120 mm (3.9 to 4.7 in) thick, respectively. The 38 cm (15 in) turrets were protected by 360 mm (14.2 in) thick faces and 220 mm (8.7 in) thick sides.
Service history
Bismarck was ordered under the name Ersatz Hannover (“Hannover replacement”), a replacement for the old pre-dreadnought SMS Hannover, under contract “F”. The contract was awarded to the Blohm & Voss shipyard in Hamburg, where the keel was laid on 1 July 1936 at Helgen IX. The ship was launched on 14 February 1939 and during the elaborate ceremonies was christened by Dorothee von Löwenfeld, granddaughter of Chancellor Otto von Bismarck, the ship’s namesake. Adolf Hitler made the christening speech.] Fitting-out work followed the launch, during which time the original straight stem was replaced with a raked “Atlantic bow” similar to those of the Scharnhorst-class battleships. Bismarck was commissioned into the fleet on 24 August 1940 for sea trials, which were conducted in the Baltic. Kapitän zur See Ernst Lindemann took command of the ship at the time of commissioning.
On 15 September 1940, three weeks after commissioning, Bismarck left Hamburg to begin sea trials in Kiel Bay. Sperrbrecher 13 escorted the ship to Arcona on 28 September, and then on to Gotenhafen for trials in the Gulf of Danzig. The ship’s power-plant was given a thorough workout; Bismarck made measured-mile and high speed runs. As the ship’s stability and manoeuvrability were being tested, a flaw in her design was discovered. When attempting to steer the ship solely through altering propeller revolutions, the crew learned that Bismarck could be kept on course only with great difficulty. Even with the outboard screws running at full power in opposite directions, they generated only a slight turning ability. Bismarck’s main battery guns were first test-fired in late November. The tests proved she was a very stable gun platform. Trials lasted until December; Bismarck returned to Hamburg, arriving on 9 December, for minor alterations and the completion of the fitting-out process.
The ship was scheduled to return to Kiel on 24 January 1941, but a merchant vessel had been sunk in the Kiel Canal and prevented use of the waterway. Severe weather hampered efforts to remove the wreck, and Bismarck was not able to reach Kiel until March. The delay greatly frustrated Lindemann, who remarked that “[Bismarck] had been tied down at Hamburg for five weeks … the precious time at sea lost as a result cannot be made up, and a significant delay in the final war deployment of the ship thus is unavoidable.” While waiting to reach Kiel, Bismarck hosted Captain Anders Forshell, the Swedish naval attaché to Berlin. He returned to Sweden with a detailed description of the ship, which was subsequently leaked to Britain by pro-British elements in the Swedish Navy. The information provided the Royal Navy with its first full description of the vessel, although it lacked important facts, including top speed, radius of action, and displacement.
On 6 March, Bismarck received the order to steam to Kiel. On the way, the ship was escorted by several Messerschmitt Bf 109 fighters and a pair of armed merchant vessels, along with an icebreaker. At 08:45 on 8 March, Bismarck briefly ran aground on the southern shore of the Kiel Canal; she was freed within an hour. The ship reached Kiel the following day, where her crew stocked ammunition, fuel, and other supplies and applied a coat of dazzle paint to camouflage her. British bombers attacked the harbour without success on 12 March. On 17 March, the old battleship Schlesien, now used as an icebreaker, escorted Bismarck through the ice to Gotenhafen, where the latter continued combat readiness training.
The Naval High Command (Oberkommando der Marine or OKM), commanded by Admiral Erich Raeder, intended to continue the practice of using heavy ships as surface raiders against Allied merchant traffic in the Atlantic Ocean. The two Scharnhorst-class battleships were based in Brest, France, at the time, having just completed Operation Berlin, a major raid into the Atlantic. Bismarck’s sister ship Tirpitz rapidly approached completion. Bismarck and Tirpitz were to sortie from the Baltic and rendezvous with the two Scharnhorst-class ships in the Atlantic; the operation was initially scheduled for around 25 April 1941, when a new moon period would make conditions more favourable.
Work on Tirpitz was completed later than anticipated, and she was not commissioned until 25 February; the ship was not ready for combat until late in the year. To further complicate the situation, Gneisenau was torpedoed in Brest and damaged further by bombs when in drydock. Scharnhorst required a boiler overhaul following Operation Berlin; the workers discovered during the overhaul that the boilers were in worse condition than expected. She would also be unavailable for the planned sortie. Attacks by British bombers on supply depots in Kiel delayed repairs to the heavy cruisers Admiral Scheer and Admiral Hipper. The two ships would not be ready for action until July or August. Admiral Günther Lütjens, Flottenchef (Fleet Chief) of the Kriegsmarine, chosen to lead the operation, wished to delay the operation at least until either Scharnhorst or Tirpitz became available, but the OKM decided to proceed with the operation, codenamed Operation Rheinübung, with a force consisting of only Bismarck and the heavy cruiser Prinz Eugen. At a final meeting with Raeder in Paris on 26 April, Lütjens was encouraged by his commander-in-chief to proceed and he eventually decided that an operation should begin as soon as possible to prevent the enemy gaining any respite.
Operation Rheinübung
On 5 May 1941, Hitler and Wilhelm Keitel, with a large entourage, arrived to view Bismarck and Tirpitz in Gotenhafen. The men were given an extensive tour of the ships, after which Hitler met with Lütjens to discuss the upcoming mission. On 16 May, Lütjens reported that Bismarck and Prinz Eugen were fully prepared for Operation Rheinübung; he was therefore ordered to proceed with the mission on the evening of 19 May. As part of the operational plans, a group of eighteen supply ships would be positioned to support Bismarck and Prinz Eugen. Four U-boats would be placed along the convoy routes between Halifax and Britain to scout for the raiders.
By the start of the operation, Bismarck’s crew had increased to 2,221 officers and enlisted men. This included an admiral’s staff of nearly 65 and a prize crew of 80 sailors, who could be used to crew transports captured during the mission. At 02:00 on 19 May, Bismarck departed Gotenhafen and made for the Danish straits. She was joined at 11:25 by Prinz Eugen, which had departed the previous night at 21:18, off Cape Arkona. The two ships were escorted by three destroyers—Z10 Hans Lody, Z16 Friedrich Eckoldt, and Z23—and a flotilla of minesweepers. The Luftwaffe provided air cover during the voyage out of German waters. At around noon on 20 May, Lindemann informed the ship’s crew via loudspeaker of the ship’s mission. At approximately the same time, a group of ten or twelve Swedish aircraft flying reconnaissance encountered the German force and reported its composition and heading, though the Germans did not see the Swedes.
An hour later, the German flotilla encountered the Swedish cruiser HSwMS Gotland; the cruiser shadowed the Germans for two hours in the Kattegat. Gotland transmitted a report to naval headquarters, stating: “Two large ships, three destroyers, five escort vessels, and 10–12 aircraft passed Marstrand, course 205°/20′.”The OKM was not concerned about the security risk posed by Gotland, though both Lütjens and Lindemann believed operational secrecy had been lost. The report eventually made its way to Captain Henry Denham, the British naval attaché to Sweden, who transmitted the information to the Admiralty. The code-breakers at Bletchley Park confirmed that an Atlantic raid was imminent, as they had decrypted reports that Bismarck and Prinz Eugen had taken on prize crews and requested additional navigational charts from headquarters. A pair of Supermarine Spitfires was ordered to search the Norwegian coast for the flotilla.
German aerial reconnaissance confirmed that one aircraft carrier, three battleships, and four cruisers remained at anchor in the main British naval base at Scapa Flow, which confirmed to Lütjens that the British were unaware of his operation. On the evening of 20 May, Bismarck and the rest of the flotilla reached the Norwegian coast; the minesweepers were detached and the two raiders and their destroyer escorts continued north. The following morning, radio-intercept officers on board Prinz Eugen picked up a signal ordering British reconnaissance aircraft to search for two battleships and three destroyers northbound off the Norwegian coast. At 7:00 on the 21st, the Germans spotted four unidentified aircraft, which quickly departed. Shortly after 12:00, the flotilla reached Bergen and anchored at Grimstadfjord, where the ships’ crews painted over the Baltic camouflage with the standard “outboard grey” worn by German warships operating in the Atlantic.
When Bismarck was in Norway, a pair of Bf 109 fighters circled overhead to protect her from British air attacks, but Flying Officer Michael Suckling managed to fly his Spitfire directly over the German flotilla at a height of 8,000 m (26,000 ft) and take photos of Bismarck and her escorts. Upon receipt of the information, Admiral John Tovey ordered the battlecruiser HMS Hood, the newly commissioned battleship HMS Prince of Wales, and six destroyers to reinforce the pair of cruisers patrolling the Denmark Strait. The rest of the Home Fleet was placed on high alert in Scapa Flow. Eighteen bombers were dispatched to attack the Germans, but weather over the fjord had worsened and they were unable to find the German warships.
Bismarck did not replenish her fuel stores in Norway, as her operational orders did not require her to do so. She had left port 200 t (200 long tons) short of a full load, and had since expended another 1,000 t (980 long tons) on the voyage from Gotenhafen. Prinz Eugen took on 764 t (752 long tons) of fuel. At 19:30 on 21 May, Bismarck, Prinz Eugen, and the three escorting destroyers left Bergen. At midnight, when the force was in the open sea, heading towards the Arctic Ocean, Raeder disclosed the operation to Hitler, who reluctantly consented to the raid. The three escorting destroyers were detached at 04:14 on 22 May, while the force steamed off Trondheim. At around 12:00, Lütjens ordered his two ships to turn toward the Denmark Strait to attempt the break-out into the open Atlantic.
By 04:00 on 23 May, Lütjens ordered Bismarck and Prinz Eugen to increase speed to 27 knots (50 km/h; 31 mph) to make the dash through the Denmark Strait. Upon entering the Strait, both ships activated their FuMO radar detection equipment sets. Bismarck led Prinz Eugen by about 700 m (770 yd); mist reduced visibility to 3,000 to 4,000 m (3,300 to 4,400 yd). The Germans encountered some ice at around 10:00, which necessitated a reduction in speed to 24 knots (44 km/h; 28 mph). Two hours later, the pair had reached a point north of Iceland. The ships were forced to zigzag to avoid ice floes. At 19:22, hydrophone and radar operators aboard the German warships detected the cruiser HMS Suffolk at a range of approximately 12,500 m (13,700 yd). Prinz Eugen’s radio-intercept team decrypted the radio signals being sent by Suffolk and learned that their location had been reported.
Lütjens gave permission for Prinz Eugen to engage Suffolk, but the captain of the German cruiser could not clearly make out his target and so held fire. Suffolk quickly retreated to a safe distance and shadowed the German ships. At 20:30, the heavy cruiser HMS Norfolk joined Suffolk, but approached the German raiders too closely. Lütjens ordered his ships to engage the British cruiser; Bismarck fired five salvoes, three of which straddled Norfolk and rained shell splinters on her decks. The cruiser laid a smoke screen and fled into a fog bank, ending the brief engagement. The concussion from the 38 cm guns’ firing disabled Bismarck’s FuMO 23 radar set; this prompted Lütjens to order Prinz Eugen to take station ahead so she could use her functioning radar to scout for the formation.
At around 22:00, Lütjens ordered Bismarck to make a 180-degree turn in an effort to surprise the two heavy cruisers shadowing him. Although Bismarck was visually obscured in a rain squall, Suffolk’s radar quickly detected the manoeuvre, allowing the cruiser to evade. The cruisers remained on station through the night, continually relaying the location and bearing of the German ships. The harsh weather broke on the morning of 24 May, revealing a clear sky. At 05:07, hydrophone operators aboard Prinz Eugen detected a pair of unidentified vessels approaching the German formation at a range of 20 nmi (37 km; 23 mi), reporting “Noise of two fast-moving turbine ships at 280° relative bearing!”
Chase
After the engagement, Lütjens reported, “Battlecruiser, probably Hood, sunk. Another battleship, King George V or Renown, turned away damaged. Two heavy cruisers maintain contact.”At 08:01, he transmitted a damage report and his intentions to OKM, which were to detach Prinz Eugen for commerce raiding and to make for Saint-Nazaire for repairs. Shortly after 10:00, Lütjens ordered Prinz Eugen to fall behind Bismarck to determine the severity of the oil leakage from the bow hit. After confirming “broad streams of oil on both sides of [Bismarck’s] wake”, Prinz Eugen returned to the forward position. About an hour later, a British Short Sunderland flying boat reported the oil slick to Suffolk and Norfolk, which had been joined by the damaged Prince of Wales. Rear Admiral Frederic Wake-Walker, the commander of the two cruisers, ordered Prince of Wales to remain behind his ships.
Prime Minister Winston Churchill ordered all warships in the area to join the pursuit of Bismarck and Prinz Eugen. Tovey’s Home Fleet was steaming to intercept the German raiders, but on the morning of 24 May was still over 350 nmi (650 km; 400 mi) away. The Admiralty ordered the light cruisers Manchester, Birmingham, and Arethusa to patrol the Denmark Strait in the event that Lütjens attempted to retrace his route. The battleship Rodney, which had been escorting RMS Britannic and was due for a refit in the Boston Navy Yard, joined Tovey. Two old Revenge-class battleships were ordered into the hunt: Revenge, from Halifax, and Ramillies, which was escorting Convoy HX 127. In all, six battleships and battlecruisers, two aircraft carriers, thirteen cruisers, and twenty-one destroyers were committed to the chase. By around 17:00, the crew aboard Prince of Wales restored nine of her ten main guns to working order, which permitted Wake-Walker to place her in the front of his formation to attack Bismarck if the opportunity arose.
With the weather worsening, Lütjens attempted to detach Prinz Eugen at 16:40. The squall was not heavy enough to cover her withdrawal from Wake-Walker’s cruisers, which continued to maintain radar contact. Prinz Eugen was therefore recalled temporarily. The cruiser was successfully detached at 18:14. Bismarck turned around to face Wake-Walker’s formation, forcing Suffolk to turn away at high speed. Prince of Wales fired twelve salvos at Bismarck, which responded with nine salvos, none of which hit. The action diverted British attention and permitted Prinz Eugen to slip away. After Bismarck resumed her previous heading, Wake-Walker’s three ships took up station on Bismarck’s port side.
Although Bismarck had been damaged in the engagement and forced to reduce speed, she was still capable of reaching 27 to 28 knots (50 to 52 km/h; 31 to 32 mph), the maximum speed of Tovey’s King George V. Unless Bismarck could be slowed, the British would be unable to prevent her from reaching Saint-Nazaire. Shortly before 16:00 on 25 May, Tovey detached the aircraft carrier Victorious and four light cruisers to shape a course that would position her to launch her torpedo bombers. At 22:00, Victorious launched the strike, which comprised six Fairey Fulmar fighters and nine Fairey Swordfish torpedo bombers of 825 Naval Air Squadron, led by Lt Cdr Eugene Esmonde. The inexperienced aviators nearly attacked Norfolk and the U.S. Coast Guard cutter USCGC Modoc on their approach; the confusion alerted Bismarck’s anti-aircraft gunners.
Bismarck also used her main and secondary batteries to fire at maximum depression to create giant splashes in the paths of the incoming torpedo bombers. None of the attacking aircraft were shot down. Bismarck evaded eight of the torpedoes launched at her, but the ninth struck amidships on the main armoured belt, throwing one man into a bulkhead and killing him and injuring five others. The explosion also caused minor damage to electrical equipment. The ship suffered more serious damage from manoeuvres to evade the torpedoes: rapid shifts in speed and course loosened collision mats, which increased the flooding from the forward shell hole and eventually forced abandonment of the port number 2 boiler room. This loss of a second boiler, combined with fuel losses and increasing bow trim, forced the ship to slow to 16 knots (30 km/h; 18 mph). Divers repaired the collision mats in the bow, after which speed increased to 20 knots (37 km/h; 23 mph), the speed that the command staff determined was the most economical for the voyage to occupied France.
Shortly after the Swordfish departed the scene, Bismarck and Prince of Wales engaged in a brief artillery duel. Neither scored a hit. Bismarck’s damage control teams resumed work after the short engagement. The sea water that had flooded the number 2 port side boiler threatened to enter the number 4 turbo-generator feedwater system, which would have permitted saltwater to reach the turbines. The saltwater would have damaged the turbine blades and thus greatly reduced the ship’s speed. By morning on 25 May, the danger had passed. The ship slowed to 12 knots (22 km/h; 14 mph) to allow divers to pump fuel from the forward compartments to the rear tanks; two hoses were successfully connected and a few hundred tons of fuel were transferred.
As the chase entered open waters, Wake-Walker’s ships were compelled to zig-zag to avoid German U-boats that might be in the area. This required the ships to steam for ten minutes to port, then ten minutes to starboard, to keep the ships on the same base course. For the last few minutes of the turn to port, Bismarck was out of range of Suffolk’s radar. At 03:00 on 25 May, Lütjens ordered an increase to maximum speed, which at this point was 28 knots (52 km/h; 32 mph). He then ordered the ship to circle away to the west and then north. This manoeuvre coincided with the period during which his ship was out of radar range; Bismarck successfully broke radar contact and circled back behind her pursuers. Suffolk’s captain assumed that Bismarck had broken off to the west and attempted to find her by also steaming west. After half an hour, he informed Wake-Walker, who ordered the three ships to disperse at daylight to search visually.
The Royal Navy search became frantic, as many of the British ships were low on fuel. Victorious and her escorting cruisers were sent west, Wake-Walker’s ships continued to the south and west, and Tovey continued to steam toward the mid-Atlantic. Force H, with the aircraft carrier Ark Royal and steaming up from Gibraltar, was still at least a day away. Unaware that he had shaken off Wake-Walker, Lütjens sent long radio messages to Naval Group West headquarters in Paris. The signals were intercepted by the British, from which bearings were determined. They were wrongly plotted on board King George V, leading Tovey to believe that Bismarck was heading back to Germany through the Iceland-Faeroe gap, which kept his fleet on the wrong course for seven hours. By the time the mistake had been discovered, Bismarck had put a sizeable gap between herself and the British ships.
British code-breakers were able to decrypt some of the German signals, including an order to the Luftwaffe to provide support for Bismarck making for Brest, decrypted by Jane Fawcett on 25 May 1941. The French Resistance provided the British with confirmation that Luftwaffe units were relocating there. Tovey could now turn his forces toward France to converge in areas through which Bismarck would have to pass. A squadron of Coastal Command PBY Catalinas based in Northern Ireland joined the search, covering areas where Bismarck might head in the attempt to reach occupied France. At 10:30 on 26 May, a Catalina piloted by Ensign Leonard B. Smith of the US Navy located her, some 690 nmi (1,280 km; 790 mi) northwest of Brest. At her current speed, she would have been close enough to reach the protection of U-boats and the Luftwaffe in less than a day. Most British forces were not close enough to stop her.
The only possibility for the Royal Navy was Ark Royal with Force H, under the command of Admiral James Somerville. Victorious, Prince of Wales, Suffolk and Repulse were forced to break off the search due to fuel shortage; the only heavy ships remaining apart from Force H were King George V and Rodney, but they were too distant. Ark Royal’s Swordfish were already searching nearby when the Catalina found her. Several torpedo bombers also located the battleship, about 60 nmi (110 km; 69 mi) away from Ark Royal. Somerville ordered an attack as soon as the Swordfish returned and were rearmed with torpedoes. He detached the cruiser Sheffield to shadow Bismarck, though Ark Royal’s aviators were not informed of this. As a result, the Swordfish, which were armed with torpedoes equipped with new magnetic detonators, accidentally attacked Sheffield. The magnetic detonators failed to work properly and Sheffield emerged unscathed.
Upon returning to Ark Royal, the Swordfish loaded torpedoes equipped with contact detonators. The second attack comprised fifteen aircraft and was launched at 19:10. At 20:47, the torpedo bombers began their attack descent through the clouds. As the Swordfish approached, Bismarck fired her main battery at Sheffield, straddling the cruiser with her second salvo. Shell fragments rained down on Sheffield, killing three men and wounding several others. Sheffield quickly retreated under cover of a smoke screen. The Swordfish then attacked; Bismarck began to turn violently as her anti-aircraft batteries engaged the bombers. One torpedo hit amidships on the port side, just below the bottom edge of the main armour belt. The force of the explosion was largely contained by the underwater protection system and the belt armour but some structural damage caused minor flooding.
The second torpedo struck Bismarck in her stern on the port side, near the port rudder shaft. The coupling on the port rudder assembly was badly damaged and the rudder became locked in a 12° turn to port. The explosion also caused much shock damage. The crew eventually managed to repair the starboard rudder but the port rudder remained jammed. A suggestion to sever the port rudder with explosives was dismissed by Lütjens, as damage to the screws would have left the battleship helpless. At 21:15, Lütjens reported that the ship was unmanoeuvrable.
Sinking
With the port rudder jammed, Bismarck was now steaming in a large circle, unable to escape from Tovey’s forces. Though fuel shortages had reduced the number of ships available to the British, the battleships King George V and Rodney were still available, along with the heavy cruisers Dorsetshire and Norfolk. Lütjens signalled headquarters at 21:40 on the 26th: “Ship unmanoeuvrable. We will fight to the last shell. Long live the Führer.”The mood of the crew became increasingly depressed, especially as messages from the naval command reached the ship. Intended to boost morale, the messages only highlighted the desperate situation in which the crew found itself. As darkness fell, Bismarck briefly fired on Sheffield, though the cruiser quickly fled. Sheffield lost contact in the low visibility and Captain Philip Vian’s group of five destroyers was ordered to keep contact with Bismarck through the night.
The ships encountered Bismarck at 22:38; the battleship quickly engaged them with her main battery. After firing three salvos, she straddled the Polish destroyer ORP Piorun. The destroyer continued to close the range until a near miss at around 12,000 m (39,000 ft) forced her to turn away. Throughout the night and into the morning, Vian’s destroyers harried Bismarck, illuminating her with star shells and firing dozens of torpedoes, none of which hit. Between 05:00 and 06:00, Bismarck’s crew attempted to launch one of the Arado 196 float planes to carry away the ship’s war diary, footage of the engagement with Hood, and other important documents. The third shell hit from Prince of Wales had damaged the steam line on the aircraft catapult, rendering it inoperative. As it was not possible to launch the aircraft it had become a fire hazard, and was pushed overboard.
After daybreak on 27 May, King George V led the attack. Rodney followed off her port quarter; Tovey intended to steam directly at Bismarck until he was about 8 nmi (15 km; 9.2 mi) away. At that point, he would turn south to put his ships parallel to his target. At 08:43, lookouts on King George V spotted her, some 23,000 m (25,000 yd) away. Four minutes later, Rodney’s two forward turrets, comprising six 16 in (406 mm) guns, opened fire, then King George V’s 14 in (356 mm) guns began firing. Bismarck returned fire at 08:50 with her forward guns; with her second salvo, she straddled Rodney. Thereafter, Bismarck’s ability to aim her guns deteriorated as the ship, unable to steer, moved erratically in the heavy seas and deprived Schneider of a predictable course for range calculations.
As the range fell, the ships’ secondary batteries joined the battle. Norfolk and Dorsetshire closed and began firing with their 8 in (203 mm) guns. At 09:02, a 16-inch shell from Rodney struck Bismarck’s forward superstructure, killing hundreds of men and severely damaging the two forward turrets. According to survivors, this salvo probably killed both Lindemann and Lütjens and the rest of the bridge staff. The main fire control director was also destroyed by this hit, which probably also killed Schneider. A second shell from this salvo struck the forward main battery, which was disabled, though it would manage to fire one last salvo at 09:27. Lieutenant von Müllenheim-Rechberg, in the rear control station, took over firing control for the rear turrets. He managed to fire three salvos before a shell destroyed the gun director, disabling his equipment. He gave the order for the guns to fire independently, but by 09:31, all four main battery turrets had been put out of action. One of Bismarck’s shells exploded 20 feet off Rodney’s bow and damaged her starboard torpedo tube—the closest Bismarck came to a direct hit on her opponents.
By 10:00, Tovey’s two battleships had fired over 700 main battery shells, many at very close range; Bismarck had been reduced to a shambles, aflame from stem to stern. She was slowly settling by the stern from uncontrolled flooding with a 20 degree list to port. Rodney closed to 2,700 m (3,000 yd), point-blank range for guns of that size, and continued to fire. Tovey could not cease fire until the Germans struck their ensigns or it became clear they were abandoning ship. Rodney fired two torpedoes from her port-side tube and claimed one hit. According to Ludovic Kennedy, “if true, [this is] the only instance in history of one battleship torpedoing another”.
First Officer Hans Oels ordered the men below decks to abandon ship; he instructed the engine room crews to open the ship’s watertight doors and prepare scuttling charges. Gerhard Junack, the chief engineering officer, ordered his men to set the demolition charges with a 9-minute fuse but the intercom system broke down and he sent a messenger to confirm the order to scuttle the ship. The messenger never returned and Junack primed the charges and ordered the crew to abandon the ship. Junack and his comrades heard the demolition charges detonate as they made their way up through the various levels. Oels rushed throughout the ship, ordering men to abandon their posts. After he reached the deck a huge explosion killed him and about a hundred others.
The four British ships fired more than 2,800 shells at Bismarck, and scored more than 400 hits, but were unable to sink Bismarck by gunfire. At around 10:20, running low on fuel, Tovey ordered the cruiser Dorsetshire to sink Bismarck with torpedoes and sent his battleships back to port. Dorsetshire fired a pair of torpedoes into Bismarck’s starboard side, one of which hit. Dorsetshire then moved around to her port side and fired another torpedo, which also hit. By the time these torpedo attacks took place, the ship was already listing so badly that the deck was partly awash. It appears that the final torpedo may have detonated against Bismarck’s port side superstructure, which was by then already underwater. Around 10:35, Bismarck capsized to port and slowly sank by the stern, disappearing from the surface at 10:40. Some survivors reported they saw Captain Lindemann standing at attention at the stem of the ship as she sank.
Junack, who had abandoned ship by the time it capsized, observed no underwater damage to the ship’s starboard side. Von Müllenheim-Rechberg reported the same but assumed that the port side, which was then under water, had been more significantly damaged. Around 400 men were now in the water; Dorsetshire and the destroyer Maori moved in and lowered ropes to pull the survivors aboard. At 11:40, Dorsetshire’s captain ordered the rescue effort abandoned after lookouts spotted what they thought was a U-boat. Dorsetshire had rescued 85 men and Maori had picked up 25 by the time they left the scene. A U-boat later reached the survivors and found three men, and a German trawler rescued another two. One of the men picked up by the British died of his wounds the following day. Out of a crew of over 2,200 men, only 114 survived.
Contenu sujet à changement.
Produits similaires
-
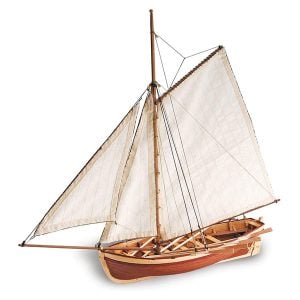
Artesania Latina HMS Bountys Jolly Boat 1/25 Scale 19004
$89.99 Continuer la lecture -
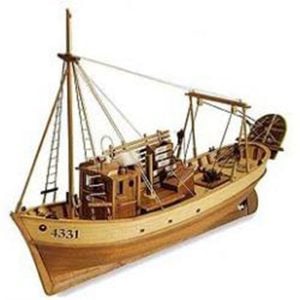
Artesania Latina Mare Nostrum Mediterranean Trawler 1/35 Scale 20100
$139.99 Continuer la lecture2 reviews -
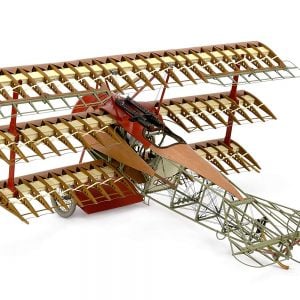
Artesania Latina Fokker DR1 Kit 1/16 Scale 20350 Special Order
$399.99 Ajouter au panier -
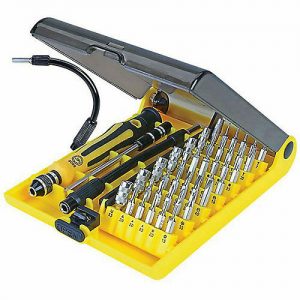
Set d'outils de précision Artesania Latina 27220
$23.99 Ajouter au panier2 reviews

