Tamiya 1/48 F4U-1D Corsair with Moto-Tug
This is the sixth part of the Tamiya 1/48 F4U-1D Corsair with Moto-Tug 61085 build and review.
Now that all of the Mr Hobby Masking Sol NEO has been applied I can get to painting the blue, and I’m really excited to start painting. I’m going to be using an overall Navy Blue, and that can be a bit boring to have a completely uniform colored model. So I’m going to be painting some other blues in an attempt to create a sort of marbled blue color, which will look a lot more interesting with the chipped paint.
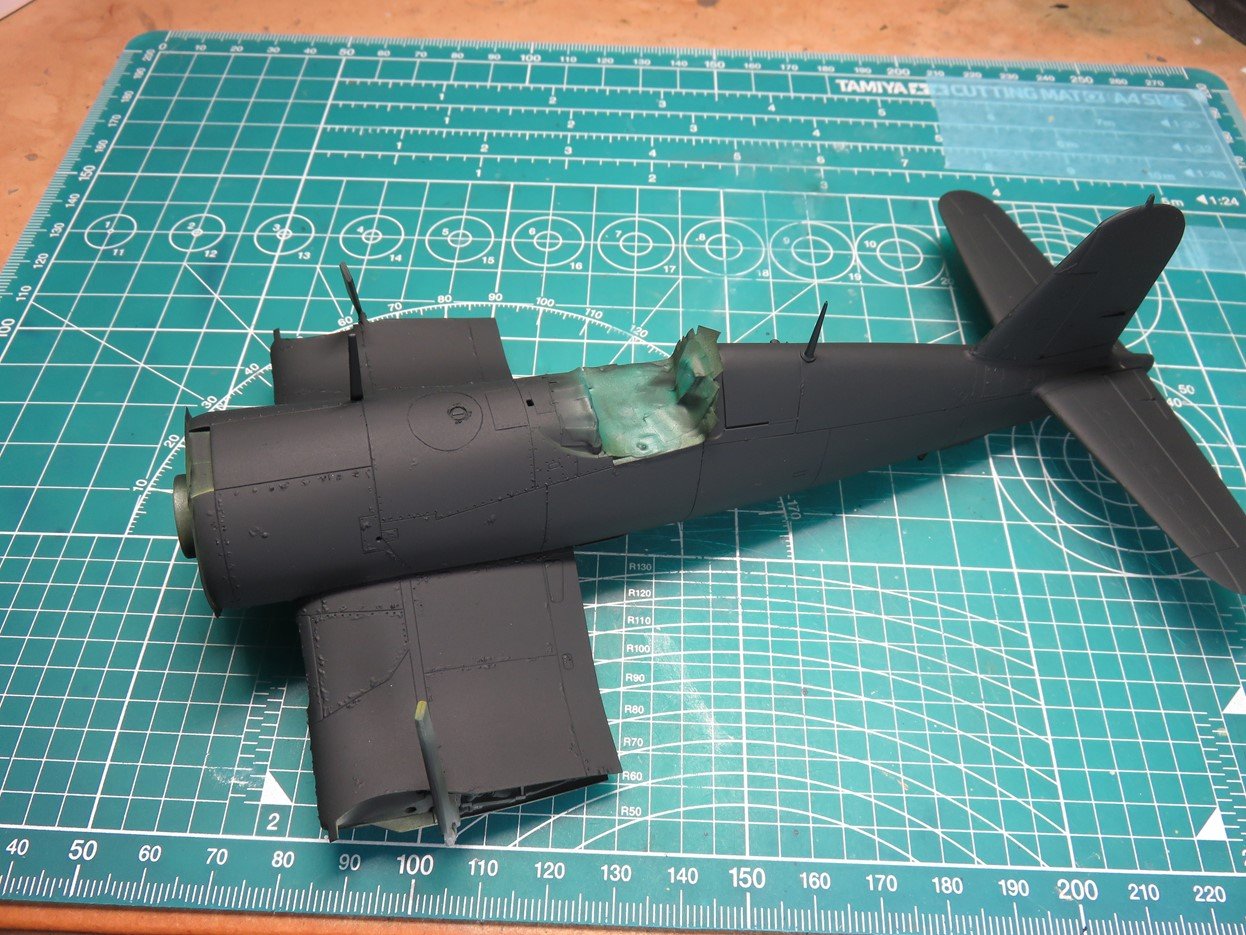
I started by painting a base coat of Tamiya XF-17 Sea Blue. This is a really nice color with a bit of a green tint to it. It’s very dark and almost looks black without direct light on it.
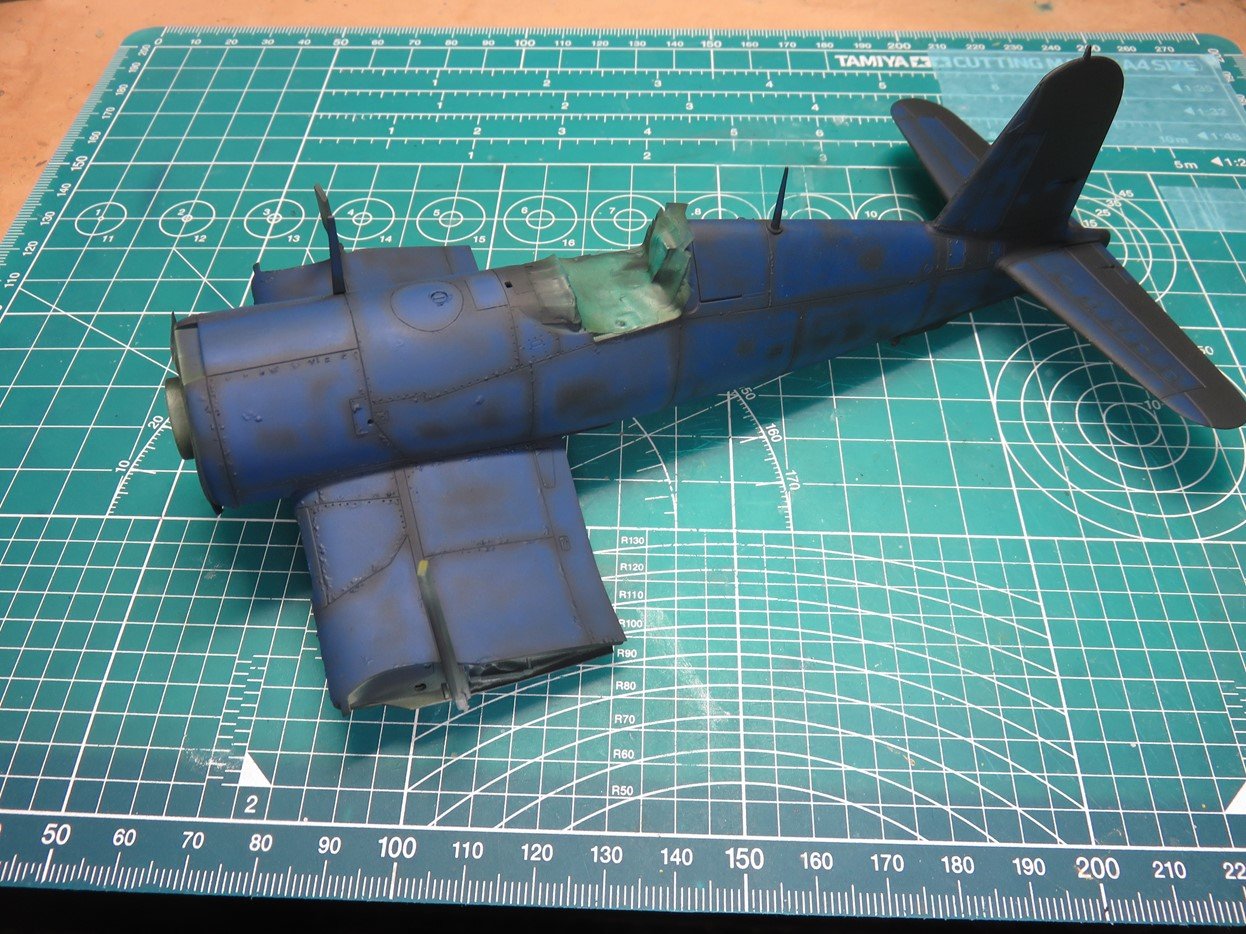
For the next color I wanted something lighter, and I used Tamiya XF-8 Flat Blue. I painted this in between all of the panel sections, and I did my best to keep the paint splotchy and uneven. This will give the effect of random fading in the paint from the harsh climate of the Pacific.
It looks a bit extreme right now as that Flat Blue looks really bright against the Sea Blue, but I can assure you in the next step it will all come together and be really impressive.
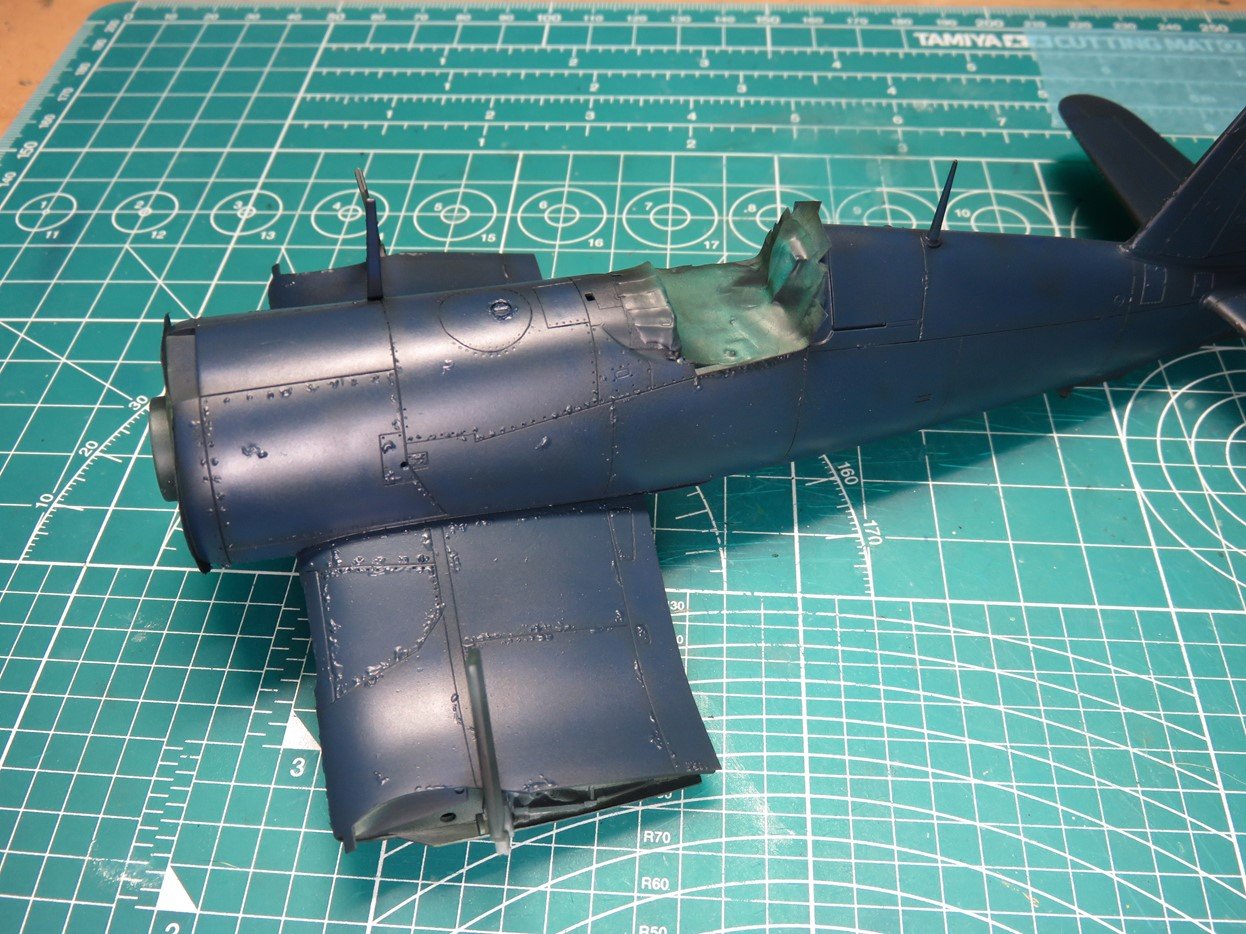
I decanted Tamiya AS-8 Navy Blue into a spare paint jar for airbrushing. After I loaded the paint into my airbrush I thinned it down about 70% so that it was quite thin and easy to spray. This stage of the painting takes some resistance, as it’s really easy to overdo it and ruin the base work we’ve just painted.
I sprayed the paint on in light layers, making even passes back and forth on the model. I sprayed these light coats until I had the color I desired. You can see how nicely the Navy Blue blends the other colors together and still leaves that nice marbled effect of the previous paints.
Another thing to keep in mind with this method is that because the paint is thinned down more it will lay on more glossy/wet, and you will want to add a lot more paint to the model. But you must remember that the paint is going to dry darker, so put the parts aside for a bit and wait for the paint to dry to really see the result. And then you can decide if it’s enough, or if you want to add more paint.
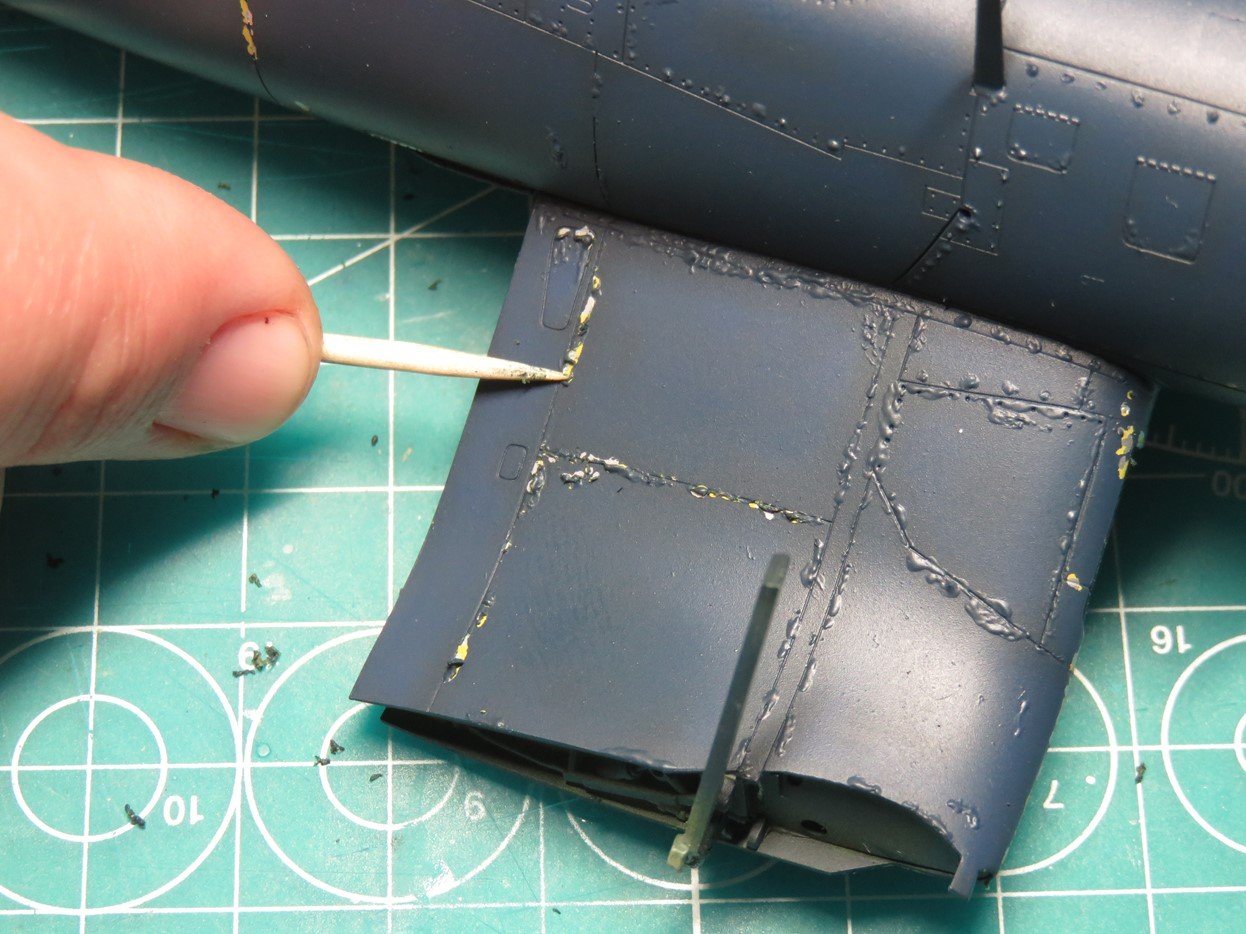
The fun doesn’t end with the painting! No, it’s actually just getting started, as it’s now time to remove the Mr. Masking Sol NEO from the model. Masking Sol NEO is pretty easy to remove, especially if you’ve painted nice thin layers onto the model. I took a cocktail stick, and I’m slowly scraping the Masking Sol NEO. Most of it was easy to remove with the cocktail stick and my finger.
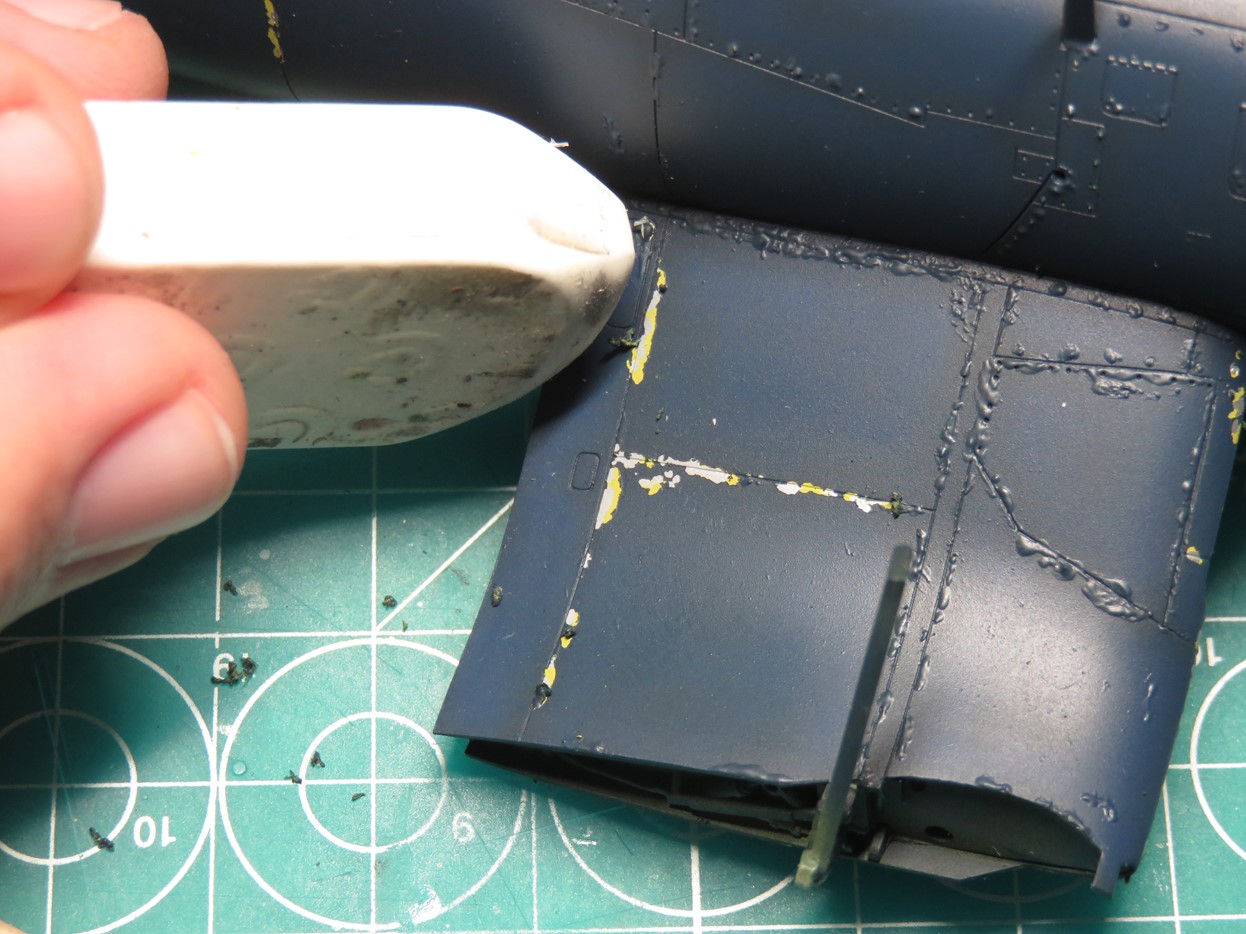
However, for those times when the masking just won’t remove itself from the model I’ve found that using a soft rubber eraser over the Masking Sol NEO makes removal very quick and easy, and it won’t damage my paint.
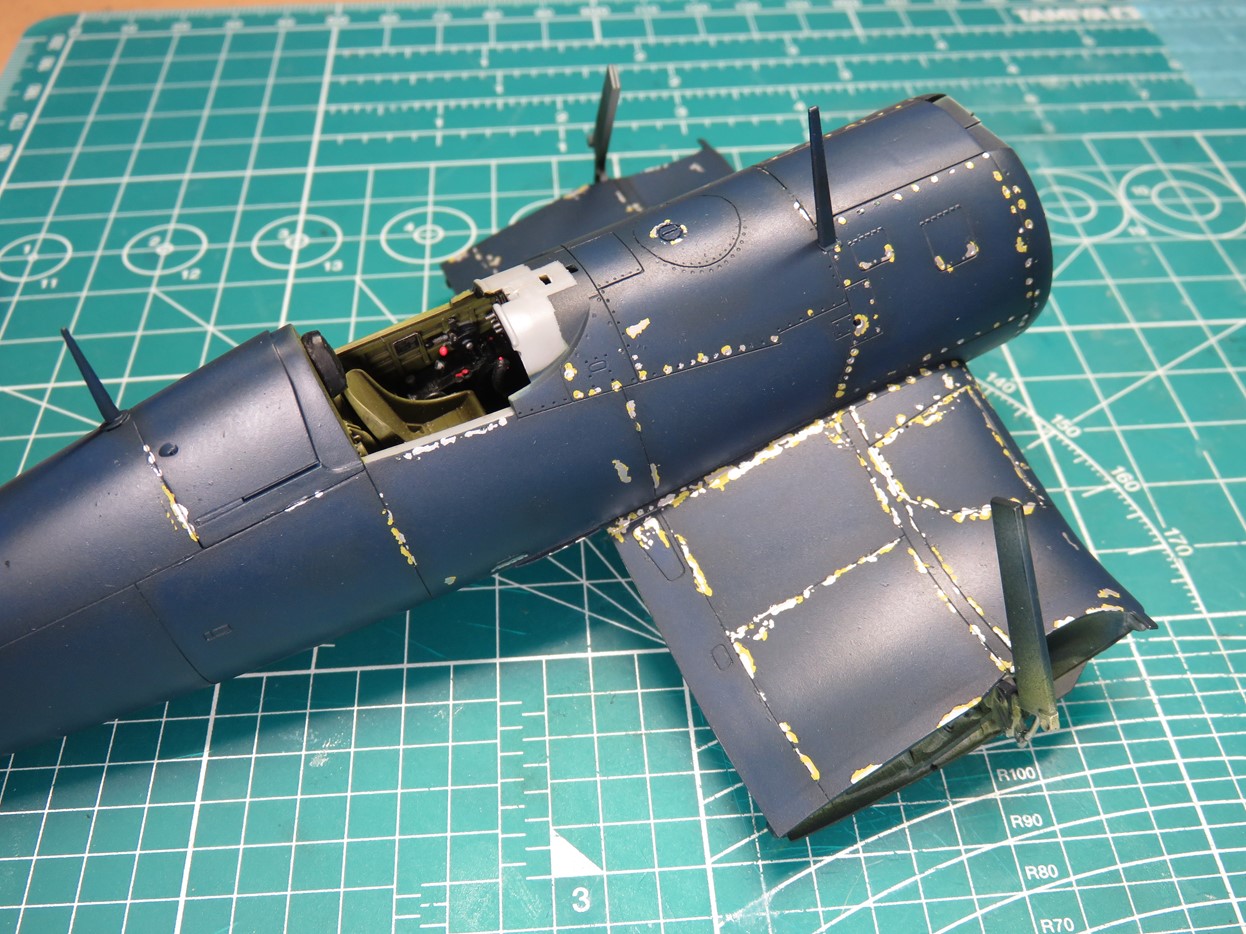
Now we can see how that chipping looks against the Navy Blue. I really love the bits of Tamiya XF-4 Yellow Green mixed with the AS-12 Bare Metal Silver. At the moment the Bare Metal Silver is really bright and overpowers the Yellow Green, but once the model is completed I’ll add a Flat or Semi-Gloss coat and this will take some of that bright shine out of the model.
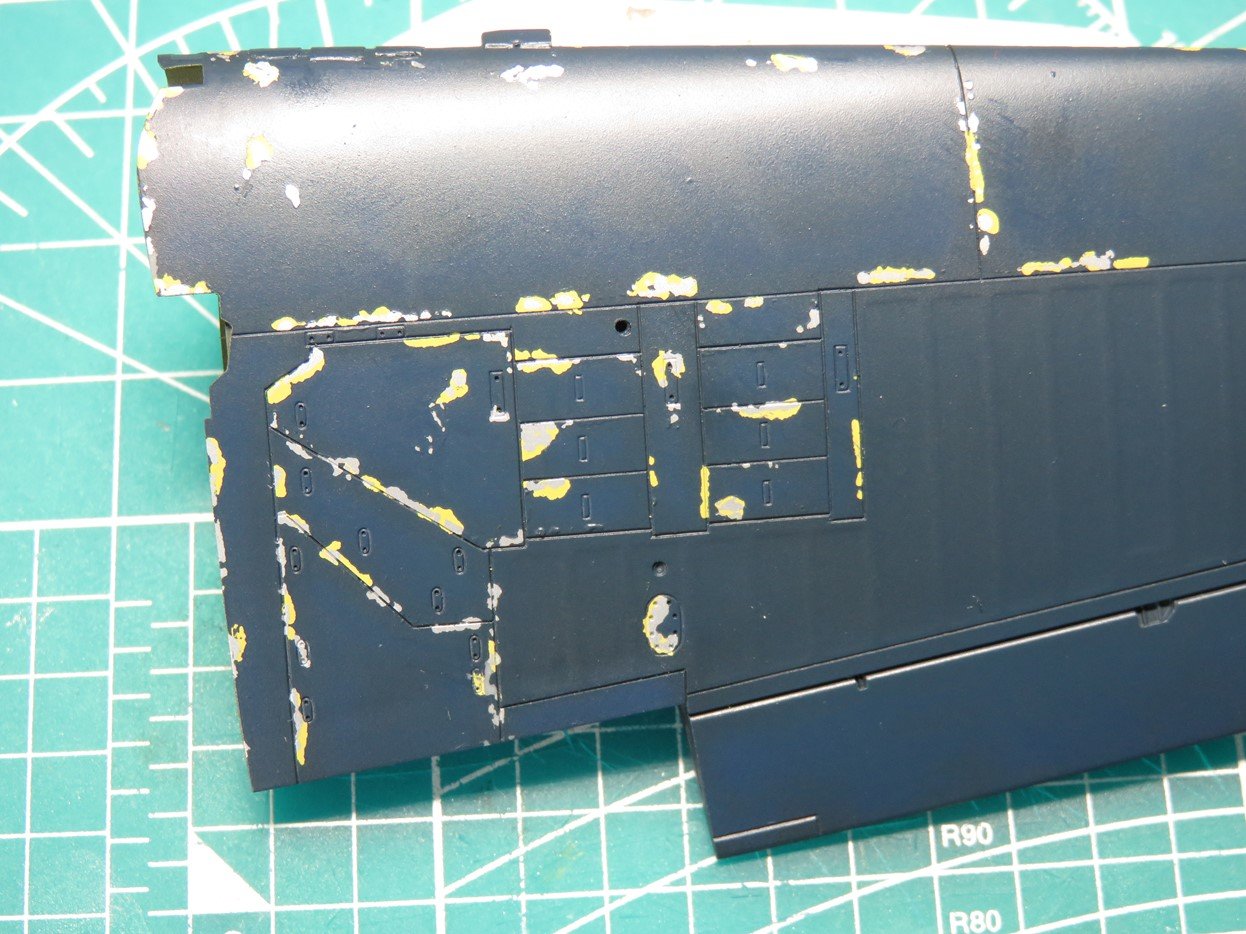
Here is a closer view of the top of the wing. Sadly a lot of this detail will be hidden once the wings are folded up. But you can see the variation in the blue tones, and the Yellow Green surrounding the silver sections.
In the words of George Lucas “I might have gone too far in a few places” but this was a lot of fun, and would look even better with a larger-scale model. It’s nice to see how these chipped sections stand out from the blue, it’s even better than I had imagined.
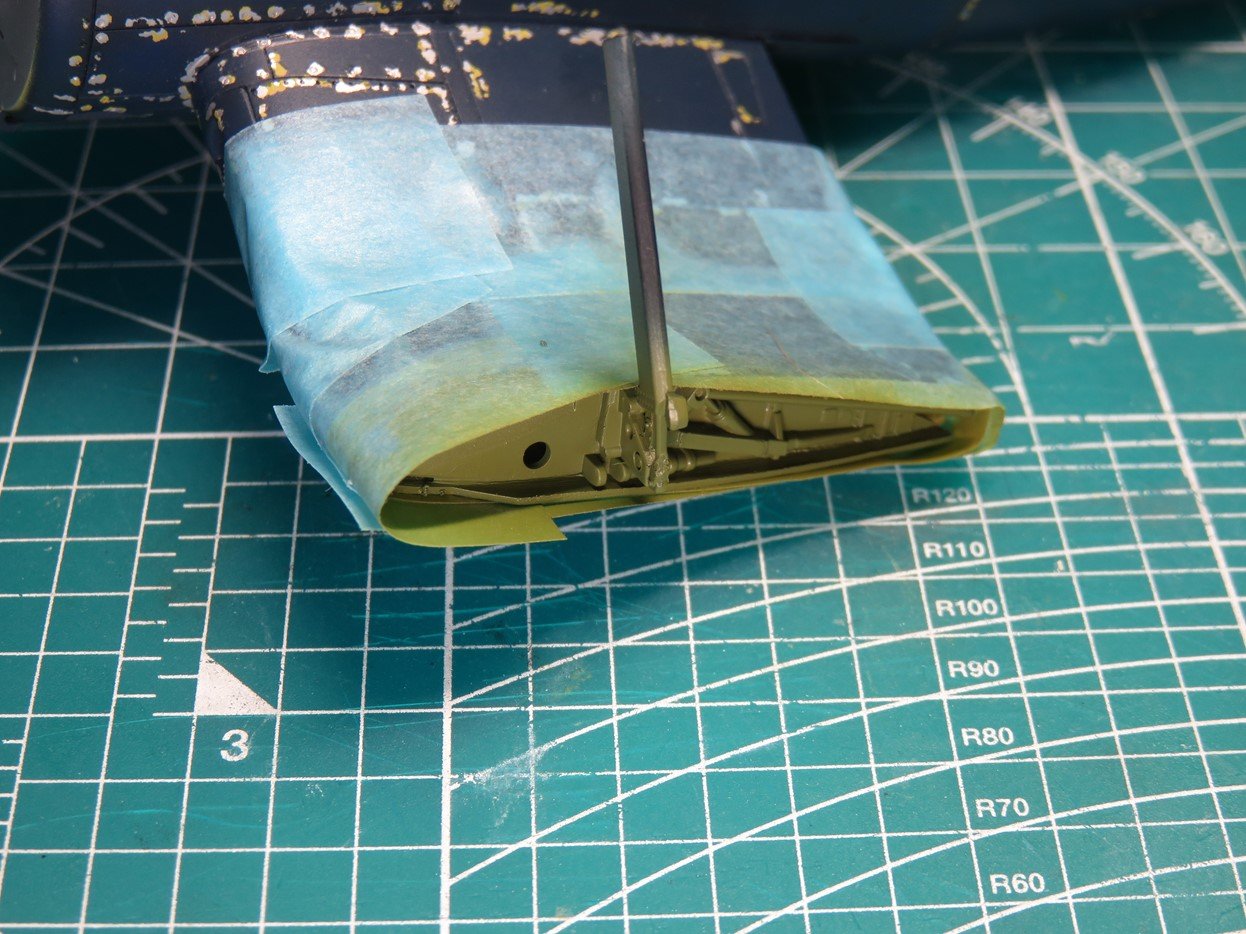
I nearly forgot a very important part to paint and that’s the middle section where the wings separate. It depends on the type of Corsair you are building, sometimes these sections are the same Navy Blue color, but I decided to follow the Tamiya instructions. I took my time here to carefully mask off these sections so that no paint would bleed through.
I again used Mr Color 351 Zinc Chromate Green, and I very carefully and slowly painted this inner section. I gradually built up the layers of paint, and I was careful not to spray in areas where the paint might pool under the tape, which would be a major setback to try and clean up.
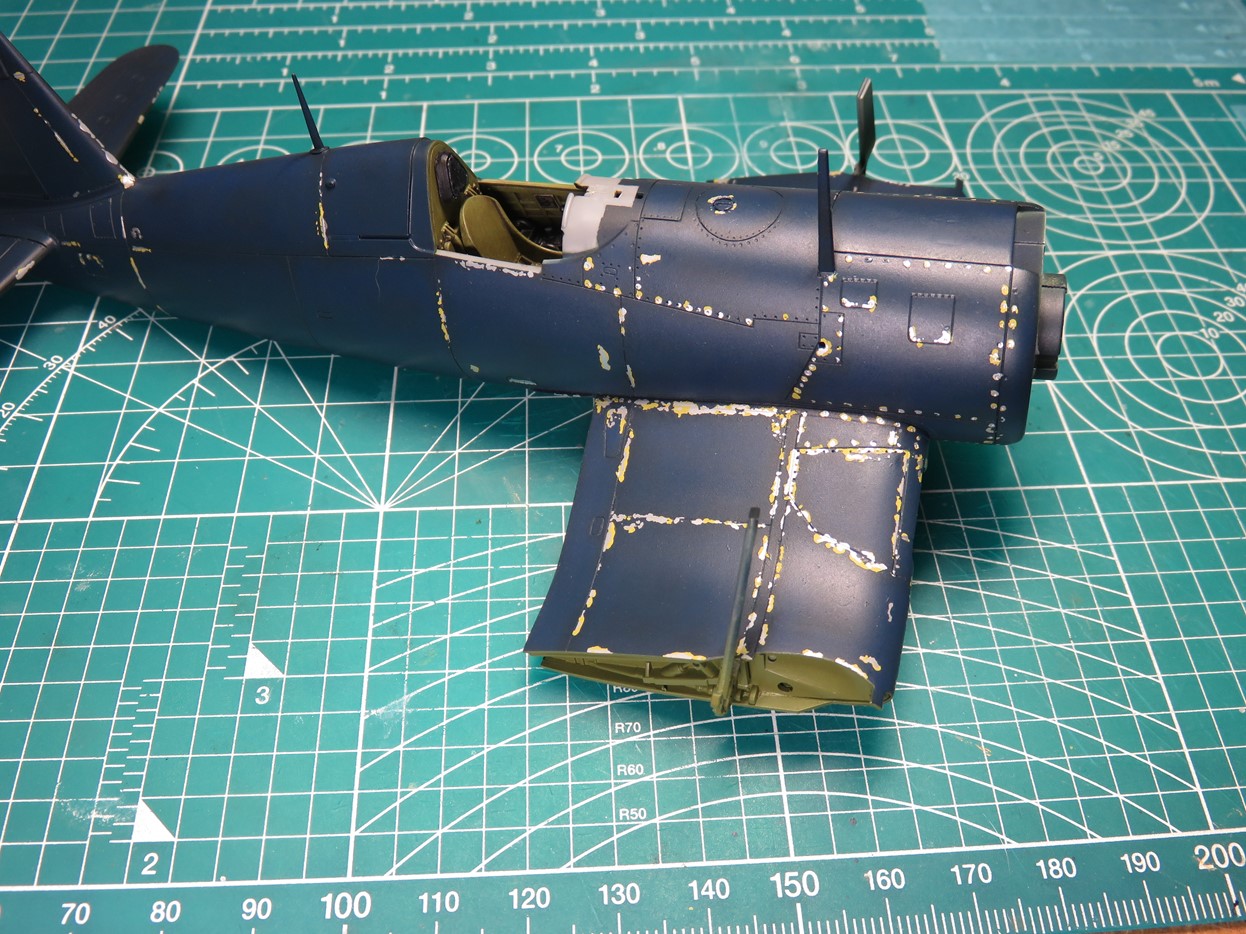
I held my breath as I slowly removed the tape, and I was relieved to see that none of the Mr. Color 351 had bled through. It’s looking really good here, and my next step is to add a gloss coat to all of the parts to get ready for the decals.
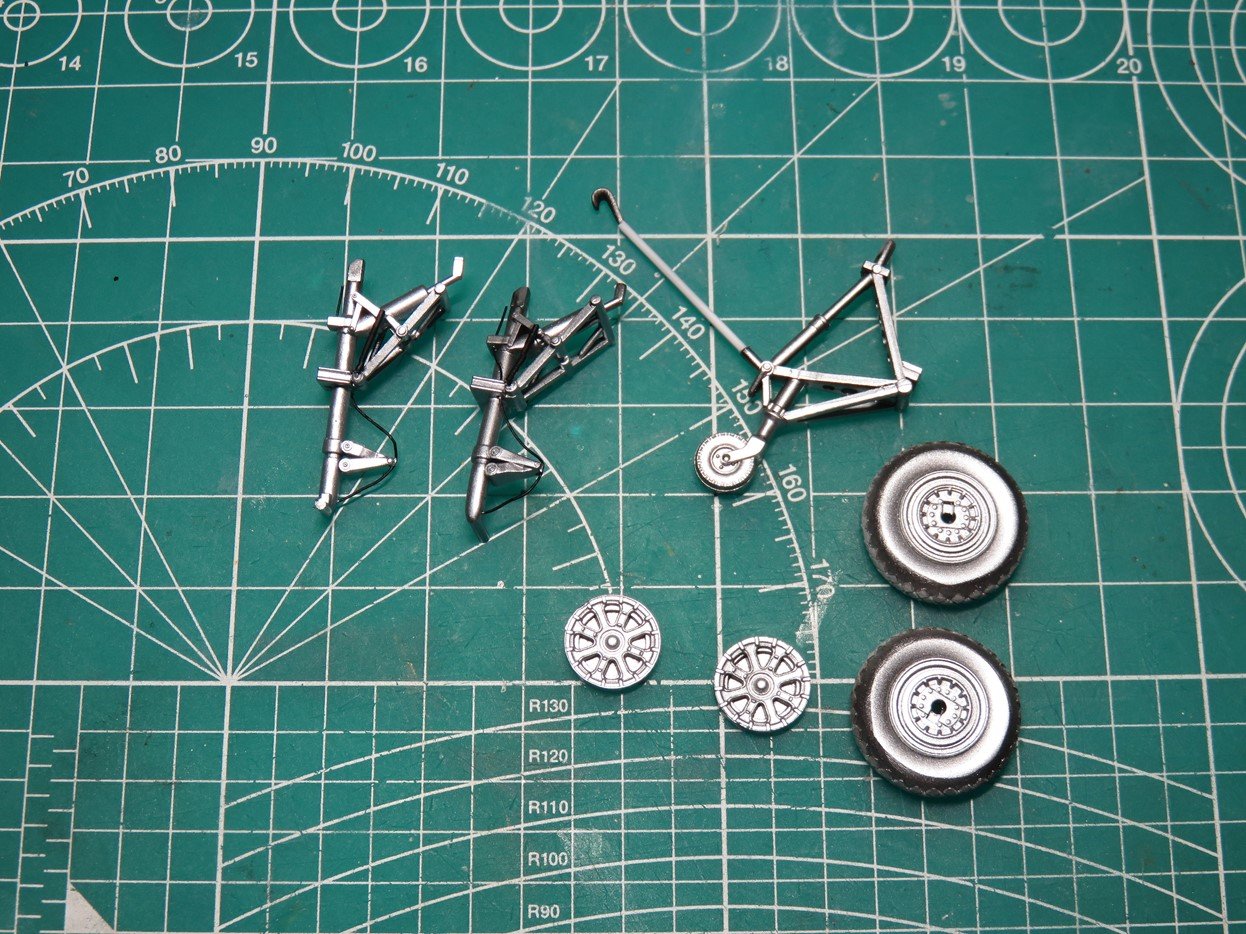
I turned my attention to the landing gear and wheel hubs. I first primed these parts with Mr. Surfacer 1500 Black, and once that had dried I sprayed the parts with Tamiya LP-72 MICA Silver. This is another silver paint that I really love as it’s duller and doesn’t have quite the same radiant luster as other Tamiya Silver paints.
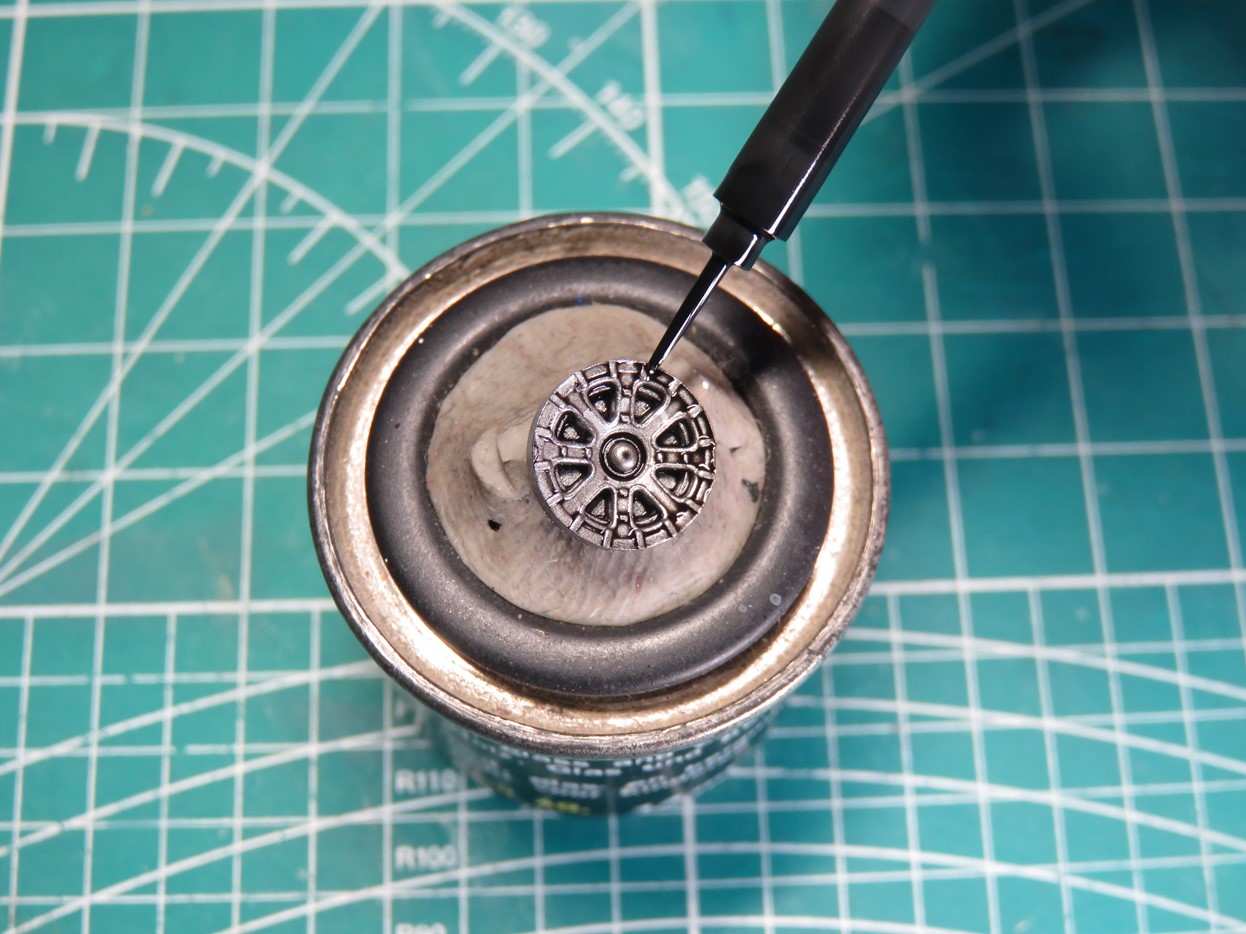
To bring out the details I painted Tamiya Panel Line Accent Color Black. When you are using silver it’s important to use a black wash. This is because the black paint will stand out and not be reflected like other colors.
After the Accent Color dries I’ll remove some of the excess wash with Tamiya Enamel thinner and seal the paint in with a gloss coat.
Unfortunately, this is where the progress will stop for the week. While I was spraying a gloss coat onto the fuselage section the clamp I was using to hold the model twisted off and the Corsair fell crashing to the floor.
Several parts are damaged, worst of all was one of the arms that will hold up the folded wing. So I’m going to go about fixing that, but once it’s fixed I’ll resume painting a gloss coat and we can finally add some decals.
To be continued…
Jared Demes is a modeler from southern Alberta. He has been building models since he was 4 years old when his Dad first introduced him to the hobby. He has written for several magazines including, Fine Scale Modeler, Scale Aircraft Modeling, Phoenix Scale Models, and others. He has an interest in all modeling subjects, with a focus on WWII Japanese aircraft and Science Fiction.
Jared has won several IPMS awards for his modeling, and currently operates his YouTube channel rebelsatcloudnine, where he showcases model builds and product demonstrations.
Next Post: Part 6
First Post: Part 1
Previous Post: Part 5
