
Revell HMCS Snowberry Flower Class Corvette
This is the ninth part of the Revell HMCS Snowberry Flower Class Corvette 1/144 Scale RVG 05132
Well, this has been a tougher week than I was expecting. Most of my time was spent cleaning the railing sections which contained a lot of flash. I was also tossing around the idea of refitting the railings as they are too big and out of scale for 1/144. This is where photo-etch parts would come in handy, but this would also make the model more delicate.
I looked at trimming the centres of the railings so that only the post remained and then drilling out holes to fill it in with thin wire. Though I really liked this idea again it’s very, very, time-consuming.
After talking it over with a friend of mine who also built this kit (I mentioned in the previous post), I found it would be less complicated for this build to just use the kit-supplied parts, and I think that was for the best as it’s not the exact look I want, but the railings are complicated enough without me making them more difficult.

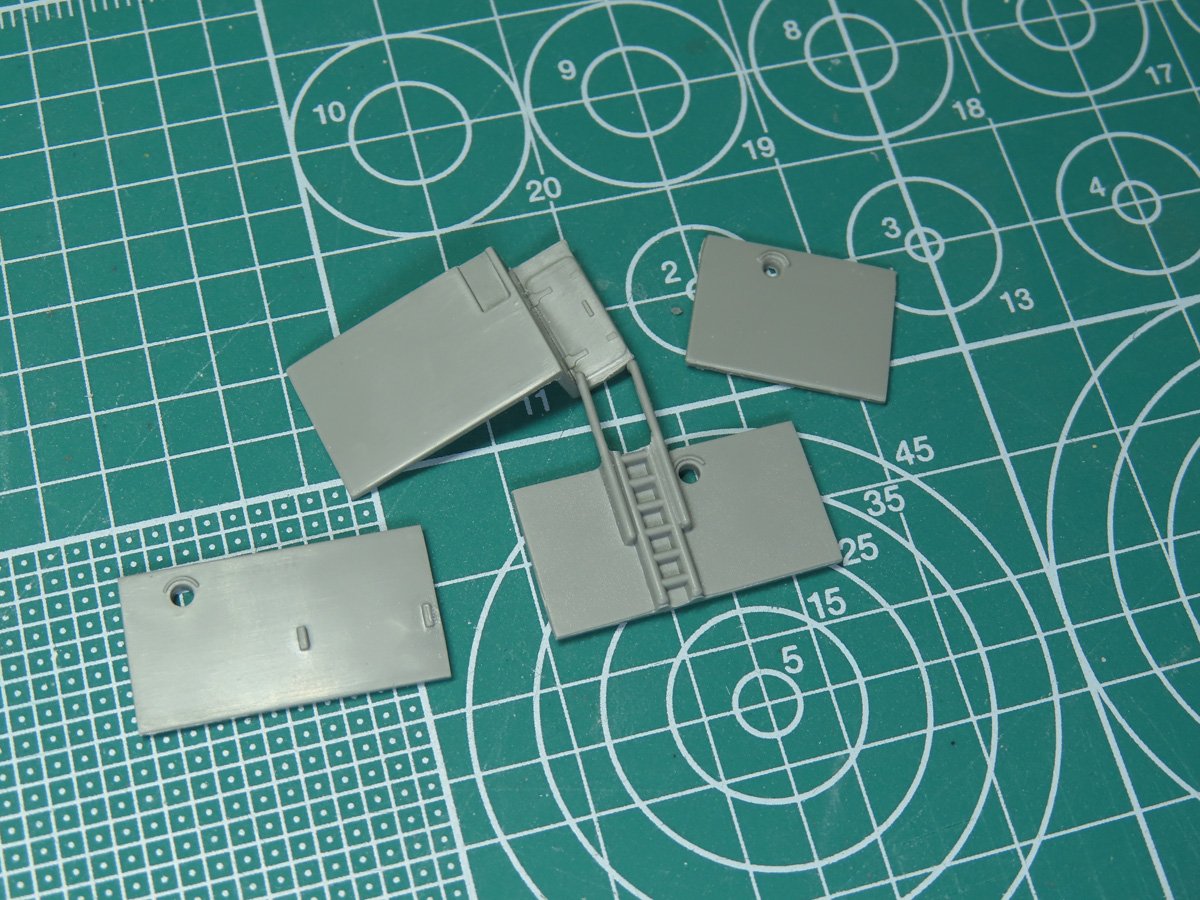
My first task was to build the small cabin mast. This section came in small segments and the fit wasn’t exactly precise. I would need to fill these gaps in, and I did with some Mr Dissolved Putty which easily fell into all of the small cracks.

After some initial sanding, I found that there were still some gaps in a few places. So I applied more Mr. Dissolved Putty, but for some reason, this refused to dry and harden. So I scraped it off and tried again, this time I was able to sand the surfaces smooth and the Cabin Mast was ready for some paint.
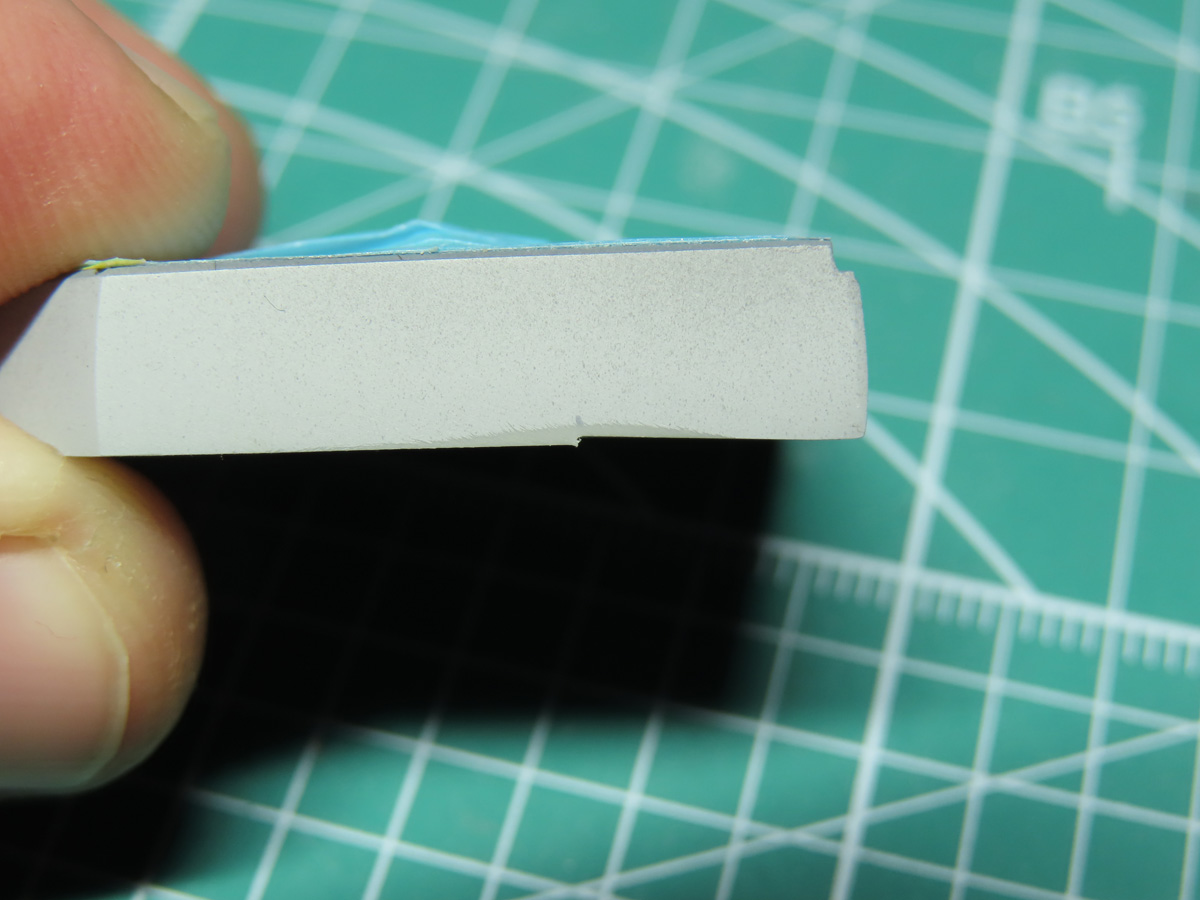
Moving on to the smoke cabin, the platform where the smoke stack would be placed on top of. I noticed that it didn’t fit properly where the two sections of the deck connected. The back section of the deck tapered upwards slightly and this would cause the platform to be raised at the back. To fit this I marked off the area where the decks met and then I carefully and gradually sanded the plastic creating a slight indent.

Here you can see that this quick modification has led to a very even and secure fit.
Now I began the long process of cleaning and prepping the parts for painting. I’ve shown this in previous posts, but just to keep everyone up to speed, I started by scraping and sanding off the flash from all of the railings. Next, I painted the parts with Tamiya XF-84 Dark Iron, and once I had dried properly I sponged on some Mr. Masking Sol Neo to create chipping in the paint. Lastly, I sprayed on a base coat of Tamiya XF-19 Sky Grey and removed the masking to reveal the chipped paint.

I glued the smoke cabin base to the deck of the ship, and I carefully applied Mr. Cement SP around the base. I also painted the circle in the centre with AK Interactive Black (AK 11029) as this is where the funnel was going to be placed.

I weathered the funnel as I had mentioned previously and painted the lower section with XF-19 Sky Grey. For the upper blue section, I used a mixture of Tamiya XF-23 Light Blue and X-14 Sky Blue (50-50 ratio)
Something I noticed that wasn’t mentioned in the instructions, if you look closely near the rim where the blue and grey meet you can see a very small indent. This is where the cables go that help hold down the stack to the deck. I drilled these four indents out as I plan to add wires to it later on.

The cabin mast was added next, and it rests right next to the smoke cabin.

The smoke funnel sort of sits on the deck and I just wasn’t pleased with the security of the fit. Worried that I might accidentally bump it off at some point in the build I glued it down with Mr. Just super glue and now it rests on very tight and secure.
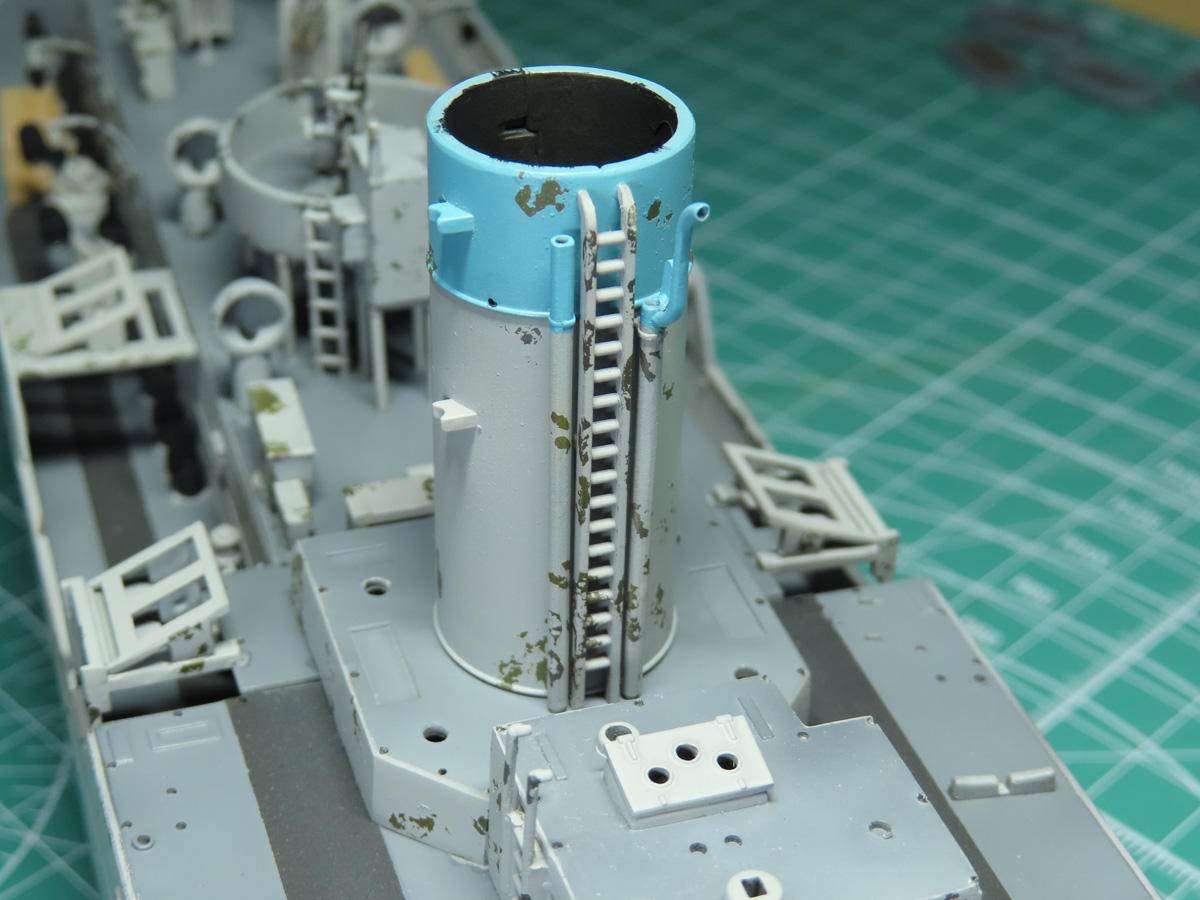
Moving towards the front of the funnel I added the small ladder and the smaller funnels that rest on the front. These were also secured with BSI Glue, and I had drilled out the openings of the smaller funnel prior to painting. It was tricky to get them centred for drilling, but I’m really glad that I did as it added a bit of extra realism to the model.

The railings were tricky to add at times as the pegs at times were too big to fit into the sockets. And this forced me to slow down with the building. Adding the extra intake funnels and boxes to this small section really created a cramped space.
I can now see why Revell left off the cables from the funnel, once those intakes are added there sadly isn’t any room to add wires. So I might have to omit this idea from the build.

Something I’d like to point out especially if you are following along with this build, is that part 453 isn’t on sprue G as noted in the instructions, it is on sprue E. This caused me a bit of confusion as I thought I had lost one of the parts, but thankfully the parts diagram in the instructions helped to to locate this piece of railing.

I added the smaller boxes to the top of the cabin, and once they were in place I started to add on the railings. Sadly this is where I’ll have to stop as I accidentally painted the wrong section of the railing so I’ll have to work on that later today.

With some careful manoeuvring, I was able to get the whistle added to the funnel, this was painted with XF-1 Flat Black.

I added the four life rafts to the sides of the ship. It was a bit difficult to figure out the exact colour as they all seemed to vary from ship to ship. I found several that were a blue-grey colour so I decided to use Tamiya XF-82 Ocean Grey 2 (RAF). For the wooden sections on the insides of the rafts, I used AK Interactive Burnt Umber (AK11111).

To wrap up this post, I last added the top cap to the funnel. Despite the difficulties I found in placing all of the tiny parts into a cramped area, as I stand back and look at the parts, I’m once again really impressed with how great all of these details look.
It’s oddly overwhelming to look at them all as there is just so much to see that you sort of get lost looking at it all. And we’re only halfway there, there is still a lot more that needs to be built.
I want to mention the railings one more time as they can be a very frustrating part of this build. They need a lot of clean up and at times they don’t want to fit exactly where they are supposed to go in their sockets. A few times I had to bend the posts slightly to get a better fit.
What adds greater difficulty is that you have to add these small delicate parts to an already delicate model with lots of small parts all over. I even had the railings “ping” off of my tweezers, but thankfully they didn’t land very far away and I could recover them.
I don’t want to deter anyone from this model, it’s not as precise as a Tamiya or Eduard kit. But with some careful and strategic planning, you will be rewarded with a great kit and a fun experience.
To be continued…
Jared Demes is a modeler from southern Alberta. He has been building models since he was 4 years old when his Dad first introduced him to the hobby. He has written for several magazines including, Fine Scale Modeler, Scale Aircraft Modeling, Phoenix Scale Models, and others. He has an interest in all modeling subjects, with a focus on WWII Japanese aircraft and Science Fiction.
Jared has won several IPMS awards for his modeling, and currently operates his YouTube channel rebelsatcloudnine, where he showcases model builds and product demonstrations.