Revell HMCS Snowberry Flower Class Corvette
This is the seventh part of the Revell HMCS Snowberry Flower Class Corvette 1/144 Scale RVG 05132
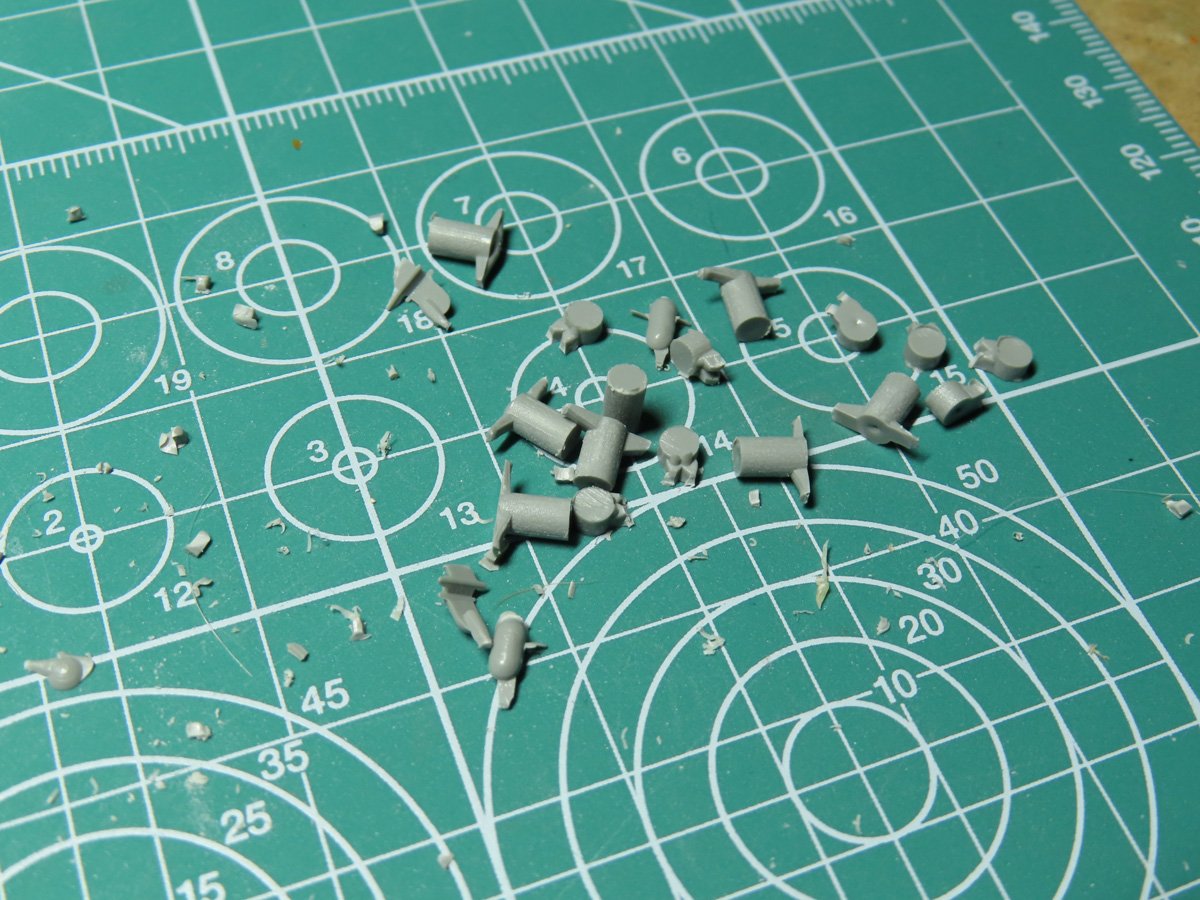
I’m realizing that some parts of the build will slow down a bit due to the amount of cleanup I’m going to have to do on all of these parts. What makes this a bit more difficult is that these are very tiny parts and some are very fragile and can be difficult to grip.
Revell decided to put as many parts onto each of the sprues as possible, this helps keep the cost of the kit down, and it makes it easier to put fewer sprues into the box, but this means that more styrene needs to be shot into the molding and that a more of the parts can become unaligned as the molds get used.
This is where I can see 3D printing starting to take over in the modeling scene. Resin printers are especially great at printing small and very detailed parts that injection molding just cannot compete with. After cleaning these parts I’m a bit inspired to give creating my own 3D files and making my own parts a try.
Perhaps creating our own 3D prints will be the future of “scratch building” parts?
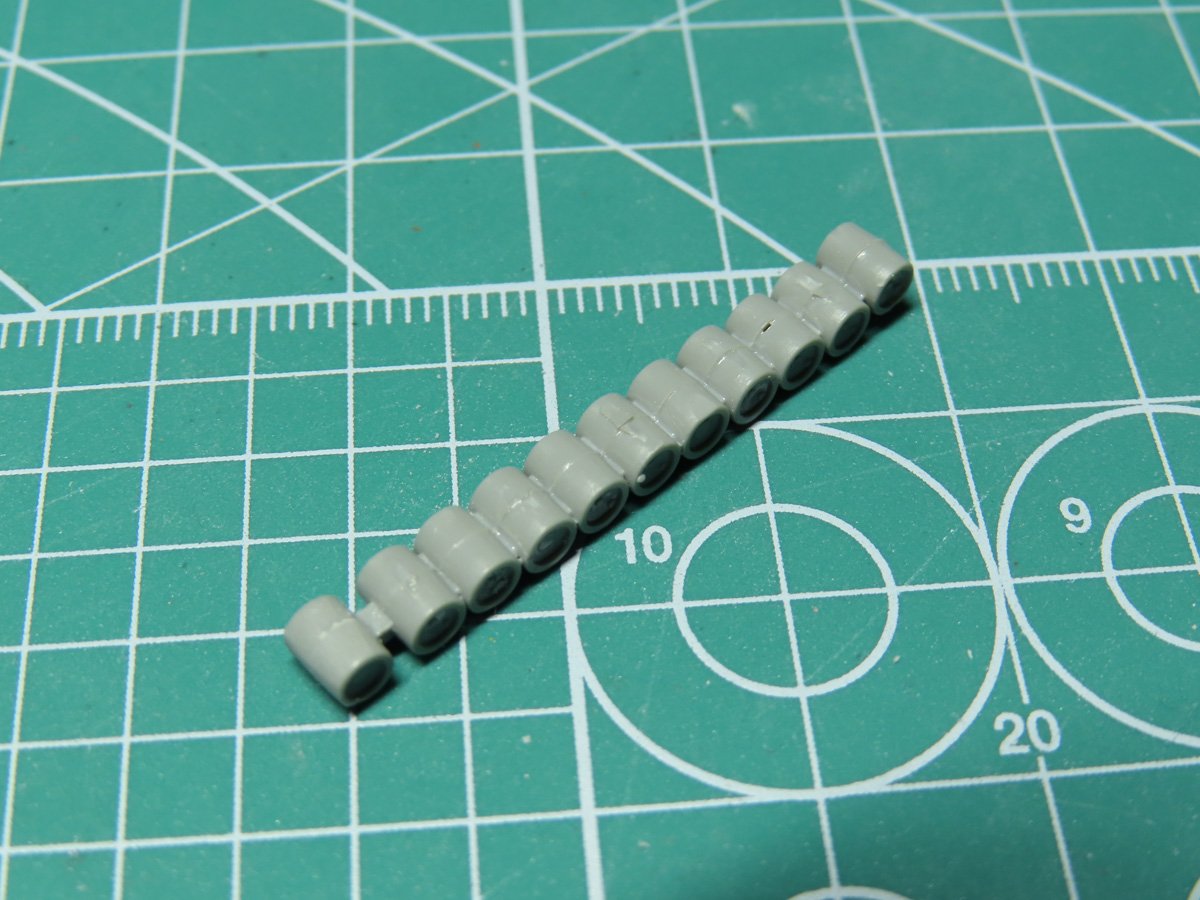
I’m going to start with building all of the parts that will fit onto the lower deck. Beginning with the depth charges that will be placed onto the racks fitted to the back of the ship. These were glued together with Mr. Cement SP, and once that had dried I sanded the tops to try and remove the seamline and smooth out everything.
The good thing with this is that I only had to sand the upper sides as you won’t be able to see the underside once the parts are installed.
Here are the sides that will hold the racks for the depth charges. As you can see there is quite a lot of flash and excess plastic to trim and clean. For this, a good set of modeling cutters will greatly aid you. For parts this delicate I’d suggest nippers such as the Tamiya Sharp Pointed Side Cutter 74035.

Once the parts were all cleaned and ready for painting I separated the parts that were going to be painted black. I started with a primer coat of Mr. Surfacer 1200, thinned with Mr. Levelling Thinner.
After the prime had dried I sprayed on a coat of Mr. Hobby Aqueous H-13 Flat Black.
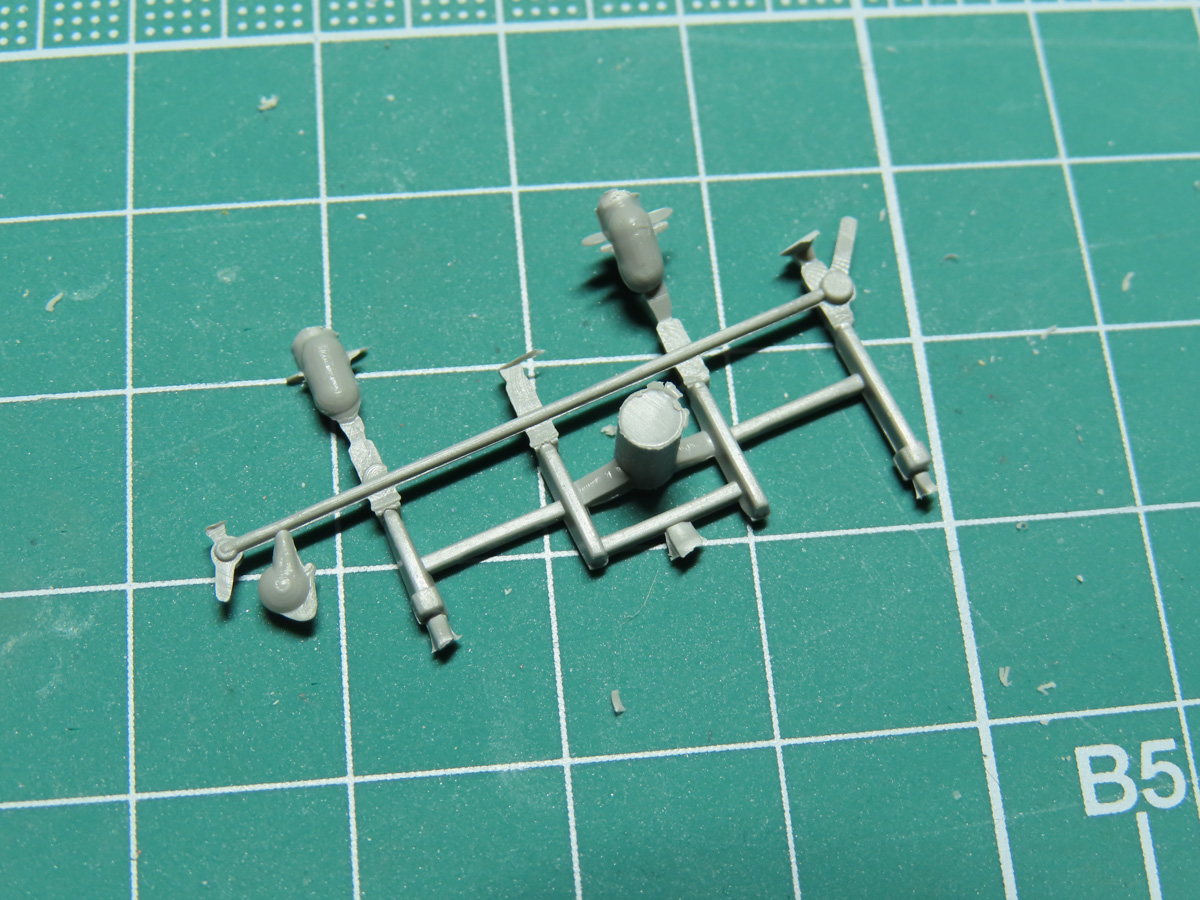
The parts on the right are the depth charges that were used in the launchers on the sides of the ship. I left plugs from the sprues on the underside of the parts so they could be held while I was painting and then I could easily cut these off and glue them to the model.

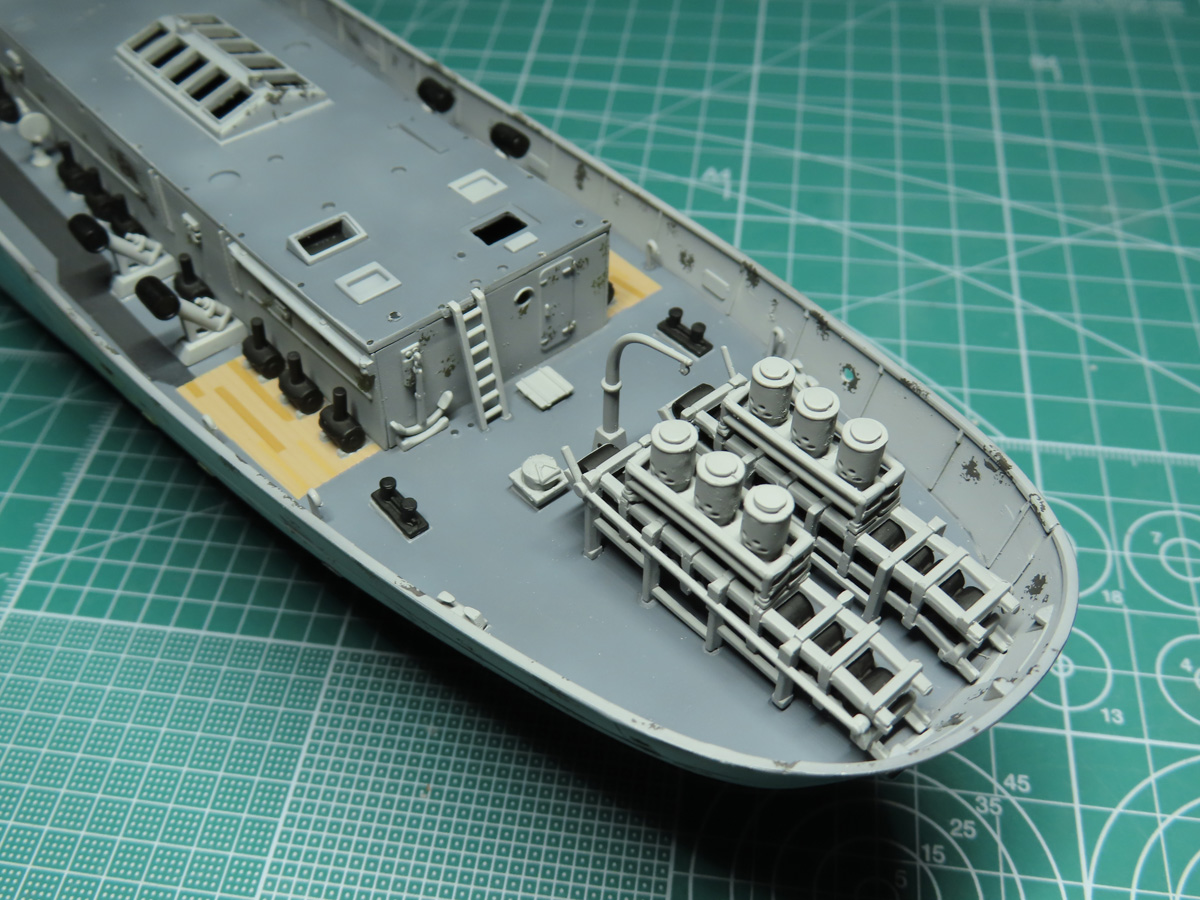
With a little bit of Mr. Cement added to either side of the parts I was able to easily place each of the depth charges into their resting mounts. I’m very pleased with how these look and that you can see the color difference with the sky grey painted mounts.

Next, I added the launchers. There are 2 of these for either side of the model, and they have a bit of a fit issue with the plugs on the underside. This was an easy fix, I took my small square metal file and quickly sanded down the edges and the parts fit much more securely into the sockets.

I then added the anchor ladder and some of the small hatches on the floor. I figured it was best to add these parts now before things became too crowded.

Lastly, I added some of the smaller details to the sides like the J-shaped exhaust vents. For situations like this, you really want to invest in a sturdy pair of tweezers like Tamiya Straight Tweezers 74004
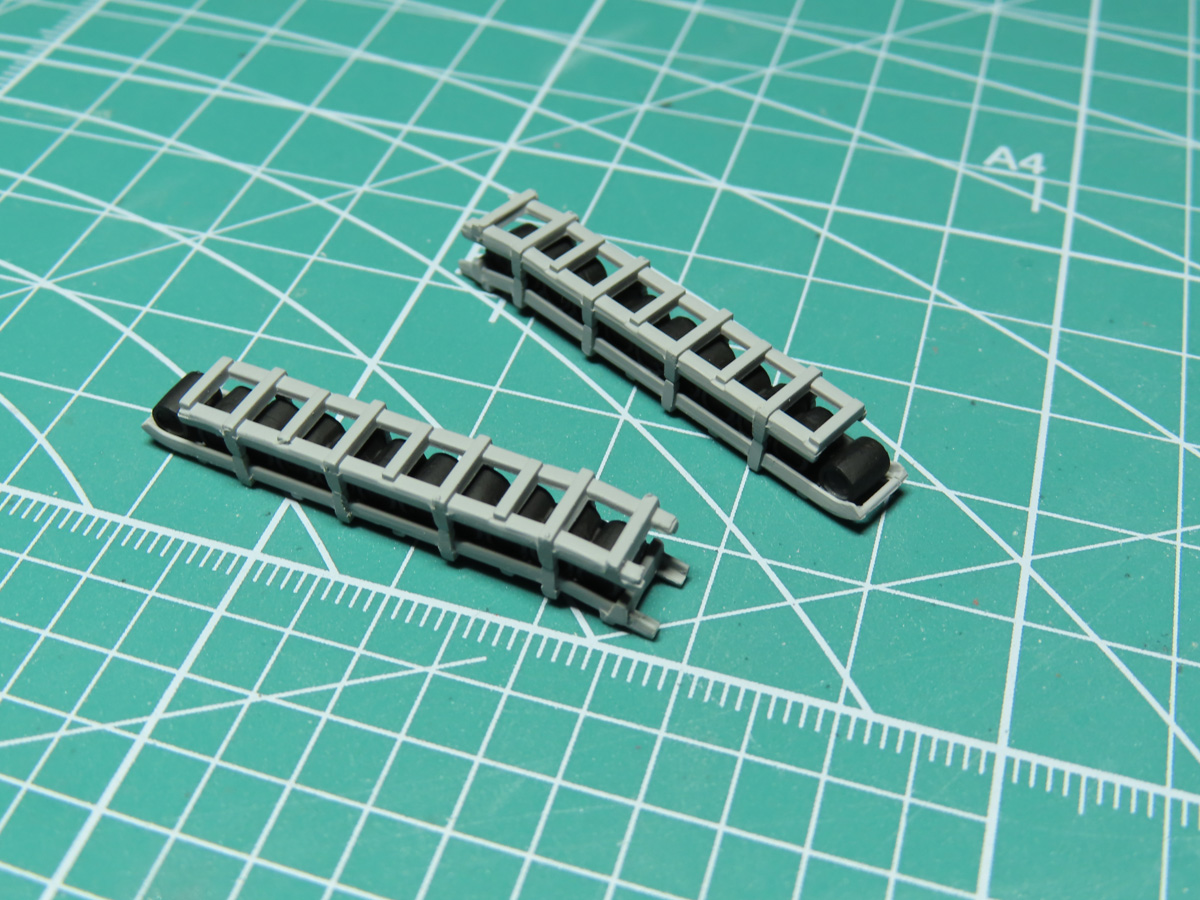
The depth chargers were first glued into the lower cage, and then I pressed the upper cage together to try and create a tight bond. The cages don’t really fit into place so you are going to have to use your best guess to keep these parts aligned.

When I test fit the sides of the frames I noticed that the cages didn’t exactly fit. This is a bit of a flaw within the kit. Here is the inner side of the frame, and highlighted in red I’ve marked the sections of plastic that needed to be carved away to ensure a proper fit.

Here is one of the completed depth charge racks. I’ll admit this is a bit of a fussy part to build, but once you trim the plastic from the sides everything goes together a lot easier.

I glued the racks to the deck with some Mr. Cement SP, adding a bit of glue to each of the legs and then gently pressing the parts together.

Lastly, I added these canisters to the tops of the racks. I don’t know exactly what these are for, some Corvettes had them and many more didn’t. The best information that I could find on them is that they were for storage of some kind.
I’m looking forward to the next stages of adding more parts to this model, there is a lot more cleanup work than I’d like to see on these parts it is impressive to see how much detail Revell put into this kit.
As I mentioned before at the beginning of this post, I think that we’re still seeing the infancy of 3D printing. And it will still take time to where everyone can easily print their own models. But I admire the number of modelers who are out there creating extra detail parts, and for things that I never thought would be possible.
This upcoming week look and see if there are any modifications that I might be able to 3D print and add to this project. I should probably start with the intake that I lost, it fell just before I was about to paint it. I guess that was my sacrifice to the modeling Gods.
To be continued…
Jared Demes is a modeler from southern Alberta. He has been building models since he was 4 years old when his Dad first introduced him to the hobby. He has written for several magazines including, Fine Scale Modeler, Scale Aircraft Modeling, Phoenix Scale Models, and others. He has an interest in all modeling subjects, with a focus on WWII Japanese aircraft and Science Fiction.
Jared has won several IPMS awards for his modeling, and currently operates his YouTube channel rebelsatcloudnine, where he showcases model builds and product demonstrations.