Revell HMCS Snowberry Flower Class Corvette
This is the twelfth part of the Revell HMCS Snowberry Flower Class Corvette 1/144 Scale RVG 05132
I stumbled onto this picture early on in the build. It’s Donald Duck holding a depth charge over a German U-boat, and this was painted on both sides of the main gun. One of the things that I really like about Canadian subjects is that they usually had artwork painted on their ships and aircraft. A good example of this is the nose art on the Halifax and Lancaster bombers. While the British did allow painting, it was usually kept to a minimum.
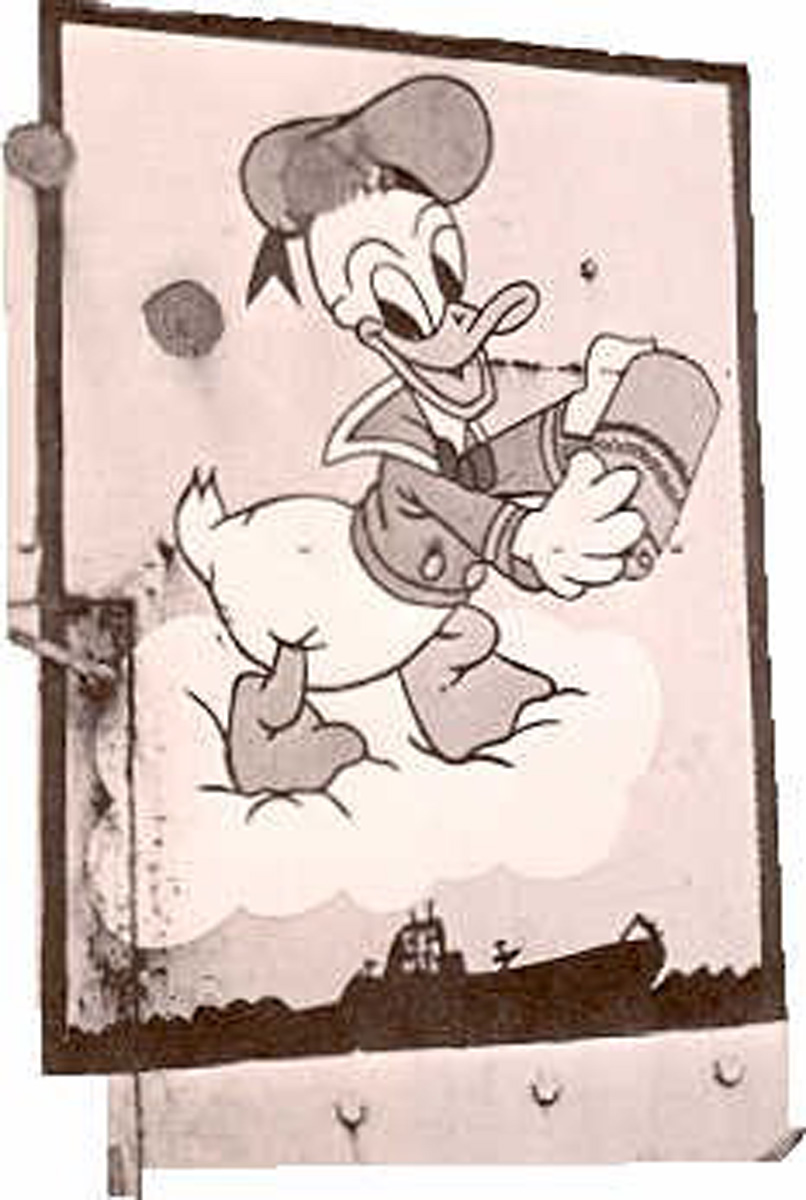
These little details really stand out, and it’s a great reminder that this painting probably meant a lot to the Canadians serving on Snowberry; it was sort of a mascot or something to rally over.
Well, I’ve been staring at this decal for weeks now, and I’m ecstatic to finally be able to add these little decals to the main gun and to see how much more I can finish this week.
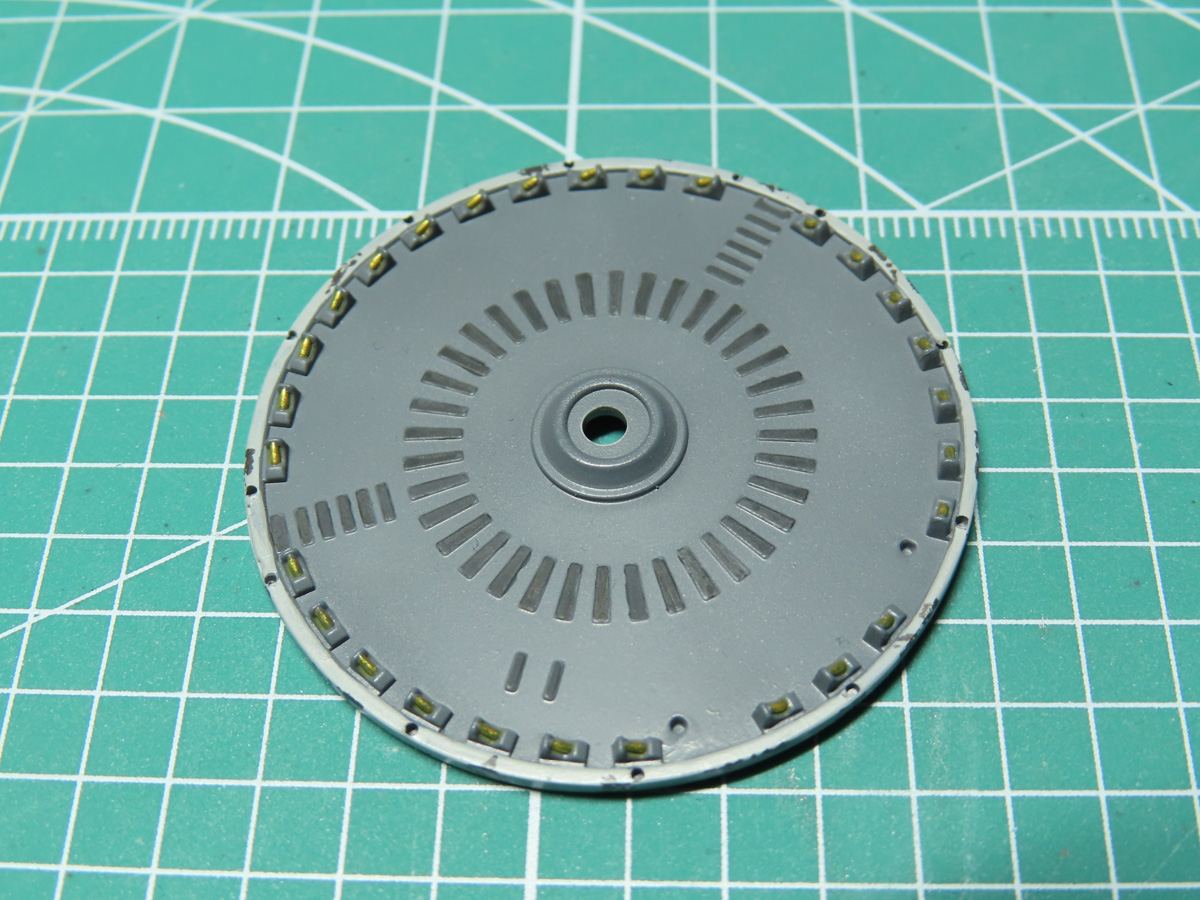
I’m starting this week by further painting the gun platform. The grey was painted at the same time that I painted the rest of the ship’s deck.
For the traction pads, I hand brushed Vallejo Black Grey 70862. The cannon rounds on the edge of the platform were painted with Vallejo Game Polished Gold 72055. This gold is a bit brighter, and that helps the details stand out a bit more as they are very small.
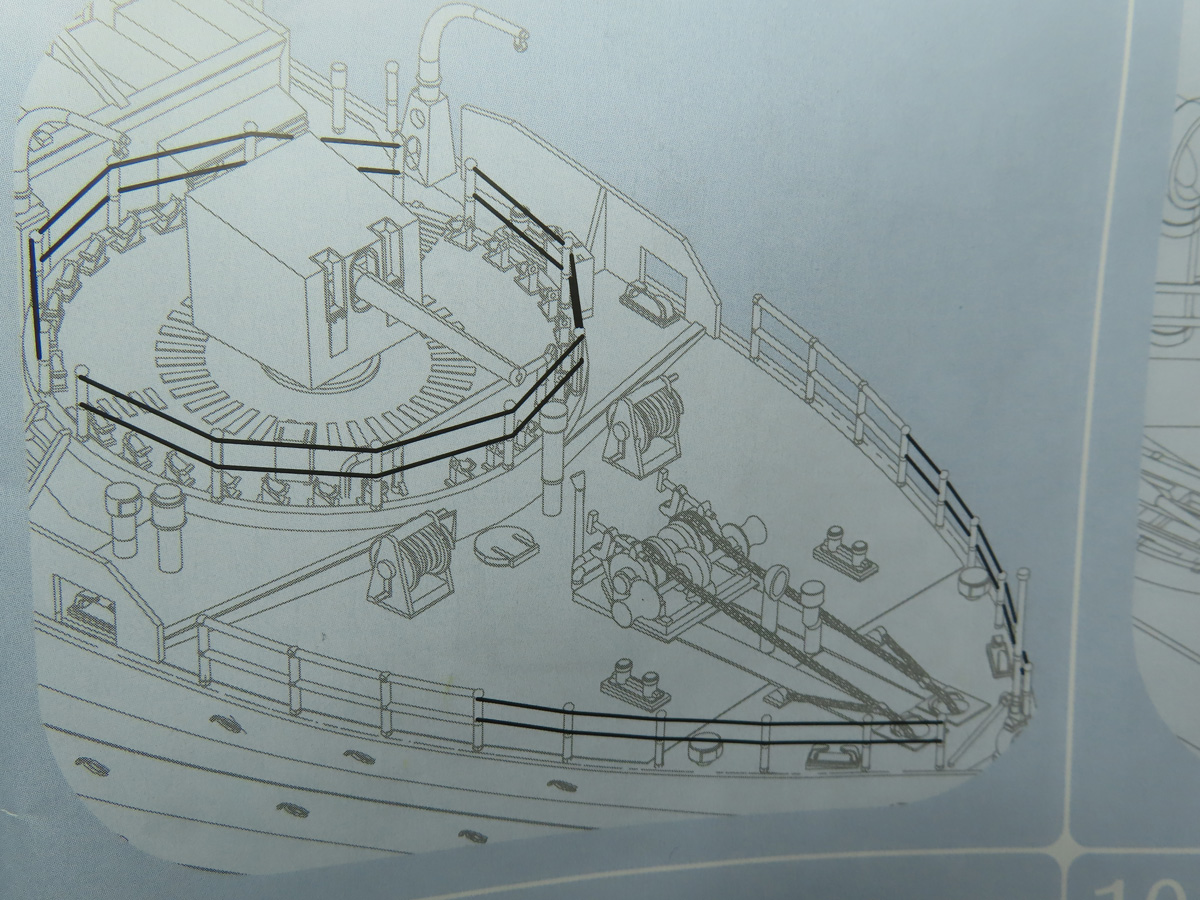
On the bow, there are a few sections with just poles, and then you are supposed to add wire or the supplied string to create this thinner section of the railing.
I have a bit of a different idea in mind, and it’s one that will be tricky to pull off, but it will look a lot nicer and more accurate.

I took a very fine drill bit and loaded it into my Tamiya Pin Vise. I then carefully drilled out 2 holes in the top and center of the poles.
This was delicate work, and the extra holes made the poles a lot weaker as a result, and they were a bit fragile to begin with. This process took me just over 2 hours to complete, but it will be worth it in the end.
This was something that I wanted to do a lot earlier on in the build with the railings in the kit. I decided against doing it there for a few reasons. The biggest reason was that it was going to take me a lot of time to complete, and just doing these was long enough for me.

I painted the poles with Tamiya XF-19 Sky Grey. I didn’t go through the usual process of chipping these parts because, as I mentioned, they were fragile, and I thought removing the Mr Masking Sol Neo could break them. Also, I didn’t want to build up the paint and possibly plug in the openings.
I glued the poles to the platform with Mr Cement SP. Then, I left the glue alone overnight to properly cure and harden.
I then took some K&S Engineering Music thin wire (0.20mm) and slowly threaded the wire through each of the poles. I applied a small amount of BSI CA Glue to the post to properly secure the wire.
You might notice that the wire is curved with the platform instead of being in a straight line. This was the result of passing the wire through each of the poles. I tried to straighten them out, but I could see it was causing stress on the poles. So yes, it’s inaccurate, but I actually really like how the curve follows the platform.

Before I painted the red wire, I wanted to prime it to avoid the paint potentially flaking off when I handle the part.
I used Mr Metal Primer, a clear and rather aggressive primer. This was simply brushed onto the wire and given an hour to fully cure.
I like to use Mr Metal Primer on all metal and photoetch parts. It’s a bit smelly, but it cleans up with some Lacquer thinner, and it can be airbrushed.
After the primer was dried, I brushed on a few thin coats of Tamiya XF-19 Sky Grey, and the red was completely gone.
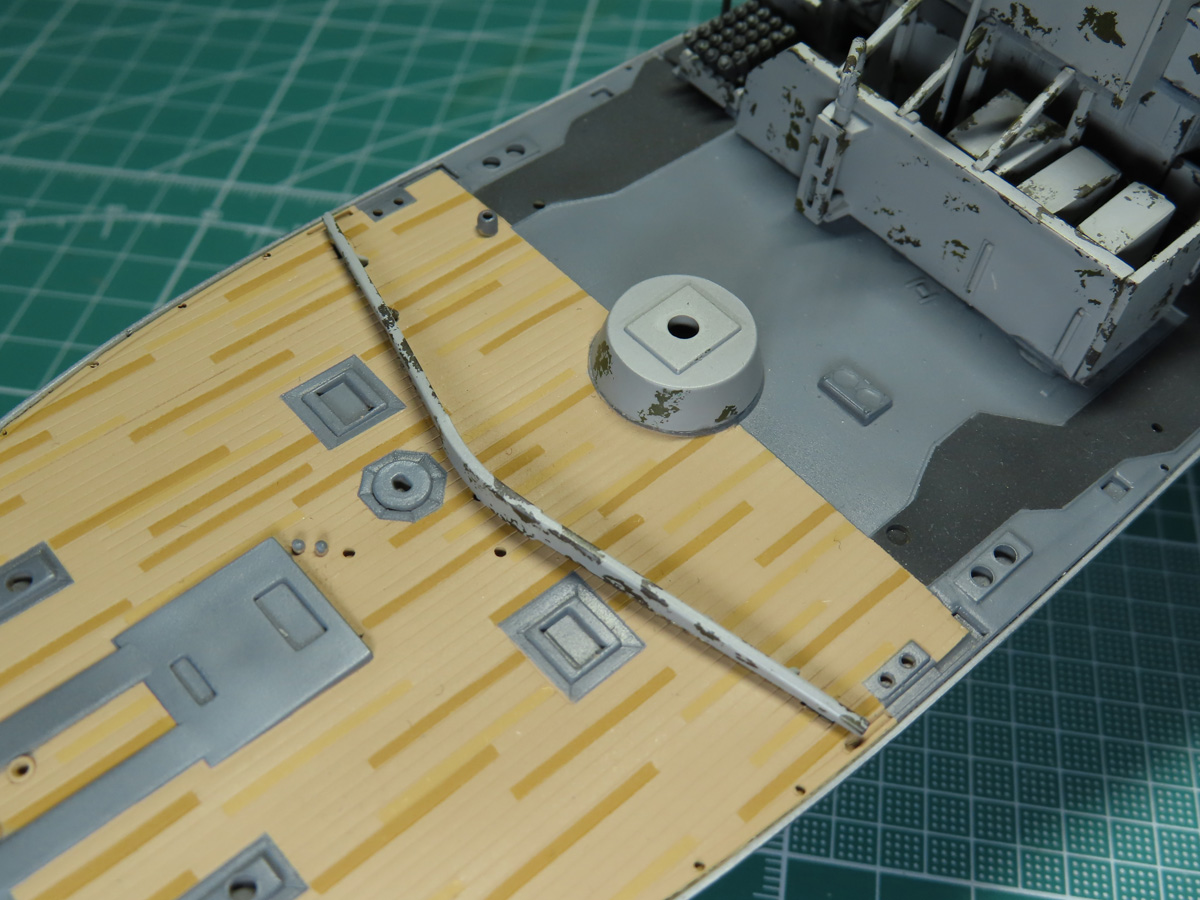
Now it’s time to begin adding pieces to the deck. I added the small tower for the gun platform and the breakwater just ahead of this. The gun platform should almost rest on the top of the breakwater.
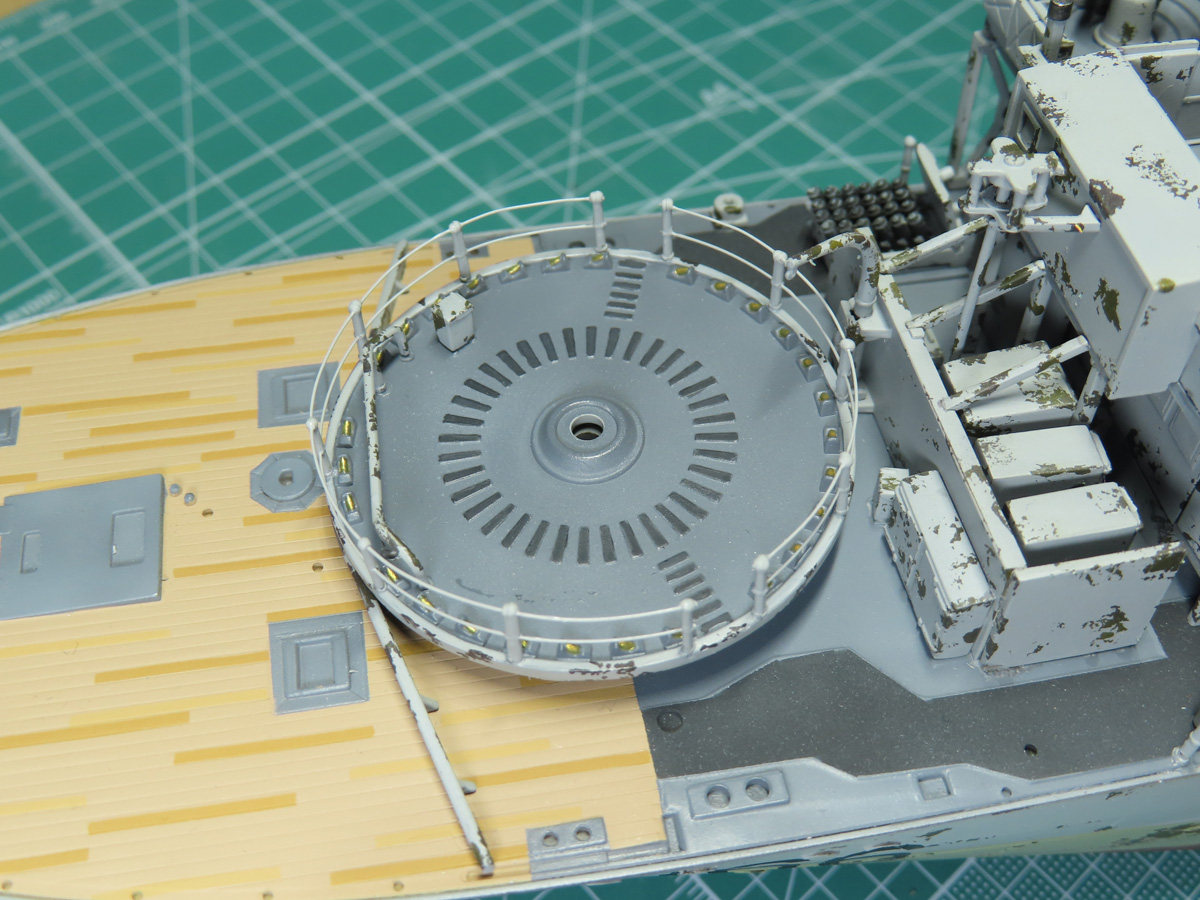
I used a liberal amount of glue to really secure the platform down, and I held it down while it dried. Unfortunately, the part doesn’t fit on the great and slants downwards slightly. This is something you’ll need to take into consideration with your own build.

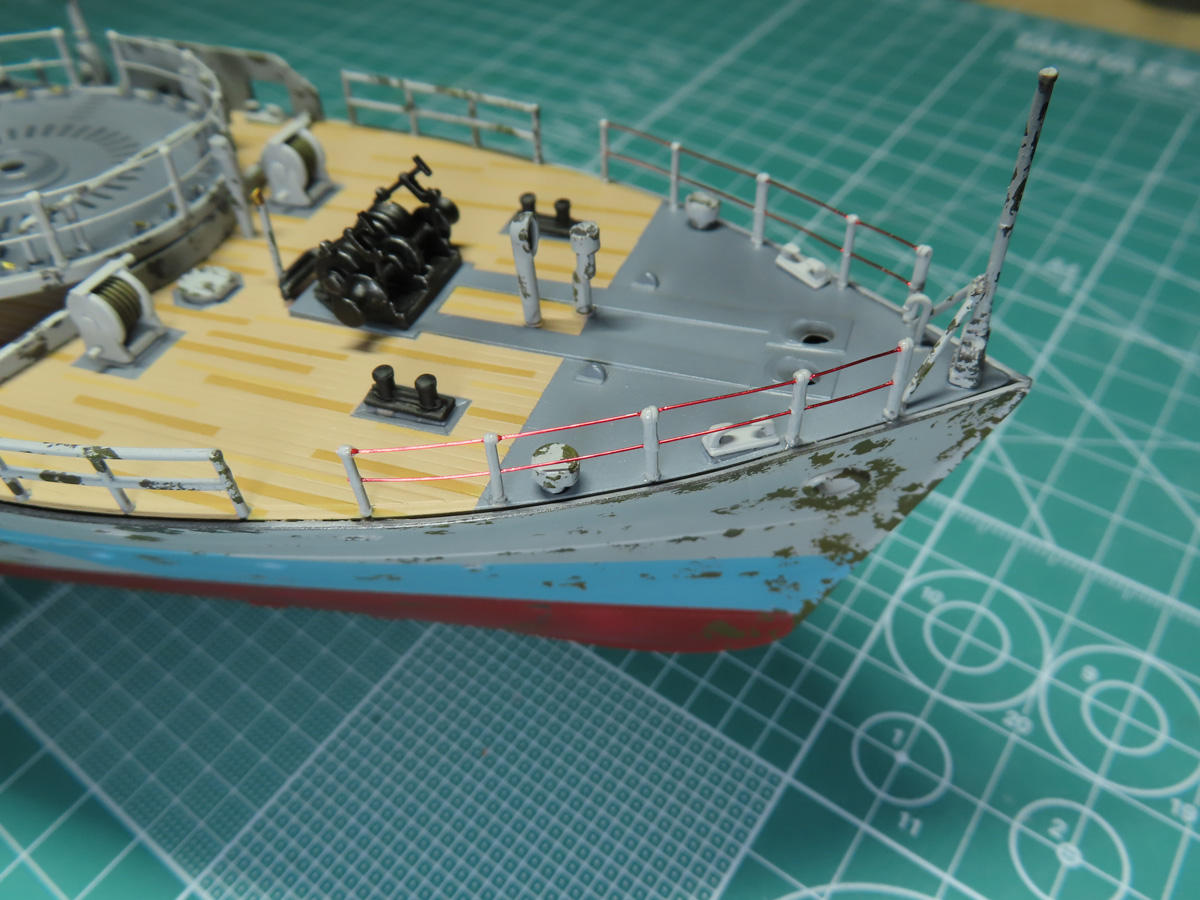
The steps, crane and other smaller details were now added. Similar details were added to the other side of the platform.

More of the smaller parts like the hoses, chimneys and the tie downs were glued into place. It’s nice to see everything becoming busier, and I really like how that wooden deck is standing out.

The anchor winch took quite a while to clean all of the seam lines, but once I had it cleaned, I painted it with Mr. Color 92 Semi-Gloss Black. To help the details stand out a bit, I drybrushed on some Tamiya X-10 Gun Metal.

I want to mention these side wall barriers that go along the deck. These parts took some time to sand out and get the correct shape. This needs to be done prior to painting; otherwise, they won’t fit into the deck.

More poles were added to the ship’s bow. These were secured in place with Mr. Cement SP. I had to pay careful attention so that the poles were straight and aligned so the wire would follow the ship’s curve.
As stressful as it was to drill out all of those holes, it was incredibly satisfying to thread the wire through them. I think that this worked out really well, but it’s one of those times when I really start to question my modeling sanity.
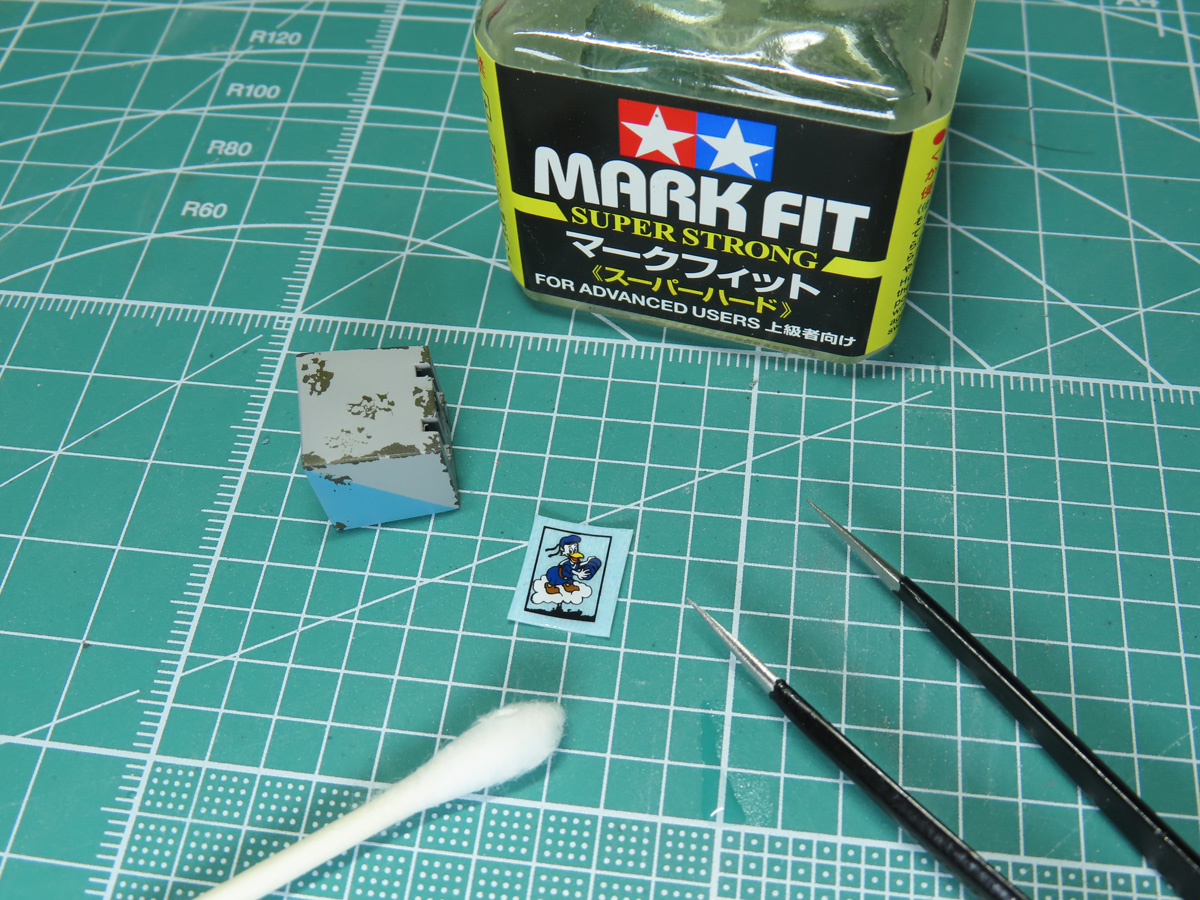
Moving onto the main gun, I was now ready to add the decal to the side. My preferred decal solvent is Tamiya Mark Fit Super Strong. This is a very aggressive decal solvent, and it usually reacts well to decals, providing a secure bond to the model.
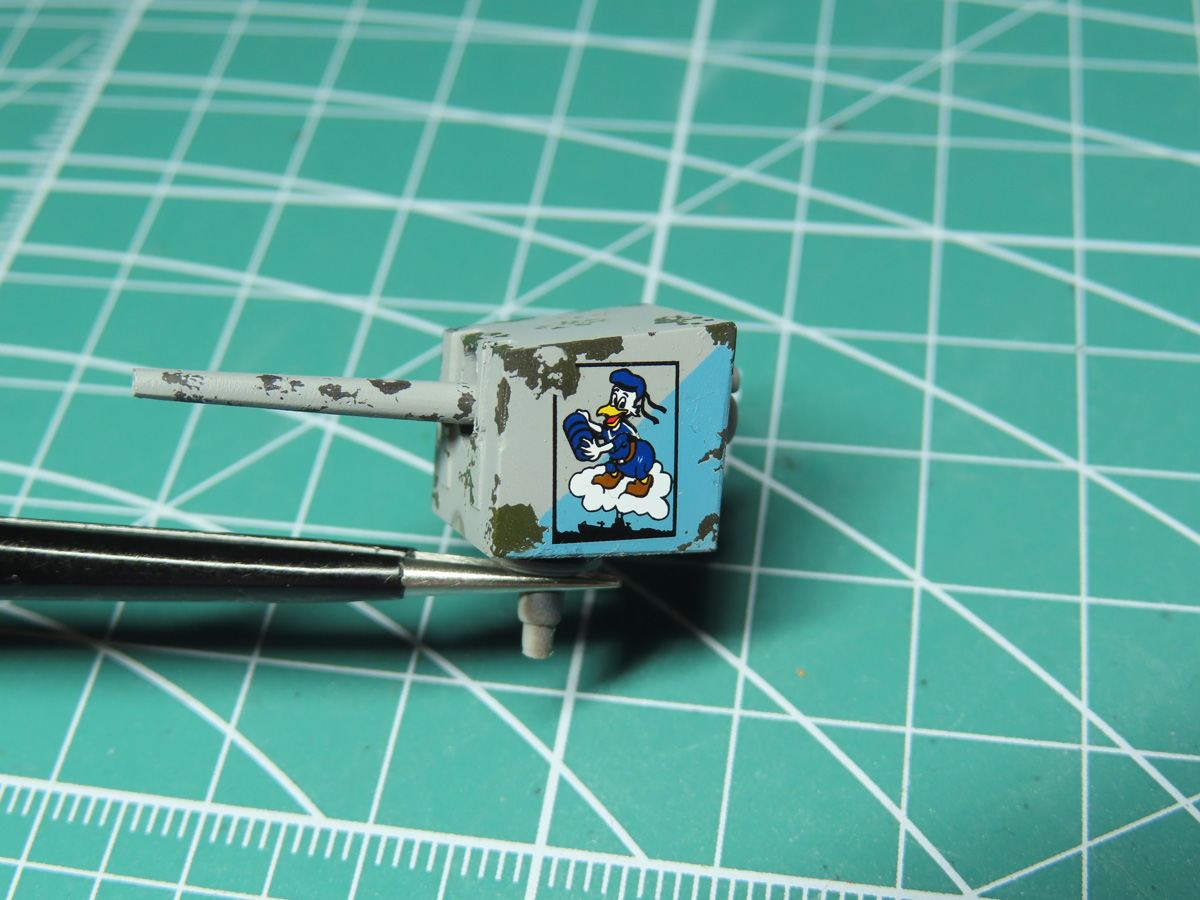
I never really noticed until now, but this character isn’t Donald Duck. Not that it really matters, but I’m guessing Revell did this to avoid copyright from Disney.

I’ve temporarily placed the main gun on its mount. I’m going to wait until the ship is in the water before I make my final decision on where it will be glued in place. And you might still notice the red wire on the bow; this will be painted tomorrow as I’ve run a bit short on time.
Drilling out those poles might be seen as unnecessary to some modelers, and to some, it might be an overreaction to simply glue the wire around the poles. But it was a challenge and something I wanted to see if I could do.
Personally, I like it when a model challenges me to try something different that I might not have done otherwise. It lets me know that, possibly in the future, I could try bigger and bolder projects. And most importantly, I still had fun doing it.
And that’s the most important part of your modeling: It’s your time and your project, so go out and have the most fun with it that you can!
To be continued…
Jared Demes is a modeler from southern Alberta. He has been building models since he was 4 years old when his Dad first introduced him to the hobby. He has written for several magazines including, Fine Scale Modeler, Scale Aircraft Modeling, Phoenix Scale Models, and others. He has an interest in all modeling subjects, with a focus on WWII Japanese aircraft and Science Fiction.
Jared has won several IPMS awards for his modeling, and currently operates his YouTube channel rebelsatcloudnine, where he showcases model builds and product demonstrations.
First Post: Part 1
Previous Post: Part 11
Next Post: Part 13