
Revell HMCS Snowberry Flower Class Corvette
This is the tenth part of the Revell HMCS Snowberry Flower Class Corvette 1/144 Scale RVG 05132
Two years ago I was commissioned to build the Tamiya 1/32 Scale P-51D, and the client wanted this model to be super detailed. I added a lot of details to the engine, a lot of wires and plumbing, which at the time looked impressive. However, most of these details were quickly lost once the engine frame and other parts were added.
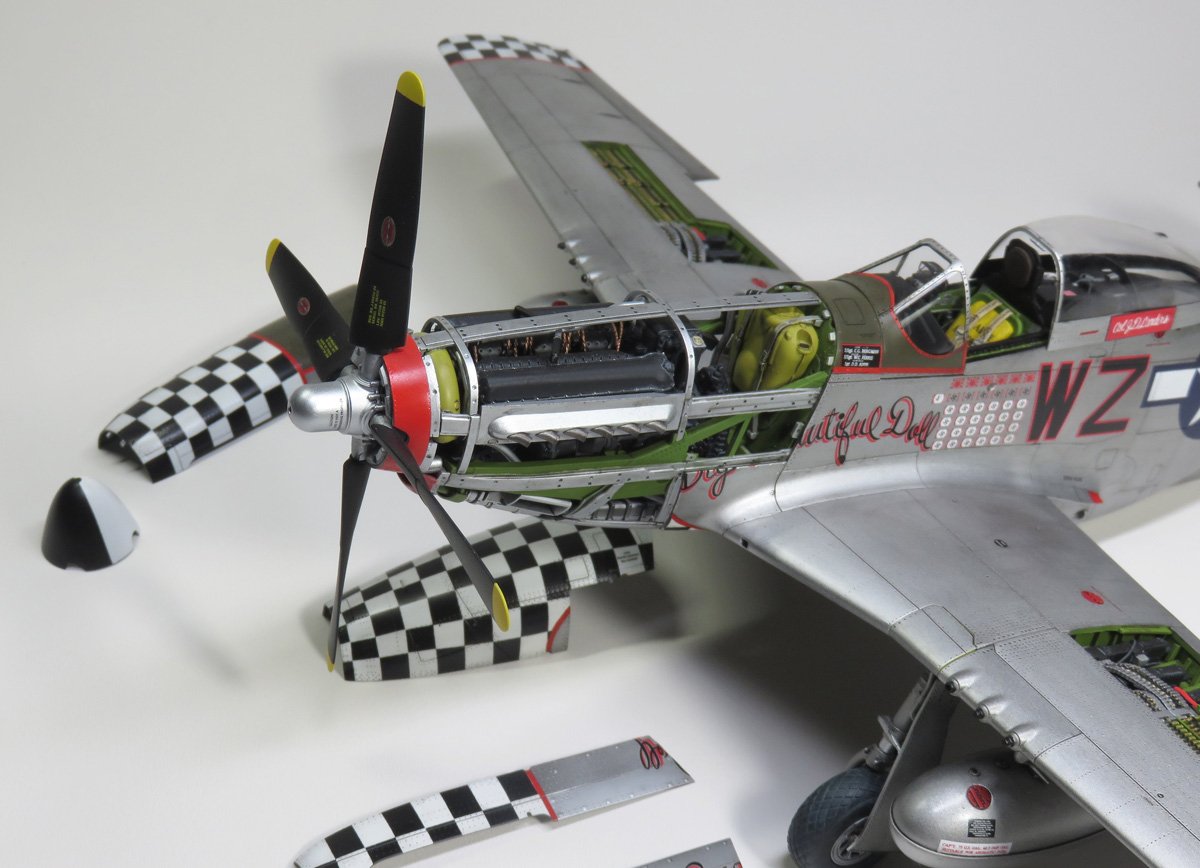
Covering up all of those wires at times felt like a wasted effort. But they helped me develop better scratch building skills and all around I felt like I had slightly bettered myself as a modeler. I’ve experienced the same thing a few times with this project, and you’ll see one example in this post. So don’t get too discouraged the next time you cover up some details, even though you and no one else will ever see them again, you’re just improving your skills for the next build.
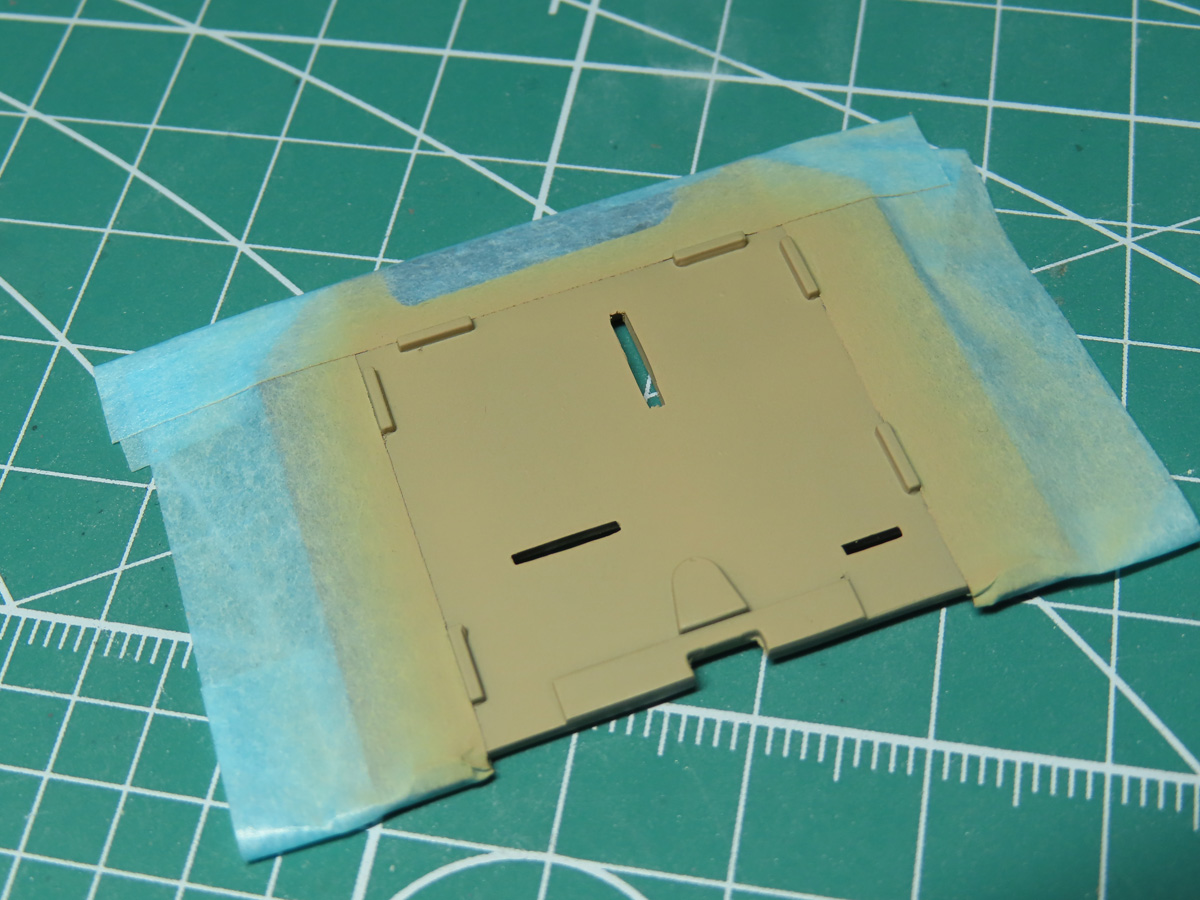
I’m starting by painting the floor of the wheelhouse. In the instructions, Revell calls for this section to be painted the same light grey as the ship’s exterior. But I found some pictures of this section and thought adding a bit of color to this lonely part of the model would be fun. Especially since there would be windows added.
I masked off the exterior grey deck and painted the interior with Tamiya XF-78 Wooden Deck Tan.
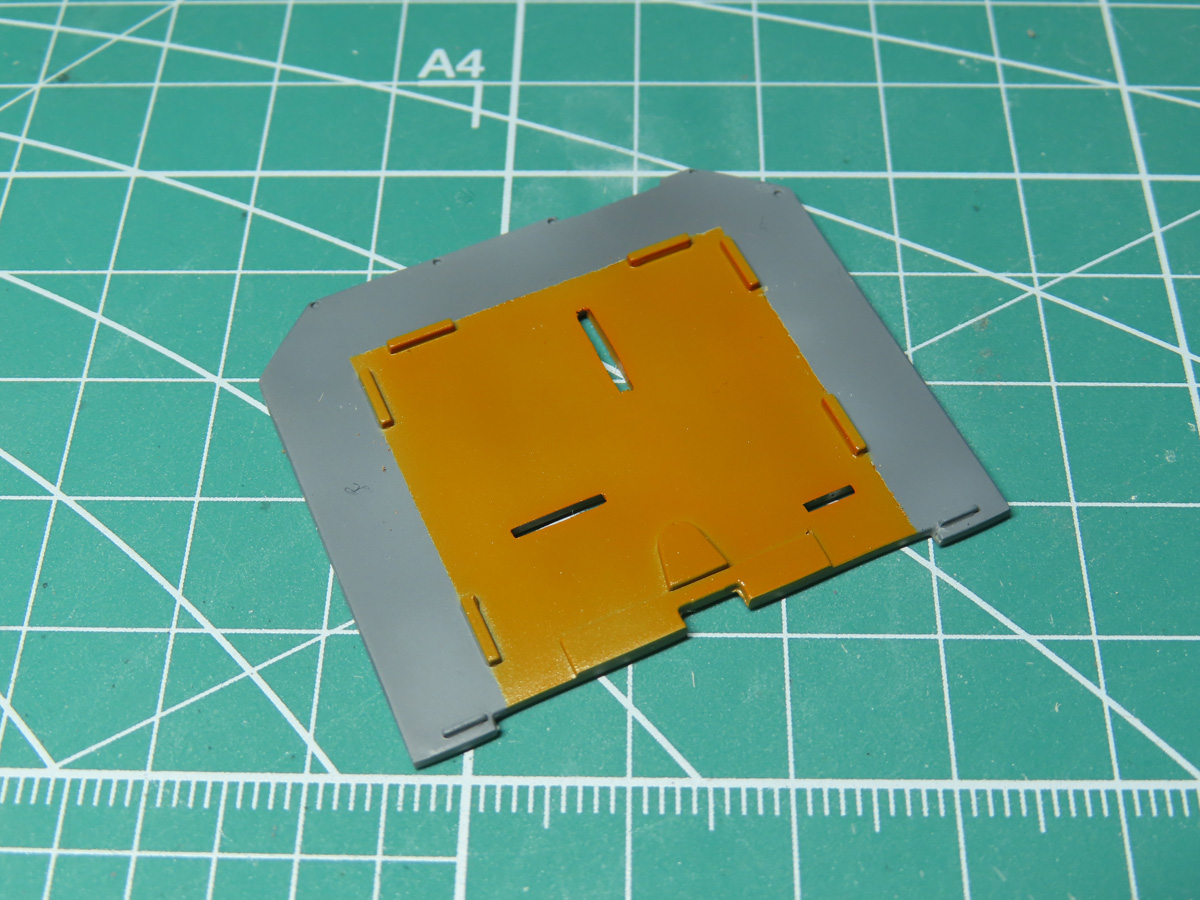
To replicate the lacquer varnish on the floor, I lightly sprayed on a few coats with Tamiya X-26 Clear Orange, thinned with Mr. Rapid Thinner. The Rapid Thinner would help the X-26 to dry faster and harder as sometimes the Tamiya Gloss Acrylics can dry slowly and leave fingerprints behind.

For the walls of the wheelhouse, I painted XF-79 Linoleum Deck Tan. These parts took a bit of careful trimming to get them to fit into the sockets properly, as there was some flash on the floor that I didn’t see on the first inspection.

Next, I added the windows to the walls, and once those were glued in place I was able to carefully mask off each of the windows with modeling tape. The deck and the exposed roof were also masked off, and the wheelhouse was finally ready for some paint.

With the exterior painted using XF-19 Sky Grey, I was now ready to glue the wheelhouse to the raised mount. I used a very liberal amount of Mr. Cement, and I pressed the structure to the platform while the glue set, trying to create as tight a join as possible.

I also added the lifeboats that I hadn’t completed from the previous post. The inside of the boats was painted with XF-82 Ocean Grey 2 (RAF), and the seats were painted with AK Interactive Burnt Umber AK11111. The exterior of the boats and the cranes was painted with XF-19 Sky Grey.
The masts and oars are delicate parts, and I’m concerned at some point I might accidentally break them off, so I glued them down, along with the cranes, with BSI CA super glue.

Returning to the wheelhouse, I added the roof/platform for the bridge. I’ll be working on this section further in the next post. The small opening on the right is where the ladder goes, at this stage I added it as it would be very complicated near impossible later on.

The walls on either side of the wheelhouse were a bit tricky to add. I placed the bottom of the wall to the deck first, and then carefully pushed the supports into the pegs on the underside.
It was a tight fit, but with some careful adjusting everything went in place. I then added some Mr. Cement SP to the top and bottom, which greatly strengthened the entire structure.
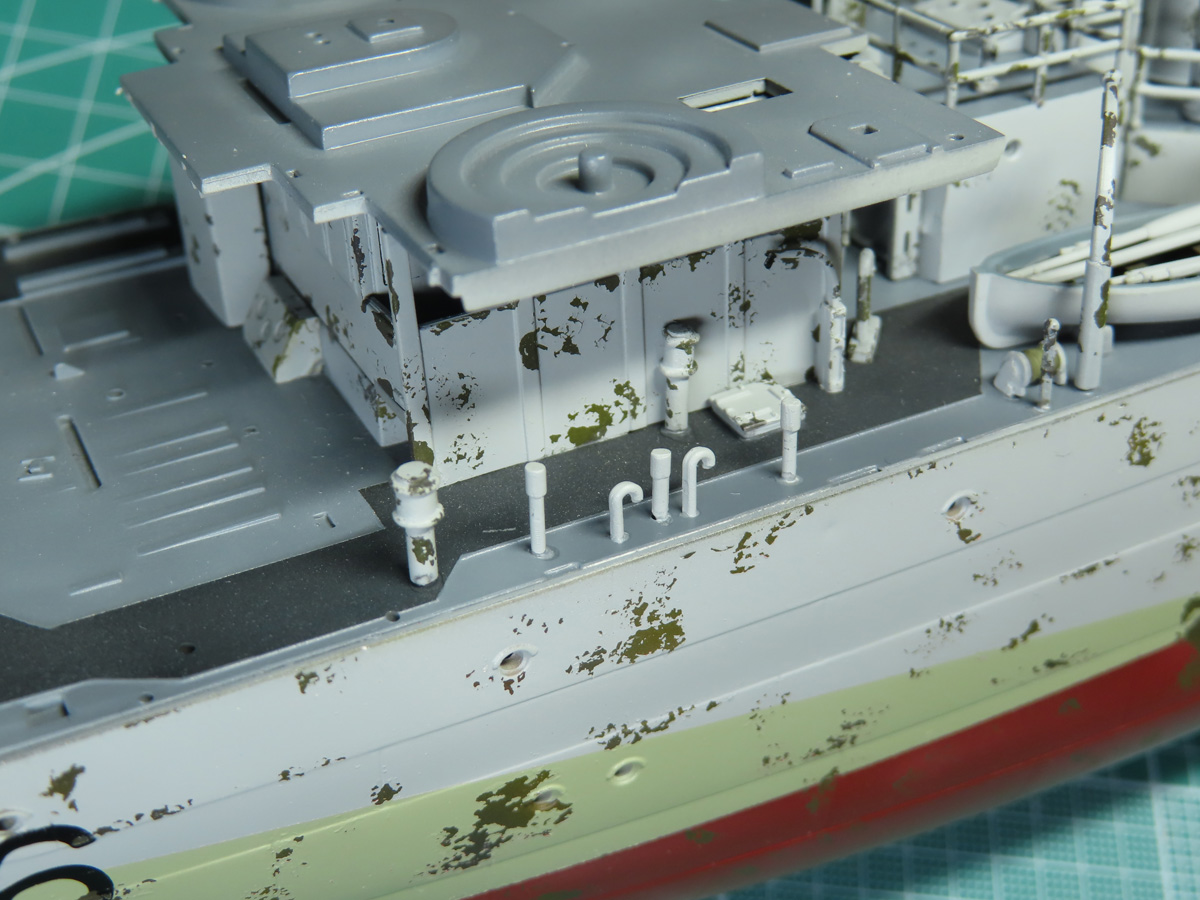
Now it was time to add the smaller and very fragile details like the flow hatch and chimneys. These took some extra time to get into place as either the holes weren’t big enough, or the pegs on the parts were never properly molded.
I took a new blade into my hobby knife and I carefully trimmed the ends to be more painted. Then with a drop of Mr Cement SP, I could add these tiny parts to the deck.
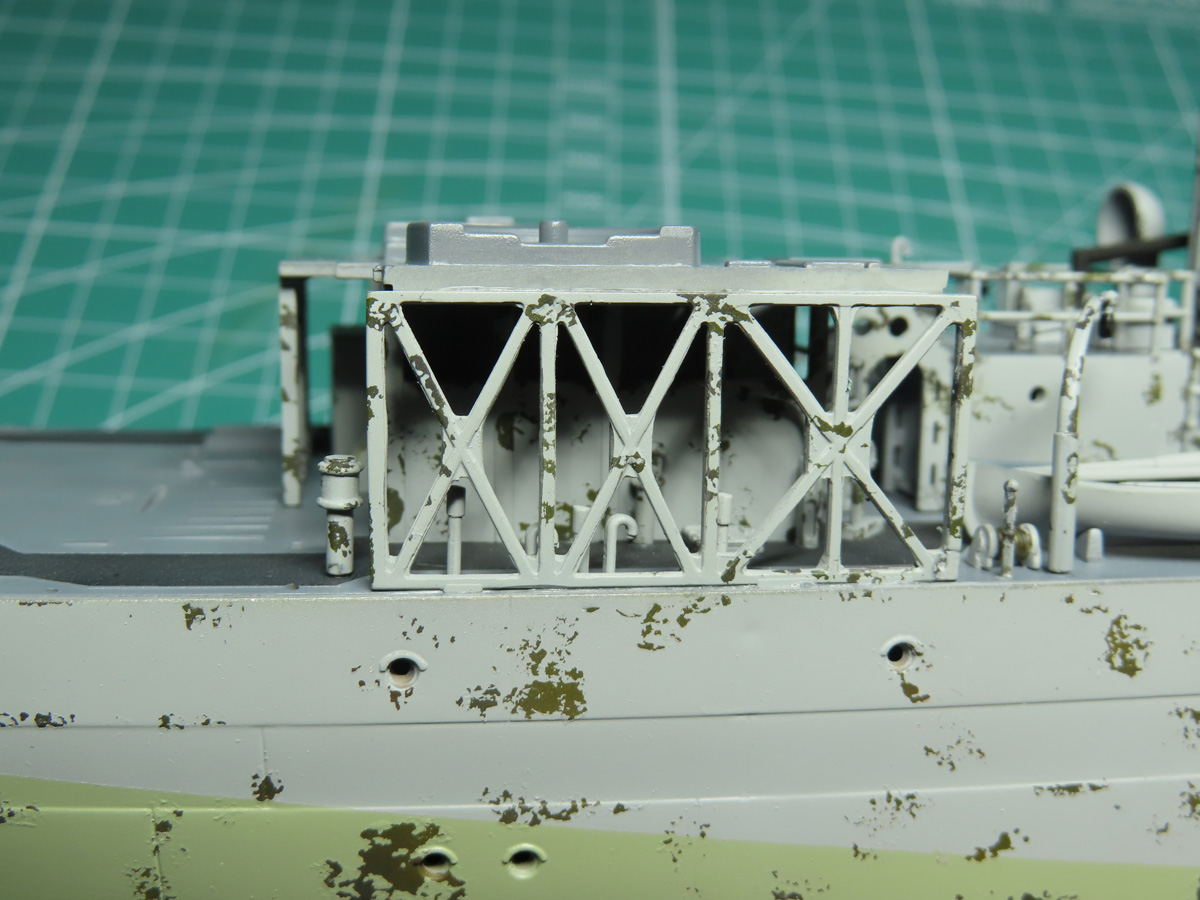
With the smaller parts now dried I was ready to add the X braces. These were easily glued with some more Mr Cement SP.
I do want to mention that these parts have so far caused me the most grief on this project. They took a very long time to clean as there was a lot of thick flash to clean up. It was a huge relief to finally get them all cleaned up, and I really do like the look they have on the model.

Last to be added to the front was a stowage locker and three bracers.
I had forgotten how tiny and compact this model was when I masked off the windows, so removing those from the completed model is going to be an interesting challenge, to say the least.

I’ve been looking forward to building this part of the model for a while now. Building the bridge is going to be a lot of fun as there are a lot of smaller details that are going to be added and seen as the top is all opened and exposed.
You can’t help but imagine yourself in whatever modeling project you are working on. For the Snowberry, it would have freaked me out to be stationed on one of these ships. They are so cramped and crowded, that running around in an emergency must have been difficult, not to mention the more exposed sections without any railing.
I don’t think this prairie boy will be getting his sea legs anytime soon. For now, I’ll just stick to modeling the sea and appreciating it from a distance.
To be continued…
Jared Demes is a modeler from southern Alberta. He has been building models since he was 4 years old when his Dad first introduced him to the hobby. He has written for several magazines including, Fine Scale Modeler, Scale Aircraft Modeling, Phoenix Scale Models, and others. He has an interest in all modeling subjects, with a focus on WWII Japanese aircraft and Science Fiction.
Jared has won several IPMS awards for his modeling, and currently operates his YouTube channel rebelsatcloudnine, where he showcases model builds and product demonstrations.