Revell Corvette Stingray with New Tooling
This is the fourth part of the Revell 2022 Corvette Stingray Z51 Coupe New Tooling 1/25 Scale 85-4556 14556.
To conclude what I mentioned in my previous post, this past week, we were able to find a new car. As we left the city with the new car, we passed by many car dealerships, and you wouldn’t believe it, but I saw a lone 2022 Corvette painted in the exact same electric blue that’s on the box art, all alone in the middle of a car lot.
And in that color, it really catches your attention!
Seeing how striking that electric blue was I had a few moments to reconsider my initial choice of color for this model. But thinking back to when I started this project, that metallic orange is going to be equally as bold of a color, and I hope that when it’s done it will catch my attention just like the real deal.
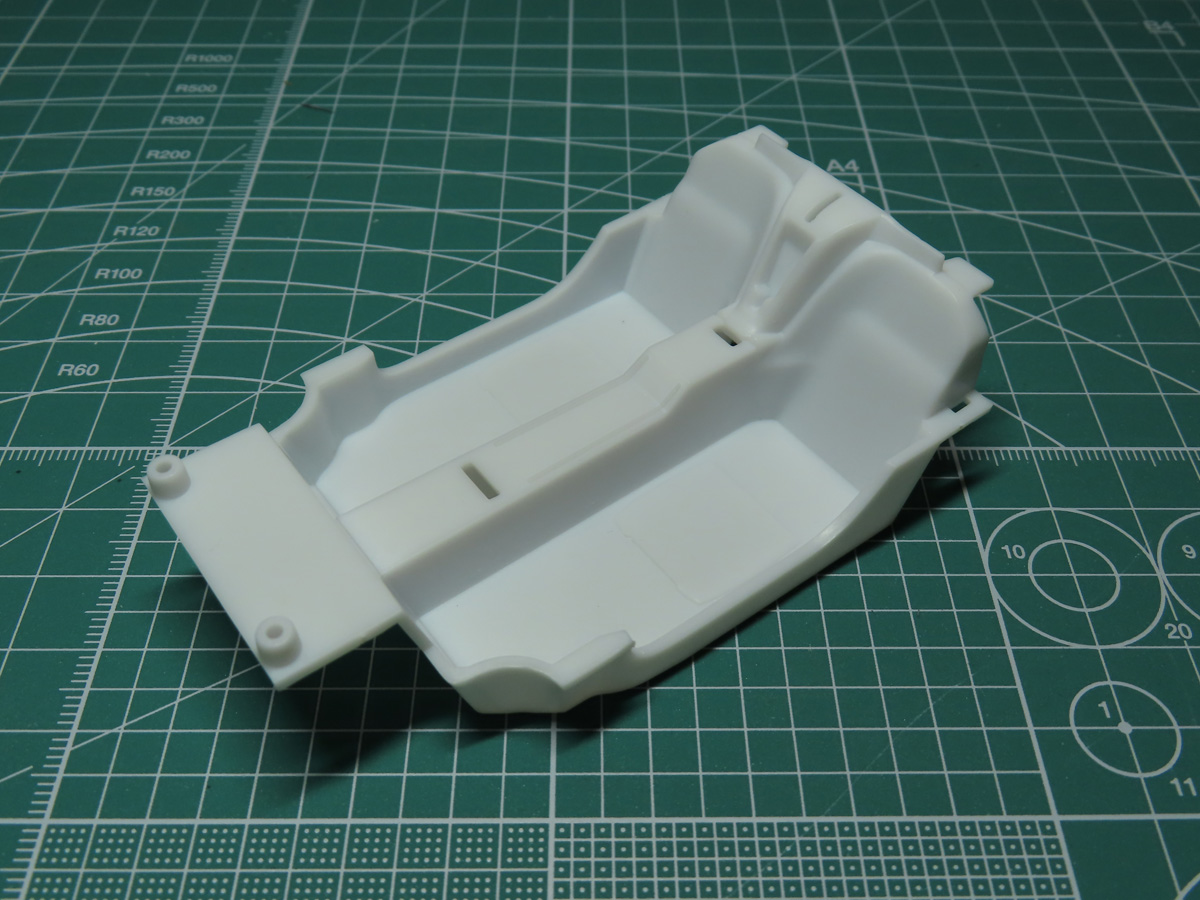
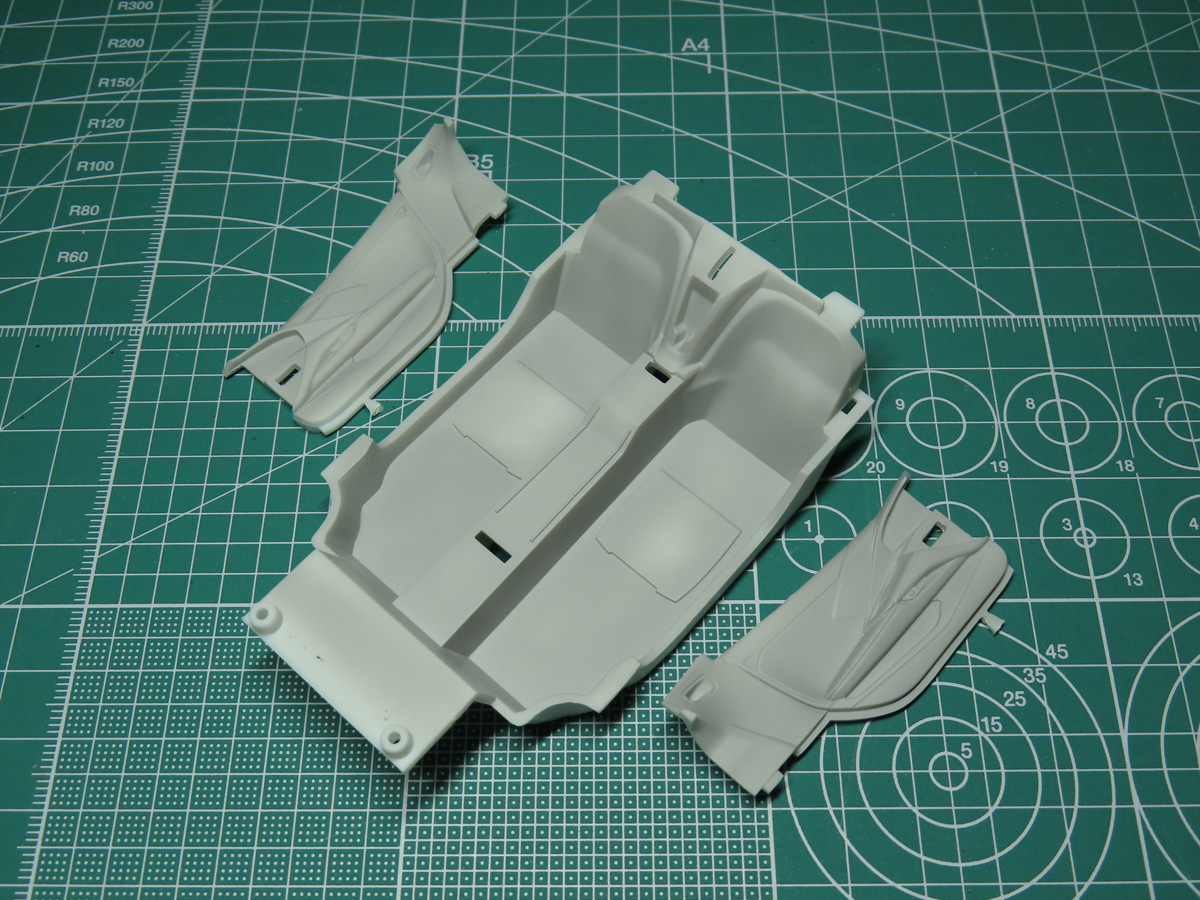
I was looking forward to painting the interior of this Corvette. With its sharp angles, masking is going to be a challenge, but it would be really satisfying to see painted up. I began by priming the parts with Mr Surfacer 1200 Grey primer.
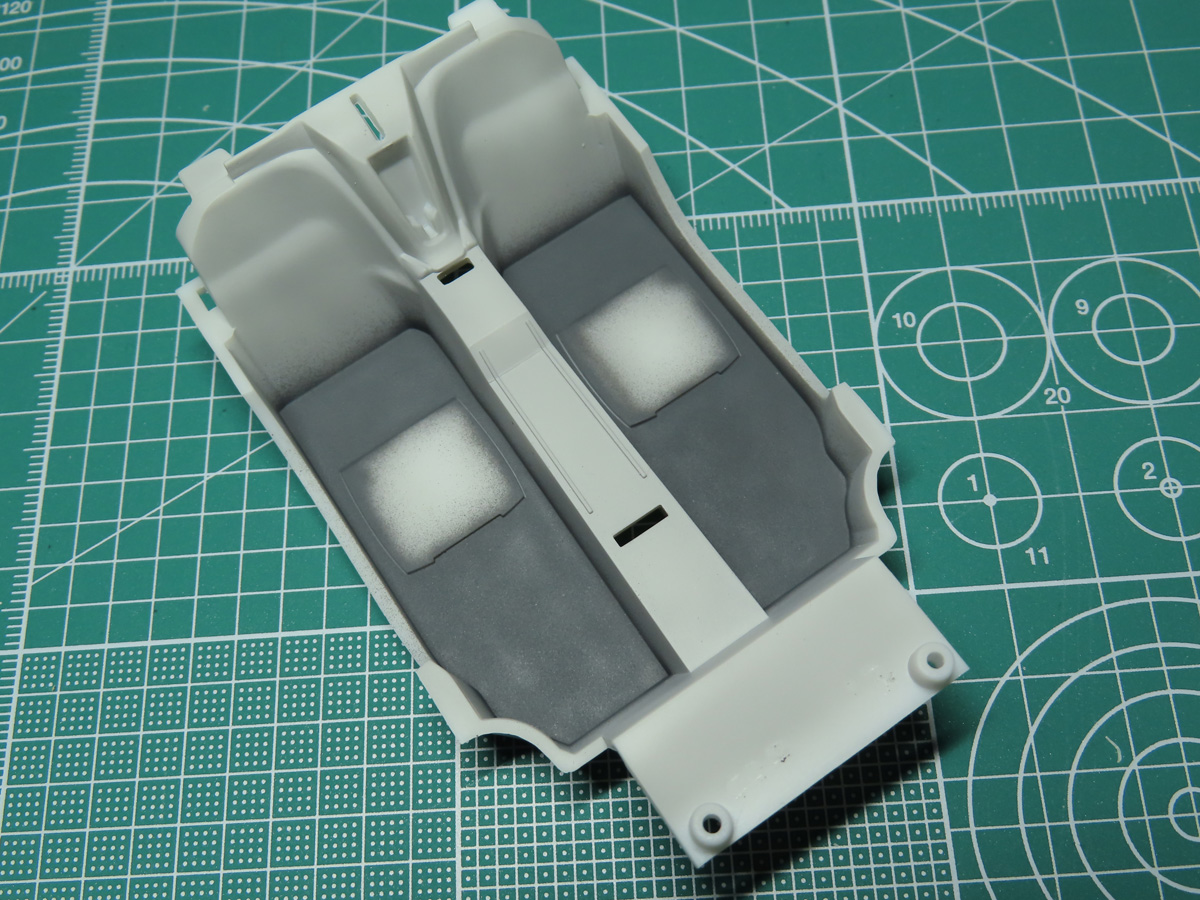
The main color of the interior is black with select sections painted the same as the exterior. But I didn’t want all of the black to blend in together so I painted the floors with Tamiya XF-24 Dark Grey. I also painted the center of the seats with Dark Grey.
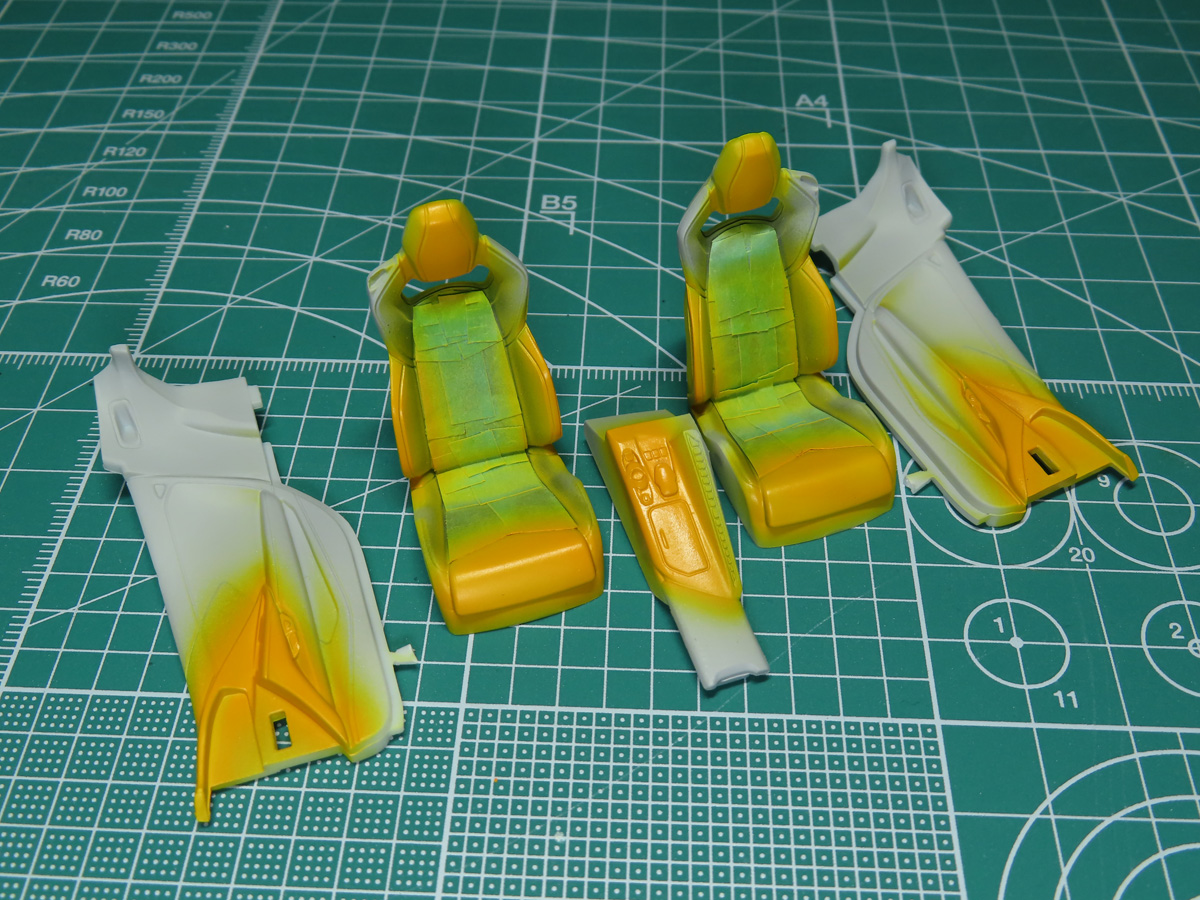
Before I painted the orange sections I sprayed on a layer of Tamiya XF-2 Flat White. This base layer will help the orange paint be a lot brighter, and I won’t have to spray on as many layers to build up the color.
As I rummaged around the few boxes where I store my paints I looked for all the orange paints I had and most of the basic orange colors were too dark for my liking. Then I remembered I had Mr. Color 58 Orange-Yellow, which was the perfect brighter orange I was looking for. It will also really stand out when the rest of the interior is painted black.
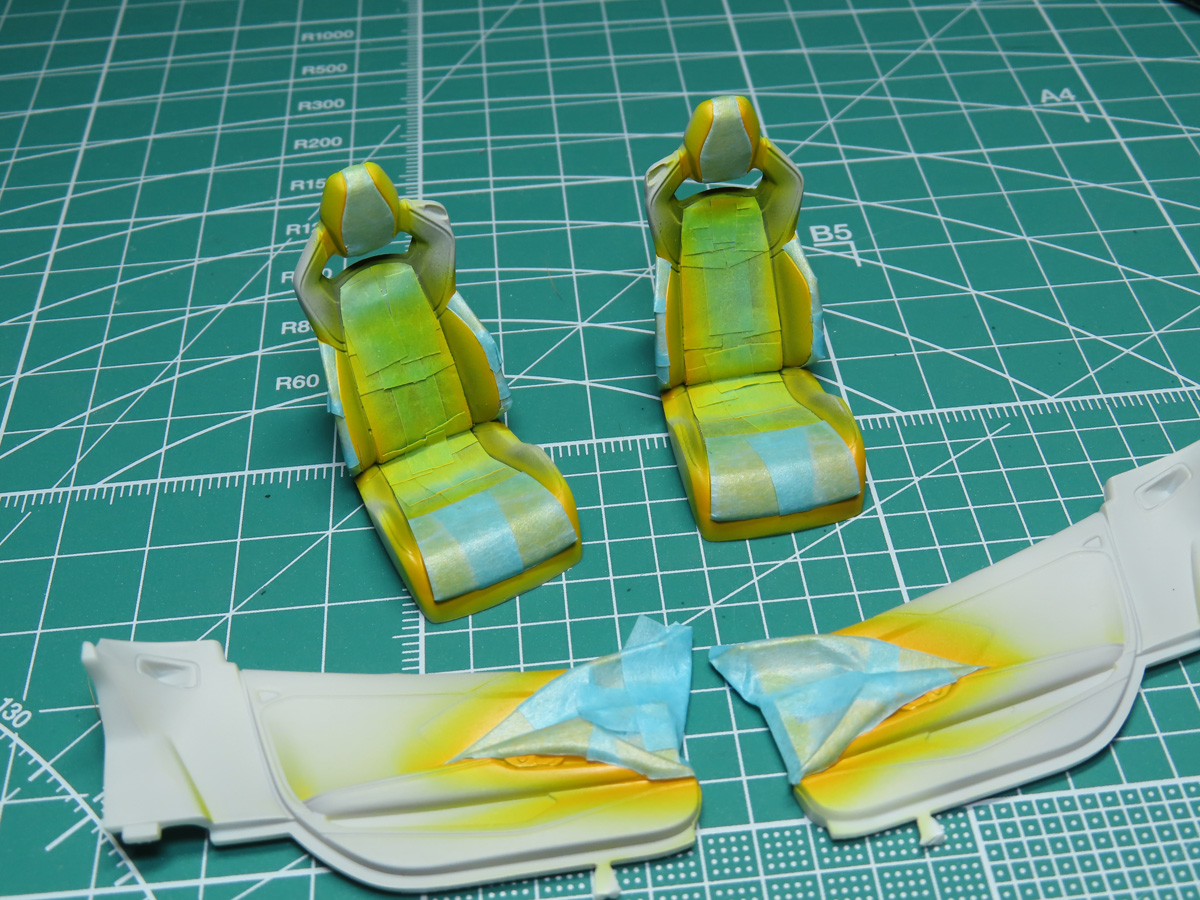
Masking off the orange sections was a challenge because of the shapes and angles, however, using a thin masking tape helped out a lot.
I loaded a new sharp blade into my hobby knife, and I carefully cut away the excess tape. This is a tricky thing that normally I don’t like to do. If I’m not careful and I cut deeper than the tape and score into the paint I risk the paint lifting when I remove the tape.
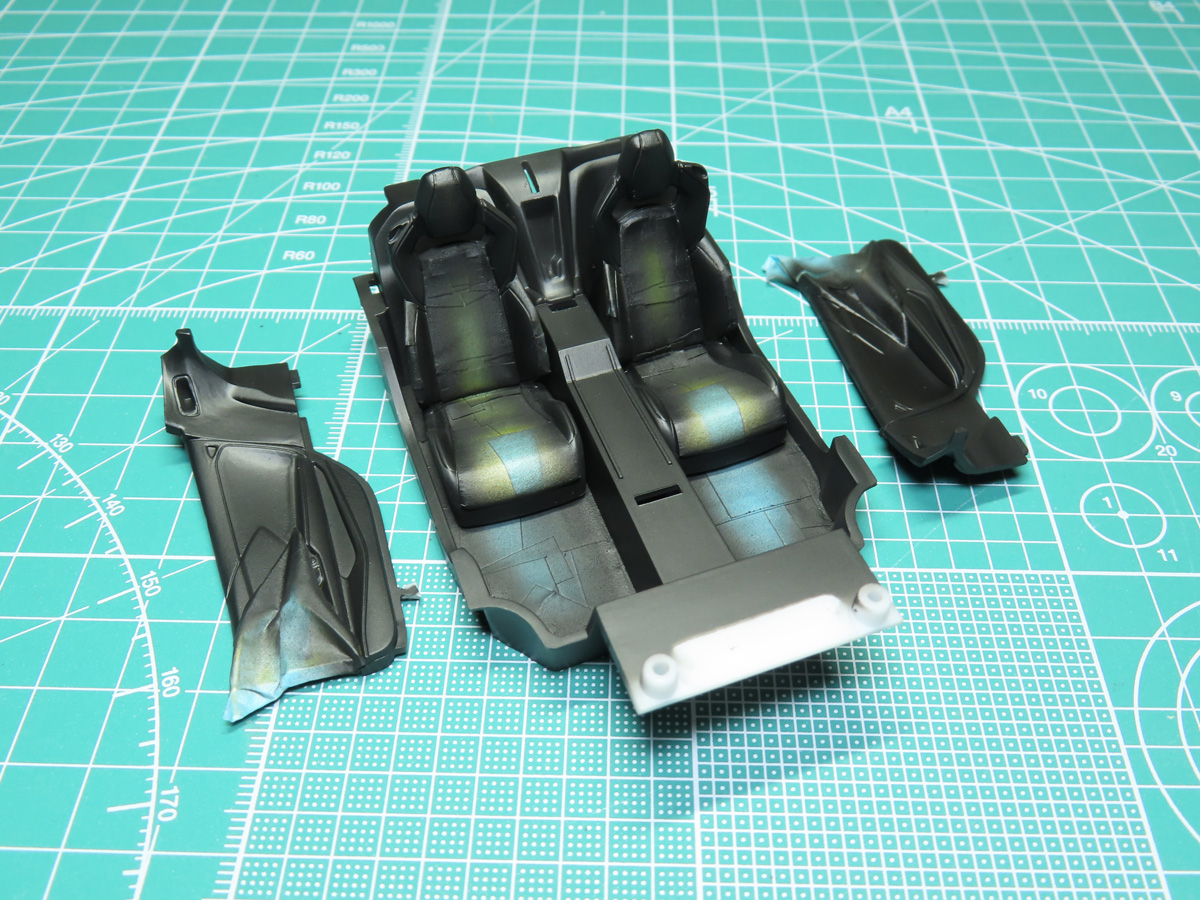
Before I painted each of the parts to the interior I burnished down the tape as it began to lift in certain areas because there wasn’t a lot for the tape to cling to in certain locations.
I painted the parts with Mr. Color 92 Semi-gloss Black. This was done in light passes to avoid paint building up to the edges of the tape.
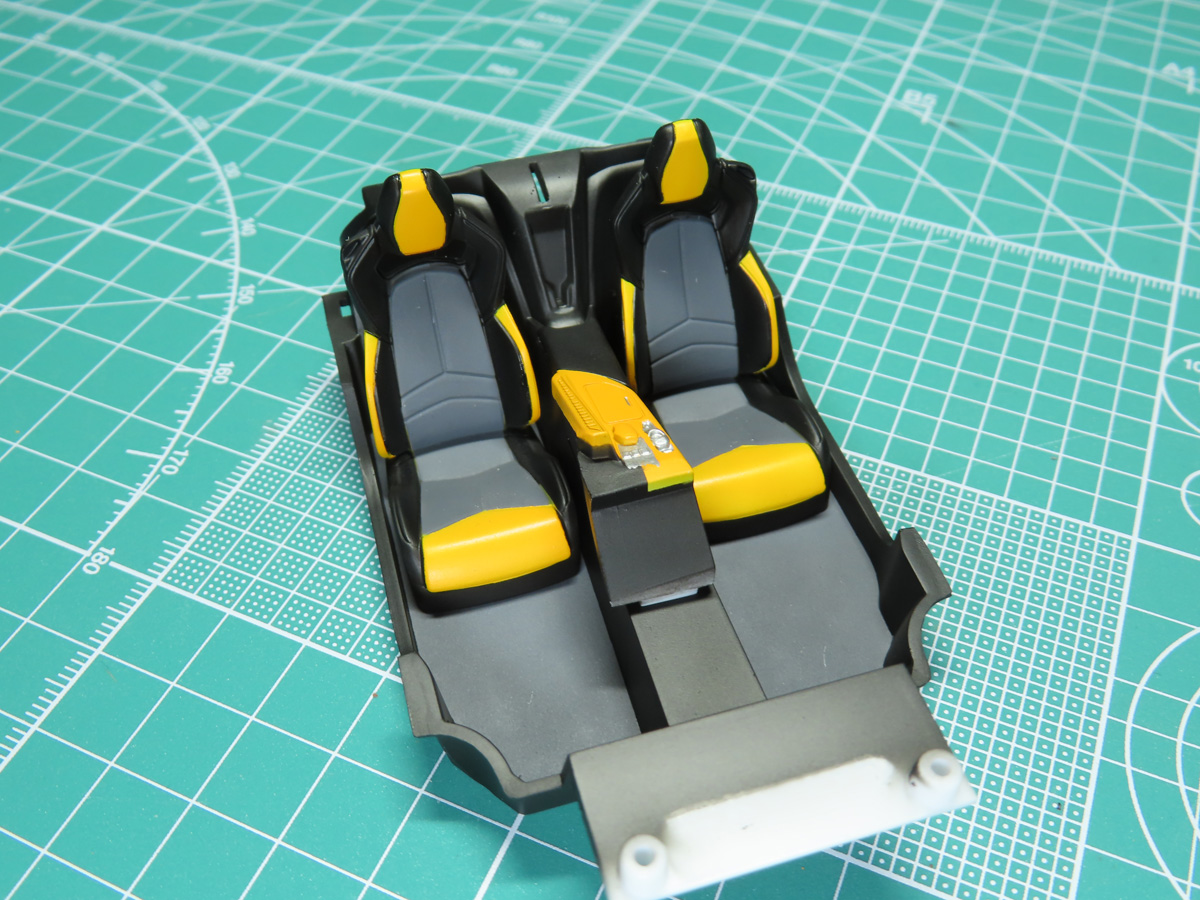
As I removed the tape I found a few small places that would need some detail painting to tidy up, but things were looking great. And I was especially pleased with how vibrant that Orange-Yellow looked against the black background.
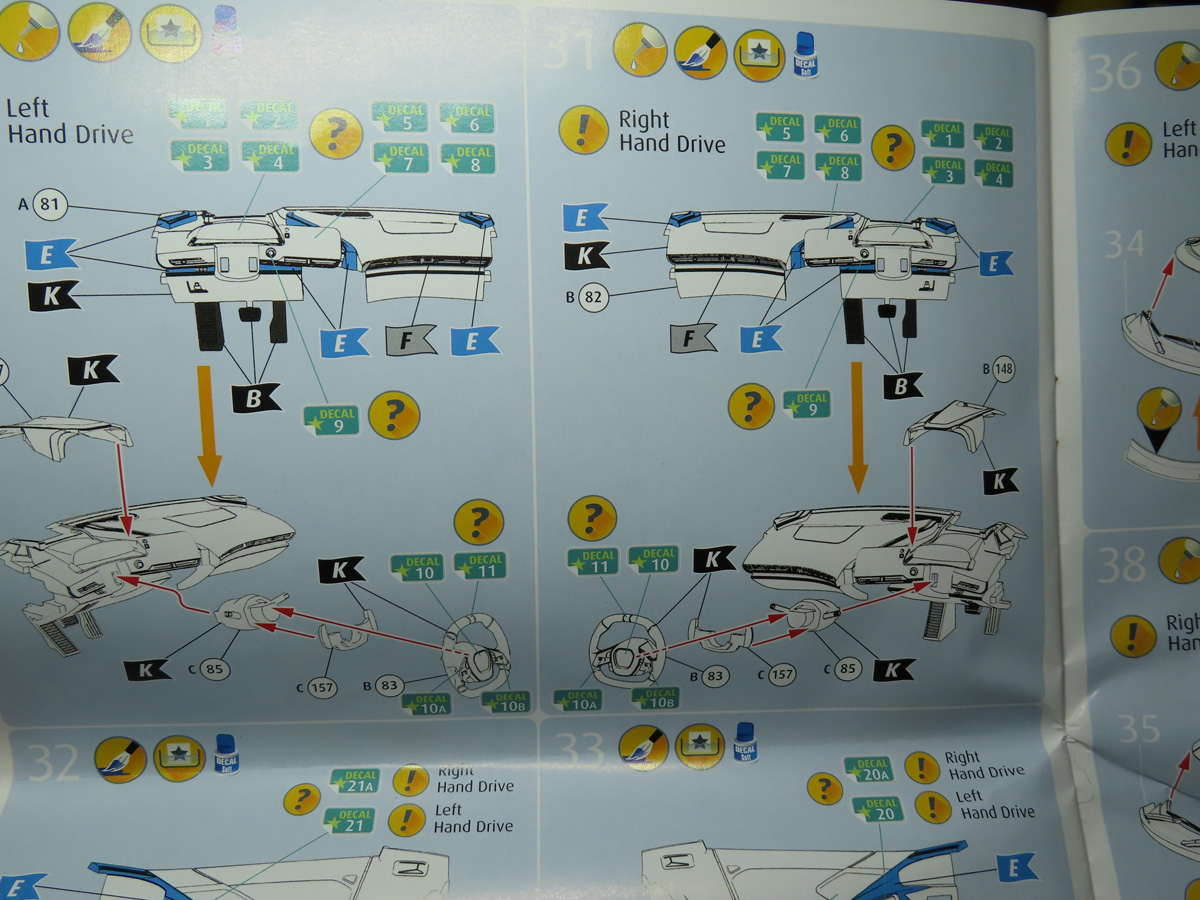
With everything now painted I was excited to add on the decals. I wanted to show the instructions and how they show the decal placement.
It’s not terribly confusing to follow, but I wish that Revell showed the decals and how they are meant to be placed onto the parts. It is easy enough to figure out, but I think these could have been clearer. I think what Revell was trying to do was accommodate as many options as possible with this kit, and this layout might have been the easiest solution.
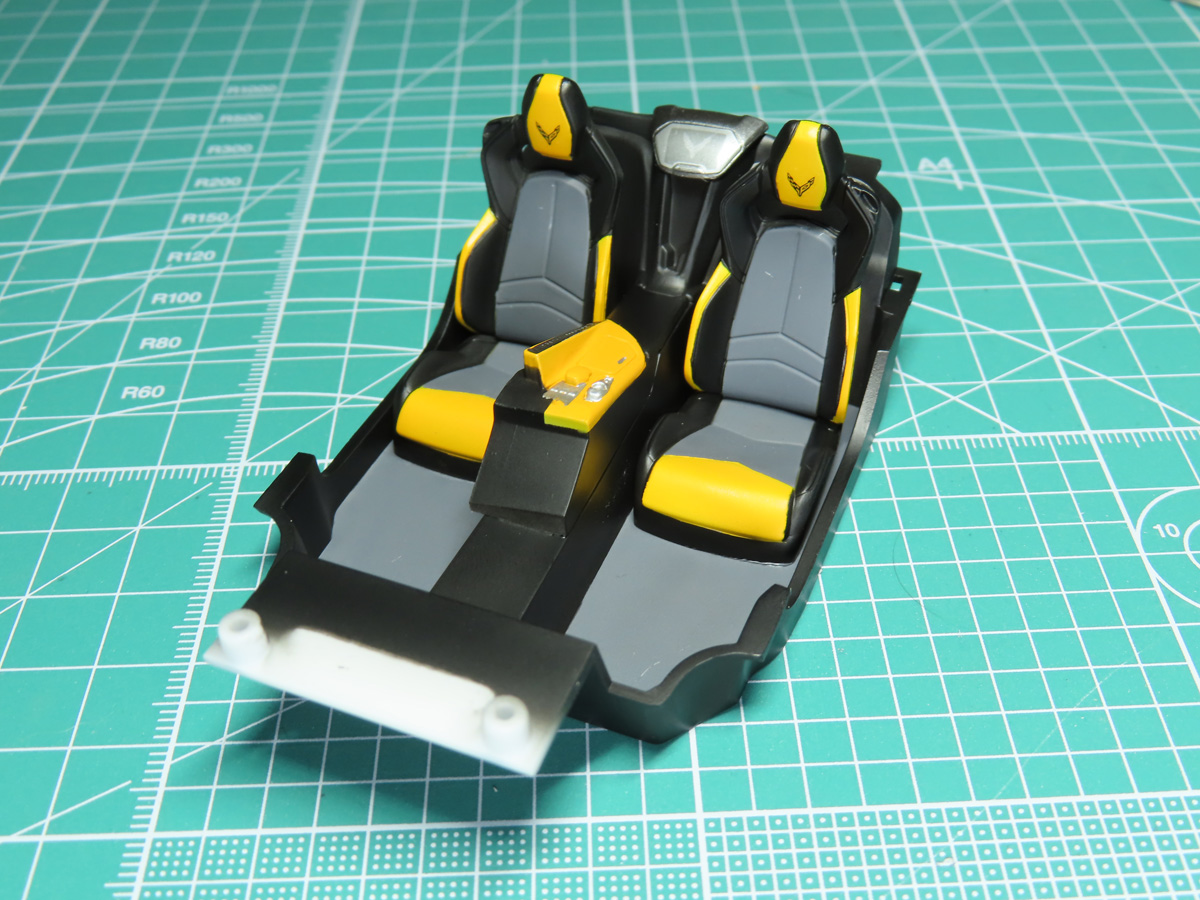
As I mentioned there are multiple options for many of the decals, and I used the black Corvette insignia for the headrests, and I really love how they look.
The decals from this kit are very thin and lifted from the backing after just a few seconds in water. They reacted well when I applied Tamiya Mark Fit “Super Strong” and snugged down tight to the surface.
However, the carrier film on my batch was off-center, so I had to trim that off of a lot of the decals. They are oddly very slippery, so pushing the excess water out from underneath and having the decal stay in place was a bit of a challenge with some of the decals.
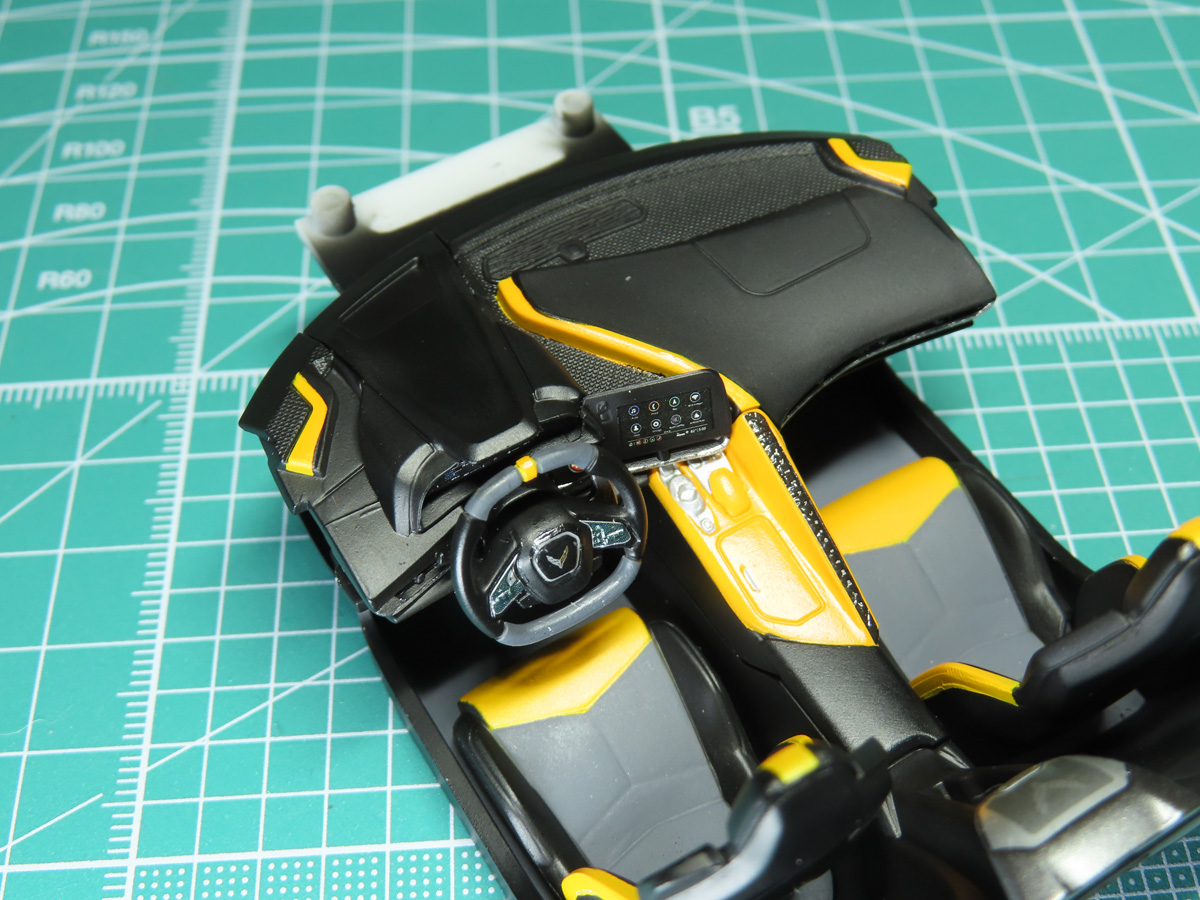
I set the dashboard in place, and it fits up with the center console section. Masking that curved S in the center was difficult, but seeing all of the orange blend together it was worth the extra effort.
Revell has printed silver decals which add an extra level of detail that makes this feel like a luxury sports car. You can see some of it around the steering wheel center, and the speaker decals that will go on the sidewalls.
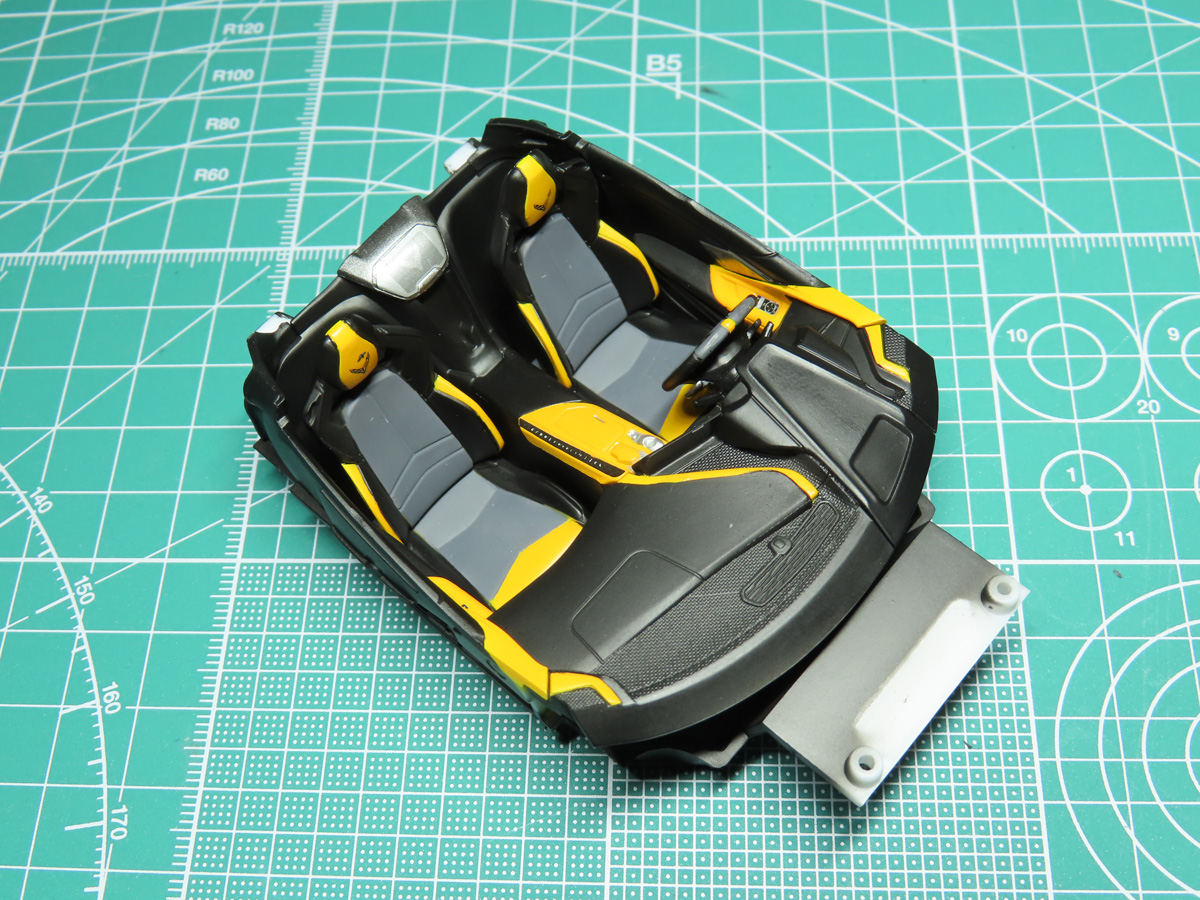
Lastly, I’ve added on the side walls, and the interior is now completed.
Before I began painting the interior I looked up Corvettes to see how they were painted and there wasn’t really a right answer. And I was really looking forward to this, to add a bit of my own creativity to the colors. It was a lot of fun and incredibly satisfying to see it all come together like this.
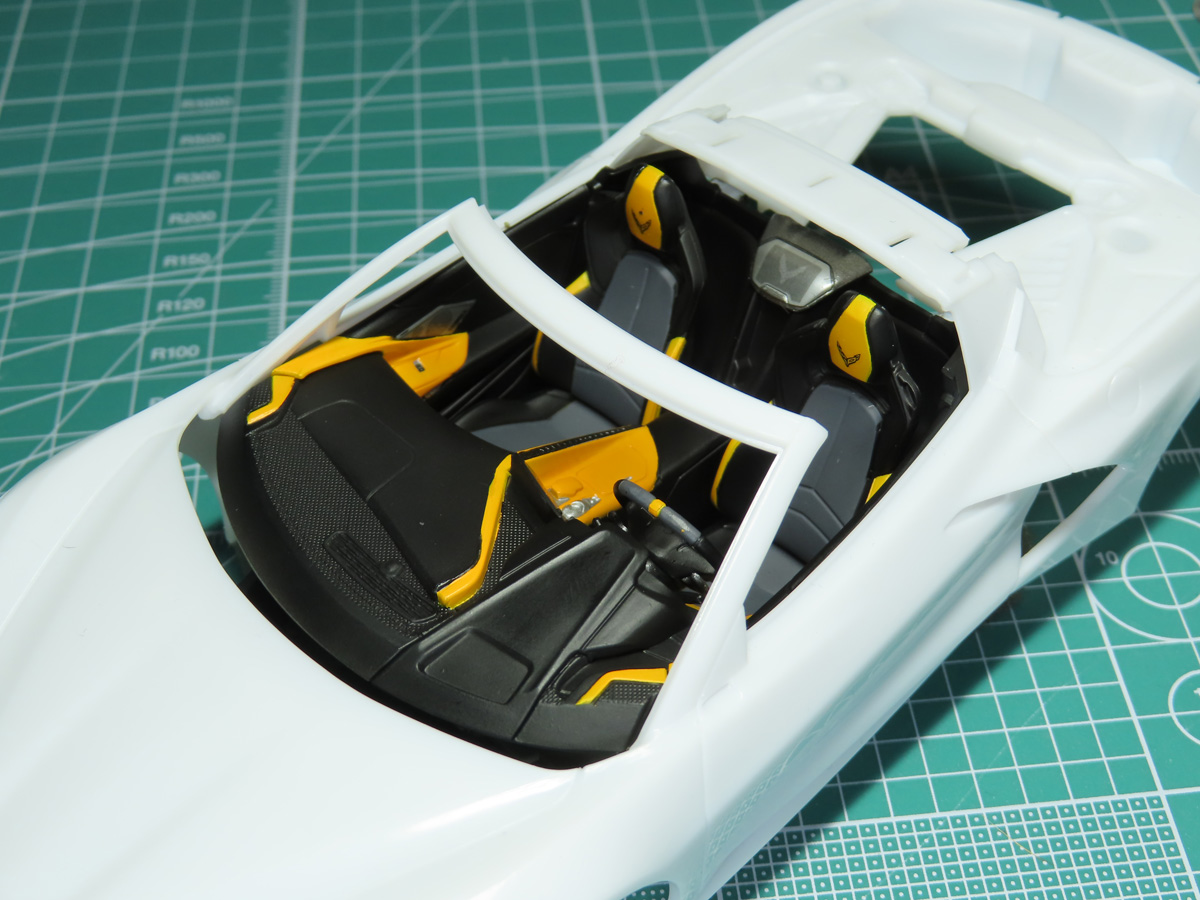
I placed the interior into the car body, just to get an idea of what it’s going to look like when it’s all completed. I had tossed the idea around of tinting the windows, but I’m going to ditch that idea as I don’t want to lose any of that interior.
Of the Corvettes that I researched all of the interiors were differently painted and colored. And I like this aspect a lot with car modeling, as it’s a lot more freeing than a Spitfire, as they are basically all painted the same interior green. Here I got the chance to customize a lot of the parts and it’s a very creative feeling, something that maybe I’ve been lacking in my own modeling lately.
I’ve got the engine completed, and now the interior. Next, I’ll be working on cleaning and painting many of the small exterior parts, and then I finally get to paint the body, that is going to be a project all in its own, and I can’t wait to get to it!
To be continued…
Jared Demes is a modeler from southern Alberta. He has been building models since he was 4 years old when his Dad first introduced him to the hobby. He has written for several magazines including, Fine Scale Modeler, Scale Aircraft Modeling, Phoenix Scale Models, and others. He has an interest in all modeling subjects, with a focus on WWII Japanese aircraft and Science Fiction.
Jared has won several IPMS awards for his modeling, and currently operates his YouTube channel rebelsatcloudnine, where he showcases model builds and product demonstrations.
