MPC A New Hope Hans Solo Edition
This is the sixth part of the MPC Star Wars A New Hope Hans Solo Millenium Falcon 1/72 Scale MPC953 build and review.
This is the part of the build where I stop, look around and ask myself “Why are you doing this?” Now I could have easily at this stage with the model painted Insignia White, been satisfied enough to just add the decals and do some weathering and have a really nice looking Millennium Falcon. I could have kept it simple, but those blue panels with those complicated curves were too enticing. Maybe, someday I’ll learn to keep it simple, but it’s not going to happen this time!
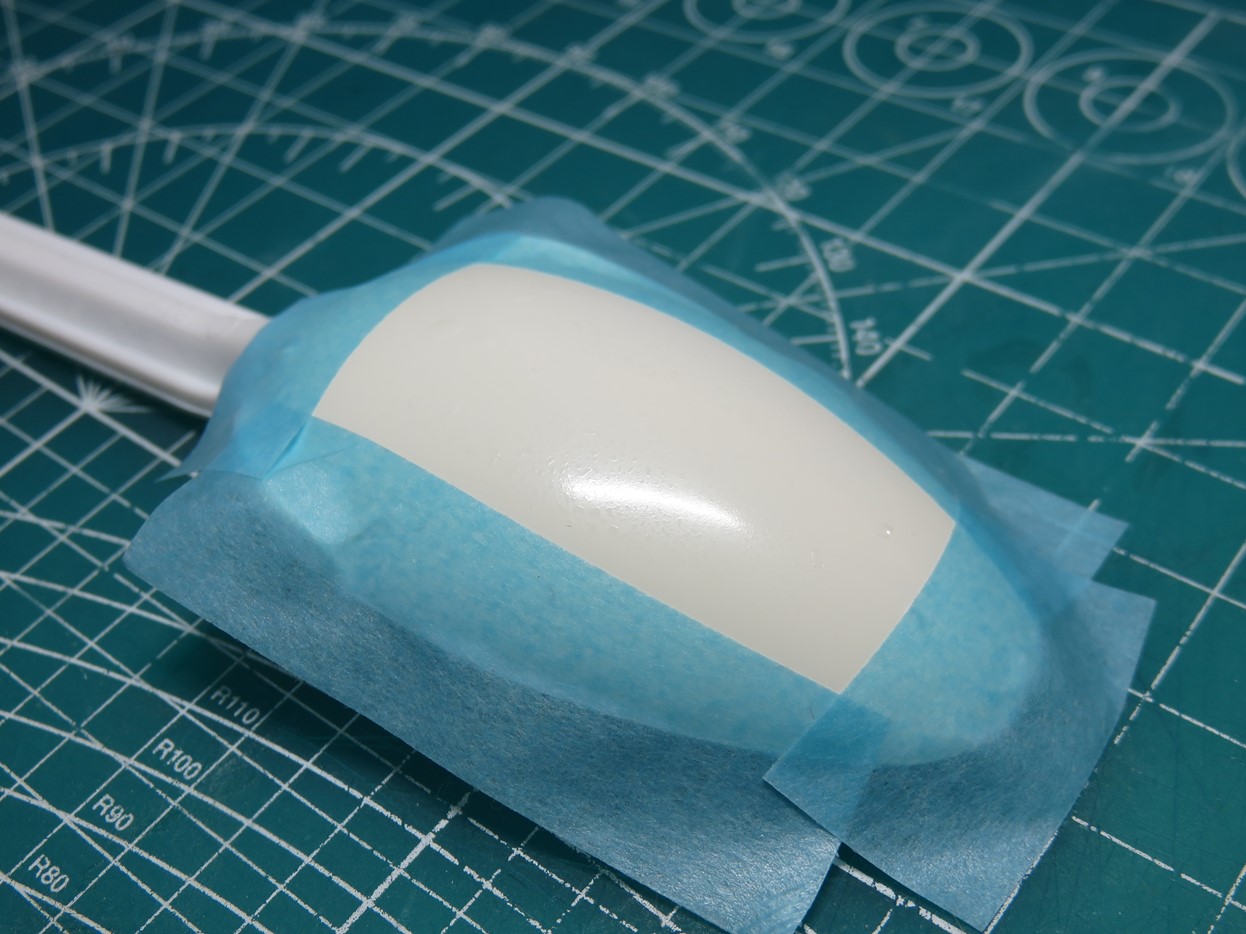
Around the same time that I started this project, Tamiya had released their new Chipping Liquid, and I thought that this would be the perfect project to test this out on. I painted a test spoon with some Insignia White and taped off a space where I could test the Chipping Liquid.
Tamiya was a bit vague with the directions on the bottle, so I decided to test if I could airbrush it onto the spoon. I thinned the Chipping Liquid with Water as per the directions, and as I sprayed it on I couldn’t get it to level out, instead it pooled into small droplets.
This was my own fault as the directions clearly stated to be used on a Flat/Matte surface. However, it would be a lot of work to spray the Envoy with a flat coat, only to add a gloss for weathering, and then once more flat coat the model once it was completed. So this was a test to see if I could get away with using a glossy surface.
It’s difficult to see in this picture, especially against the Insignia White, but you can see how the Chipping Liquid has formed small droplets.
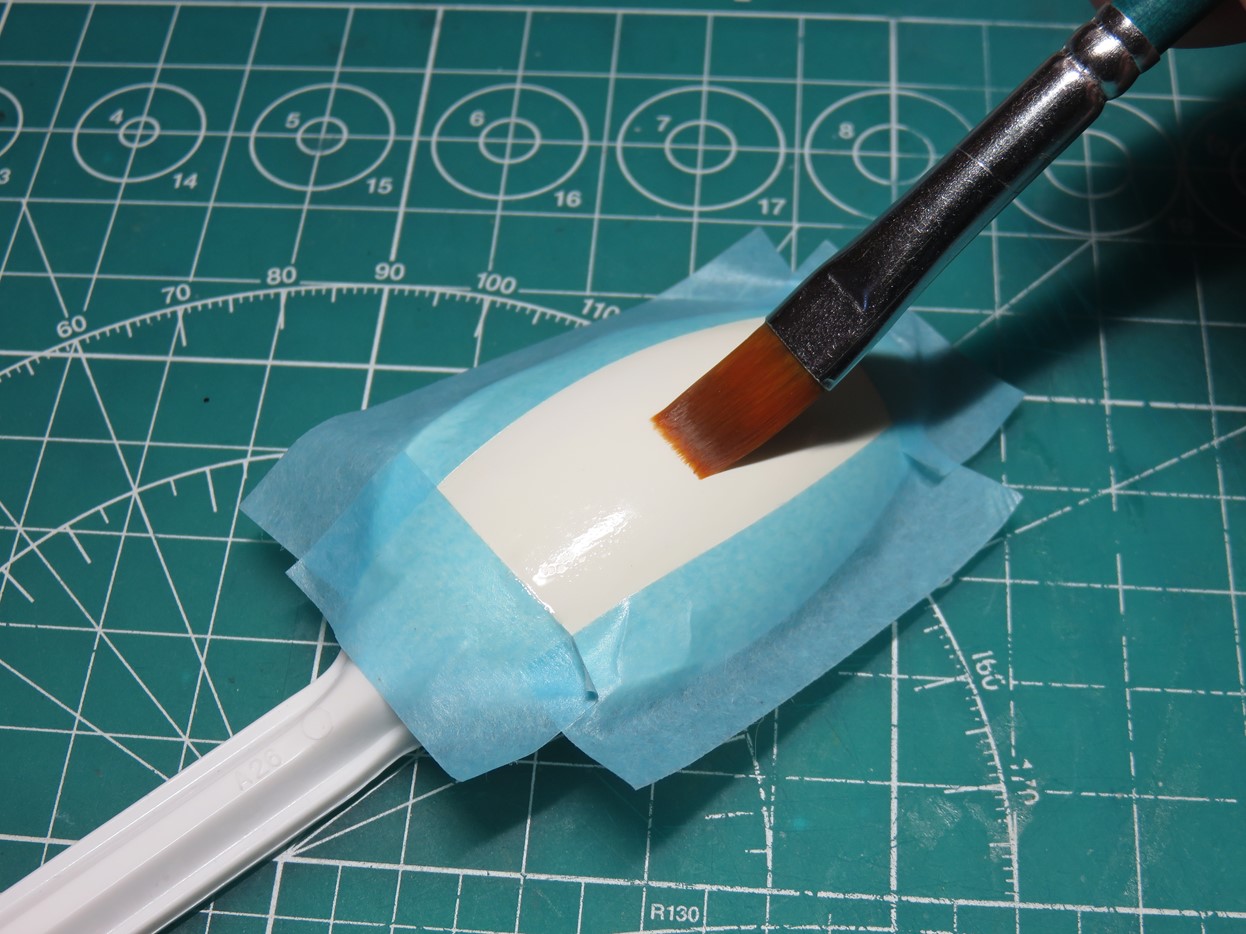
I sprayed on a flat coat from Mr. Color, and I decided to try brushing on the Liquid Chipping.
The first coat was thin and it made thin droplets like before, but not as many and I had better coverage. It took 3 applications to build up a nice looking layer. Then I left the sample to dry overnight.
When I came back I masked over the one side so that I could test spray one of the blues I had planned to use, but when I lifted the tape most of the Chipping Liquid came with it. The rest came off when I removed the tape from the border.
I was very frustrated at this point, as I couldn’t figure out how to exactly use this product, and it had cost me a few days that I could have used masking and painting.
So I decided to give up on using the Tamiya Chipping Liquid, and in the future, I’ll test it some more, and properly figure out how to use it, and give a report on it then.
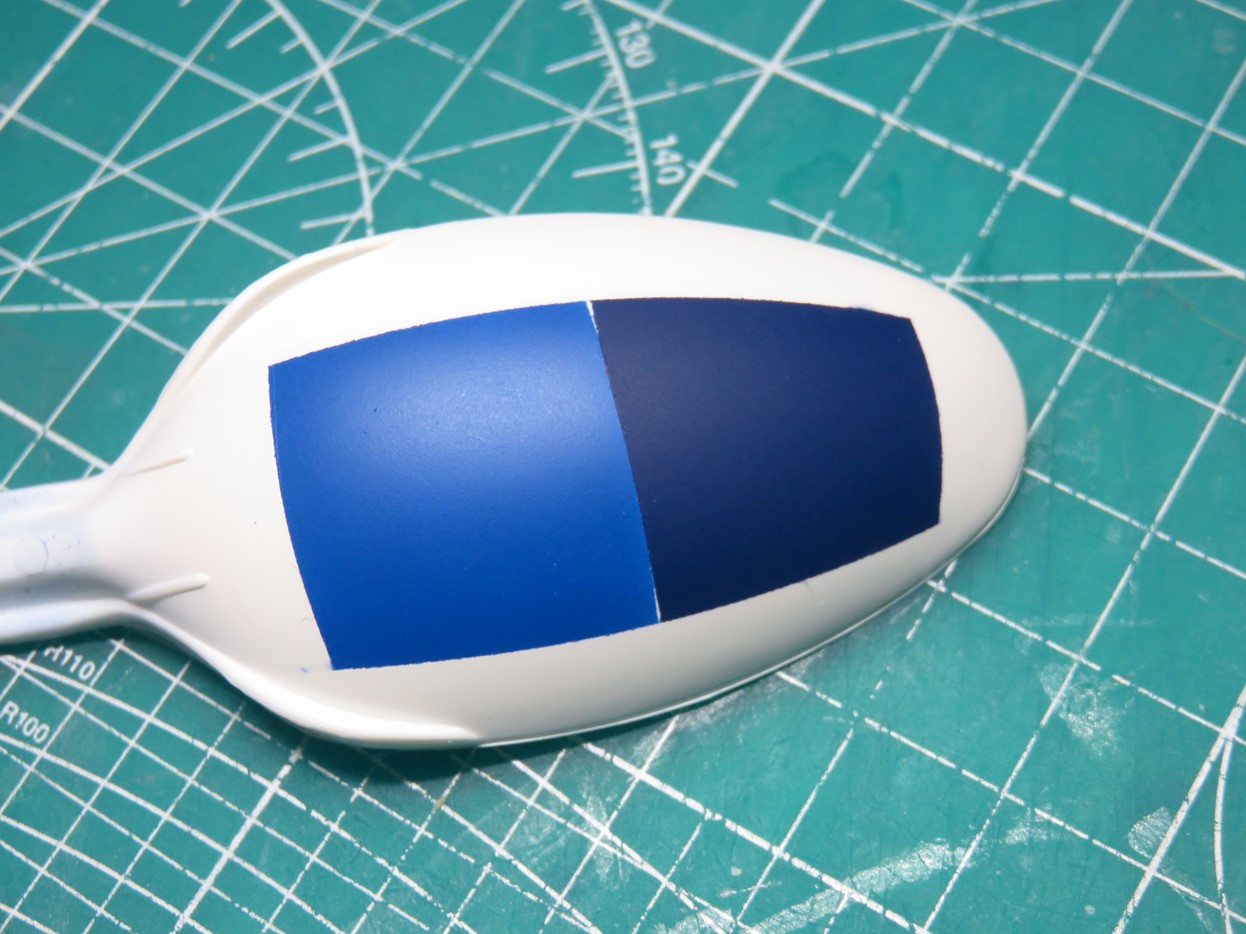
I tested my blue paints to see which one I liked better. On the Left is the new Mr Hobby Aqueous HUG 107 Freedom Blue from Gundam Seed. This is a really bright and bold blue that I like a lot. On the Right is Tamiya XF-8 Flat Blue. This is quite a darker blue compared to Freedom Blue, but it feels more like a prequel era Star Wars color, so I decided to use this one.
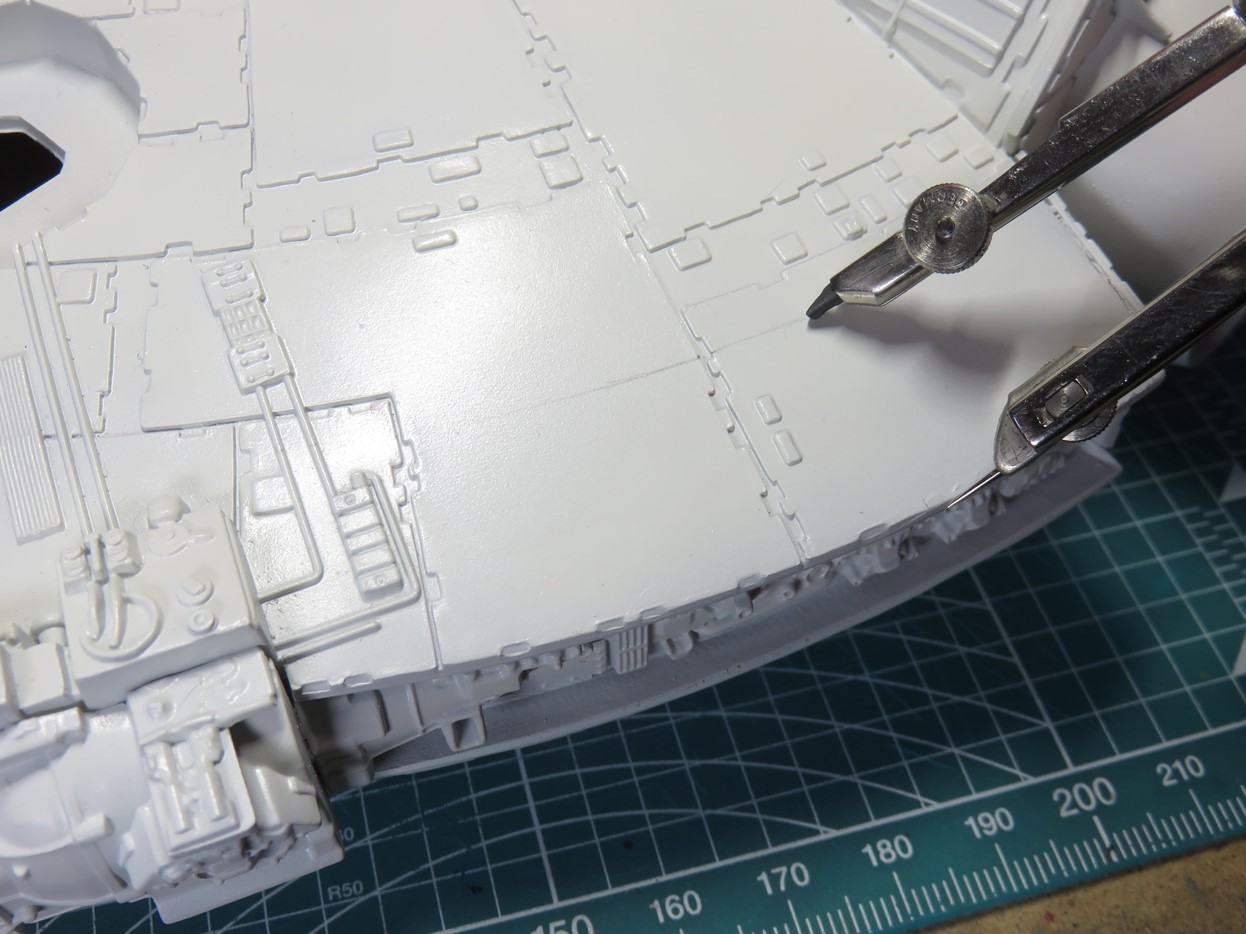
To create the curved edges I started with a drawing compass. I measured the distance I wanted and then I took the pointed end of the compass and drew a faint line on the other side.
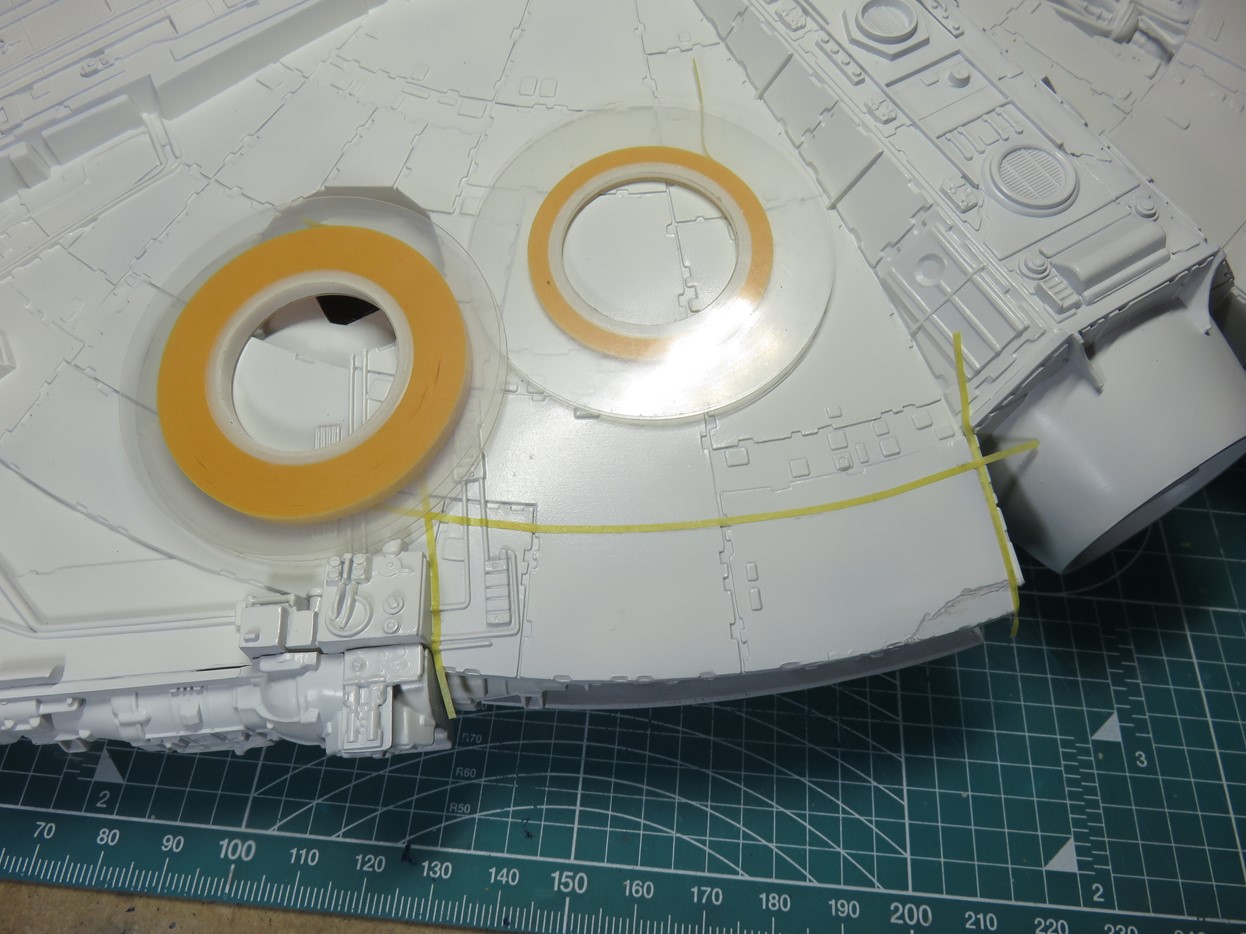
I then masked off the section with Tamiya 1.0mm tape 87206. Using this thin tape I was able to easily follow along with the curve that I had traced. I’ve used Tamiya 1.0mm and 3.0mm tape, and they have been invaluable during this process. I used to cut thin strips of tape but using these makes things easier and I can work faster. I highly recommend adding these to your shopping cart.
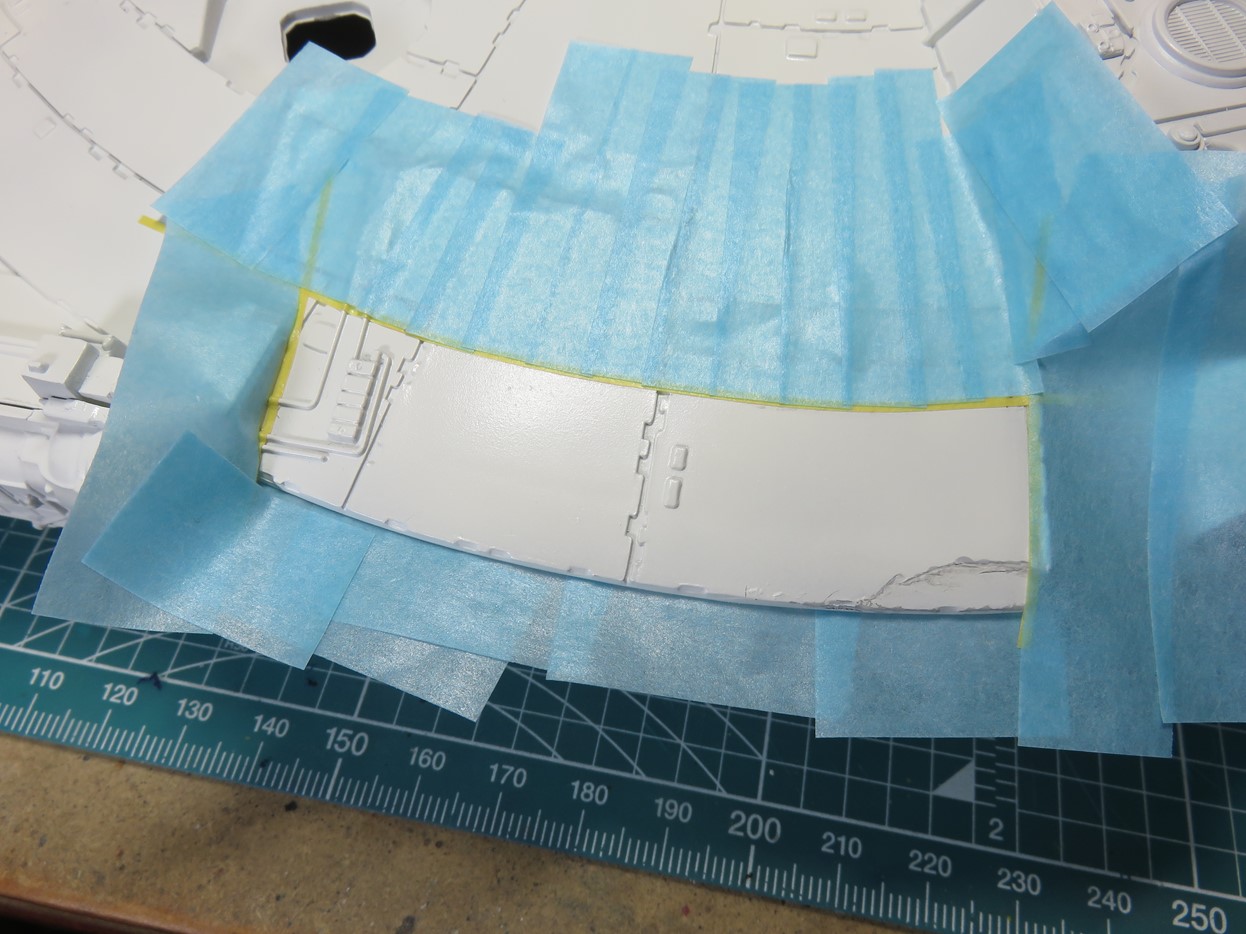
Next, I placed more modeling tape around the area, doing my best to press down the tape to cover up the pipes and other raised details. I’m going to try my best, but given all of the details on the surface I think I’m going to have to deal with quite a bit of paint bleeding.
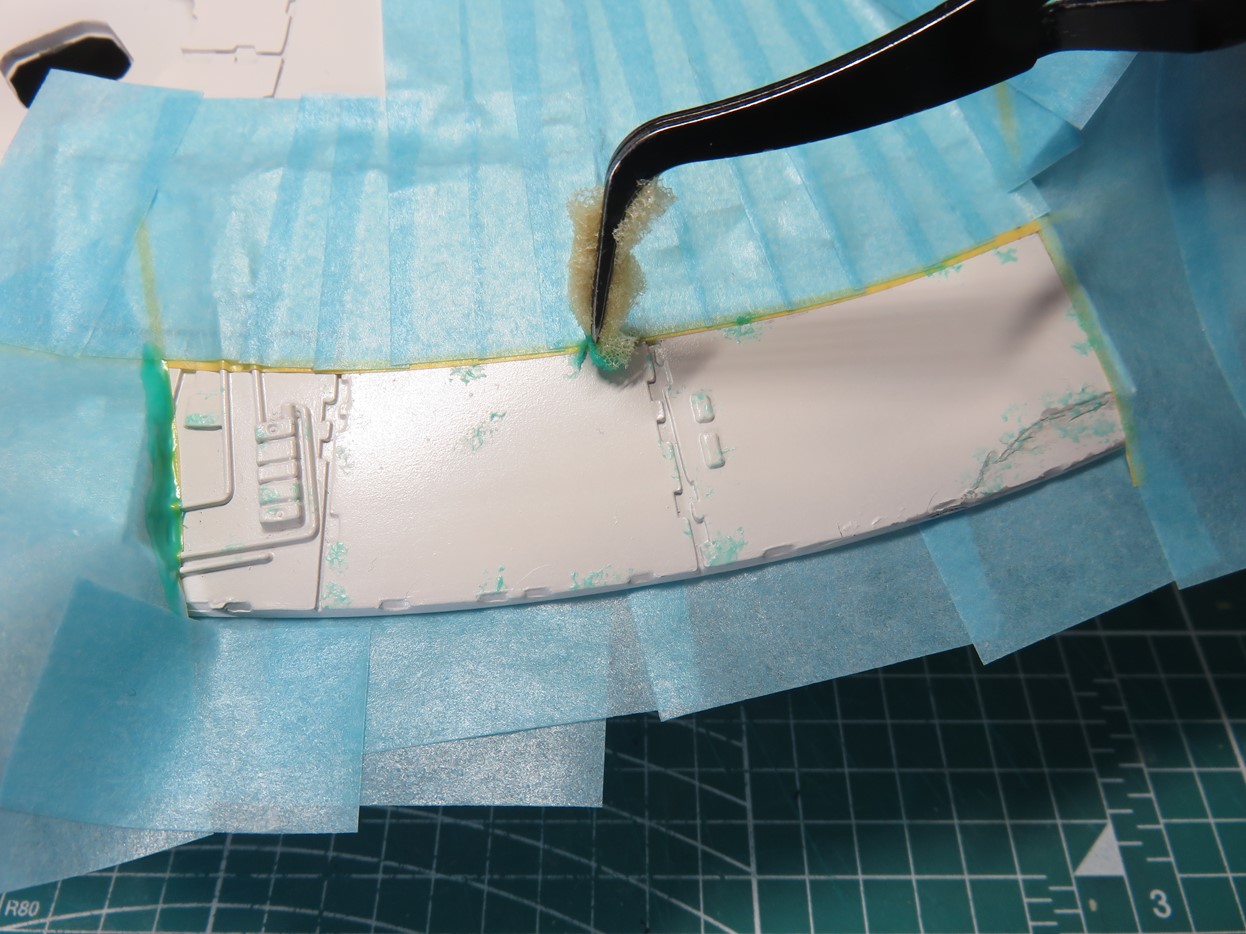
I bought some sea sponge for this project that I could cut up into little chunks. I dipped the sponge into Mr Hobby Masking Sol NEO M132 to create some chipping in the paint. I’m not the best at using sponges, so this project will be great practice for me, but I was really impressed with how tiny I could get the chipping to be using the sponge versus my previous attempts with a paintbrush.
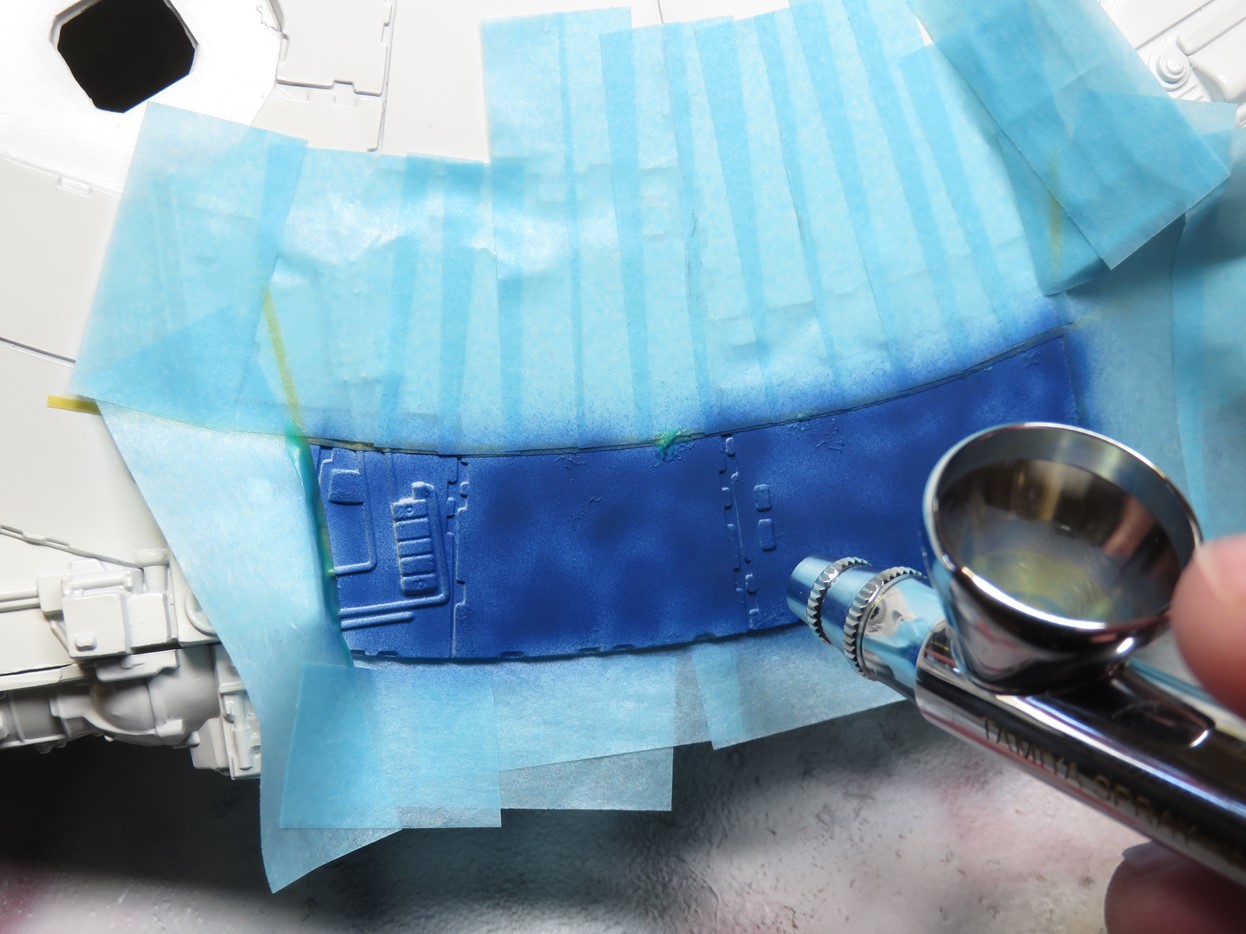
I painted on the XF-8 Flat Blue, mixing it with Mr Leveling Thinner T108 at about a 50-50 ratio. I painted it on in a splotchy pattern to create some fading in the blue paint, helping add to the illusion that this is a well used spacecraft.
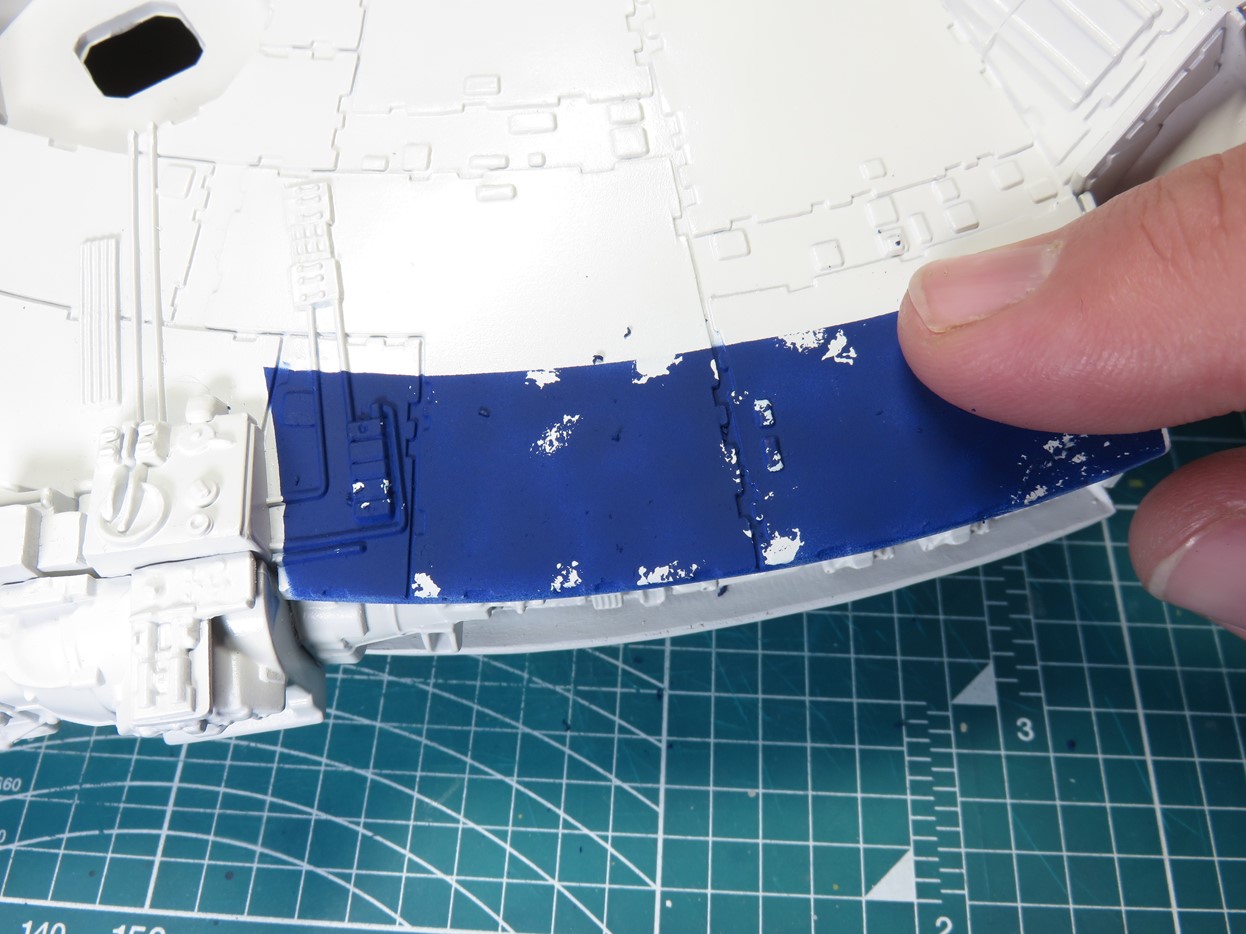
Usually, I’ll use a soft eraser to rub off and remove the Mr Masking Sol NEO, but I painted on the Flat Blue so thin that I was able to easily brush it off by just using my finger.
I’m really pleased with the results of the chipped paint, and it looks even better with the light and dark tones in the paint. I think I might have overdone it in a few places, but I’ve got a lot more of the model to paint and practice on.
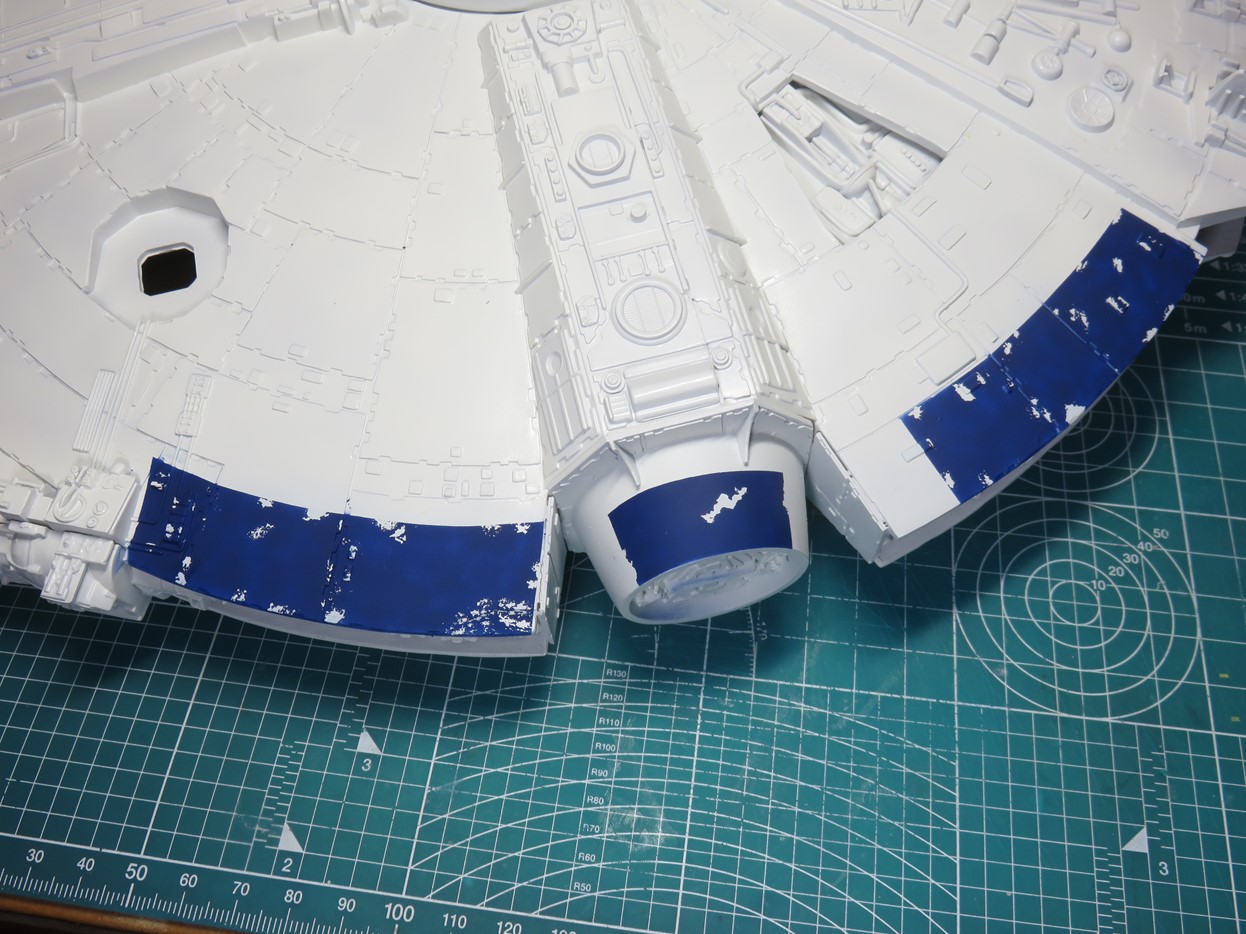
Sadly, because of my testing with the Tamiya Chipping Liquid, I didn’t get as much done as I had planned. Fussing with that stuff was really frustrating but I’m going to try it again in the future once the envoy is complete. Thankfully I’ve still got Mr. Masking Sol NEO which has been my go to for creating chipping for a long while now.
I’m going to spend the next week here masking and painting, and that’s going to take a lot of time. It would have been a lot easier to build the Falcon, but once I started sponging on the masking agent and painting the blue I’ve had a lot of fun and I’m much more motivated to keep on with this painting than I was at the beginning of the week.
I’ve been masking all of these areas in small sections and then painting them. This makes it easier for me to handle the model, and also because of the dry climate right now the tape will lift quickly. I don’t want to finish taping this model and then find out most of the paint bled through the tape.
To be continued…
Jared Demes is a modeler from southern Alberta. He has been building models since he was 4 years old when his Dad first introduced him to the hobby. He has written for several magazines including, Fine Scale Modeler, Scale Aircraft Modeling, Phoenix Scale Models, and others. He has an interest in all modeling subjects, with a focus on WWII Japanese aircraft and Science Fiction.
Jared has won several IPMS awards for his modeling, and currently operates his YouTube channel rebelsatcloudnine, where he showcases model builds and product demonstrations.
