
MPC A New Hope Hans Solo Edition
This is the eleventh part of the MPC Star Wars A New Hope Hans Solo Millennium Falcon 1/72 Scale MPC953 build and review.
When I decided to build the Millennium Falcon as the Stellar Envoy I was left with the opportunity to add new characters to the cockpit section. I really liked this idea as it would give me the chance to sculpt a fun alien from the Star Wars universe.
And thankfully because the Star Wars universe is so vast there are a lot of different aliens to choose from. I decided I’d try sculpting a Gran, the 3 eyed aliens that were first seen in Return of the Jedi. I’ve always thought that these were fun-looking creatures and that one would make a nice addition to the model.
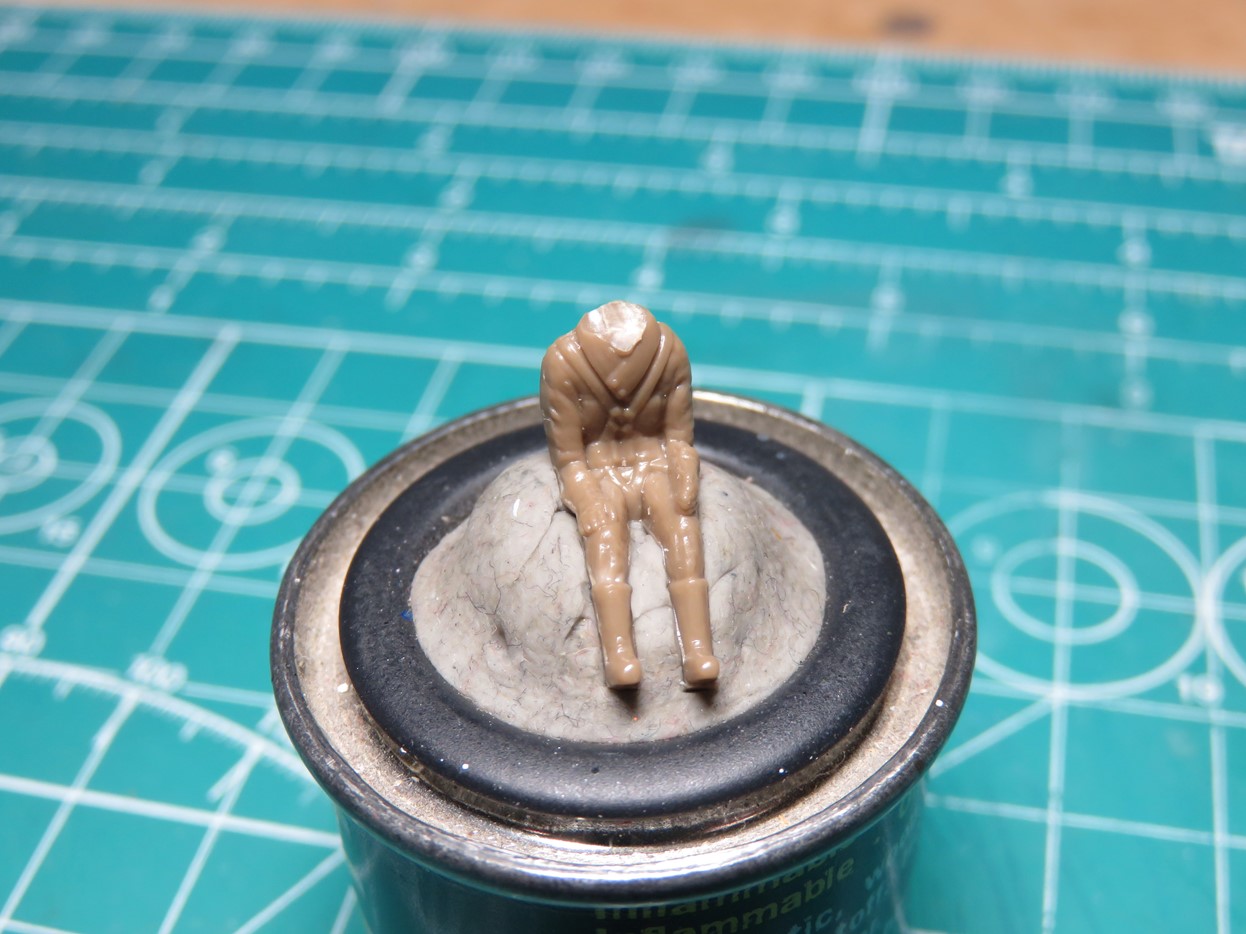
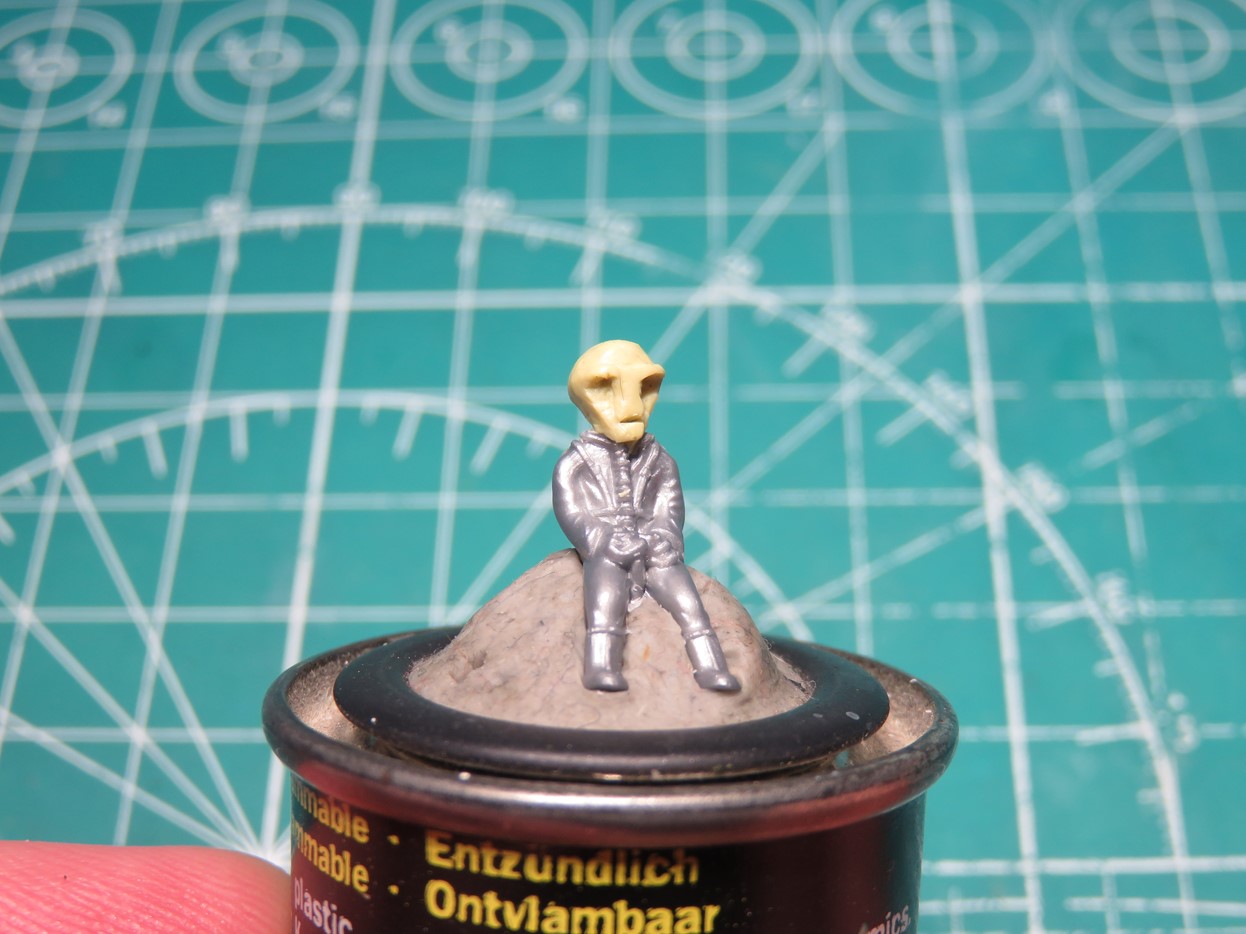
I began by raiding my spare figures box looking for any pilot figures that I thought would look appropriate. I found this one from an old Matchbox model kit. I then used my Tamiya Sprue cutters to quickly cut the head off of this figure.
I’m also using an old paint pot that was included with a very vintage Matchbox Model kit. One day I put some modeling clay on top and ever since these paint pots have been my small parts holders. The best part is that the paints are still fresh so they are heavy and aren’t easily tipped over.
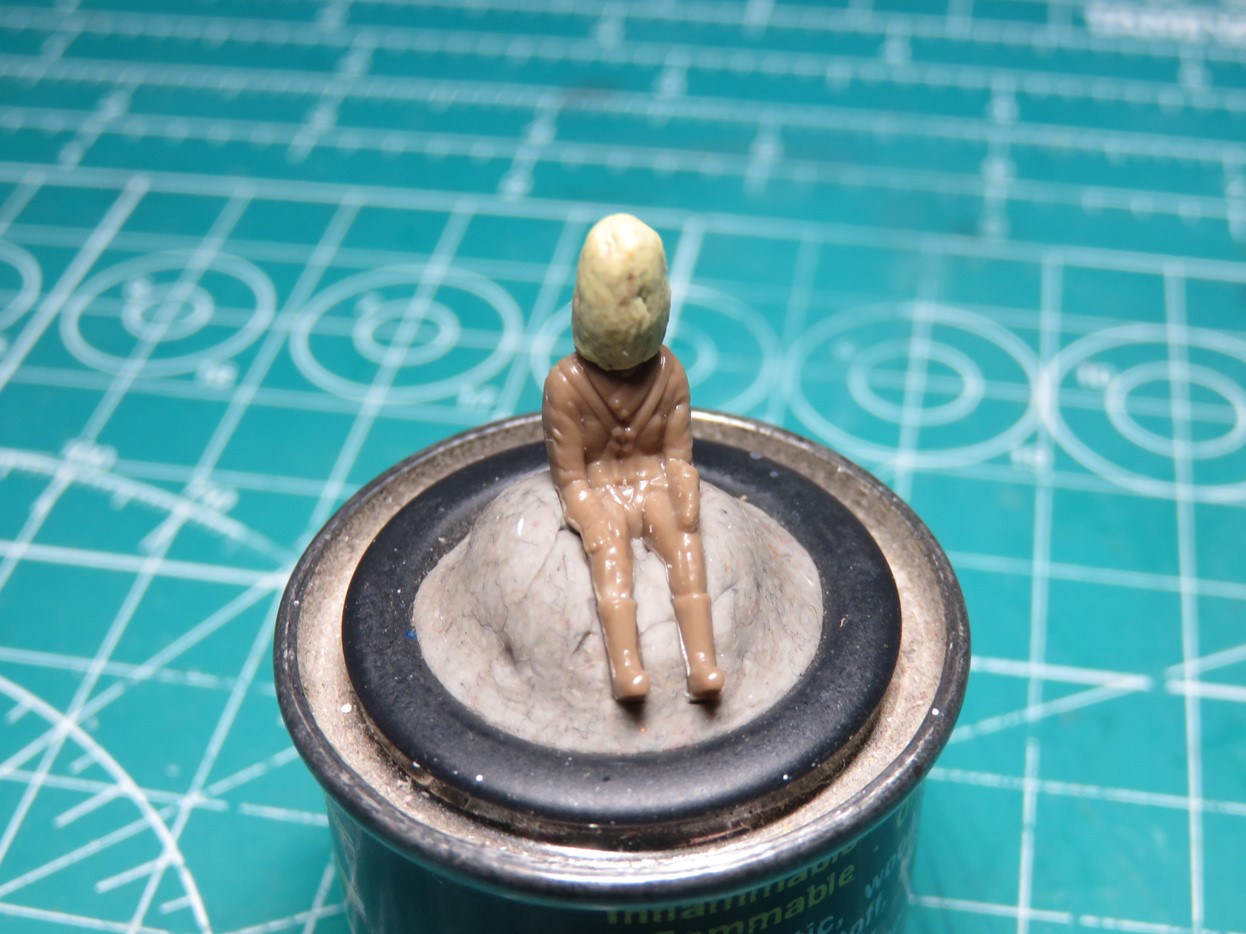
Next, I mixed some Milliput 2-part Sculpting Clay. Milliput is really nice as it is very easy to work with, and it air dries to a rock-hard finish. There are many varieties of Milliput to choose from, and for this project, I’m using their Standard version.
This clay comes in 2 colors, Yellow is the sculpting clay, and Grey is the hardener. I mixed these two together for about a minute, wetting my fingers with a bit of water when it got too sticky. When you mix the 2 together enough it should be fairly smooth.
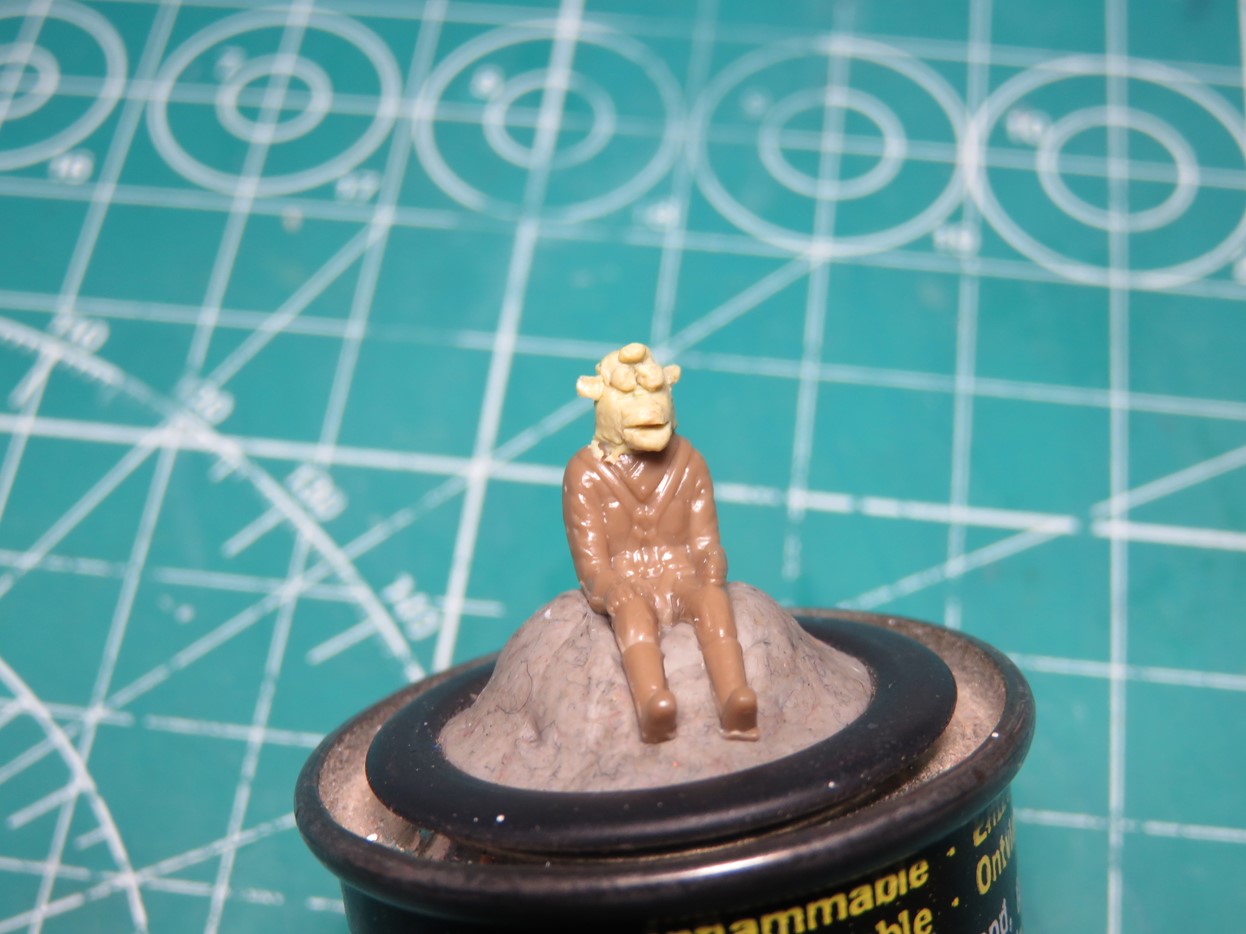
Using mainly my hobby knife and a cocktail stick I was able to sculpt a small head and carve out a pointed mouth. Then I created the 3 eyes and fit them to the top of the face, and lastly, I flattened some Milliput to form the ears on the sides.
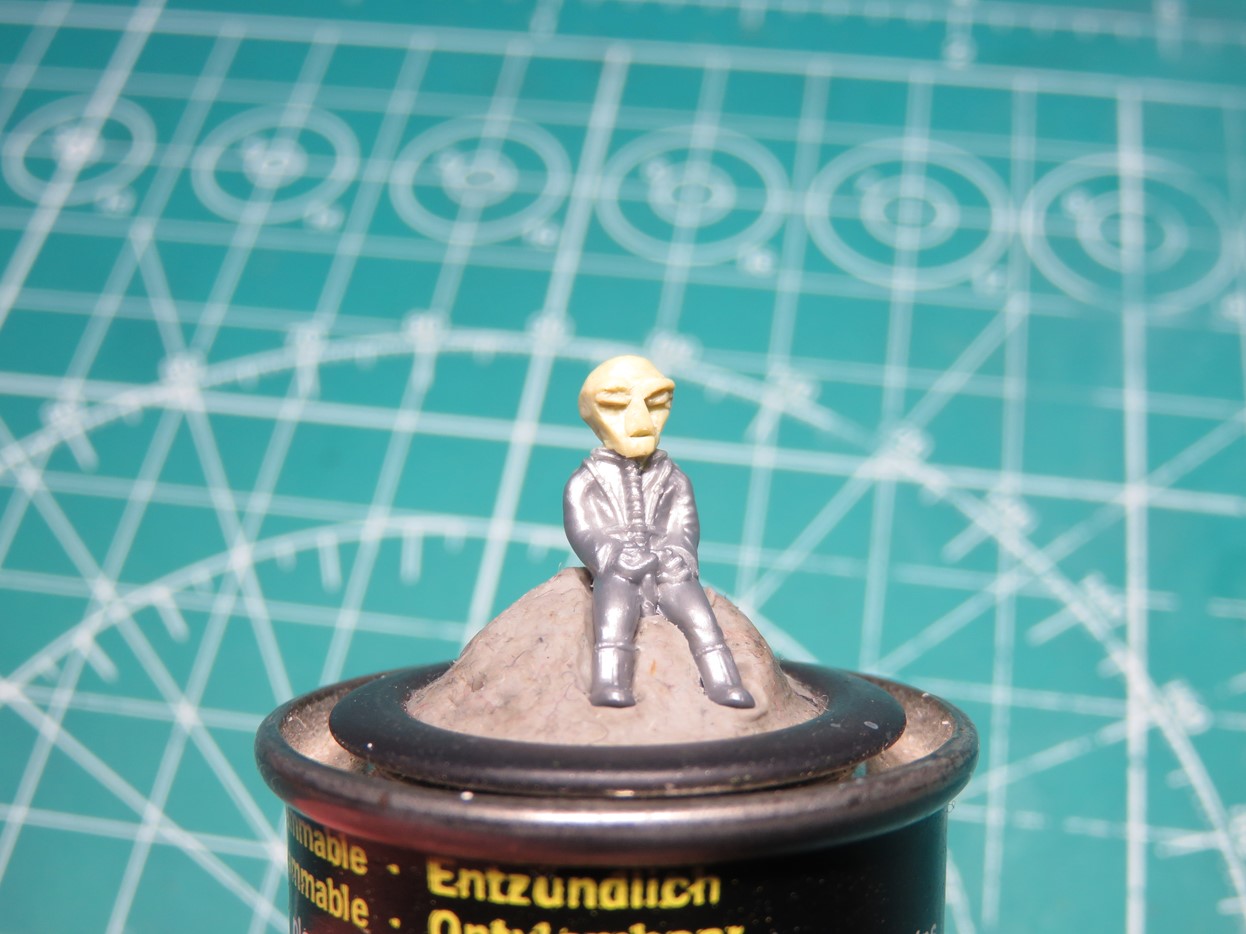
At this point, it looks more like a 3 eyed space cow than a Gran, but later on, I’ll pass this figure to my brother who is an award winning figurine painter and it will look a lot better.
Unfortunately, I got so carried away with the sculpting that I forgot to photograph more of the sculpting process.
Later on, I had the idea that I should have sculpted one of the typical Grey aliens that apparently are out abducting everyone. And then I remembered that something similar already existed in Star Wars, an alien race called Duros.
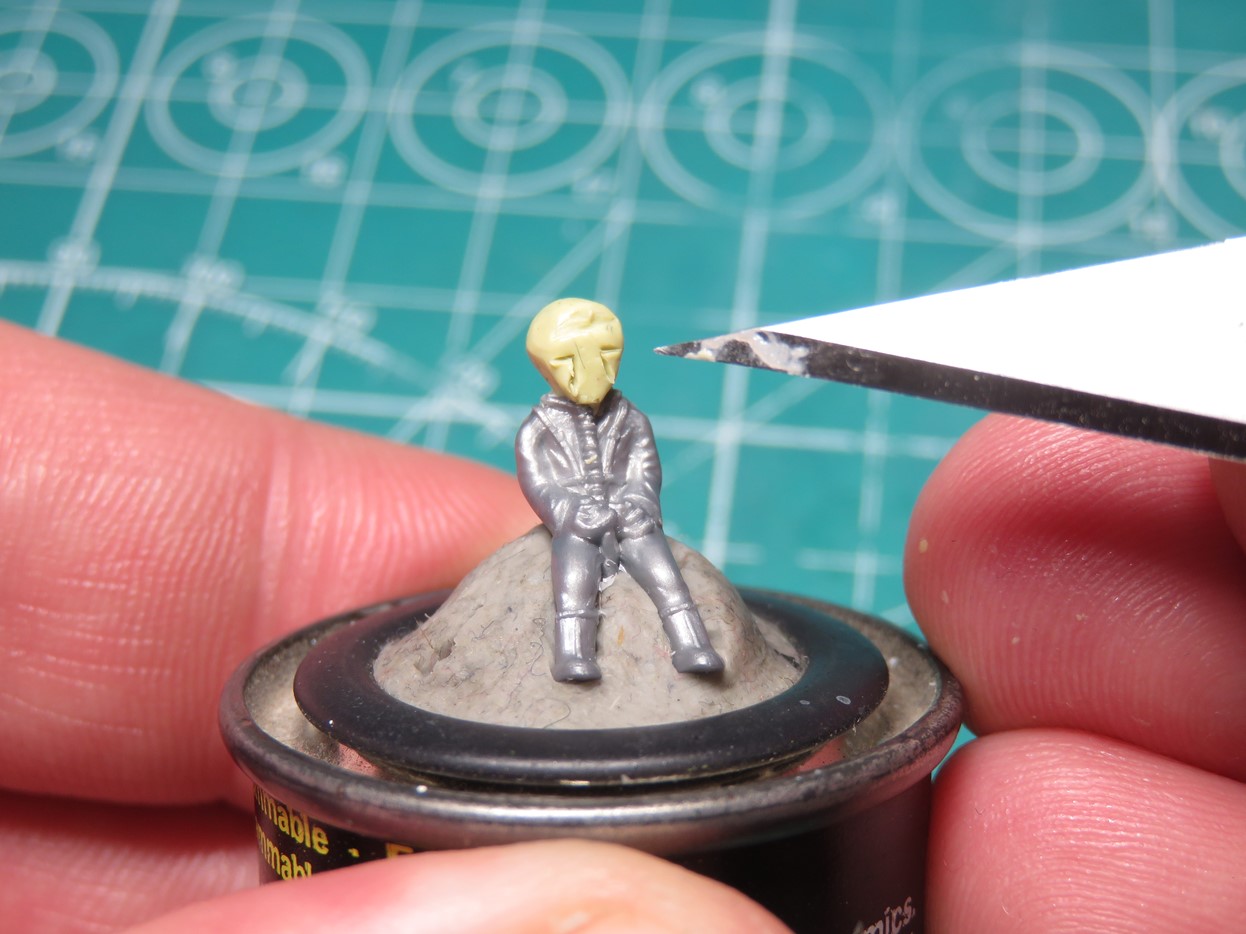
To create my Duros pilot I cut the head off of a very, very old Revell pilot. And again I mixed up some Milliput and formed it into an egg shape, with a pointed chin and more bulbous head.
I took my hobby knife and I carved out some lines on the face where the Milliput would need to be carved out.
I carved out the Milliput where his eyes would eventually go. And formed a brow on the top of his head. This was done using the spoon side of my Tamiya Paint Stirrer 74017, which worked incredibly well at smoothing out the Milliput.
I also carved out a small mouth for him using my hobby knife. So far I think this one is looking really great.
With some difficulty I used extra Milliput I had discarded and rounded the putty into two small eyes for the Duros. I carefully stabbed these with my hobby knife and gently placed them on the head. I then dipped a paintbrush into some water and slowly brushed the eyes in place.
I also used my knife to cut away the sides of his head to make it a bit more squared like the Duros featured in the series.
This sculpting was really fun and I had a much better time with the Duros than I did with the Gran. I find Milliput to be very easy to use and it encourages me to try sculpting more with future projects. The next time you are in the hobby shop pick up a box of Milliput and give sculpting a try. Even if it’s adding some fuzzy dice to hang on the mirror, or a parachute for the seat of your aircraft, I think you’ll have a lot of fun sculpting a new detail for your model.
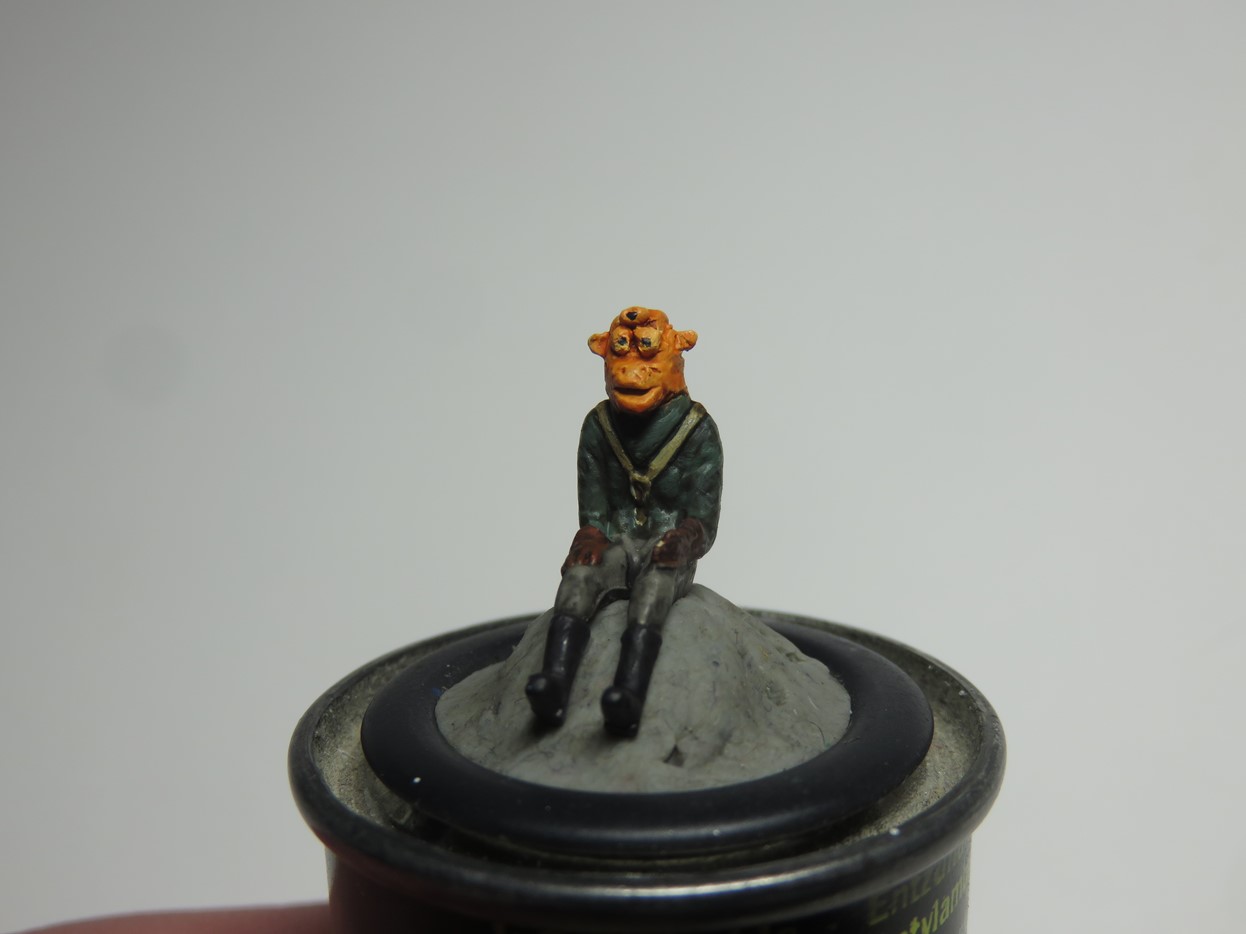
As I mentioned earlier I handed off these figures to my brother to be painted, and he didn’t disappoint! He used various acrylics to paint these figures, for the flesh tone on the Gran he started with The Army Painter Elven Flesh. Followed by adding a wash of Citadel Fuegan Orange which brilliantly brought out all of the details.
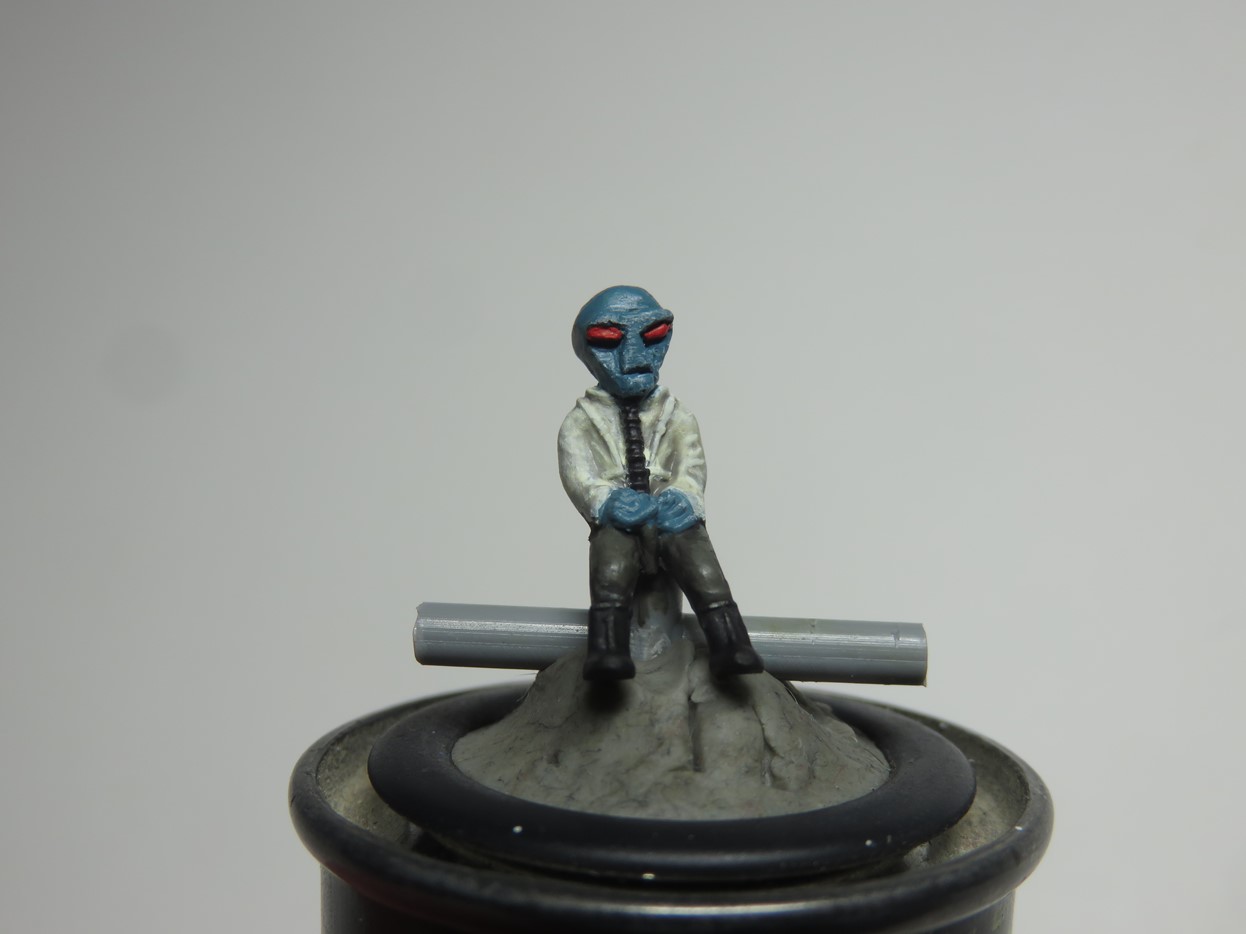
For the Duros pilot, the flesh tone was painted with Army Painter Griffon Blue and gently dry brushed with a light grey to highlight the details. The eyes were painted with Vallejo Vermillion 70909 which is really bright and bold and stands out on the figure.
Lastly, for the jacket Army Painter Gorgon Hide was painted, and given a wash of Citadel Soulblight Grey.
I’m really impressed with how beautifully he painted these figures, and in 1:72nd scale as well.

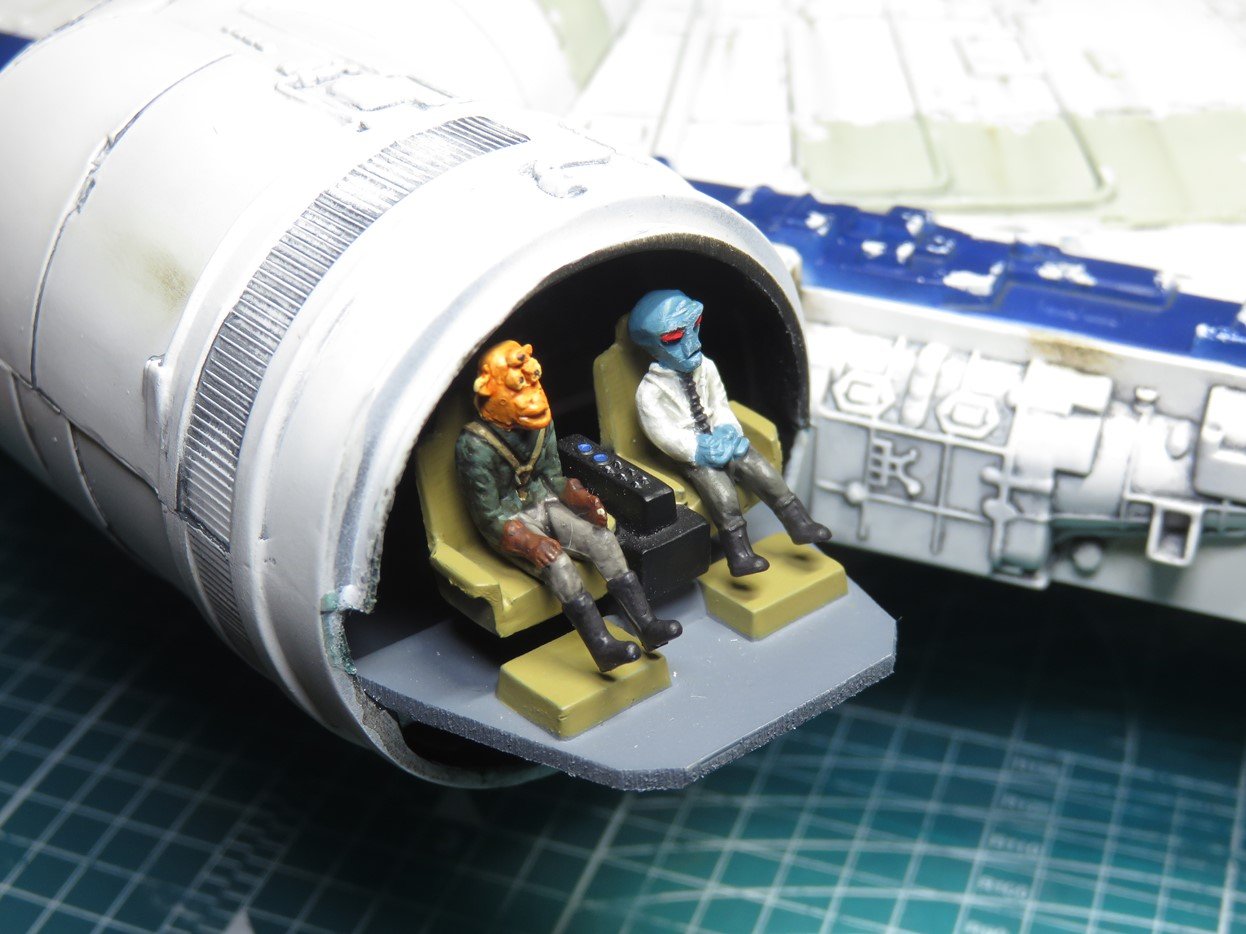
I couldn’t wait, as soon as I took the previous pictures I had to glue these figures to their seats to see what it would look like. And I wasn’t disappointed, these odd-looking aliens are perfect for adding more to the story of the Stellar Envoy, whatever that might be.
And I find it sort of funny that I’ve had these figures in my stash since I was an early teen, thinking that I’d never use them. And then I get a project like this, and all of sudden they are the perfect parts and they are transformed into aliens. I guess that’s just part of the male mentality to hold onto things, that someday they will eventually be used.
It took a bit of fidgeting but I was able to get the cockpit section placed into the tunnel. I used some BSI CA Cyanoacrylate Super Glue to attach the bottom of the floor to the tunnel.
I had mentioned in one of my earlier posts, that it was a shame that Round 2 created these fantastic new figures of Han Solo and Chewbacca, but not the front console. When I test-fitted the canopy cone, the front just felt too bare. So I decided the only thing to do was to build one myself.
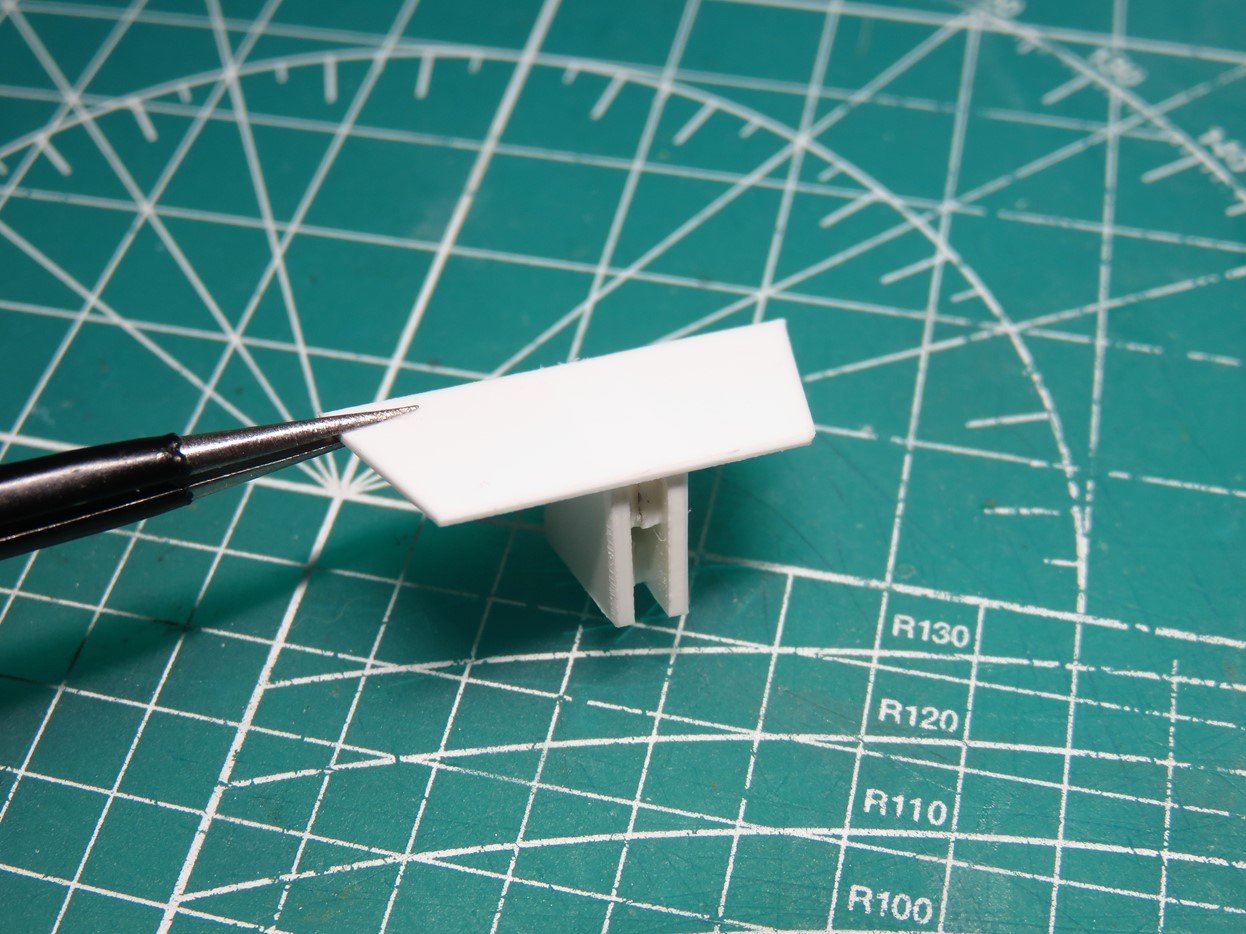
I used scrap pieces of Evergreen styrene, and I built a center leg piece, and then an angled flat top was glued. I would then add more styrene to the front and sides of the console. For a size I kept this console fairly low, close to the alien’s waists. I didn’t want this to be too tall and distract from the figures.
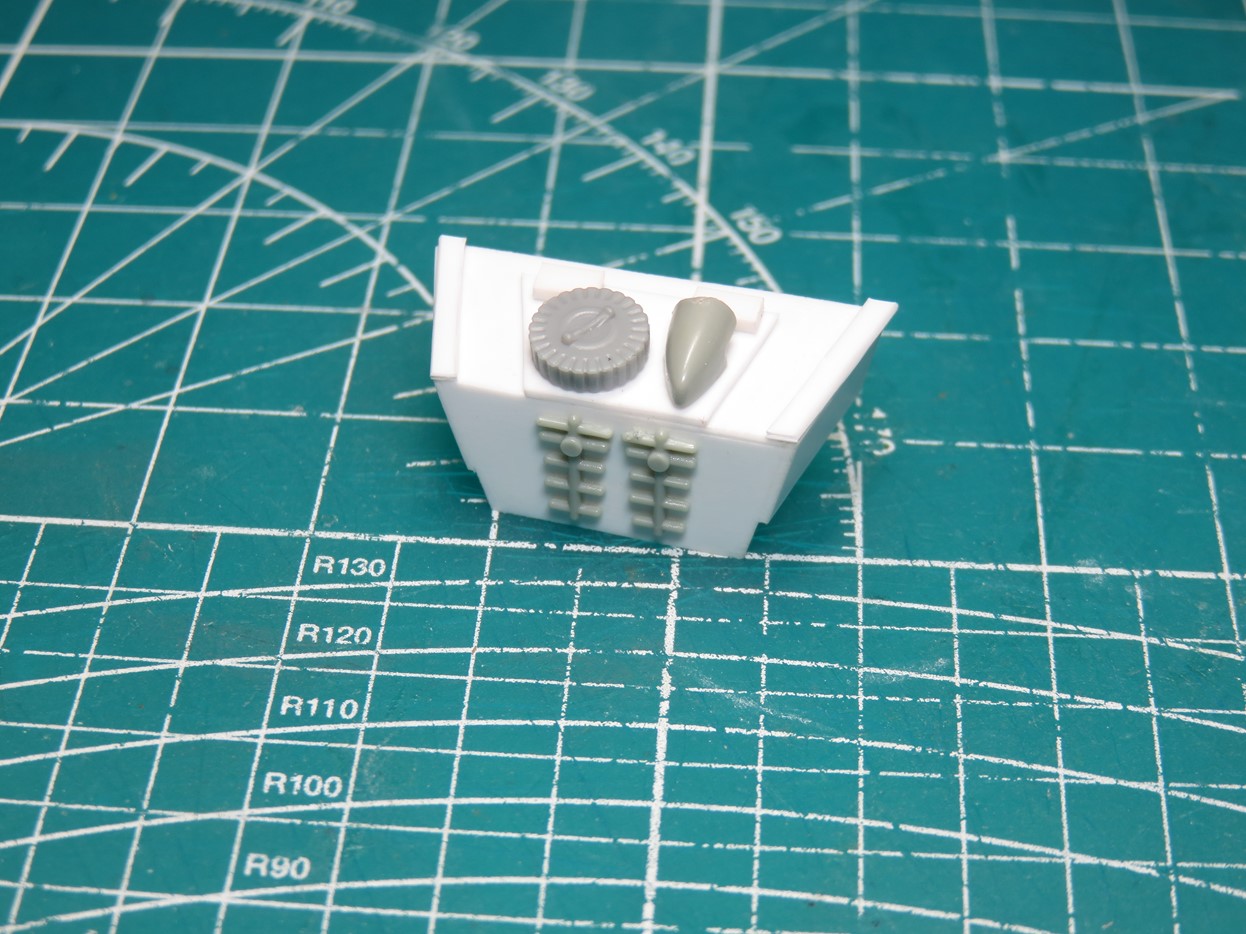
I added some more styrene to the top of the console, and then I searched through my spare parts box to see what I could find that looked interesting.
I added some antenna to the front of the console, and an intake to the right side. I wanted to add one of these ammunition canisters when I was building the canons but I never found a good place for them, so I got to add one here.

I airbrushed the console with Tamiya XF-53 Neutral Grey. When the paint had dried I hand-painted a few of the smaller details. The antenna was painted with Tamiya XF-56 Metallic Grey. The intake was painted with Tamiya LP-11 Silver, and XF-84 Burnt Iron was painted onto the ammunition canister.
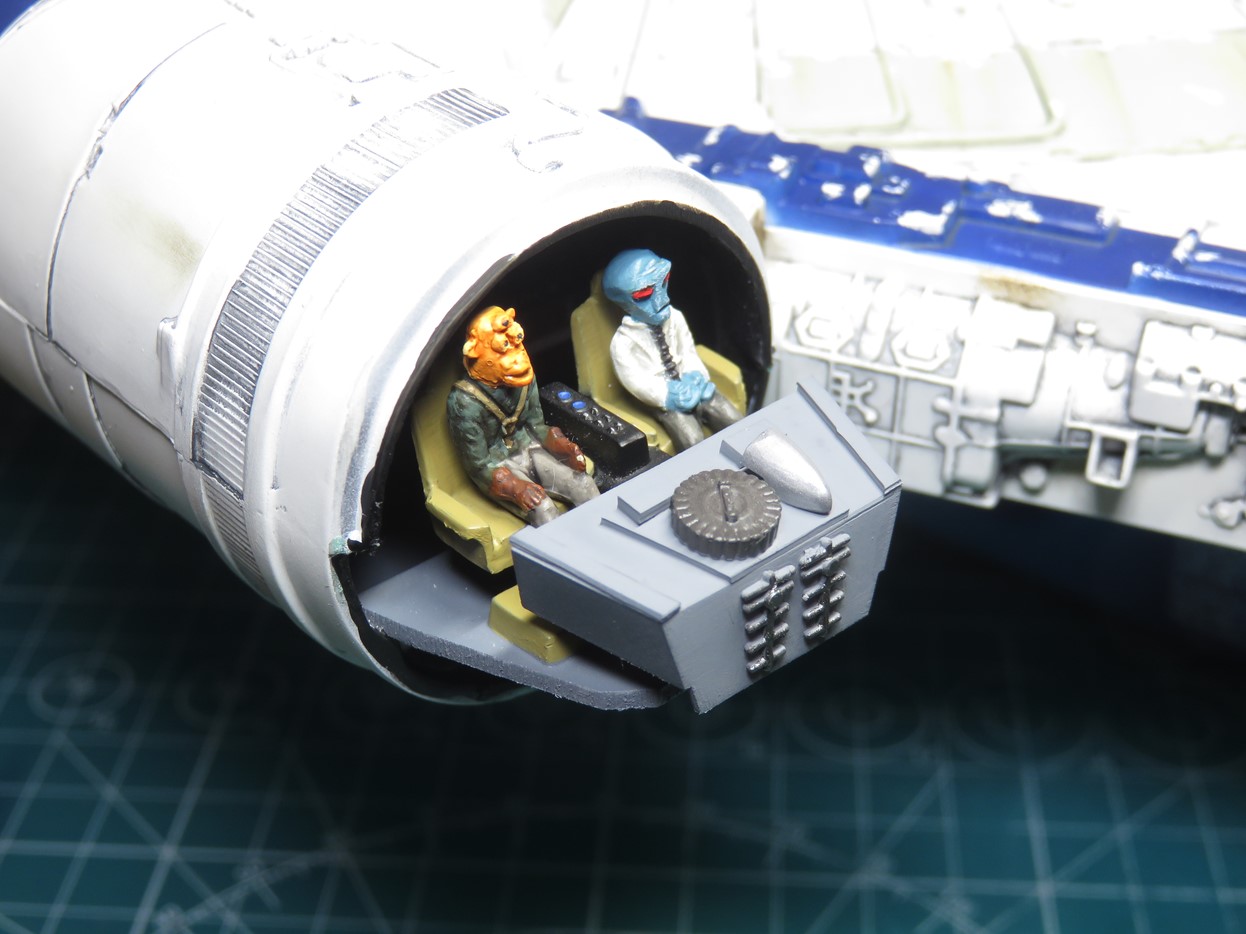
And here I’ve glued the console onto the cockpit floor. This was a pretty simple build, but it really helps to fill out and busy the rest of the cockpit.
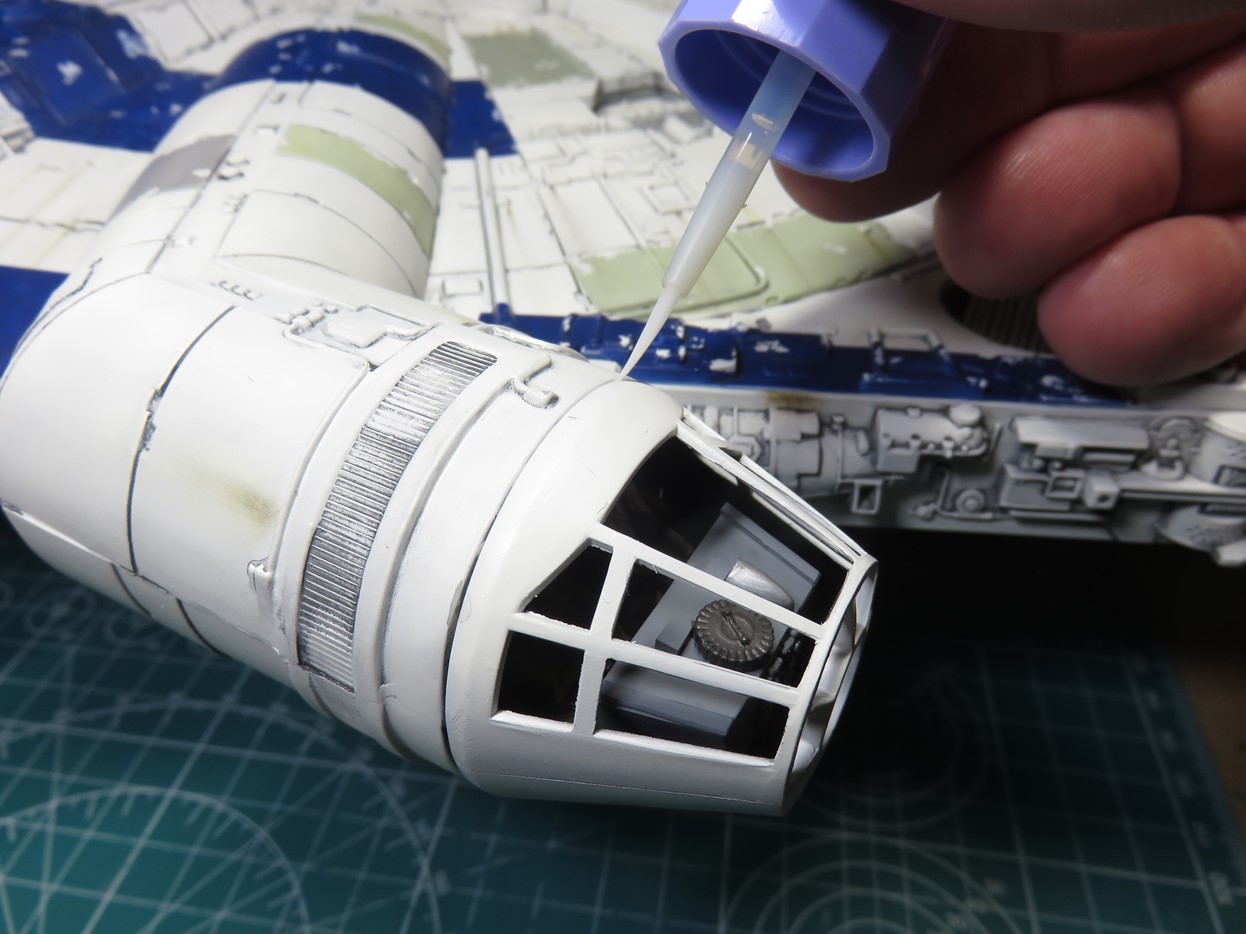
Lastly, I added the nose cone canopy to the Stellar Envoy with Mr Cement SP. You might have noticed that I didn’t add the clear part to the canopy first. This was because of the extra frames that I added to correct the cockpit frame. Unfortunately, the clear parts were pushing against these frames, and I was concerned that they might break and ruin the paint.
So much like the original studio model of the Millennium Falcon, I decided it would be better for me to leave this part off.

And that will do it for this post. The cockpit section is all completed and there’s not much more left now. I had hoped that I would have this all done for May 4th this weekend, but I think that the next post will be the final one.
In the next post, I’m going to try and build a simple and effective display stand for the Stellar Envoy and then add on the last parts.
It was a lot of fun to create these aliens, and to build that console, the Envoy looks a lot better now. I get nervous every time I decide to try sculpting, but every time I end up having fun trying something new. And maybe next time I’ll get my brother to teach me how to paint figures and learn a new skill.
To be concluded…
Jared Demes is a modeler from southern Alberta. He has been building models since he was 4 years old when his Dad first introduced him to the hobby. He has written for several magazines including, Fine Scale Modeler, Scale Aircraft Modeling, Phoenix Scale Models, and others. He has an interest in all modeling subjects, with a focus on WWII Japanese aircraft and Science Fiction.
Jared has won several IPMS awards for his modeling, and currently operates his YouTube channel rebelsatcloudnine, where he showcases model builds and product demonstrations.
Next Post: Part 12 – Last Post
First Post: Part 1
Previous Post: Part 10