MPC A New Hope Hans Solo Edition
This is the first part of the MPC Star Wars A New Hope Hans Solo Millenium Falcon 1/72 Scale MPC953 build and review.

I remember back to Wonderfest 2023 when the first pictures of the MPC Millennium Falcon were first released online. This was a kit that many had been anxiously awaiting. The classic Falcon model, but with new parts for the side walls, and this was a big deal.
The original side walls of the Falcon were too tall and very inaccurate missing a lot of the key details. There have been many custom kits made on the secondary market to try and accurize this model. However, when Round 2 announced that new parts were on the way fans of this old kit were delighted to get the chance to rebuild a part of their childhood nostalgia, and this time to give the Falcon the proper detail it deserves.
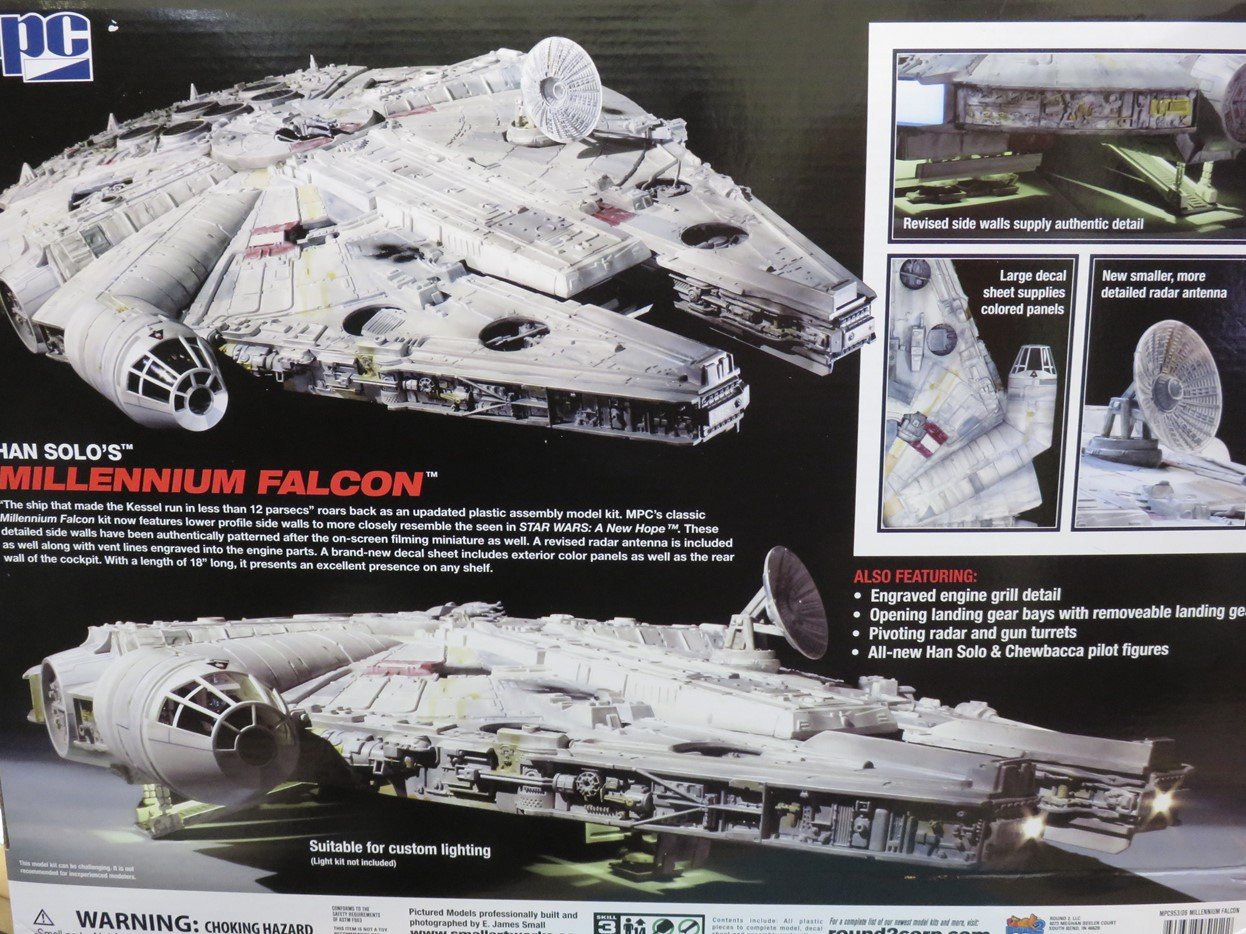
In this posting, I’m going to talk about the new features and examine the rest of the kit. More of the building process will come in the next post, as there is quite a bit to talk about here.
This kit was first released in 1979 by MPC. and with the mad rush for Star Wars merchandise, there are some shortcomings with these models. However, the Falcon is a pretty sturdy kit, and the details on it are fairly decent, especially for the time when it was created.
So what scale is this kit? That has always been a mystery, especially since the Falcon’s measurements have been inconsistent. We’ll never truly know what the scale of the Falcon is, but comparing it to the Bandai model, which most consider to be the most accurate and true version of the Falcon, the MPC kit is basically 1:72nd scale.
The cockpit and tunnel are too small, and the front mandibles are a bit too long, but for all intents and purposes, I agree with many Falcon modelers that this kit is near 72nd scale.
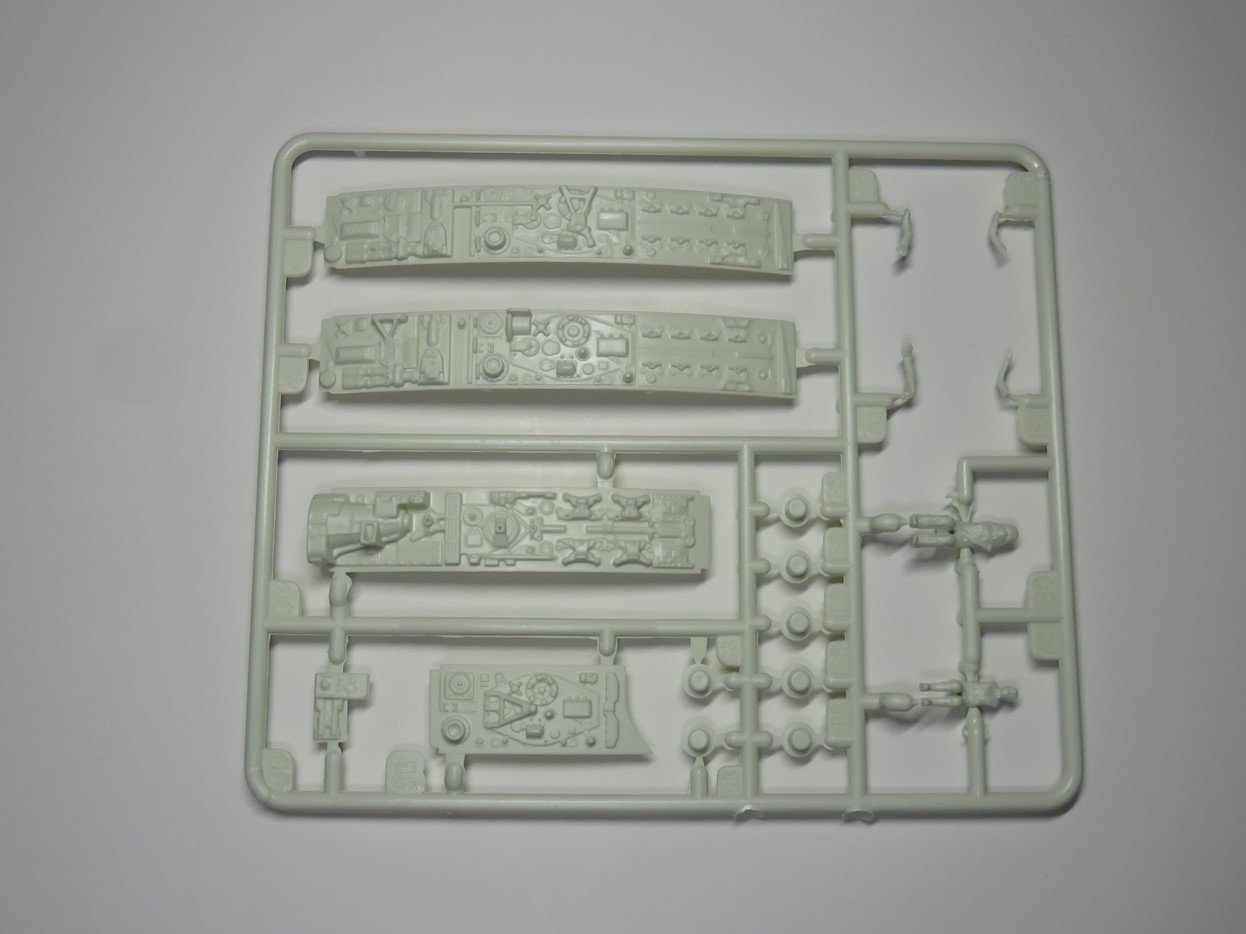
Let’s get to the new parts! There are 2 bags when you first open the kit, the bigger of the two contains the older parts. Here we can see that new side wall detail as well as a newly sculpted Han Solo and Chewbacca. What I really admire with Round 2, is that they added in more accurate details, but they somehow still kept it in the same style as the 1979 parts. They look really great!
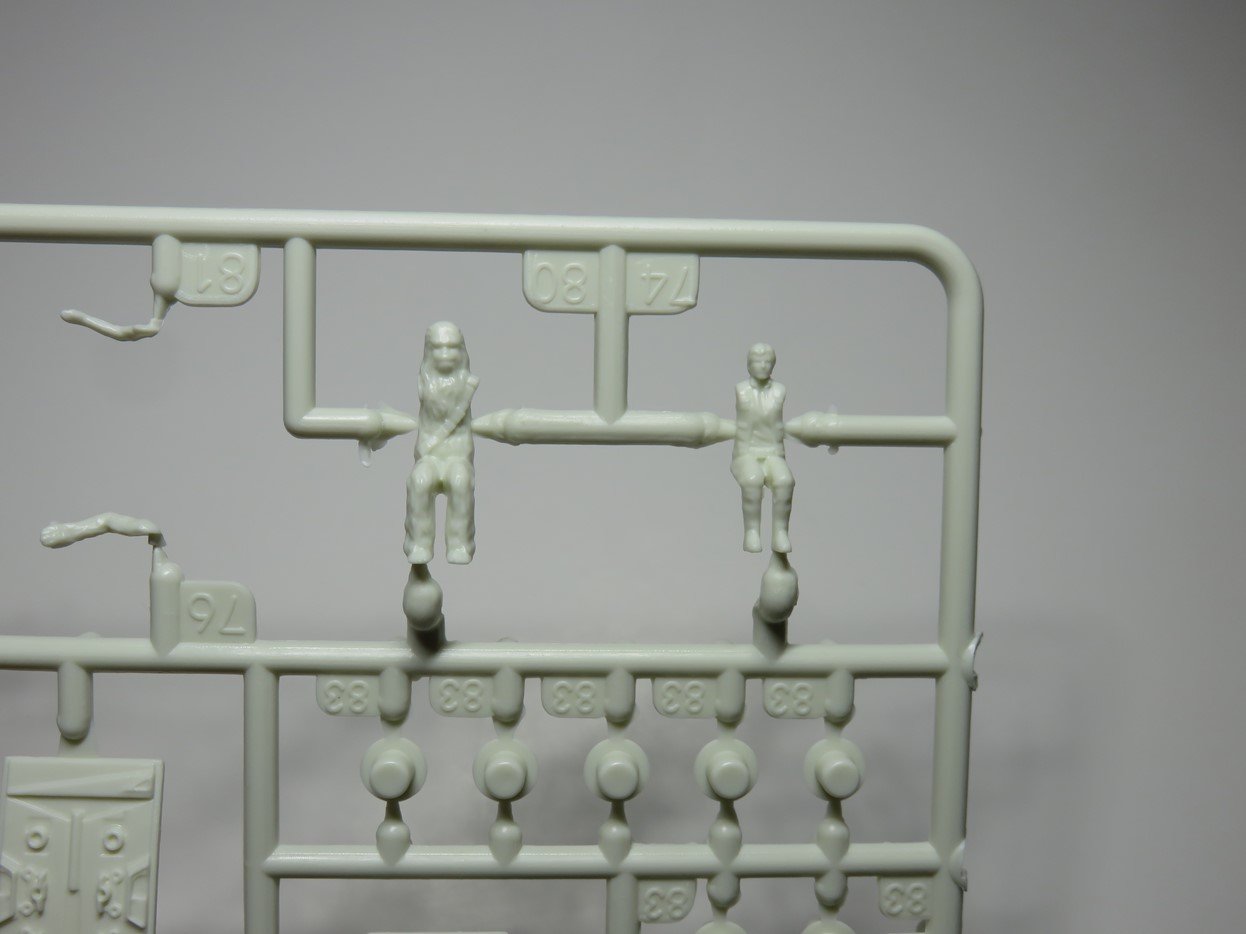
The new Han and Chewie are some of my favourite parts. The likeness is fantastic, and there are a lot of details to the figures. These are going to look fantastic in the completed model.
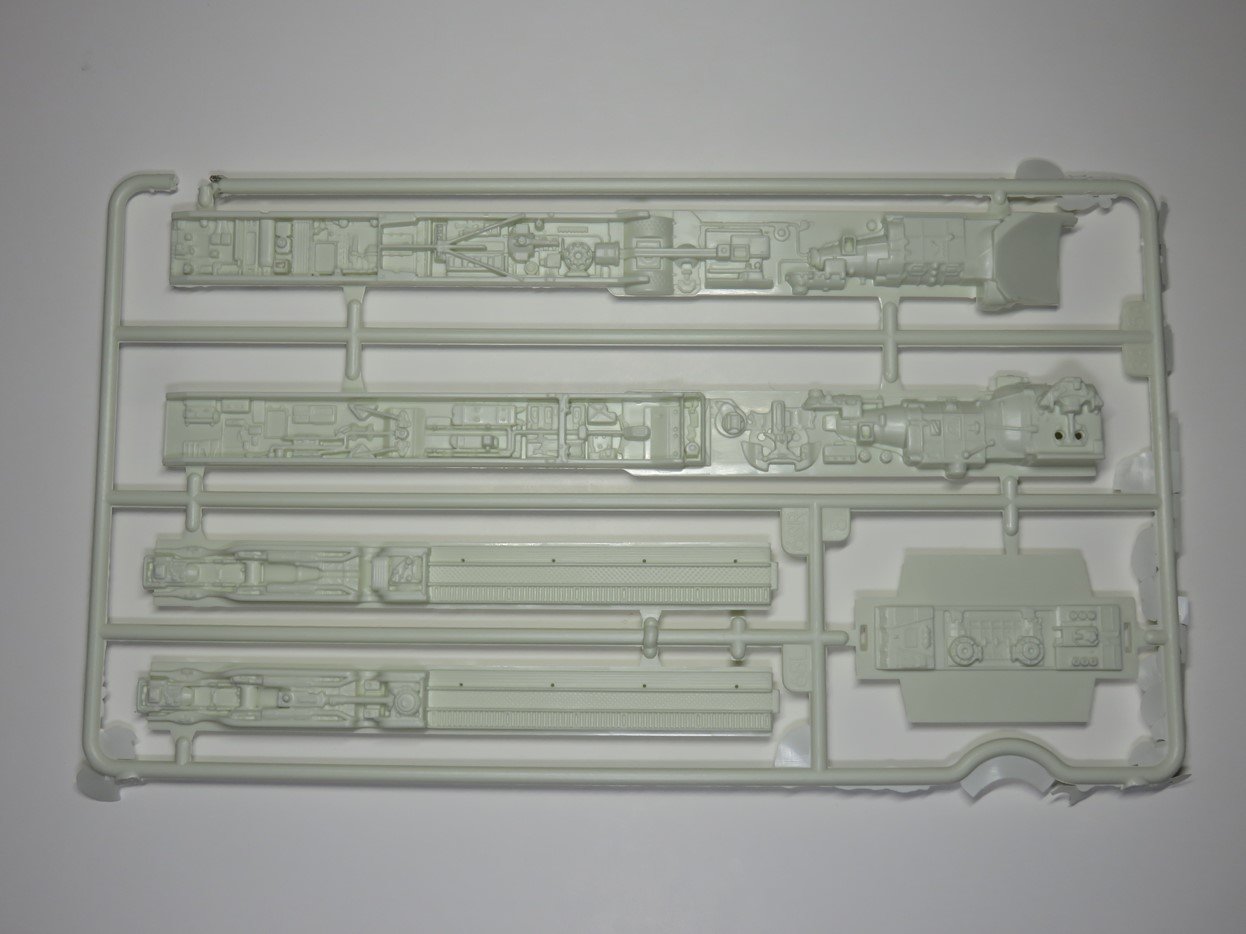
Here we have the side details for the forward mandibles. They got the details right, especially by adding those iconic Tamiya engine blocks. A wash added to these parts is really going to bring out the details.
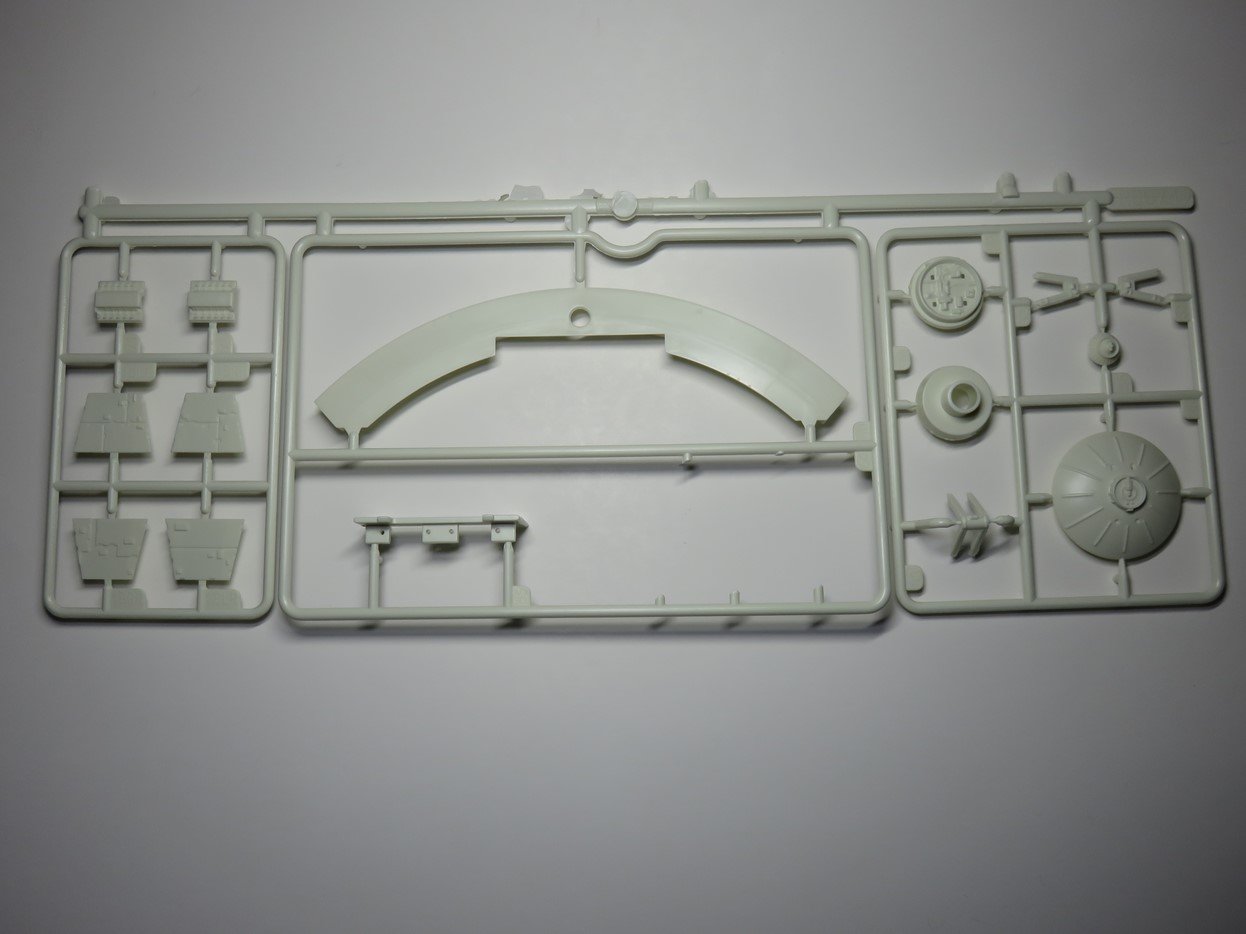
The original 1979 release came with a very simple lighting kit, and Round 2 has added this curved bar that can be installed into the Falcon to add LED’s to the back engine. I won’t be lighting this model, but it’s a really nice feature to have included with the kit.
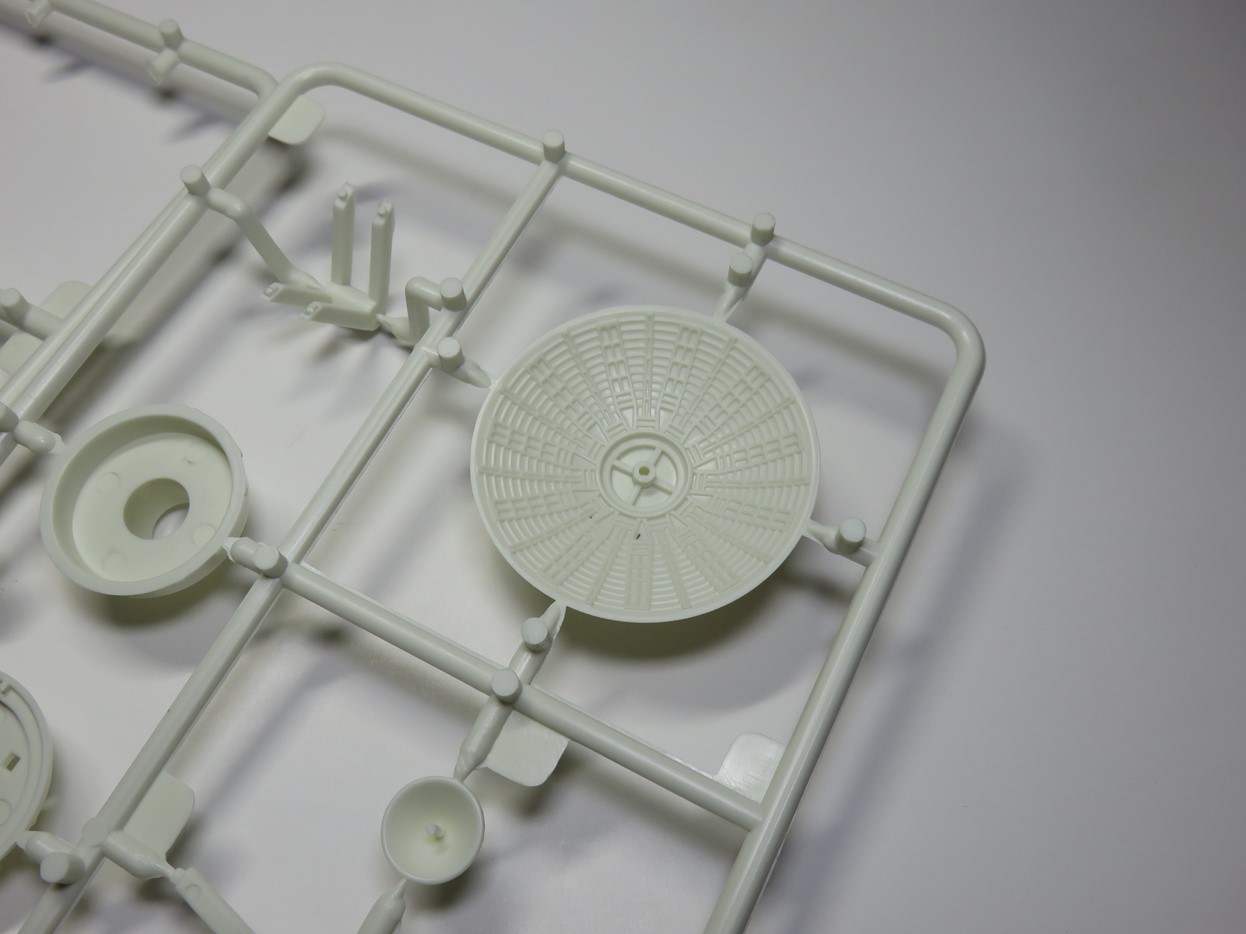
The dish has also been given an upgrade. It’s a bit smaller than the original, and the details are accurate for this version of the Falcon.
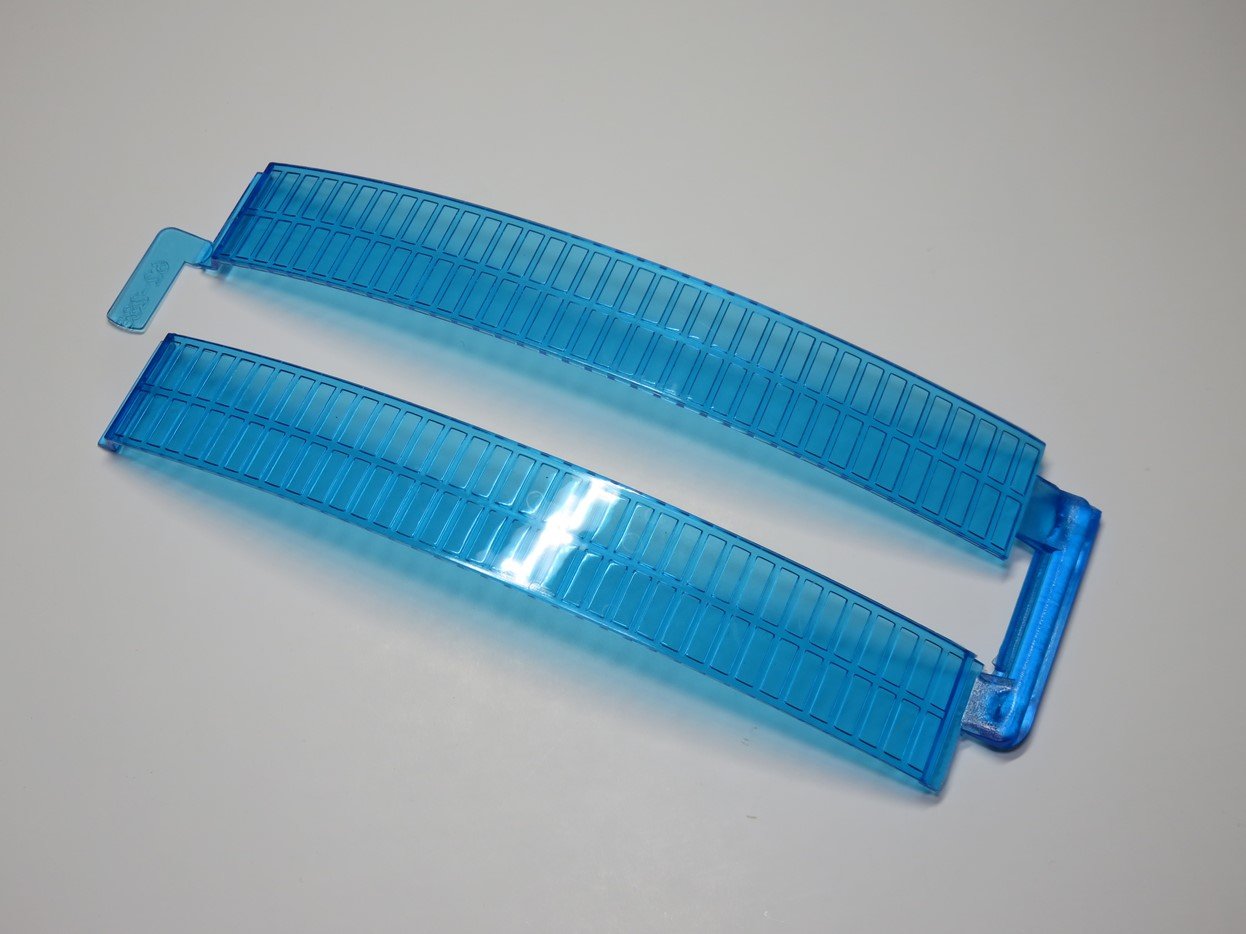
The old clear plastic engines are gone, and we’ve got these clear blue sections with grill detail. To be honest, this is probably the only upgrade with the kit that I’m not that excited about, and that’s probably because I’m not lighting this. So I’ll have to figure something out with this later on.
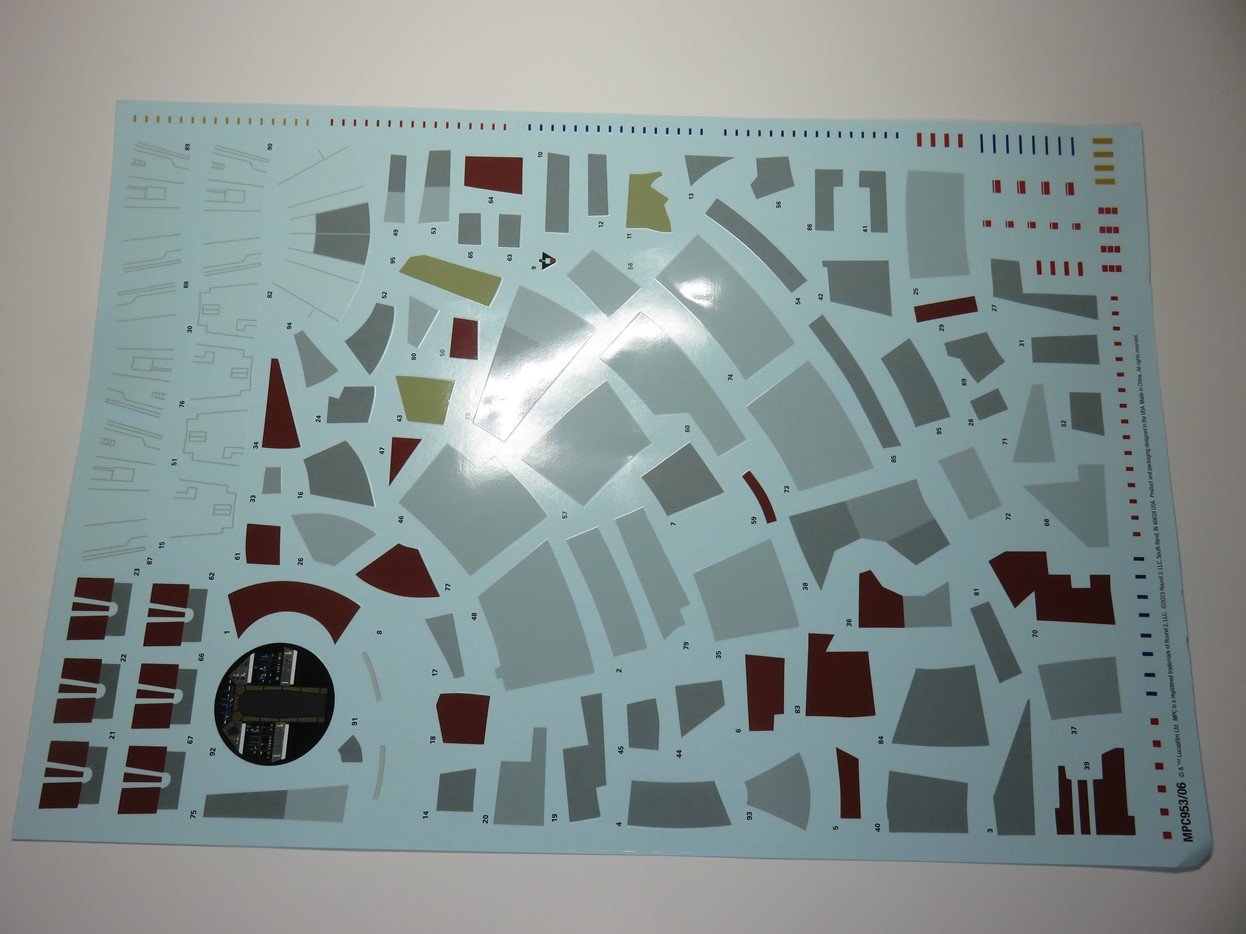
The decal sheet is a welcome addition, as all of these various squares will be a challenge to mask over. And there are a lot of stencils to lose your mind over!
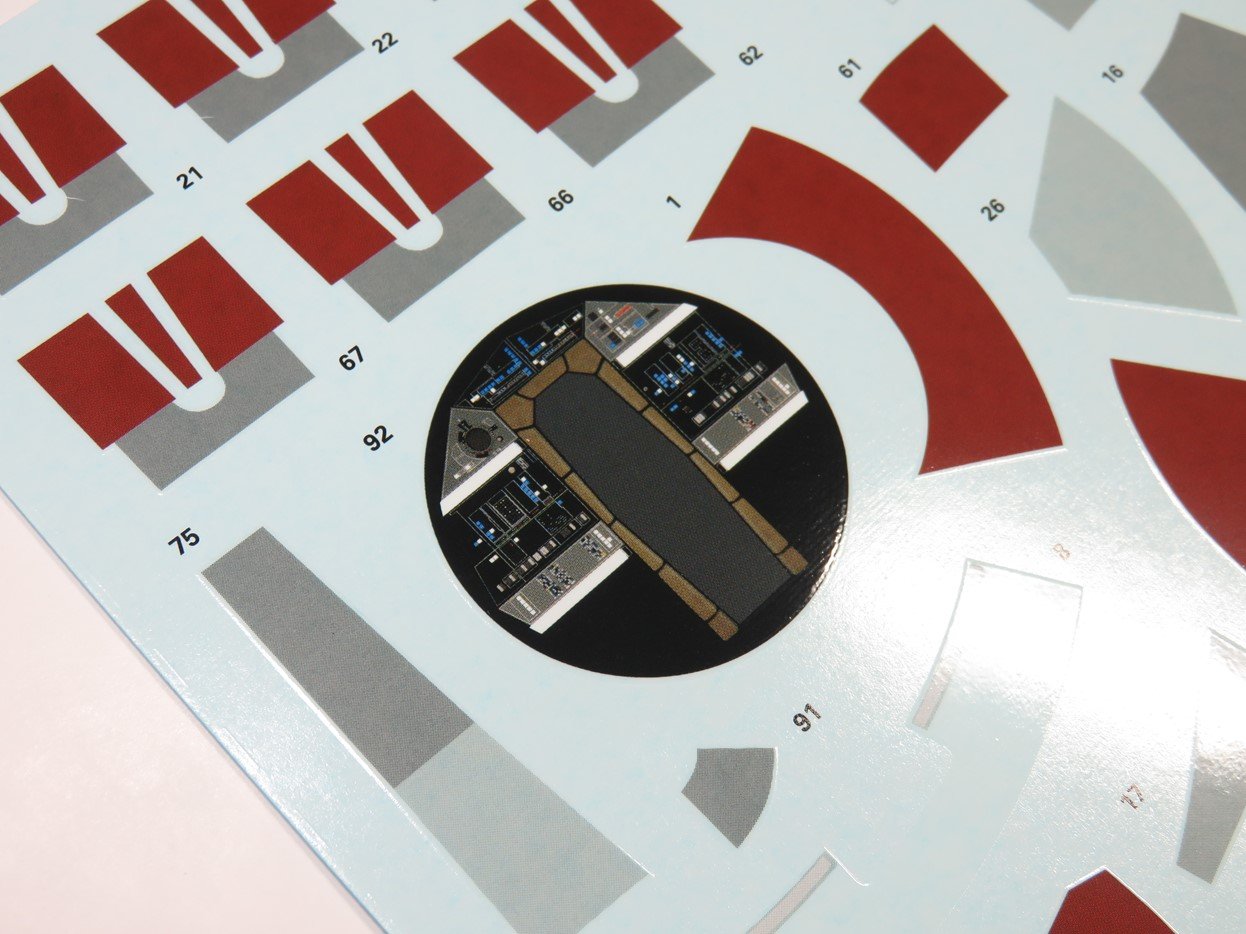
I really like this decal for the bulkhead of the cockpit section. This will look really great when you see it through the window on the completed model.
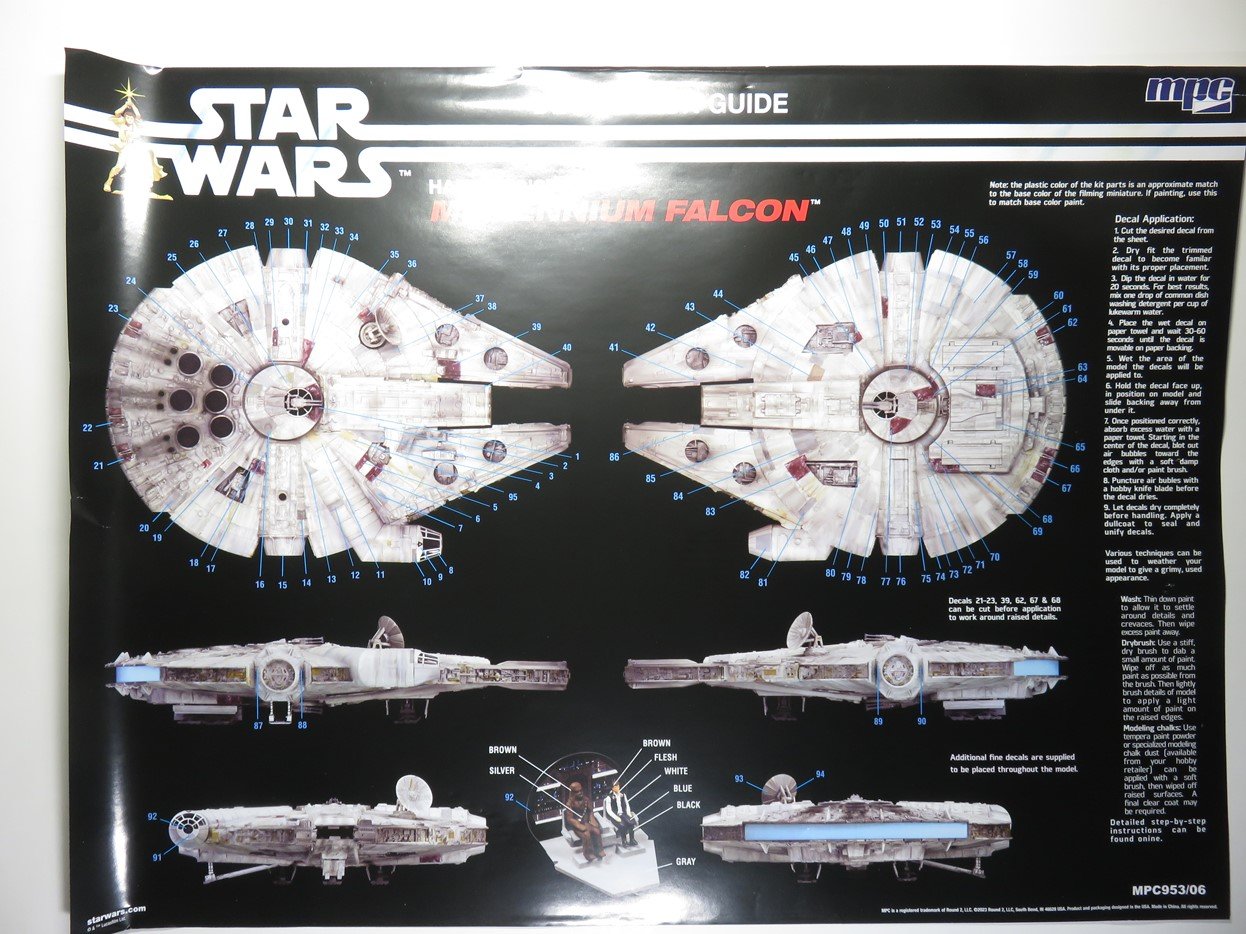
Round 2 has been adding painting and decal diagrams to the outside of the box edges, but this time they included this fantastic poster of the Falcon. I just love how they’ve kept this in the same style as other Star Wars merchandise of the 70s. I’m really tempted to frame this once the model is completed.
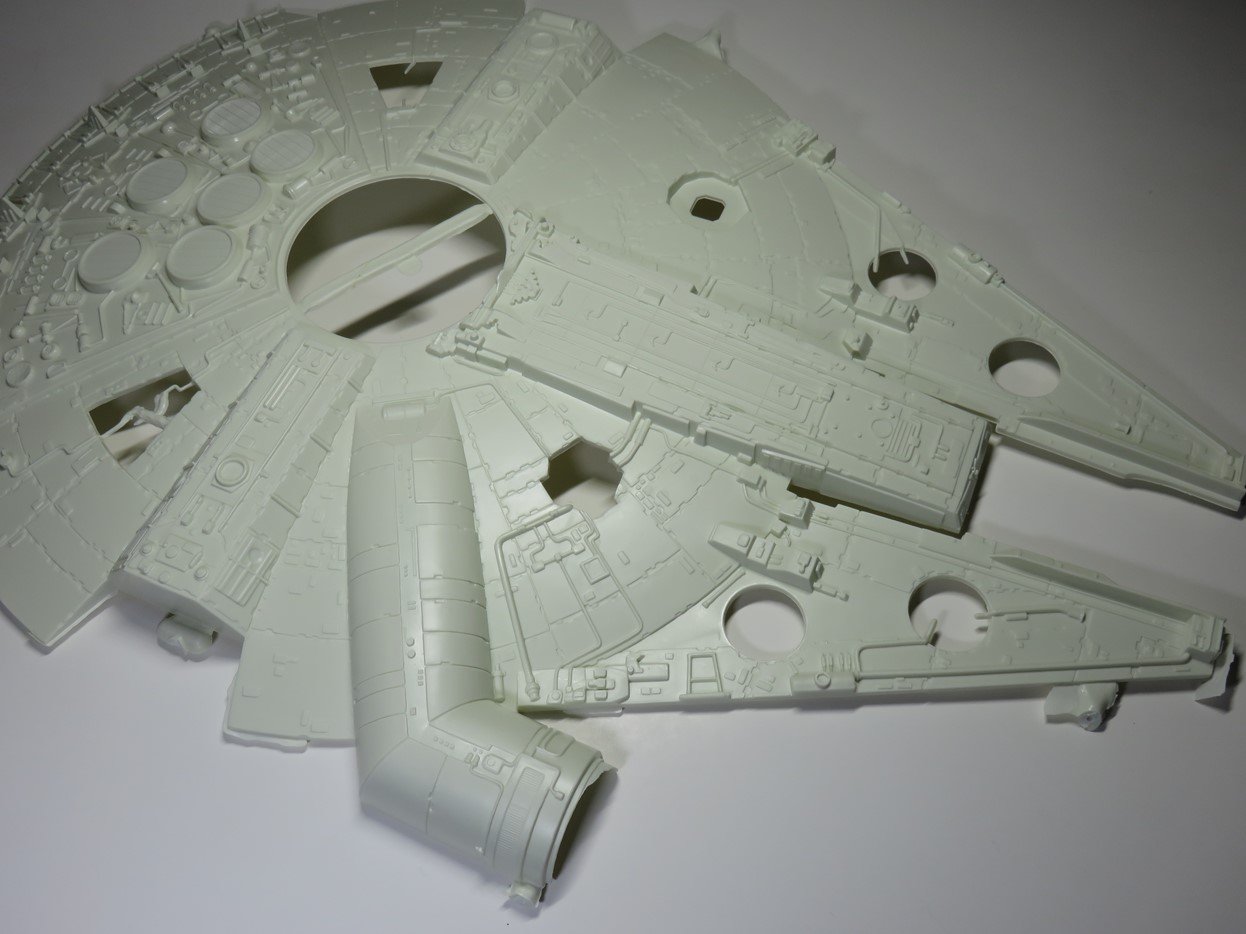
Here is the top section, this section hasn’t changed since 1979, but in the next posting we’re going to get to work removing those huge stubs and cleaning up the flash. It’s going to be a lot of work, but once it’s done the rest of the build should be smooth sailing.

Since I have several Millennium Falcon kits still in my stash I was thinking if there was anything I could do differently with this kit. I remembered that the Falcon has had cameos in Attack of the Clones, and Revenge of the Sith, as pictured above ( it was also snuck into Star Trek First Contact by Industrial Light and Magic at the Battle of Sector 001). But this isn’t exactly Han Solo’s Millennium Falcon, this is the Stellar Envoy.
Stellar Envoy was built 90 years before the Battle of Yavin and was a cargo tug for most of that time. Shortly after the Clone Wars, it was involved in a collision and left for parts when Lando Calrissian got a hold of the ship fixed it up, and renamed it the Millennium Falcon.
The Stellar Envoy was painted with blue sections and though I can’t confirm this, I do wonder if this is why Lando’s version of the Falcon in the 2018 Solo film had blue highlights to the hull.
Stellar Envoy was even made into an official diecast toy in the late 2000’s by Hasbro.
This is going to be a fun project. In the next post, we’ll get to work cleaning the parts, and even get some painting done to the cockpit. I’m really excited to build this up as Stellar Envoy, it’s going to be a beautiful looking kit when it’s all done. Plus I’ll get to mess around with some weathering, and I always love doing that with sci-fi kits.
To be continued…
Jared Demes is a modeler from southern Alberta. He has been building models since he was 4 years old when his Dad first introduced him to the hobby. He has written for several magazines including, Fine Scale Modeler, Scale Aircraft Modeling, Phoenix Scale Models, and others. He has an interest in all modeling subjects, with a focus on WWII Japanese aircraft and Science Fiction.
Jared has won several IPMS awards for his modeling, and currently operates his YouTube channel rebelsatcloudnine, where he showcases model builds and product demonstrations.
Next Post: Part 2
Last Build Post: Part 12
Completed Images: Part 13
