Basic Panel Line Scribing and Riveting
In this Sunward Hobbies tutorial, I’ll be showing you the basics of panel line scribing and riveting. All the products used and shown are available at the store or their online shop.
There are countless model kits released every month which are reboxed older offerings with raised panel lines and very few, if any, rivet work. Completing your own detailing isn’t hard and, depending on how extensive you want to go, doesn’t have to take ages to complete.
Step one is to find a rivet and panel line diagram. These can be easily sourced for free online or through many publications. Obviously, this is a B-17 Flying Fortress and the rivet pattern was sourced from a B-17 engineering website for use with permission.
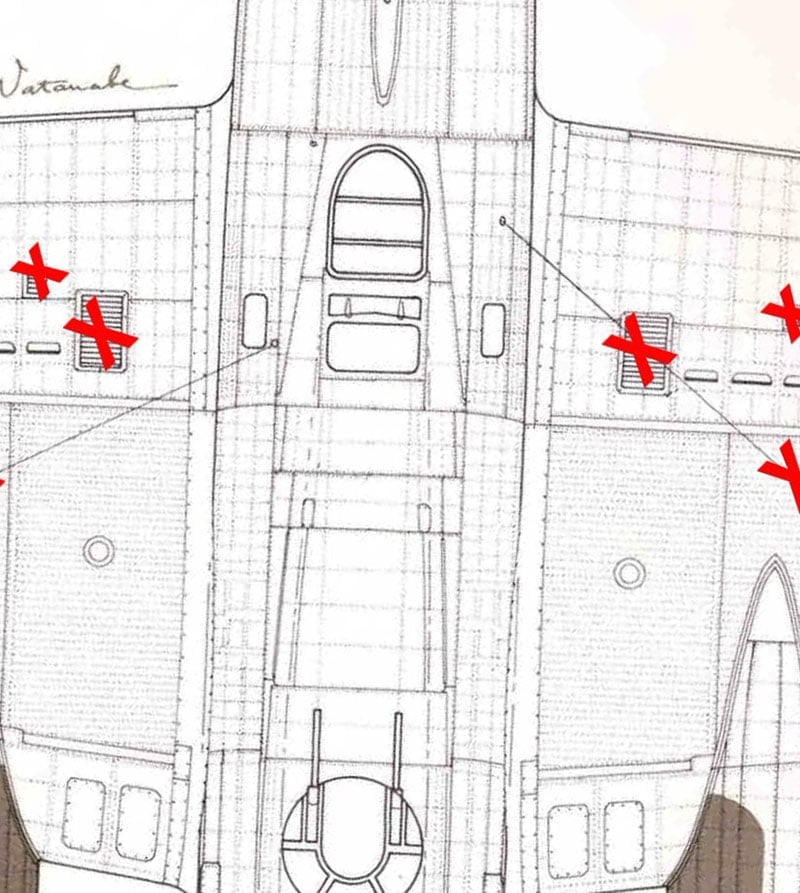
Obviously, this is the extreme extent one can put into a project. If you scale this back to something you’re more comfortable with you can still get a fantastic amount of detail with a fraction of what’s show in the diagram.
Let’s grab some tools from the shelf and I’ll walk you through it.
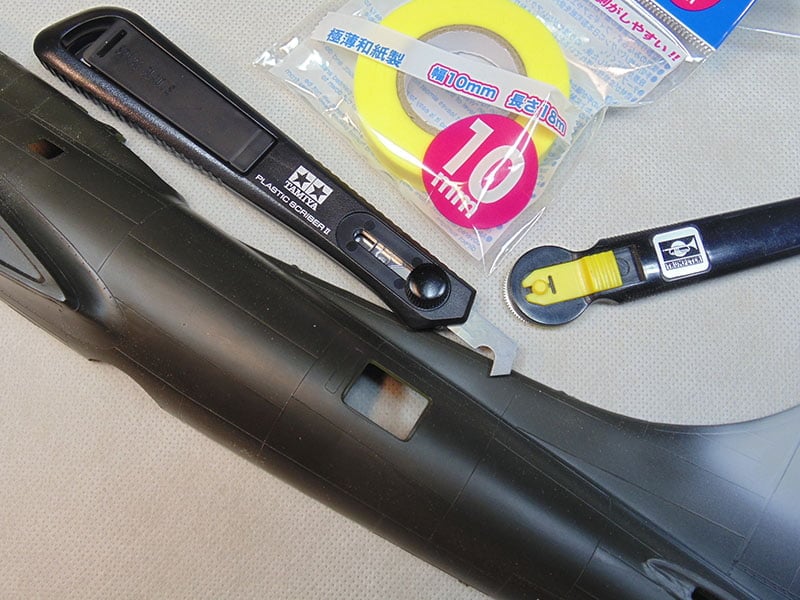
As you can see our 1/48 B-17 has raised lines and very few rivets. I’ve scribed countless lines and find that using the raised plastic as a guide to be very useful. You will want to keep your lines as straight as possible. This is where adding a strip of high-quality thick tape is essential.
Stay in one section where possible. In this case we’re just doing under the port side waist gun opening. Shorter runs with the riveter and scriber are always best because you can use one smooth movement. Longer runs usually mean some stopping and starting. This increases the chance of your lines not being straight or worse running off course. More on that later. The Tamiya Scriber makes a very thin line, so get your tape as close as possible to the existing raised line.
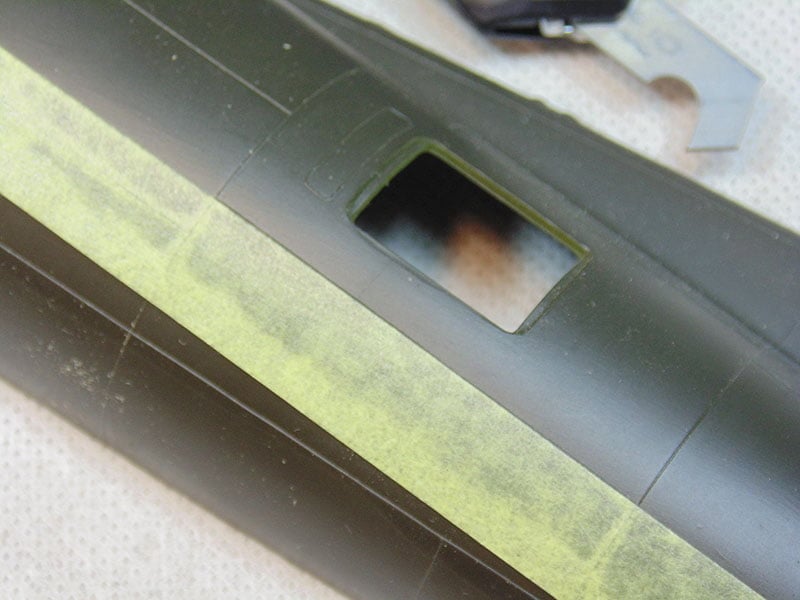
Ok, you’re ready to scribe a line in the plastic… well sort of. I always recommend spending an hour or so practising. Buy a blank sheet of 1mm styrene to work on. You need to get a feel for how the tool behaves when you apply no pressure, light pressure and moderate pressure. Also, how fast you travel on the line will determine how much material the blade rips from the surface. Next, and vital, is the angle you’re holding the tool to the relative flat surface. Hold it at 90-degree angle and absolutely straight with the line you want to create. Double check and triple check as you make the cut. Believe me, it is really easy for your angle and direction to change. Even after all these years I’m constantly checking angle and direction.
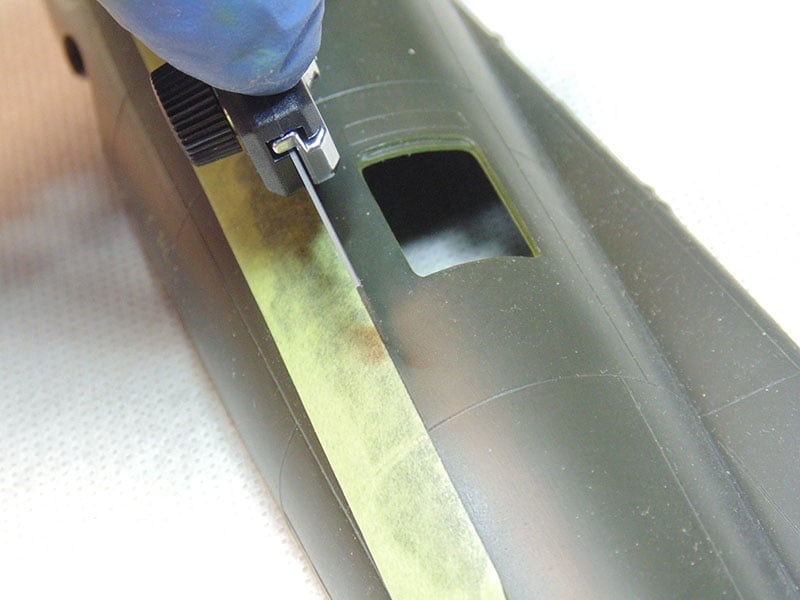
Start with a few very gentle slow passes. Whenever possible lightly push the blade first then pull. The blade will dig in ever so slightly and make a groove which allows the next pass to have a bit more pressure added. Again, check and recheck your angle and direction. Here I’ve removed the tape so you can see how much material was cut out with just a few light passes of the blade.
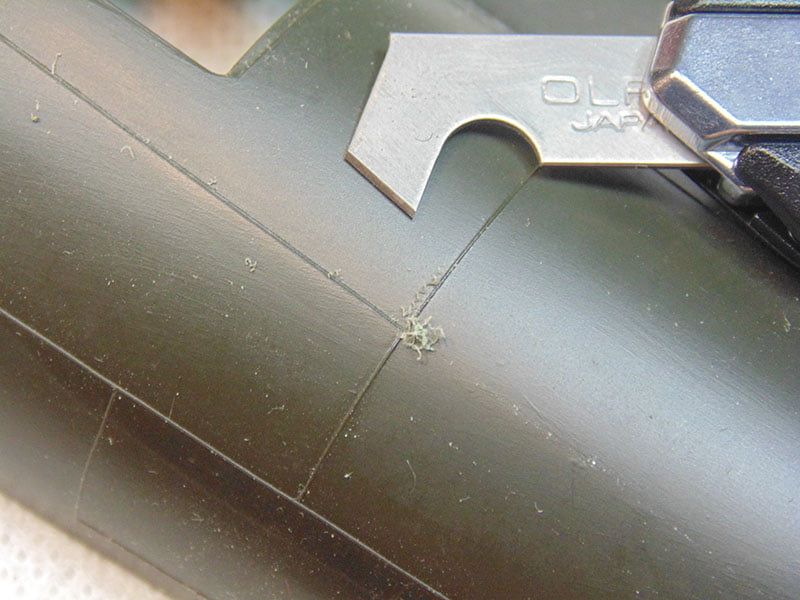
And here you can see the amount with moderate pressure. It does not take much to hog out a good amount of plastic. The thinner your lines are the more realistic they will appear on the completed model.
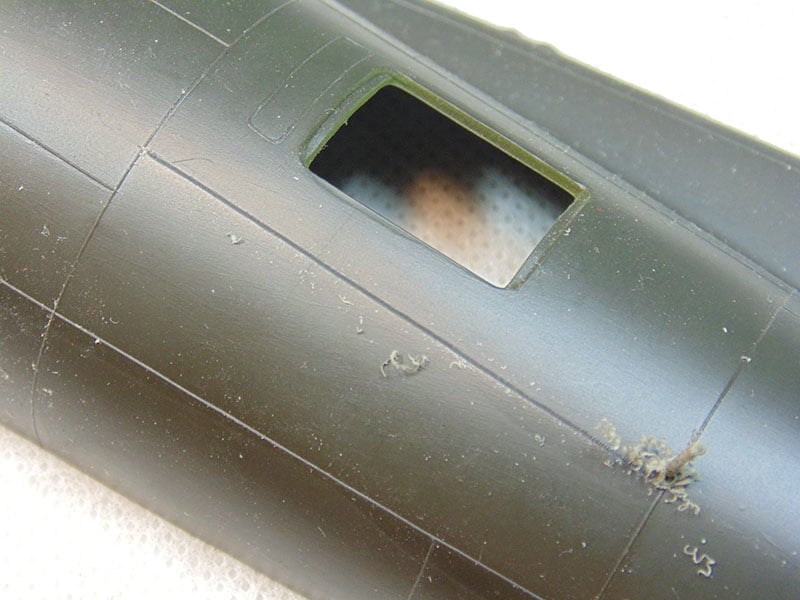
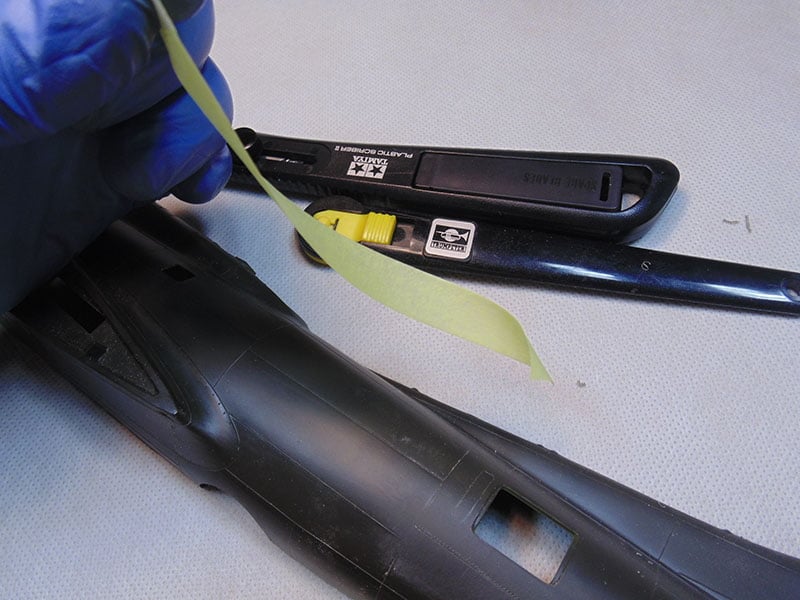
Before we move to the next line here’s a tip that will save you hours of frustration when handling tape. The tape can be reused several times. If you opt to do this instead of using a fresh length the likelihood of it curling up is high. This happens when you pull the tape off at a steep angle, such as straight up.
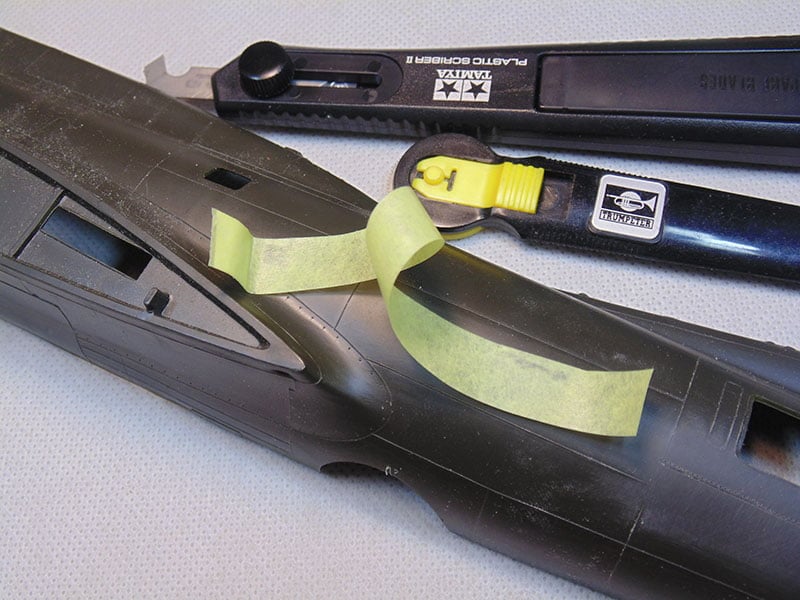
Do this, pull the tape from one end at a slight angle. The tape will stretch a bit, but nothing to be concerned about.
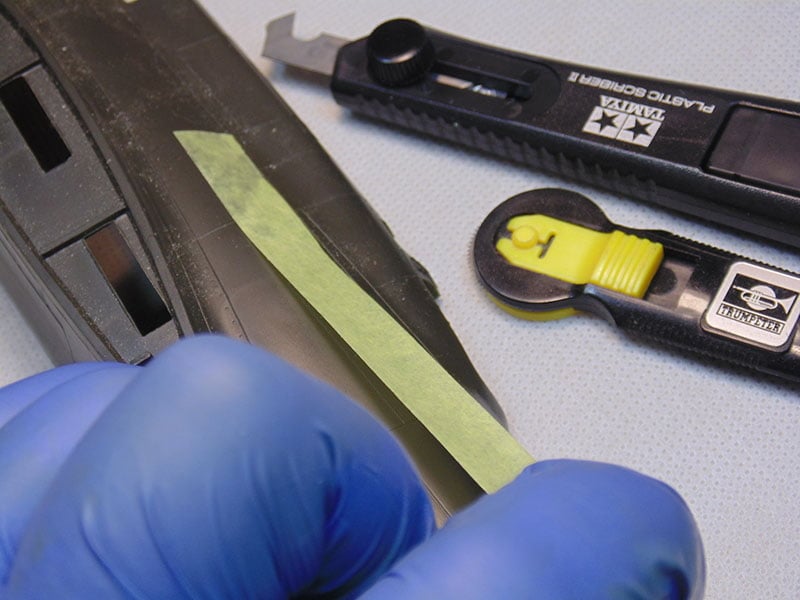
See how the tape is much flatter? This technique works for how it’s removed from the roll as well. Again, don’t pull straight up but at a severe low angle.
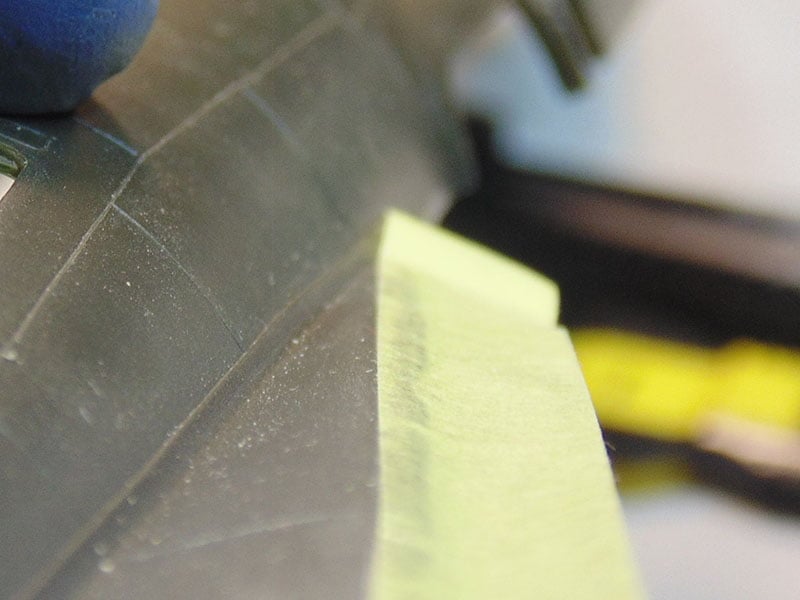
Eventually the tape’s edge will get worn and filled with plastic bits. It’s unavoidable and important to remember that the cleaner the edge the cleaner line.
Some times longer lines need to be done. Eyeball the length of tape to ensure it’s straight. Make certain you have a clean strip of tape for these longer runs.
When doing complex curves and simple rounded sections I’ve found that holding the tool as close to your finger tips and rotating the part gives me better control. Doing this in one motion may not be possible, so a few more initial light passes, pushing then pulling, will greatly reduce the chance of the blade going off course.
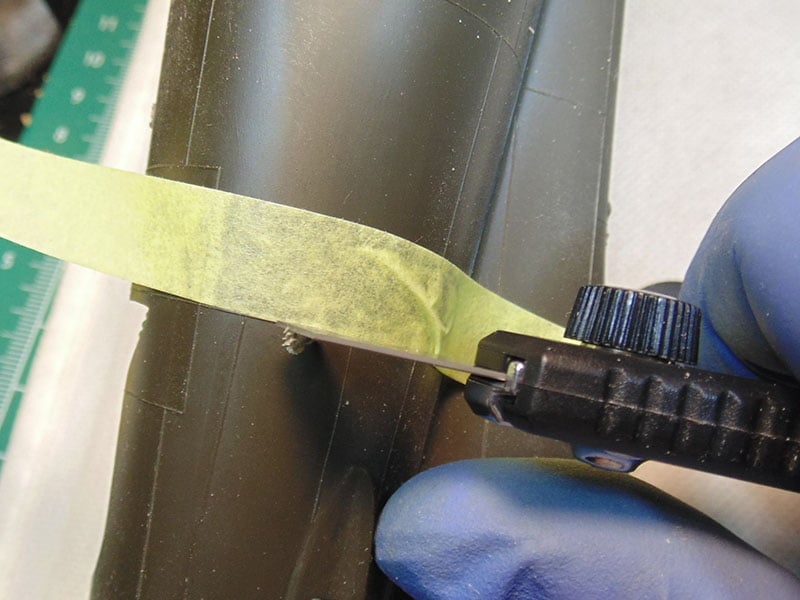
“Going Off Course”, is the bane of all scribers. It’s part of the process and still happens to me from time to time. There might be an imperfection in the plastic or a mis-mold in that particular kit, regardless they happen. That said, they are super easy to repair. Here I’ve intentionally cut off course.
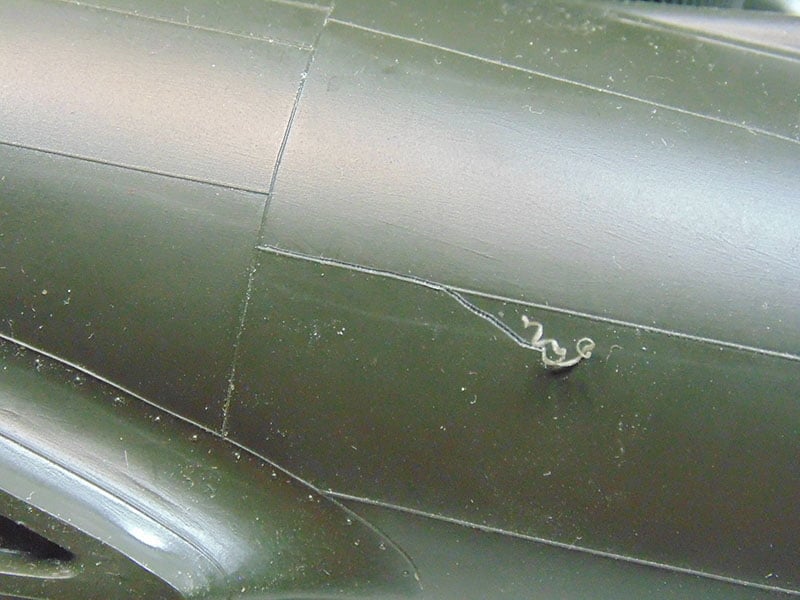
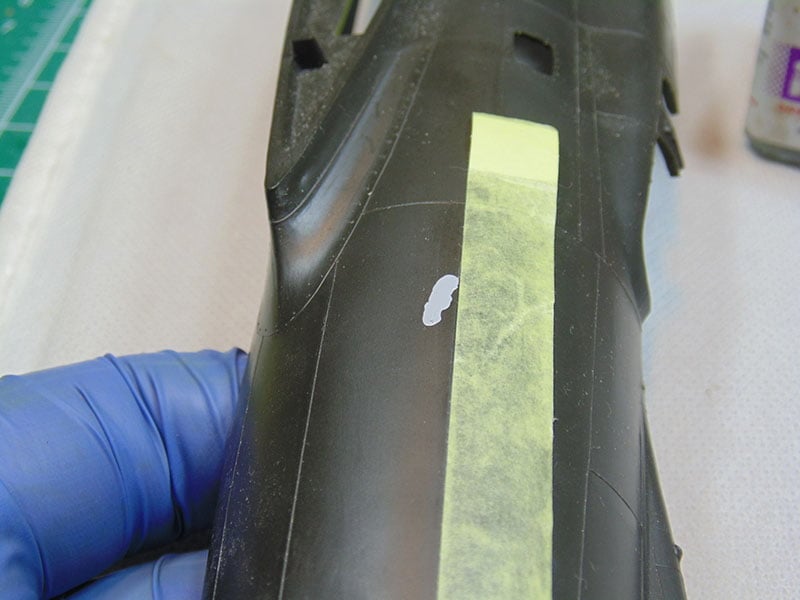
Take some Tamiya, or other brand at Sunward, styrene cement and work the debris back into the mistaken groove and let it dry for ten minutes, longer is better. Then use a good quality filler and move on to another area. That time spent on another line will allow the filler to cure.
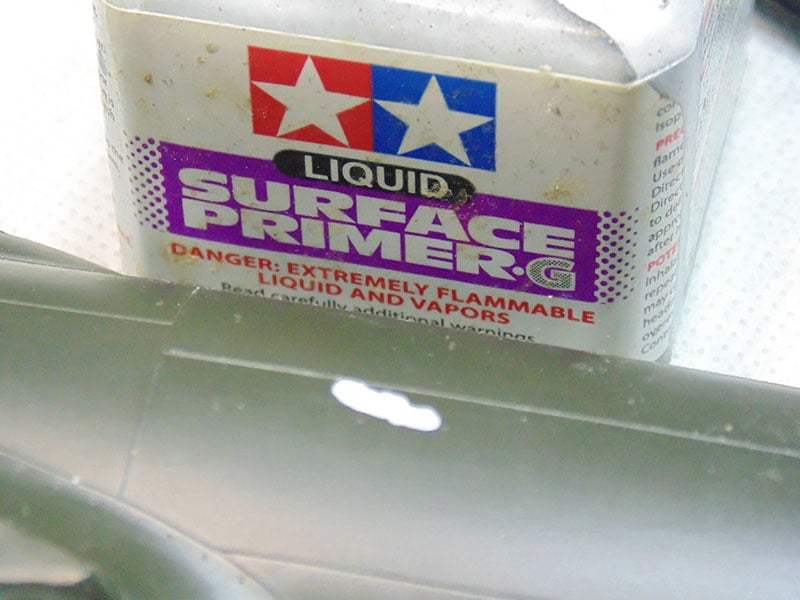
Once the filler has hardened you can lay down some new tape and re-establish your line. Make certain to cut in the opposite direction of the movement that caused the accident. This way you won’t risk making the same mistake in the same spot.
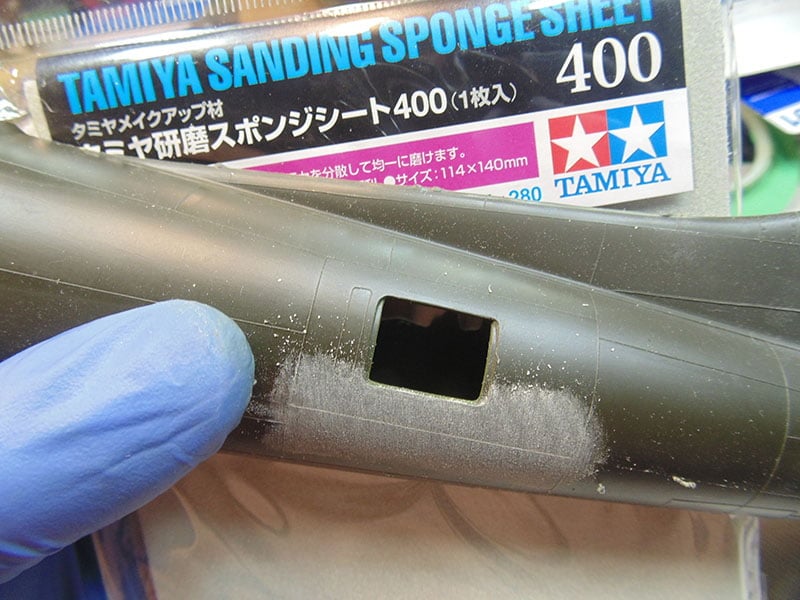
Now that your panel line is scribed you can remove the old raised one. I discovered ages ago that making panel lines first then riveting goes a lot faster. The plastic dust from sanding will collect in your new line and make an easily seen line to follow with the riveting or pounce wheel. Some people use a scraper to remove material from the surface. That’s fine provided when you sand there’s enough dust to fill the new one. Here I’m using a Tamiya sanding sponge as this part is rounded. Sand 90 degrees to the line so dust will collect.
Now that we’ve established a path the riveting can begin. Just as with your scriber make certain the angle is 90 degrees. If not, the indents will look oddly shaped when you add a pigment wash later. Naturally, the direction must be correct as well and here’s where your dust filled line comes in. The closer you hold the tip of the riveter with your finger tips the more control you’ll have. Make sure you are in the ideal spot before pressing down to puncture the surface. Use that blank sheet of plastic to practice on the panel lines you created in that practice.
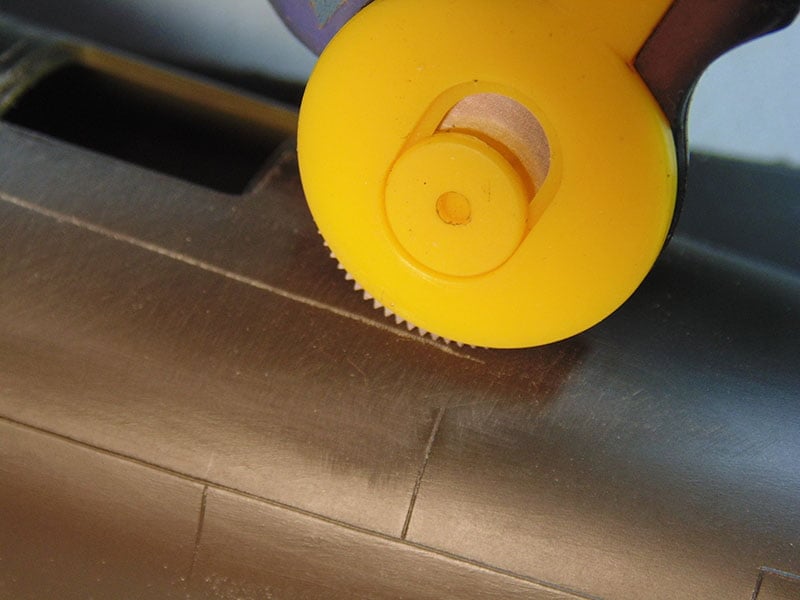
When rolling the wheel try to look slightly ahead of the spot where the work is being done, kind of the way you would look at the road ahead when driving. Go slow and don’t be afraid to add enough pressure to get the result you want.
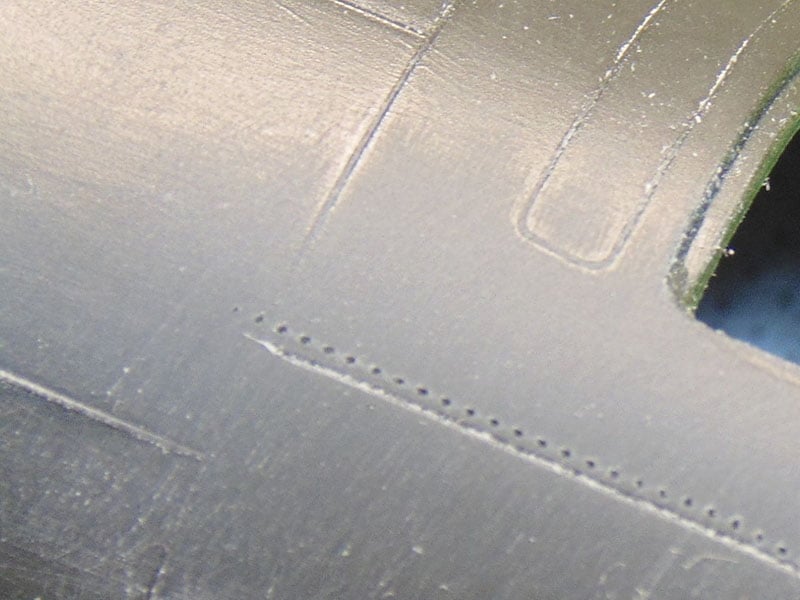
When you need to do a sharp curve or tight corner, such as this rounded window, it’s often best to make each rivet. Use the wheel which has the best spacing.
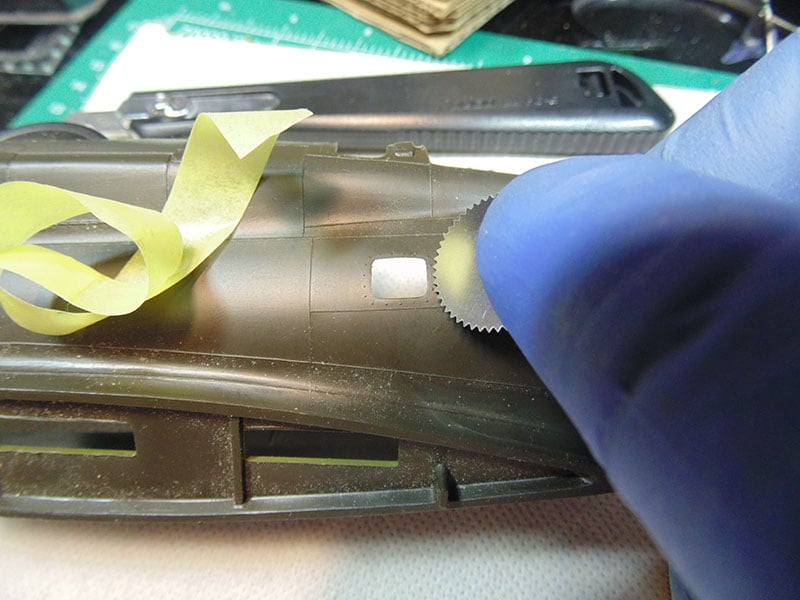
You can puncture a spot then pivot that embedded point to turn to the next raised bolt or curve. By using the wheel alone, you also ensure the spacing looks correct.
In some cases, the plastic may be a bit thinner around windows and openings. Try to support the material by simply backing it with your finger.
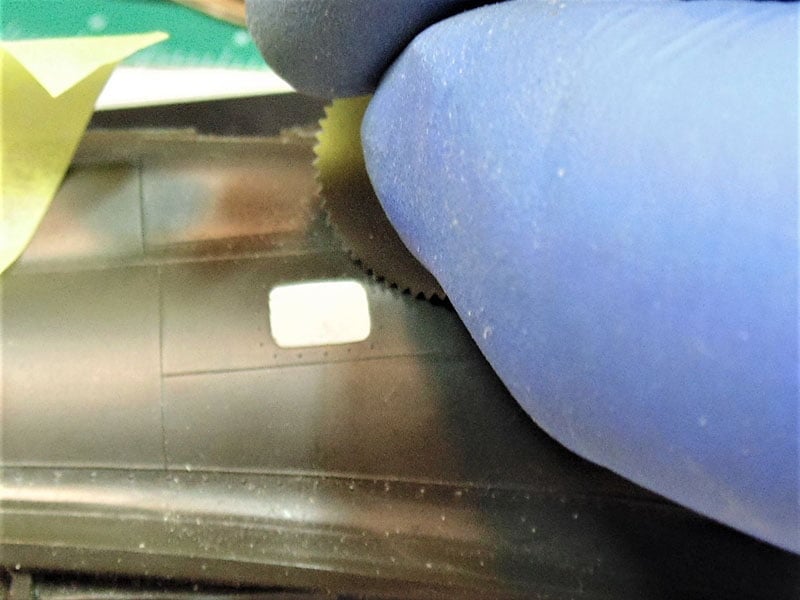
Sunward Hobbies offer several types of riveting and pounce wheels. Larger diameter wheels are great for covering a longer run quicker, while smaller wheels allow you to get into tight areas where the larger won’t fit. I use both.
Another bit of advice is to mark off a section and work on that until completed.
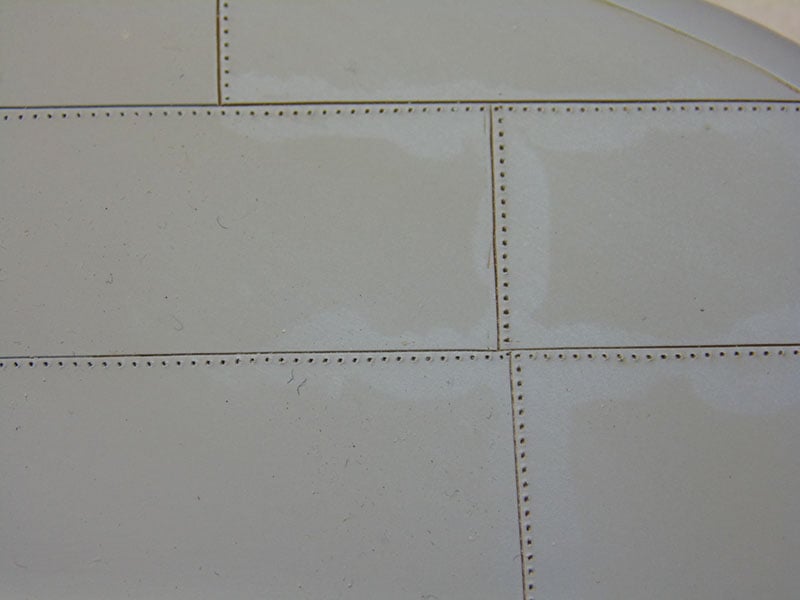
These are the basics of how to do panel lines and rivet holes. A more extensive tutorial is in the works, but as you can see these small detail additions add a tremendous amount to the look of your project. Here’s a Boulton Paul Defiant Mk. 1 model you can pick up at the store. It went from bare plastic with very few recessed lines to what you see. Anyone can recreate this with a little patience.
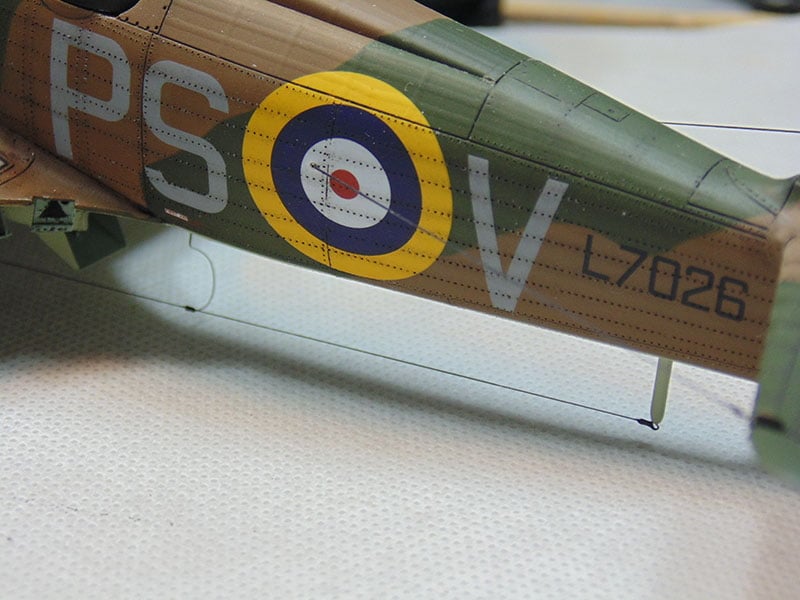
Thanks for taking the time to follow along and hope it helps. If you have any questions after your purchase just let them know and I’ll get back to you as soon as possible. Happy modeling and stay safe.
H.G. Barnes is a former voice-over artist and retired sales and marketing professional. He’s the author of two large volume science fiction adventure romance novels with many more in the works. For well over 40 years he’s been building scale model replicas and now does commission work for clients in Canada and the USA, plus completes projects for companies in Asia and Europe.
Currently H.G. is involved as an Associate Editor with KitMaker Network’s Online Magazine Channels.
