
Airfix Avro Vulcan B.2 Black Buck
This is the third part of the Airfix Avro Vulcan B.2 Black Buck 1/72 Scale A12013 build and review.
As I mentioned in the previous post I built a lot of Airfix as a youngster, and a lot of those kits were reissues of kits dating as far back as the late 50’s. I recall opening their Spitfire Mk IXe and being really disappointed with the quality of that particular model. Once I had it together it didn’t really resemble a Spitfire. the nose was too square, and the wings were too short, as was the landing gear. All of these issues are forgivable to me now, but back then I was used to a more simplistic design of the models.
So it’s amazing today to see the leaps and bounds Airfix has made to bring its kits up to the latest and newest innovations within the modeling industry. It is astounding to see how complicated and innovative this Vulcan is. but enough of me talking about it, let’s get into this kit and I’ll show you what I mean.

I will admit I’m not as big a fan of nose-sitting aircraft as most modelers as there are times when I worry I didn’t add enough weight to the nose and the model will be a heavy tail sitter. This happened when I built the Airfix 1:72 B-25 C/D Mitchell. As brilliant as that model was to build it still required more weight to stay down.
For the Vulcan, Airfix has created this inner nose cone that will attach to the bulkhead of the cockpit. Listed in the instructions are directions to add 40g of weight needed to keep the model down.

The best place for me to find weight was my Dad’s workshop where he had some spare strips of lead that I cut up into small sections. Another substitute would be small lead fishing weights which are easy to find.
The pieces I had cut up added to a weight of 49g. I’d prefer it to be a bit heavier just in case.

I dropped the lead bits into the nose cone, and after the bottom was covered I added a layer of hot glue to keep everything together. I did this layer by layer until I had all of the weight added. The Woodlood Low Temperature Hot glue would keep the lead from moving around and potentially becoming dislodged inside the model.
For those worried about the hot glue melting the styrene, once I had finished adding the hot glue I immediately ran the part under some cold water which prevented the plastic from melting.
To my surprise, there was still room inside where I could have added some extra weights. But I trust the extra bits that I added will be enough. Only time will tell if Airfix’s measurements were correct.

I glued the weighted nose to the bulkhead with Mr Cement SP, and then I placed the entire section into the outer nose. I had to twist this section around a few times to get it set in the right place but it does fit in there quite snugly.
I added some more Mr Cement SP and then sealed the cockpit up with the other half of the nose.

Oddly, there are no pins and sockets on these parts, and this would have helped a lot with the alignment, which was difficult because of the curved shape. I decided to leave this little section of the sprue attached to the nose so that I could clamp it down for a more secure join.
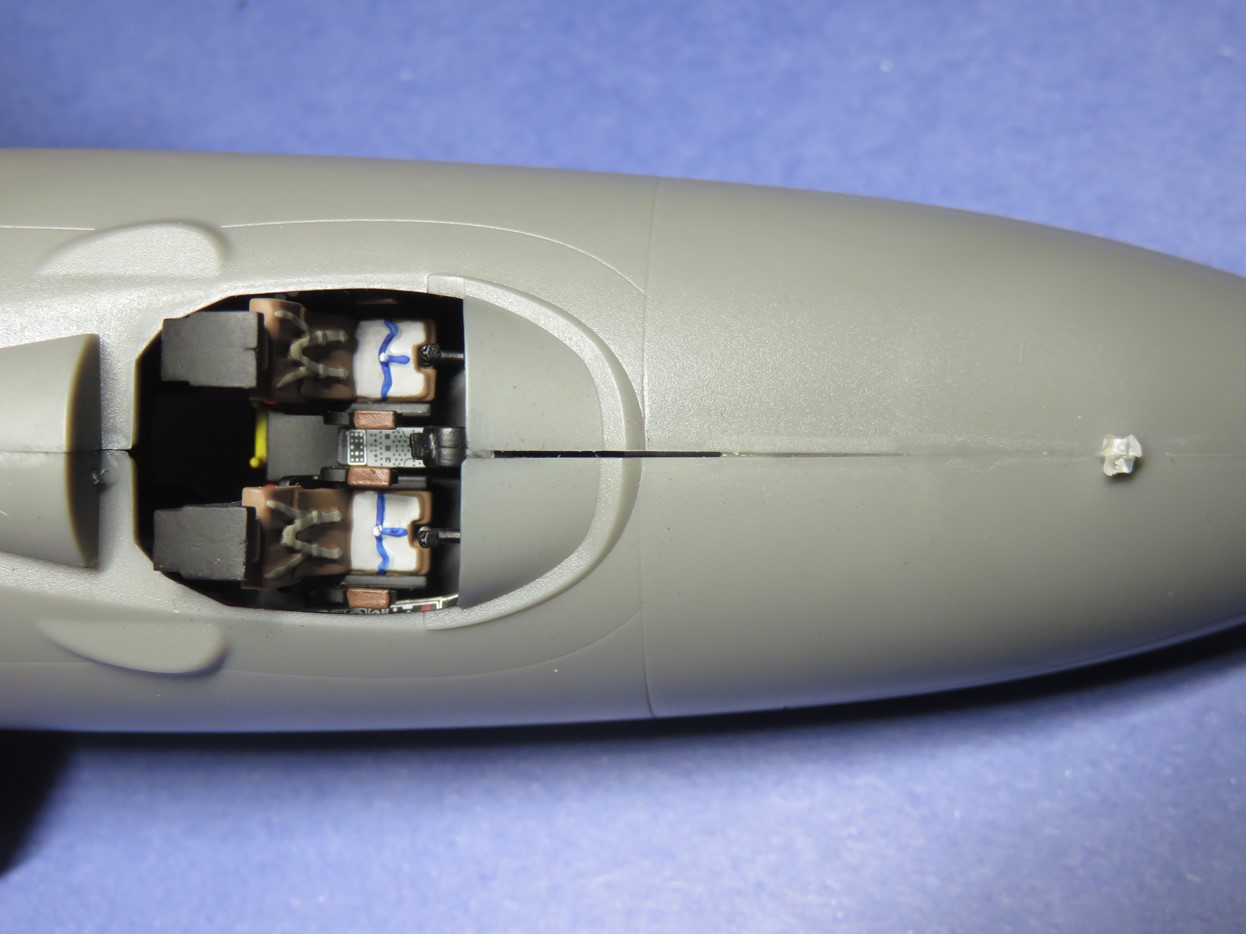
Despite my best efforts in gluing, there is a gap running down the nose. I believe this might have been caused by the bulkhead being slightly too wide. I had a similar issue when I built Airfix’s 1:72 B-17G. With that the solution was to sand the bulkhead down until it fit, but unfortunately for me this time the model was glued up too much for me to fix it.

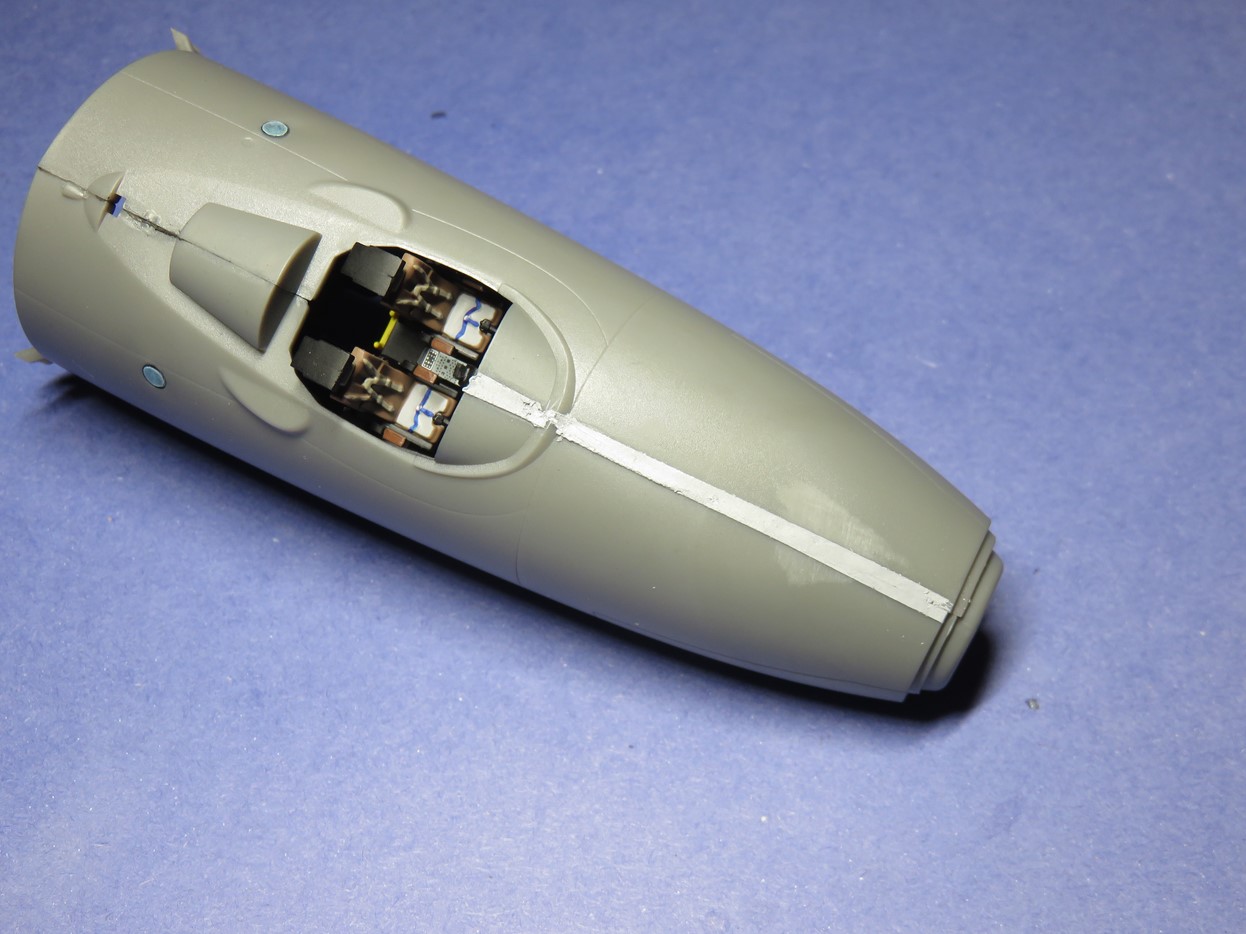
Thankfully this was going to be a quick fix. I took some spare Evergreen Styrene, and I wedged it into the gap. If the part has some resistance going in that’s even better. I pushed this styrene down the nose as far as I could. And then I added a good portion of Mr Cement SP to fuse all of the plastics together.
Once the glue had dried I took my hobby knife and slowly cut the excess styrene so that it was flush with the rest of the nose.
I refrain from using putty in these situations as I’ve found from past experiences that if the gap is too thick (which it was in this instance) it doesn’t really fill in the gap but rather will fall through the gap, and this will just cause extra work in the long run or become easily damaged later on in the build.

Before I added putty, I glued in the lower nose section with the bomb aimer window and the crew hatch. I glued the window to the model with a drop of Mr. Cement S, and after the glue had dried I placed some modeling tape over the window and carefully cut out a mask.

I’ve tried a few modeling putties over the years and I still find Tamiya Putty Basic Type to be one of the best. It’s a lacquer based putty so it bites into the plastic. You can also add some lacquer thinner to it to create your own version of Mr Dissolved Putty.
I placed some modeling tape on either side of the gap. As you can see my modeling spatula gets the putty all over the place, and laying tape on either side will help keep things tidy.
Here is the result of the putty with the tape removed. It’s a lot cleaner and sanding this down will now be a lot easier. I’m going to let this section dry for another day as Tamiya Putty is easier to work with when it’s all dried out.
To test if the putty is dry you can do this quick and simple test of pushing the edge of your thumbnail into the putty, if it sinks in and leaves a mark it’s still too wet.

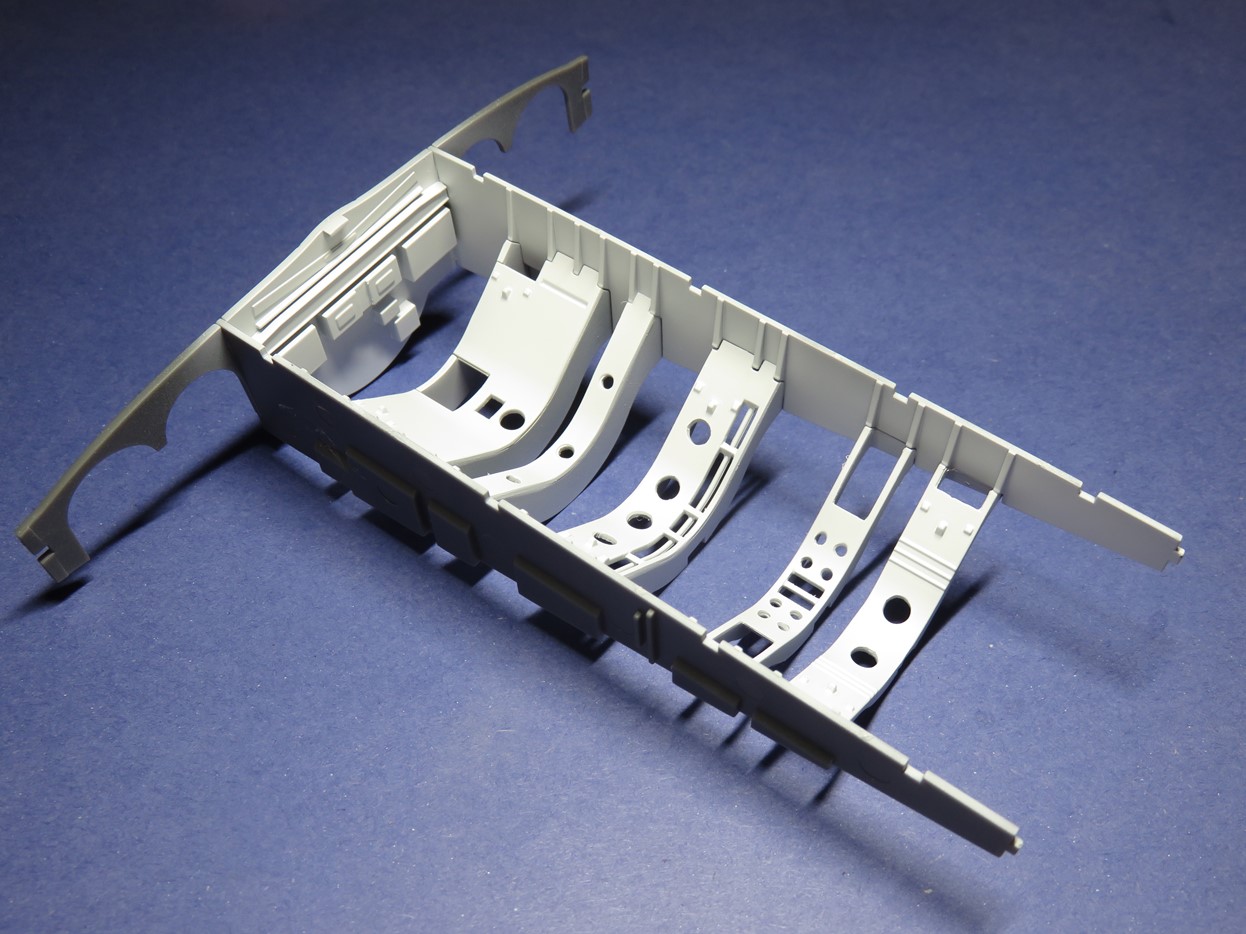
While I waited for the putty to dry, I moved on to work building the inner support frames of the bomb bay.
Based on my reference material I noticed that the holes in these frames were quite noticeable, so I used my Tamiya Fine Pin Vise to drill out all of the holes. The drill bit I got from The Army Painter Drill Bit set. I really like these drill bits as they are quite sharp and got the holes drilled out quickly.

Here are all of the supports with the openings drilled out. It’s really cool how something as simple as drilling out these holes can add a nice extra detail to the model.

I’ve now glued the support frames to the side walls of the bomb bay as well as the forward bulkhead. It was really exciting to see all of these parts fit together as well as they did, and this area is going to look very impressive with all of the bombs added in.
Because of the angles of the frames, I decided that it would be best to paint this section white before it was all added to the interior of the model. I sprayed on several light layers of Tamiya XF-2 Flat White and gradually built up a nice bright finish. Later on, I will add a gloss coat so that I can add some weathering to this section.

Lastly, I added some of the frame supports that will help hold the wings together and add extra strength to the Vulcan. This is a big kit, but at this stage, I’m becoming more alert to just how big this model is going to eventually be.
I’m very excited for the next stages in this build. Next time we’re going to be adding the lower sections of the wings as well as adding in the landing gear bays. This big model is about to get bigger and I need to prepare some more space on my desk here to properly store these parts.
I’ll also get into some sanding which is personally my least favourite part of the build, but hey, it’s got to be done, and it’s got to be done right!
To be continued…
Jared Demes is a modeler from southern Alberta. He has been building models since he was 4 years old when his Dad first introduced him to the hobby. He has written for several magazines including, Fine Scale Modeler, Scale Aircraft Modeling, Phoenix Scale Models, and others. He has an interest in all modeling subjects, with a focus on WWII Japanese aircraft and Science Fiction.
Jared has won several IPMS awards for his modeling, and currently operates his YouTube channel rebelsatcloudnine, where he showcases model builds and product demonstrations.